
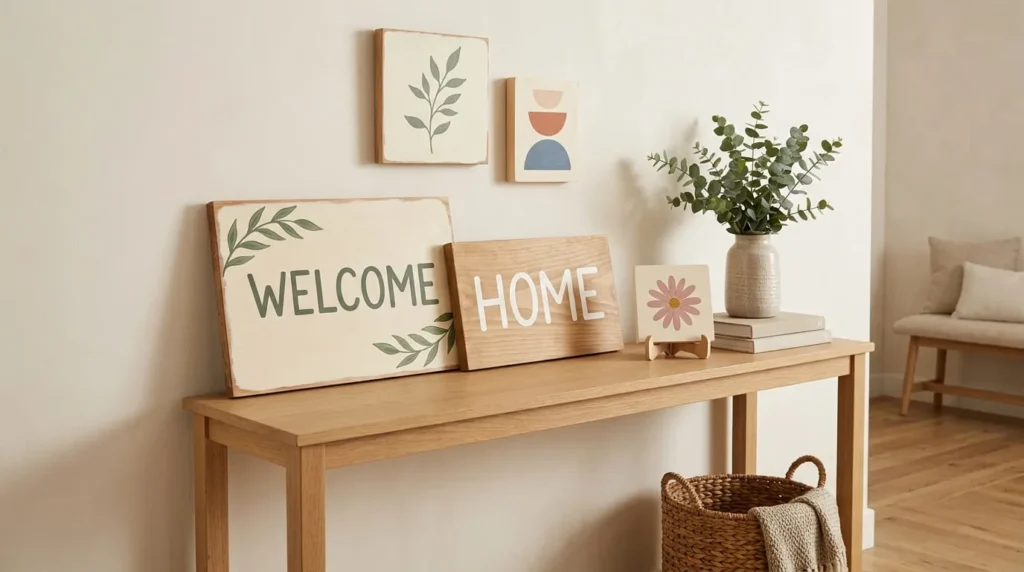
DIY wooden sign ideas for home decor are a simple and creative way to make your home feel warm, welcoming, and personal. With a plain wooden board, a few paint colors, and basic craft supplies, you can create beautiful decorations for almost any room.
You do not need advanced woodworking skills to get started. Premade wooden sign blanks make the process easier because you can focus on painting and decorating instead of cutting wood.
You can make welcome signs for your entryway, farmhouse signs for your kitchen, personalized family signs for your living room, or simple artwork for your bedroom.
The best part is that you can choose colors, words, and designs that match your own style.
In this guide, you will discover 15 easy wooden sign ideas, learn how to make a simple welcome sign step by step, and find helpful tips for decorating and displaying handmade wooden signs throughout your home.
Why Make DIY Wooden Signs for Home Decor?
Wooden signs are a popular choice for handmade home decorations because they are easy to personalize and can suit many decorating styles.
You can create something simple using one wooden board and a few paint colors, or add small details to make your sign more decorative.
Whether you prefer rustic farmhouse decorations or clean modern designs, wooden signs offer plenty of creative options.
Wooden Signs Add a Personal Touch
A handmade wooden sign can make an ordinary room feel more personal.
You can paint your family name, a welcoming message, or a short phrase that means something to you.
For example, a wooden sign with the word “HOME” can look beautiful in a living room, while a small “WELCOME” sign can add a friendly touch to an entryway.
You can also create signs featuring simple flowers, leaves, or geometric shapes instead of words.
Making the decoration yourself allows you to choose every detail.
You Can Match Signs to Your Decorating Style
One advantage of wooden signs is that they can work with different home decorating styles.
For a farmhouse look, you might choose a cream background with dark lettering and slightly distressed edges.
A rustic sign can feature visible natural wood grain, warm brown colors, and simple painted words.
For a modern home, try a smooth wooden panel with clean lines, neutral colors, and a minimal design.
You can also create softer decorations using sage green, dusty pink, or muted blue.
The important thing is to choose a style that looks natural in your room.
Wooden Sign Projects Can Be Beginner-Friendly
Making a wooden sign does not always require saws, drills, or complicated woodworking tools.
You can buy a premade wooden sign blank and decorate it using acrylic paint, brushes, and stencils.
This makes the project easier for beginners who want to create home decorations without building the wooden board themselves.
Start with a small sign and a short word.
As you become more comfortable with painting and lettering, you can try larger signs and more detailed designs.
What Supplies Do You Need to Make Wooden Signs?
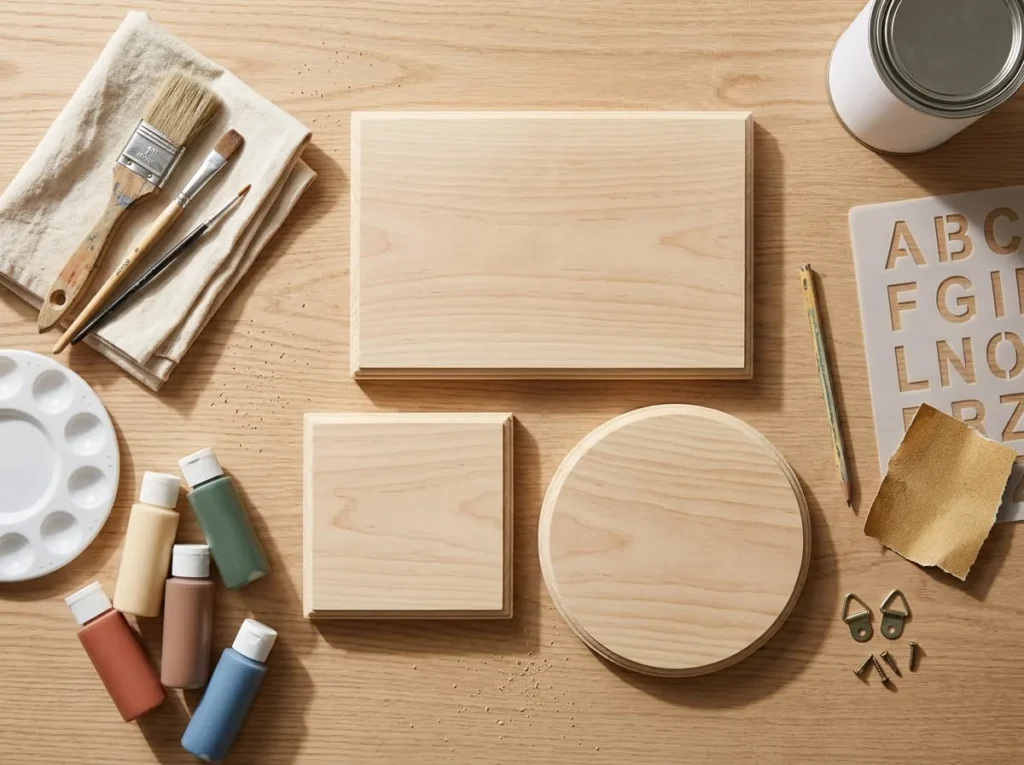
You only need a few basic materials to make attractive wooden signs at home.
The exact supplies depend on your chosen design, but most beginner projects use a wooden blank, suitable paint, brushes, and simple lettering tools.
Preparing your materials before starting can make the painting process easier.
Choosing Wooden Sign Blanks
Start with an unfinished wooden sign blank that has a reasonably smooth surface.
Premade blanks are available in several shapes, including rectangles, squares, and circles.
Rectangular boards work well for welcome messages, family names, and short quotes.
Round wooden blanks are useful for decorative designs featuring flowers, leaves, or large initials.
Choose a board that feels solid and is not visibly warped.
Check for cracks, splinters, loose pieces, or rough edges.
If you plan to hang the sign, consider its weight and whether suitable hanging hardware can be attached securely.
For your first project, a small rectangular wooden blank is a practical choice.
Acrylic Paint and Optional Wood Stain
Acrylic paint is useful for creating colorful wooden sign designs.
You can use it to paint the background, add lettering, or create simple decorative shapes.
Choose paint recommended for your wooden surface.
Basic colors such as white, black, green, brown, and cream work well for many home décor projects.
If you prefer a rustic appearance, you may want to keep some of the natural wood grain visible.
A suitable wood stain can add color while allowing the grain to show through.
However, wood stain and acrylic paint have different application requirements.
If you plan to use both, check their compatibility and follow the manufacturer’s instructions.
Paintbrushes, Stencils, and Paint Pens
A small flat paintbrush is useful for applying background colors.
A medium round brush can help you paint leaves, flowers, and larger decorative shapes.
A fine detail brush is helpful for thin stems, small lines, and correcting lettering.
Letter stencils can make painting words easier for beginners.
You can also use compatible acrylic paint pens for simple lettering and small details.
Choose tools that suit your design and the size of your wooden board.
You do not need expensive brushes to make a simple sign.
A few suitable tools are enough to create attractive results.
Sandpaper and Surface Preparation Supplies
Some wooden sign blanks may need light sanding before painting.
Fine-grit sandpaper can help smooth small rough patches and uncomfortable edges.
You will also need a clean cloth or suitable dust-removal tool.
Make sure the wood is free from loose particles before applying paint.
Depending on your chosen paint and wood surface, a compatible primer may also be useful.
Primer can help some surfaces accept paint more evenly, but not every wooden sign project requires one.
Always follow the preparation instructions for your materials.
Hanging Hardware and Protective Finishes
If you plan to hang your wooden sign, choose hardware suitable for the sign’s weight and construction.
Options may include appropriate picture hangers, D-rings, or other secure mounting systems.
The correct hardware also depends on your wall surface.
For example, drywall and masonry may require different fixings.
You can also display smaller wooden signs on stable shelves or suitable sign stands.
A protective finish is optional for some indoor decorations.
If you choose to use one, make sure it is compatible with your paint and intended display conditions.
Allow the finish to cure according to the manufacturer’s instructions before handling or hanging the sign.
How to Choose the Right Wooden Sign for Each Room
Before painting your wooden sign, think about where you want to display it.
A design that looks attractive in a farmhouse kitchen may not suit a modern bedroom.
Choosing the right colors, shape, and message can help your handmade decoration fit naturally into the space.
Consider Your Room’s Color Palette
Look at the main colors already used in your room.
Pay attention to the walls, furniture, curtains, rugs, and other decorations.
If your living room has neutral furniture, a cream wooden sign with sage green leaves may look attractive.
For a bedroom with soft pink accents, you might choose a dusty pink background with simple white lettering.
A kitchen with natural wooden cabinets may suit a rustic sign with warm brown details.
Try choosing two or three colors that complement the existing space.
You do not need to match every decoration exactly.
Choose the Right Sign Shape and Style
Different wooden sign shapes can create different visual effects.
A long rectangular sign works well above a small entryway shelf or as part of a wall arrangement.
A square sign can be useful for a single large initial or a simple painted flower.
Round signs can look attractive with botanical patterns and short welcoming messages.
Vertical signs may work well in narrow areas where there is limited horizontal wall space.
Choose a shape that fits your available space without making the room feel crowded.
Decide Between Words and Simple Artwork
Not every wooden sign needs lettering.
Some signs look beautiful with simple painted flowers, leaves, or abstract shapes.
If you want to include words, choose a short message that is easy to read.
For example, “WELCOME,” “HOME,” or “BE KIND” can work well on small wooden signs.
Long phrases may require smaller letters, which can be more difficult for beginners to paint neatly.
If you prefer artwork, choose one main design rather than filling the entire board with tiny details.
Leave enough empty space around the painting to keep the sign balanced.
Think About Where the Sign Will Be Displayed
Consider the location before choosing your materials.
A wooden sign displayed in a dry bedroom may have different finishing needs from one placed near a kitchen sink.
Moisture, direct sunlight, and heat can affect some paints and wooden surfaces.
If your sign will be placed in a kitchen, avoid areas with frequent splashes or strong heat unless the complete materials and finish are suitable.
For wall signs, check that there is enough space for safe mounting.
For shelf decorations, choose a stable location where the sign cannot easily fall.
How to Make a Simple DIY Wooden Welcome Sign Step by Step
A small wooden welcome sign is one of the easiest home décor projects for beginners.
For this tutorial, we will create a rectangular sign with a warm cream background, dark green lettering, and simple painted leaves.
This design works well in an entryway, hallway, or living room.
You can use a premade wooden sign blank, so there is no need to cut or build the board yourself.
The main goal is to create a neat, readable decoration using simple painting techniques.
Step 1: Prepare Your Workspace and Materials
Choose a clean, comfortable table with good lighting.
Cover the work surface with protective paper or a suitable craft mat.
Gather your rectangular wooden sign blank, cream acrylic paint, dark green acrylic paint, flat brush, fine detail brush, pencil, and letter stencil.
Keep a clean cloth and water container nearby for ordinary water-based acrylic painting.
If your materials require primer, sanding, or a protective finish, have those supplies ready too.
Place the wooden blank flat on your worktable.
Make sure you have enough space to move your brushes comfortably.
Step 2: Check and Smooth the Wooden Surface

Examine the wooden blank before painting.
Look for rough areas, splinters, dust, or loose pieces.
If needed, gently sand the rough sections using suitable fine-grit sandpaper.
Pay attention to the edges because these areas may feel uncomfortable to handle.
Avoid sanding excessively.
Your goal is to create a smooth, clean surface without changing the shape of the board.
After sanding, remove the dust using a clean cloth or another suitable method.
If you use moisture during cleaning, let the wood dry thoroughly before painting.
Step 3: Apply Primer if Needed
Some wooden surfaces benefit from primer before painting.
Primer may help improve coverage on certain types of wood or when using particular paints.
However, not every unfinished wooden blank requires primer.
Check whether your acrylic paint is suitable for direct application to the prepared wood.
If primer is recommended, apply a compatible product according to the manufacturer’s instructions.
Use controlled brush strokes and avoid excessive buildup.
Allow the primer to dry or cure as directed before continuing.
Step 4: Paint the Background Color
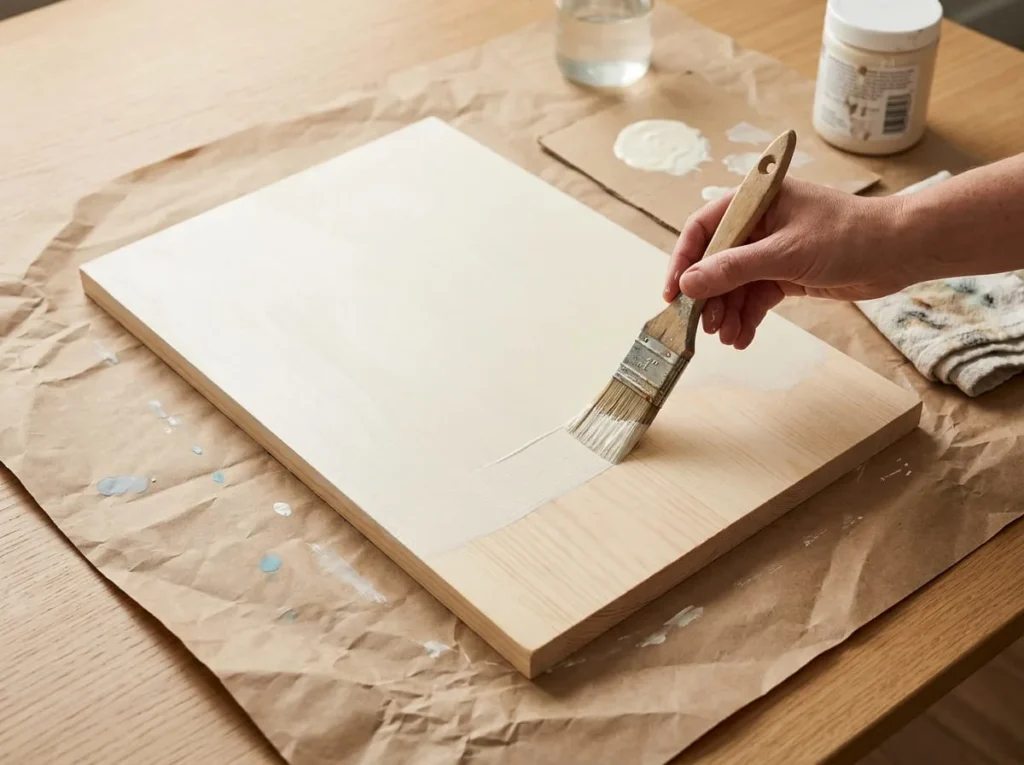
For this welcome sign, use warm cream acrylic paint.
Dip a small flat brush into the paint.
Apply a thin, even layer across the visible front surface of the wooden board.
Move the brush carefully to create consistent coverage.
Pay attention to the edges if you want them painted the same color.
Avoid leaving thick patches of paint near the corners.
If the first coat looks uneven, allow it to dry before applying another layer as directed by the paint manufacturer.
Once the background is complete, let it dry before planning your lettering.
A smooth cream background will help the dark green letters stand out.
Step 5: Plan the Welcome Lettering
The main word for this project is “WELCOME.”
Before painting, decide where the letters should appear.
For a rectangular wooden sign, placing the word near the center usually creates a balanced appearance.
Use a pencil to mark a light horizontal guideline if needed.
Check that the word will fit comfortably across the board.
Leave enough space around the letters so the sign does not look crowded.
If you plan to paint leaves around the word, keep some additional space near the corners.
Look at the overall arrangement before applying paint.
Correcting the layout at this stage is easier than repainting finished lettering.
Step 6: Transfer or Stencil the Letters

Once you are happy with the layout, prepare your letter stencil.
Position the stencil carefully over the dry background.
Keep it steady using an appropriate temporary fixing method that will not damage the paint.
Add a small amount of dark green acrylic paint to your stencil brush or suitable sponge.
Gently apply the paint inside the letter openings.
Avoid pressing too much paint against the stencil because it may spread underneath the edges.
Follow the stencil manufacturer’s instructions for lifting or repositioning it.
If you prefer painting freehand, lightly sketch the letters first and use a fine brush to fill them.
Take your time with each letter.
The goal is readable lettering rather than perfectly printed shapes.
How to Keep Wooden Sign Lettering Neat
Choose a simple letter style with clear shapes.
Large block letters are often easier for beginners than thin decorative handwriting.
Keep the spacing between letters reasonably consistent.
Use a small amount of paint when working with stencils.
If the letters need stronger coverage, allow the first layer to dry before adding more paint when appropriate.
Avoid moving the stencil while the paint is being applied.
If an edge looks uneven, let the paint dry before correcting it with a detail brush.
Small handmade differences are normal and can add character to the sign.
Step 7: Paint the Decorative Leaves
Once the welcome lettering has dried, you can add simple green leaves.
Use a fine detail brush and dark green acrylic paint.
Start by painting one short curved stem near an upper corner of the sign.
Add three or four small oval leaves along the stem.
Repeat a similar pattern near the opposite lower corner if there is enough space.
Keep the leaves simple and leave some cream background visible around them.
You do not need to paint complicated botanical details.
If you want a softer appearance, mix a lighter green shade for a few leaves.
Make sure the decoration does not cover the word “WELCOME.”
The lettering should remain the main focus of the sign.
Step 8: Allow the Paint to Dry Properly
After finishing the lettering and leaves, place the sign somewhere clean and protected.
Allow the acrylic paint to dry according to the manufacturer’s instructions.
Avoid touching the painted details while they are wet.
Remember that the surface may feel dry before the paint is ready for another coating.
Drying time depends on the paint, thickness of the layers, and surrounding conditions.
Check that the background, lettering, and leaves are ready before handling or finishing the sign.
Do not rush this step because early handling can damage the painted surface.
Step 9: Apply a Compatible Protective Finish if Needed
Some indoor painted wooden signs can be displayed without an additional clear protective coating.
However, a compatible finish may be useful if the sign will be handled frequently or needs extra surface protection.
Choose a finish suitable for your acrylic paint, wooden surface, and intended display location.
Follow the manufacturer’s preparation and application instructions.
If you are unsure how the finish will affect the colors, test it on a separate painted wood sample.
Apply the product using the recommended method.
Avoid excessively thick coats and allow the finish to dry or cure as directed.
Do not assume that ordinary indoor varnish makes the sign suitable for outdoor weather exposure.
Step 10: Add Suitable Hanging Hardware or Display the Sign
Once the paint and any protective finish are ready, decide how you want to display the sign.
For a small, lightweight sign, a suitable display stand or stable shelf may be the easiest option.
If you want to hang it on a wall, choose hardware rated for the sign’s weight.
Make sure the hanging hardware is properly attached to the wood.
Use wall fixings suitable for your wall material.
Do not rely on weak adhesive or decorative string unless it is specifically suitable for supporting the sign.
Choose a location where the sign will not be easily knocked down.
Your handmade welcome sign is now ready to become a warm and personal decoration for your home.
15 Easy DIY Wooden Sign Ideas for Home Decor
Once you have learned how to make a simple wooden welcome sign, you can try many other designs to decorate different rooms in your home.
Wooden signs can feature short messages, family names, flowers, leaves, or simple painted patterns. You can make them look rustic, modern, colorful, or minimal by choosing different paint colors and finishes.
The best DIY wooden sign ideas for home decor are easy to make and match the style of the room where you want to display them.
You do not need to create complicated artwork or use professional woodworking equipment. A premade wooden sign blank, a few suitable paint colors, and basic brushes are enough for many beginner projects.
Here are 15 creative wooden sign ideas to inspire your next handmade home decoration.
1. Rustic Wooden Welcome Sign for the Entryway

Suggested colors: Warm white, dark brown, and sage green.
Best location: Entryway or hallway.
A rustic wooden welcome sign can make your entryway feel warm and inviting.
This design works especially well with natural wooden furniture, woven baskets, and simple farmhouse decorations.
You can use a rectangular wooden blank with visible wood grain or paint the background warm white.
Large dark brown lettering keeps the message easy to read, while a few sage green leaves add a natural decorative touch.
How to Make a Rustic Welcome Sign
- Choose a smooth rectangular wooden sign blank.
- Clean the surface and sand any rough areas if needed.
- Leave the natural wood visible or apply a suitable warm white background.
- Allow the background to dry before adding lettering.
- Lightly mark the center of the board.
- Use a stencil or pencil guide to paint the word “WELCOME” in dark brown.
- Add one small sage green leafy branch near a corner.
- If desired, lightly distress suitable painted edges after the paint is ready, using a method compatible with your materials.
- Remove any dust and apply a compatible protective finish if needed.
- Display the completed sign securely near your entryway.
You can place the sign above a narrow console table or beside a small decorative basket.
Keep the surrounding decorations simple so the lettering remains easy to notice.
Beginner tip: Use one short word with large letters. Complicated messages can make a small rustic sign look crowded.
2. Farmhouse Kitchen Wooden Sign

Suggested colors: Cream, charcoal, and muted green.
Best location: Kitchen wall or stable shelf away from direct heat and splashes.
Farmhouse kitchen signs can add a cozy handmade feeling to your cooking space.
A simple wooden sign featuring the word “KITCHEN” works well with neutral cabinets, wooden shelves, and ceramic decorations.
You can make the design more interesting by painting a small herb branch near the lettering.
This gives the sign a natural kitchen theme without requiring detailed artwork.
How to Paint a Simple Farmhouse Kitchen Sign
- Select a small rectangular wooden board with a smooth surface.
- Prepare the wood according to your paint instructions.
- Apply a cream acrylic background using a flat brush.
- Allow the background to dry.
- Lightly sketch the word “KITCHEN” across the center.
- Paint the letters in charcoal using a stencil or detail brush.
- Add a small muted green herb branch beneath the word.
- Keep the leaves simple and rounded.
- Allow all painted details to dry properly.
- Apply a suitable finish if needed and display the sign securely.
You can place the sign on a stable kitchen shelf beside decorative jars or a small potted herb.
Avoid locations directly above strong heat or where the sign may receive regular water splashes unless your materials are suitable for those conditions.
Beginner tip: Choose clear block lettering and one simple herb illustration. Avoid adding too many small kitchen objects to the design.
3. Personalized Family Name Wooden Sign

Suggested colors: Natural wood, black, and warm white.
Best location: Living room or entryway.
A personalized family name sign is a lovely way to make your home feel more personal.
You can paint your family name on a wooden board and display it above a console table, on a gallery wall, or near your entrance.
Natural wood with black lettering creates a simple appearance that works with many decorating styles.
You can also add a small painted leaf or decorative line beneath the name.
How to Make a Family Name Sign
- Choose a rectangular wooden sign blank with enough space for your chosen name.
- Check the wood for rough areas and prepare the surface.
- Decide whether to keep the natural wood visible or paint a light background.
- Write the family name on paper first to check its spelling and length.
- Lightly mark the center of the wooden board.
- Position suitable letter stencils or sketch the name using a pencil.
- Paint the letters carefully with black acrylic paint.
- Allow the lettering to dry before adding any decorative details.
- Paint a small warm white accent or simple leafy branch if desired.
- Finish and display the sign according to your materials and mounting method.
Long family names may require more planning than short names.
Leave enough space around the letters rather than stretching them across the entire board.
Beginner tip: Check the spelling and letter spacing before painting. Correcting pencil guidelines is much easier than fixing a finished name.
4. Minimalist Wooden Quote Sign
Suggested colors: Ivory, black, and muted beige.
Best location: Bedroom or home office.
Minimalist wooden quote signs are ideal if you prefer simple decorations with clean lines.
You do not need bright colors or detailed artwork to create an attractive sign.
A short phrase such as “BE KIND” or “STAY CURIOUS” can become the main feature of the design.
An ivory background with black lettering creates clear contrast and works well in modern rooms.
How to Paint a Minimalist Quote Sign
- Choose a smooth square or rectangular wooden blank.
- Prepare the surface and apply a suitable ivory background.
- Allow the paint to dry.
- Choose a short phrase with only a few words.
- Lightly mark the center of the board.
- Sketch the letters using a simple block style or position suitable stencils.
- Paint the words carefully using black acrylic paint.
- Leave generous empty space around the lettering.
- Add a thin muted beige line near one edge if desired.
- Allow the paint to dry and finish the sign appropriately.
You can display the sign above a small desk or on a bedroom shelf.
Avoid adding too many flowers, borders, or decorative shapes because the purpose of this design is simplicity.
Beginner tip: Use one readable letter style throughout the sign. Mixing several decorative fonts can make the message harder to read.
5. Botanical Leaf Wooden Wall Sign
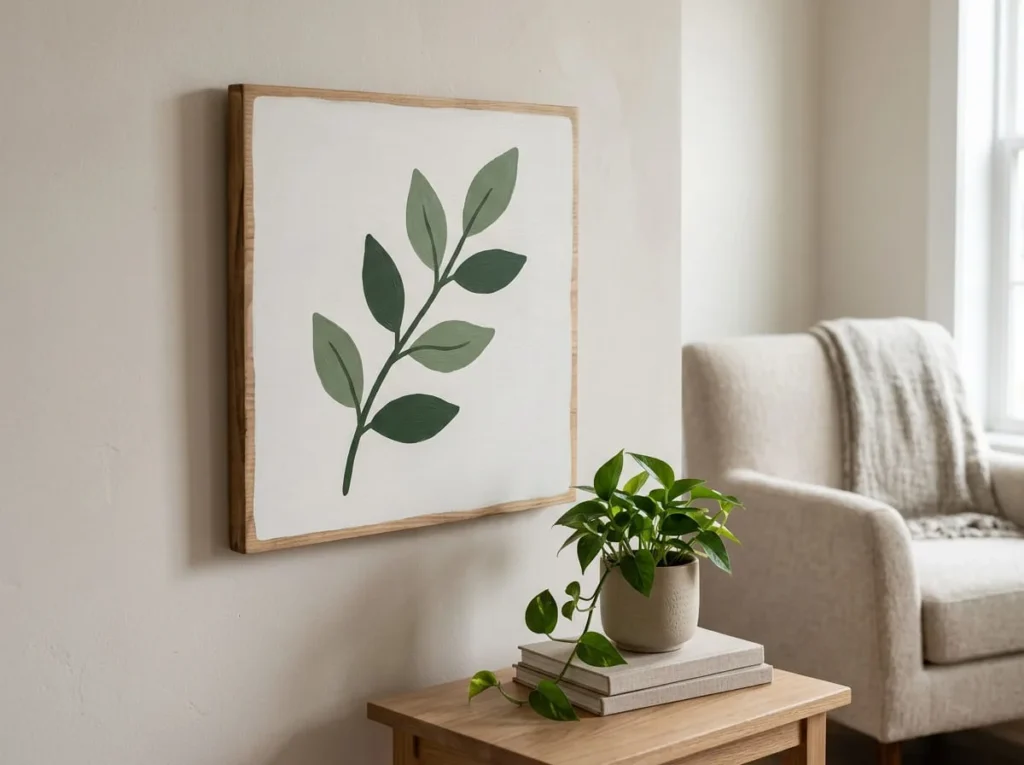
Suggested colors: Warm white, sage green, and forest green.
Best location: Living room, bedroom, or reading corner.
Botanical wooden signs are a beautiful option for people who enjoy nature-inspired home decorations.
A simple leafy branch can look attractive against a warm white background.
You can make the design using a few basic brush strokes without painting realistic leaves.
This style works well with wooden furniture, houseplants, and neutral room colors.
How to Paint Simple Leaves on a Wood Sign
- Choose a square or rectangular wooden panel.
- Prepare the wood and paint the background warm white.
- Allow the background to dry completely.
- Lightly sketch one curved branch across the center.
- Use a fine brush to paint the stem in forest green.
- Add several oval leaves along both sides of the stem.
- Use sage green for some leaves to create gentle color variation.
- Keep the leaves spaced apart so each shape remains visible.
- Allow the design to dry before applying any required protective finish.
- Hang the sign securely or place it on a stable shelf.
You can create a matching pair by painting a similar branch in a different direction on another board.
The signs do not need to be identical to look coordinated.
Beginner tip: Start with one large branch and six or eight simple leaves. A basic botanical design is easier to paint than a detailed plant illustration.
6. Small Wooden Shelf Sign
Suggested colors: Cream, terracotta, and muted blue.
Best location: Bookshelf, mantel, or stable display ledge.
Small wooden shelf signs are a good choice when you do not have much wall space.
They can be placed beside books, small plants, or other decorative objects.
You can paint a short word, a simple flower, or a small abstract design.
Because the sign is compact, the artwork should remain easy to recognize from a short distance.
How to Make a Mini Shelf Sign
- Choose a small wooden sign blank that can be displayed securely.
- Check that the surface is smooth and clean.
- Apply a cream acrylic background if desired.
- Allow the background to dry.
- Sketch one simple design near the center.
- Paint a small terracotta flower with a muted blue center, or choose another basic design.
- Leave some empty space around the artwork.
- Allow the painted details to dry properly.
- Apply a compatible protective finish if needed.
- Place the sign on a stable display stand or shelf.
A small sign can look attractive beside a stack of books or a decorative ceramic pot.
Make sure it is supported securely and cannot fall from the shelf.
Beginner tip: Choose one flower or one short word. Tiny signs become difficult to decorate when you add too many details.
7. DIY Wooden Bedroom Sign

Suggested colors: Dusty pink, warm white, and muted taupe.
Best location: Bedroom wall or dresser shelf.
A handmade wooden bedroom sign can add a calm and personal touch to your space.
Soft colors and simple artwork are especially useful if you want the room to feel peaceful.
You might choose a small crescent moon, a few flowers, or a short calming message.
A dusty pink background with warm white details can create a gentle decorative appearance.
How to Make a Calm Bedroom Wooden Sign
- Choose a smooth wooden sign blank in a shape that suits your room.
- Prepare the surface according to your paint instructions.
- Paint the background dusty pink.
- Allow the background to dry.
- Lightly sketch a simple crescent moon near the center.
- Paint the moon using warm white acrylic paint.
- Add two or three small muted taupe dots around the moon.
- Keep the remaining background mostly clear.
- Allow the artwork to dry and finish the sign if needed.
- Display the sign securely on a wall or stable dresser shelf.
You can also replace the moon with one large flower or a short message such as “REST EASY.”
Choose the design that best suits your bedroom’s colors and decorations.
Beginner tip: Use soft colors and only a few decorative elements. A simple design can create a peaceful appearance without making the sign look crowded.
8. Modern Geometric Wooden Sign

Suggested colors: Terracotta, cream, sage green, and navy.
Best location: Living room or modern home office.
Geometric wooden signs are a good option if you enjoy modern decorations.
Instead of painting letters or flowers, you can use simple shapes and large blocks of color.
Circles, arches, triangles, and diagonal sections can create interesting artwork.
This style looks attractive on square wooden panels and works well with contemporary furniture.
How to Paint Geometric Shapes on Wood
- Choose a smooth square wooden panel.
- Prepare the surface and apply a cream background.
- Allow the background to dry sufficiently.
- Lightly plan two or three large geometric shapes.
- Use suitable painter’s tape to create a straight boundary if needed.
- Paint one section terracotta with a small flat brush.
- Add a sage green curved shape near another section.
- Paint a small navy circle or rounded accent to balance the design.
- Remove any painter’s tape according to the product and paint instructions.
- Allow the artwork to dry and apply a compatible protective finish if needed.
You can make two matching geometric signs using the same colors with different shape arrangements.
Display them together above a desk or beside other simple wall decorations.
Beginner tip: Choose large, clear shapes instead of complicated patterns. A few carefully arranged color blocks can look attractive without requiring advanced painting skills.
9. Coffee Bar Wooden Sign

Suggested colors: Beige, dark brown, and cream.
Best location: Coffee station or kitchen shelf.
A coffee bar wooden sign is a lovely decoration for anyone who enjoys a cozy coffee corner at home.
You can create a small sign with the words “COFFEE BAR” and a simple painted coffee cup underneath.
This design works well with wooden shelves, ceramic mugs, and neutral kitchen decorations.
You do not need detailed drawings or complicated lettering to make an attractive coffee sign.
How to Make a Coffee Bar Sign
- Choose a small rectangular wooden sign blank.
- Prepare the wood by cleaning and sanding rough areas if needed.
- Apply a beige acrylic background using a flat brush.
- Allow the background to dry before adding the design.
- Lightly sketch the words “COFFEE BAR” near the upper center.
- Use dark brown acrylic paint to fill the letters carefully.
- Draw a simple coffee cup beneath the lettering.
- Paint the cup cream and add a small dark brown oval to represent coffee.
- Allow the details to dry before applying a compatible protective finish if needed.
- Display the sign securely near your coffee station.
You can add two small curved lines above the cup to represent steam.
Keep the sign away from frequent water splashes and direct heat unless the materials are suitable for those conditions.
Beginner tip: Use large, readable lettering and one simple coffee cup. Avoid adding too many coffee beans, decorative borders, or complicated drawings.
10. Wooden Laundry Room Sign
Suggested colors: White, charcoal, and muted blue.
Best location: Laundry room wall or stable shelf.
A handmade wooden laundry room sign can make a practical household space feel more welcoming.
You can create a simple sign with the word “LAUNDRY” and a small decorative illustration.
A white background with charcoal lettering works well with many laundry room colors.
You can add a muted blue line or a simple laundry basket drawing to make the design more interesting.
How to Paint a Laundry Room Sign
- Choose a smooth rectangular wooden sign blank.
- Check the wood for rough areas and prepare the surface.
- Apply a suitable white acrylic background.
- Allow the paint to dry properly.
- Lightly mark the center of the board.
- Sketch the word “LAUNDRY” using simple uppercase letters.
- Paint the letters with charcoal acrylic paint.
- Add a small muted blue line beneath the word.
- If desired, paint a simple laundry basket using a few straight lines.
- Allow the design to dry and finish the sign appropriately before displaying it.
Place the finished sign on a stable shelf or hang it securely on a suitable wall.
Laundry rooms can become humid, so avoid locations with regular splashes or excessive moisture unless your wooden sign and finishing system are appropriate for those conditions.
Beginner tip: Keep the lettering large and the decoration small. One word with a simple accent can look cleaner than a crowded design.
11. Handmade Wooden Home Sign
Suggested colors: Warm cream, sage green, and soft brown.
Best location: Living room or entryway.
A wooden sign featuring the word “HOME” is a simple decoration that can suit many interior styles.
You can use a square or rectangular wooden board and paint the word in large letters.
Warm cream and soft brown create a gentle farmhouse appearance, while sage green leaves add a natural touch.
This project is especially useful for beginners who want to practice painting short words.
How to Make a Simple HOME Sign
- Choose a smooth wooden sign blank.
- Clean the board and sand rough areas if necessary.
- Apply a warm cream background.
- Allow the background to dry.
- Lightly sketch the word “HOME” across the center.
- Use a stencil or suitable detail brush to paint the letters soft brown.
- Check that the letters have comfortable spacing.
- Add a small sage green leaf near one corner.
- Let the paint dry before applying any required protective finish.
- Hang the sign securely or display it on a stable shelf.
You can also leave the natural wood visible and paint the letters cream.
Choose the combination that works best with your furniture and wall colors.
Beginner tip: Center the word before painting. A simple pencil guideline can help keep the letters balanced across the board.
12. Floral Wooden Sign for Wall Decor
Suggested colors: Blush pink, sage green, and warm white.
Best location: Bedroom or living room.
Floral wooden signs can add soft colors and a handmade touch to your walls.
You can decorate a wooden board with simple daisies, rounded flowers, or small leafy stems.
A warm white background with blush pink flowers creates a light and welcoming appearance.
This project is a good choice for beginners who enjoy painting but do not want to include lettering.
How to Paint Easy Flowers on a Wooden Sign
- Choose a smooth square or rectangular wooden sign blank.
- Prepare the surface and apply a warm white acrylic background.
- Allow the background to dry.
- Lightly sketch two or three flowers across the board.
- Paint five rounded blush pink petals around each flower center.
- Allow the petals to dry before adding contrasting centers.
- Use sage green paint to create short stems and small leaves.
- Keep the flowers spaced apart so the design does not look crowded.
- Add a few small decorative dots if desired.
- Allow the painting to dry and apply a compatible protective finish if needed.
You can create a matching set by painting one larger flower on a second wooden board.
Display the signs together for a coordinated floral wall decoration.
Beginner tip: Use large petals and a limited number of flowers. Simple floral designs are easier to paint and often look more balanced.
13. Seasonal Interchangeable Wooden Sign

Suggested colors: Neutral cream background with seasonal accent colors.
Best location: Entryway shelf or display table.
An interchangeable wooden sign is a creative way to update your decorations throughout the year.
Instead of making a completely new sign for every season, you can prepare one neutral wooden base and change a small decorative accent.
For example, you might use a simple flower for spring, a painted leaf for fall, or a star for winter.
The main wooden sign can remain the same while the decoration changes.
How to Make a Reusable Seasonal Sign
- Choose a smooth wooden sign blank suitable for indoor display.
- Prepare the surface and apply a neutral cream background.
- Paint a short word such as “HELLO” near the center.
- Leave a clear space beside or beneath the lettering for a removable decoration.
- Create small seasonal accents using suitable lightweight craft materials.
- Paint a flower for spring, a leaf for fall, or a star for winter.
- Allow all painted pieces to dry and cure as directed.
- Choose a secure, suitable attachment method that allows the accent to be changed without damaging the base.
- Check that each decoration remains securely attached when displayed.
- Place the sign on a stable shelf or use appropriate hanging hardware.
Keep removable decorations in a small storage container when they are not being used.
Avoid small detachable pieces in locations accessible to young children.
Beginner tip: Use one neutral background for the entire year. Changing only the small decorative accent makes the project easier to maintain.
14. Wooden Number Sign for Home Decor
Suggested colors: Black, cream, and natural wood.
Best location: Interior door or decorative wall display.
Wooden number signs are simple decorations that can add a personal touch to a home.
You might create a number sign for an interior room, a decorative wall, or a personalized display.
Large numbers are easy to recognize and can look attractive against a plain wooden background.
This project is especially suitable for beginners because it requires very little detailed painting.
How to Make a Simple Wooden Number Sign
- Choose a small wooden blank with a smooth surface.
- Clean the wood and sand rough areas if needed.
- Decide whether to keep the natural wood grain visible or apply a cream background.
- Allow any background paint to dry.
- Choose the number you want to display.
- Position a suitable number stencil near the center of the board.
- Apply black acrylic paint using controlled brush strokes.
- Carefully remove the stencil according to its instructions.
- Add a thin decorative border if desired.
- Allow the design to dry and display the sign securely.
A single large number can look attractive without additional artwork.
If you are making a multi-digit number, check the spacing before painting.
Beginner tip: Choose a clear number style with simple shapes. Thin decorative numbers may be difficult to paint neatly.
15. DIY Wooden Gallery Wall Signs

Suggested colors: Coordinated neutrals with one accent color.
Best location: Living room or hallway gallery wall.
A wooden gallery wall is a creative way to display several handmade signs together.
Instead of creating one large decoration, you can make a matching set of three smaller wooden signs.
Each sign can feature a different design while using the same background colors and overall style.
For example, one sign could display a short word, another could feature a leafy branch, and the third could contain simple geometric shapes.
How to Make a Matching Set of Wooden Signs
- Choose three wooden sign blanks in coordinating shapes and sizes.
- Prepare each surface by cleaning and sanding where needed.
- Apply the same warm cream background to all three boards.
- Allow the backgrounds to dry properly.
- On the first sign, sketch a short word such as “HOME.”
- On the second sign, draw one simple sage green leafy branch.
- On the third sign, sketch two or three terracotta geometric shapes.
- Paint each design using a consistent color palette.
- Allow the paint to dry and finish the signs as needed.
- Arrange the completed signs on the floor to plan their layout before hanging them securely.
You can leave a small amount of space between the signs so each design remains visible.
Try to keep the visual arrangement balanced rather than placing all the larger decorations on one side.
Beginner tip: Use matching background colors and simple designs. This helps the gallery wall look coordinated even when each sign features different artwork.
How to Make Wooden Signs Look Good with Your Home Decor
Making a beautiful wooden sign is only one part of decorating your home.
The way you choose colors, lettering, and display locations can affect how the finished sign looks in a room.
A simple handmade sign can become an attractive decorative accent when it works with the surrounding furniture and accessories.
Choose Colors That Match the Room
Before painting your sign, look at the colors already used in the space.
Notice the walls, furniture, curtains, and smaller decorative objects.
If your living room uses cream and natural wood, a wooden sign with soft brown lettering may fit naturally.
For a bedroom with muted pink details, you might choose warm white and dusty pink.
Try using two or three main colors rather than adding too many unrelated shades.
You can also include one accent color to make the sign stand out.
Balance Lettering with Empty Space
A wooden sign does not need to be filled with words and decorations.
Leaving some background visible can help the design look cleaner.
If you are painting a welcome message, place the lettering where it can be read easily.
Avoid using tiny letters simply to fit a long sentence onto a small board.
You can also use a simple decorative branch or border to balance the design without overcrowding it.
A little empty space can make the main message more noticeable.
Combine Wood Signs with Other Decorations
Wooden signs can look attractive when displayed beside other home accessories.
For example, you might place a small botanical sign next to a houseplant on a bookshelf.
A farmhouse kitchen sign could sit near decorative jars or wooden utensils.
In a living room, a wooden sign can be part of a gallery wall alongside framed pictures.
Try not to place too many small decorations in one area.
Leave enough space so each object can be appreciated.
Decide Between Rustic and Modern Finishes
Rustic and modern wooden signs can look very different even when made from similar materials.
A rustic sign may feature visible wood grain, warm brown colors, and gently distressed painted edges.
A modern sign often has a smooth background, clean lettering, and simple geometric shapes.
Choose the appearance that matches your room.
If you want a distressed finish, use a method suitable for your paint and wood.
Avoid aggressive sanding that could damage the board or remove too much of the design.
How to Hang and Display DIY Wooden Signs Safely
After finishing your wooden sign, choose a suitable place to display it.
A handmade sign should look attractive, but it must also remain secure.
The correct hanging method depends on the sign’s weight, construction, and wall surface.
Choose Hanging Hardware for the Sign’s Weight
Before attaching hardware, check how heavy the finished wooden sign is.
Choose picture hangers, D-rings, or other hardware rated for the weight and intended installation.
Make sure the hardware can be attached securely to the wooden board.
Thin or damaged wood may not hold screws or other fixings reliably.
Follow the hardware manufacturer’s installation instructions.
Do not assume that decorative string or ordinary adhesive tape can safely support every wooden sign.
Use the Right Fixings for Your Wall
Different wall surfaces require different hanging methods.
Drywall, masonry, and wooden supports may need different types of anchors or screws.
Choose fixings suitable for your wall material and the sign’s weight.
Before drilling, check for hidden electrical wiring and plumbing using appropriate methods.
If you are unsure how to install a heavier sign safely, seek help from someone experienced with wall mounting.
Make sure the finished decoration cannot fall easily.
Display Smaller Signs on Stable Shelves
Not every wooden sign needs to be hung on a wall.
Small signs can look attractive on bookshelves, mantels, and entryway tables.
Choose a stable display stand or suitable support.
Keep signs away from shelf edges where they may be knocked down.
Avoid placing heavy decorations above areas where people sit or sleep without proper secure mounting.
If you display several signs together, make sure each one rests securely.
Keep Signs Away from Excessive Moisture and Heat
Ordinary indoor wooden signs may not be suitable for locations exposed to frequent moisture.
For example, a sign placed directly beside a sink may experience repeated splashes.
Strong heat can also affect some wooden materials, paints, and coatings.
Keep signs away from stovetops, heaters, and other heat sources unless the materials are specifically suitable for that location.
If you want to display a sign outdoors, choose wood, paint, hardware, and protective finishes rated for outdoor exposure.
An ordinary indoor clear coat does not automatically make a wooden sign weatherproof.
How to Protect and Maintain Painted Wooden Signs
Taking care of your handmade signs can help them remain attractive for longer.
Most indoor wooden decorations do not require complicated maintenance.
However, suitable finishing, gentle cleaning, and occasional inspection are useful.
Allow Paint to Dry Before Finishing
After painting your wooden sign, allow all decorative layers to dry according to the paint manufacturer’s instructions.
Do not apply another coating before the paint is ready.
Paint may feel dry to the touch while still requiring additional drying or curing time.
Rushing the process can affect the final appearance.
Choose a Compatible Protective Finish
Some indoor wooden signs can be displayed without a separate protective coating.
If you want extra surface protection, choose a finish compatible with the wood and paint.
Follow the manufacturer’s application instructions.
Test the finish on a separate painted wood sample if you are concerned about changes in color or appearance.
Allow the coating to cure before hanging or handling the sign.
Clean Dust Without Damaging Paint
Wooden signs may collect dust over time.
Use a soft, dry cloth or another cleaning method recommended for the finish.
Avoid aggressive scrubbing or harsh cleaning chemicals.
Do not soak ordinary wooden signs in water.
If the surface becomes dirty, clean it gently according to the materials used.
Check for Peeling, Cracks, or Loose Hardware
Inspect your wooden signs occasionally.
Look for peeling paint, cracks in the wood, or loose hanging hardware.
If a sign begins to wobble or its wall fixing becomes loose, remove it until the problem is corrected.
Small paint scratches may sometimes be repaired using compatible materials.
For serious cracks or damaged mounting points, replacing the sign or hardware may be safer.
Common Mistakes When Making DIY Wooden Signs
Wooden sign projects are beginner-friendly, but a few common mistakes can affect the finished result.
Most problems happen because of unsuitable materials, poor preparation, crowded designs, or incorrect display methods.
Learning what to avoid can make your next wooden sign easier to create.
Choosing the Wrong Wooden Surface
A warped, cracked, or heavily damaged wooden board can make painting difficult.
Before starting, check that the wood is stable and reasonably smooth.
Avoid blanks with loose pieces or sharp splinters.
Choose a board that suits the size and design of your project.
Premade wooden sign blanks are often a practical choice for beginners.
Painting Without Proper Preparation
Dust, rough patches, and existing finishes can interfere with paint application.
Clean the wooden surface before painting.
Sand rough areas if needed and remove sanding dust.
If your chosen paint requires a primer, follow the manufacturer’s instructions.
A properly prepared surface can help create a cleaner painted design.
Using Hard-to-Read Lettering
Tiny letters and complicated fonts can make wooden signs difficult to read.
Choose clear lettering that suits the size of the board.
Make sure the text contrasts with the background.
For example, dark green letters can stand out against a cream surface.
Avoid using several different lettering styles on one small sign.
Simple lettering is often the easiest option for beginners.
Overcrowding the Wooden Sign
Adding too many words, flowers, borders, and decorative shapes can make the design look busy.
Choose one main message or picture.
Leave enough empty space around the important details.
If you want to add decorative leaves or flowers, keep them smaller than the main lettering.
A balanced design is easier to recognize and often looks more attractive.
Using Too Much Paint with Stencils
Applying too much paint through a stencil can cause color to spread beneath the edges.
This may create uneven or blurred lettering.
Use a suitable stencil brush or sponge with a controlled amount of paint.
Keep the stencil secure while working.
Follow the product instructions for removing and repositioning it.
If the letters need more coverage, apply additional paint only when appropriate.
Hanging a Sign Without Secure Hardware
An attractive wooden sign can still become a problem if it is not displayed safely.
Avoid using hardware that cannot support the sign’s weight.
Check that screws, hooks, or other fixings are suitable for the wall material.
Do not place heavy signs on unstable shelves or ledges.
Secure installation helps protect both the decoration and the people nearby.
Frequently Asked Questions
What Kind of Wood Is Best for DIY Wooden Signs?
Smooth, stable wooden sign blanks are a practical choice for beginners. Unfinished wood panels are often easy to decorate using suitable paints. Choose wood without major cracks, warping, or loose pieces, and consider the sign’s size and intended display location.
Can Beginners Make Wooden Signs Without Cutting Wood?
Yes, beginners can use premade wooden sign blanks instead of cutting their own boards. These blanks are available in simple shapes such as rectangles, squares, and circles. You can focus on painting and decorating without needing saws or advanced woodworking skills.
What Paint Should You Use on Wooden Signs?
Acrylic paint is suitable for many decorative wooden sign projects when recommended for the surface. Choose colors that match your room and follow the paint manufacturer’s preparation instructions. Outdoor signs require products suitable for outdoor exposure.
Do You Need to Sand Wood Before Painting a Sign?
Not every wooden blank needs sanding. If the surface is already smooth and properly prepared, additional sanding may be unnecessary. However, light sanding can help remove rough patches and uncomfortable edges. Always remove sanding dust before painting.
Should You Prime Wooden Signs Before Painting?
Some wooden surfaces benefit from primer, especially when the wood absorbs paint unevenly or the paint system requires it. Other paints can be applied directly to properly prepared wood. Check the manufacturer’s instructions before deciding whether primer is necessary.
How Do You Paint Letters on Wooden Signs?
You can use letter stencils, light pencil guidelines, or suitable paint pens. Start by planning the spacing and centering the message. Apply paint carefully using a detail brush or stencil tool, and allow the letters to dry before making corrections.
Can You Use Acrylic Paint Pens on Wooden Signs?
Yes, compatible acrylic paint pens can be useful for lettering, outlines, and small decorative details. Make sure the pen is suitable for the wooden surface and any paint or finish underneath. Follow the manufacturer’s drying instructions before applying another coating.
What Are the Easiest DIY Wooden Sign Ideas?
Welcome signs, HOME signs, botanical branches, simple flowers, and minimalist quotes are good beginner projects. These designs use basic shapes, short words, and a small number of colors. Premade wooden blanks make them easier to complete.
How Do You Make a Wooden Sign Look Rustic?
You can create a rustic appearance using natural wood grain, warm brown colors, simple lettering, and gently distressed painted edges. Choose methods compatible with your wood and paint. Avoid excessive sanding that could damage the sign.
Do Indoor Wooden Signs Need Sealing?
Not every indoor wooden sign requires a separate protective finish. Some decorative signs can be displayed after the paint has dried or cured properly. A compatible clear coating may help protect signs that receive frequent handling, but it should be suitable for the materials used.
How Do You Hang a Wooden Sign on a Wall?
Choose hanging hardware rated for the sign’s weight and suitable for its construction. Use appropriate wall fixings for drywall, masonry, or other wall surfaces. Follow the hardware installation instructions and make sure the finished sign is secure.
Can DIY Wooden Signs Be Displayed Outdoors?
Wooden signs can be made for outdoor display when the wood, paint, protective finish, and mounting hardware are suitable for the expected conditions. Ordinary indoor acrylic paint and craft varnish should not automatically be considered weatherproof. Even outdoor-rated materials may require maintenance over time.
Final Thoughts
DIY wooden sign ideas for home decor are a simple way to bring handmade style and personality into your living spaces.
You can begin with a small welcome sign, botanical design, family name sign, or decorative shelf piece.
Choose a wooden blank that is easy to work with, select colors that complement your room, and keep your lettering or artwork clear.
Remember to prepare the wood properly and display the finished sign securely.
You do not need expensive tools or complicated painting skills to create attractive decorations.
With a little creativity and practice, you can make beautiful wooden signs that add warmth and character to your home.