
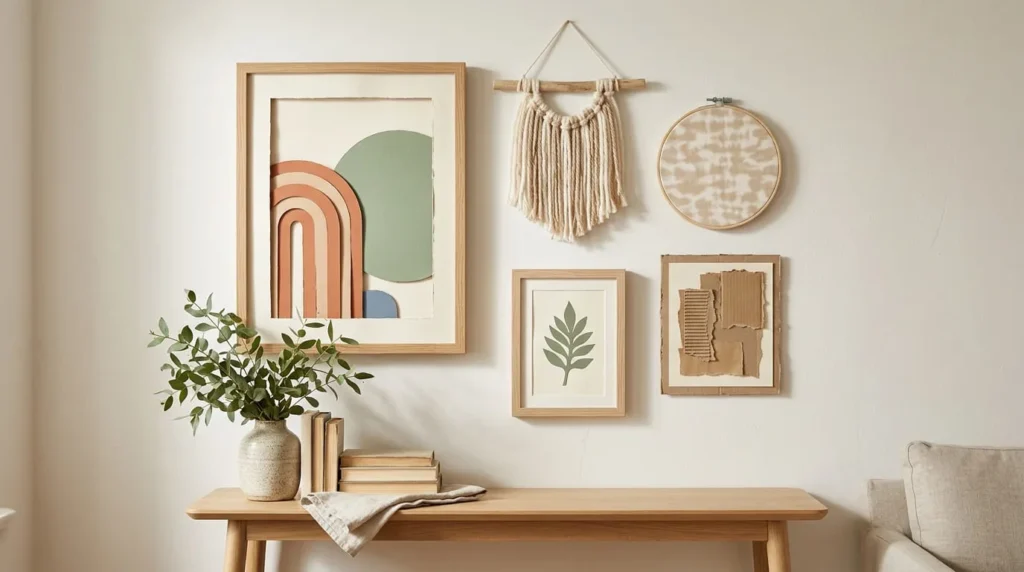
DIY handmade wall art with simple materials is a creative and affordable way to decorate your home without buying expensive artwork. With everyday supplies such as cardboard, colored paper, yarn, fabric scraps, and craft glue, you can turn an empty wall into a beautiful handmade display.
You do not need professional painting skills or complicated tools to get started. Many wall art projects involve simple cutting, folding, arranging, and gluing techniques that beginners can learn at home.
You can create abstract paper artwork for your living room, a soft yarn hanging for your bedroom, or a colorful collage for a home office.
The best part is that you can choose colors, textures, and shapes that match your personal decorating style.
In this guide, you will discover 15 easy handmade wall art ideas, learn how to make layered paper artwork step by step, and find practical tips for displaying your finished decorations.
Why Make Handmade Wall Art at Home?
Handmade wall art is a simple way to make your living space feel more personal.
Instead of buying ready-made decorations, you can create something that matches your room using materials you already have or can find at a craft store.
Many projects are suitable for beginners and do not require advanced artistic skills.
Handmade Wall Art Can Be Budget-Friendly
One of the biggest advantages of making wall art at home is that you can control how much you spend.
You may already have useful materials such as cardboard packaging, colored paper, leftover yarn, or fabric scraps.
These materials can become attractive decorations when they are arranged carefully.
For example, a piece of sturdy cardboard can support a simple paper collage, while leftover yarn can become a small wall hanging.
You do not need to purchase expensive frames or professional equipment for every project.
Start with the materials available to you and choose a design that suits them.
You Can Personalize Wall Decorations
Making your own wall art allows you to choose colors, patterns, and materials that match your home.
If your bedroom has soft pink and cream decorations, you can create paper artwork using similar shades.
For a modern living room, try geometric shapes in terracotta, sage green, and beige.
You can also choose simple natural textures such as cotton fabric or twine.
Unlike ready-made decorations, handmade projects give you more control over the finished appearance.
You can make each piece as simple or colorful as you prefer.
Many Wall Art Projects Do Not Require Painting Skills
You do not have to be good at drawing or painting to create beautiful wall decorations.
Paper cutting, fabric arranging, yarn hanging, and collage techniques are all useful alternatives.
For example, you can cut circles and arches from colored cardstock and arrange them into an abstract design.
You can also stretch patterned fabric inside an embroidery hoop or tie yarn strands to a wooden dowel.
These projects focus on simple shapes and materials instead of detailed artwork.
This makes them practical starting points for beginners.
What Simple Materials Can You Use for DIY Wall Art?
You can create handmade wall decorations using many ordinary craft supplies.
The best materials are easy to handle, suitable for your chosen project, and light enough for the intended display method.
You do not need to buy everything at once.
Choose one project, gather the necessary supplies, and add more materials as you explore different techniques.
Cardboard and Recycled Paper
Cardboard is useful for making sturdy backing boards for lightweight wall art.
You can reuse clean cardboard from suitable packaging, provided it is flat, dry, and strong enough to support your decoration.
Avoid pieces that are bent, damaged, greasy, or affected by moisture.
Cardboard works well beneath paper shapes, fabric collages, and other lightweight craft materials.
Recycled paper can also be used to create colorful cutouts and layered designs.
For example, you might arrange paper circles and curved shapes on a plain cardboard backing to create abstract artwork.
Choose materials that are clean and suitable for indoor decorative use.
Colored Cardstock and Scrapbook Paper
Colored cardstock is one of the easiest materials for beginner paper wall art.
It is generally firmer than ordinary thin writing paper and can hold simple cut shapes more neatly.
You can use it to make circles, arches, leaves, triangles, and other decorative elements.
Scrapbook paper offers additional patterns and textures.
For a simple design, combine two or three solid cardstock colors with one patterned paper.
Try to avoid mixing too many unrelated patterns.
A coordinated color palette can help your finished artwork look balanced and attractive.
Yarn, Twine, and Cotton String
Yarn and string are useful for creating soft textured wall decorations.
You can tie yarn strands to a suitable wooden dowel and trim them into a simple hanging design.
Twine can be arranged into decorative lines or shapes on a sturdy backing.
Cotton string is helpful for lightweight hanging projects and simple woven-looking decorations.
These materials add texture without requiring detailed painting.
Choose cords that are suitable for your project and avoid excessive tension that could bend lightweight backing boards.
Keep hanging cords and loose strands away from young children because they can create entanglement hazards.
Fabric Scraps and Embroidery Hoops
Leftover fabric can become attractive wall art when arranged carefully.
You can use cotton fabric, simple patterned cloth, or clean fabric scraps.
One beginner-friendly idea is to stretch a piece of fabric inside an embroidery hoop.
The hoop acts as a simple frame and allows the pattern to become the main feature.
You can also attach fabric shapes to a suitable backing using adhesive designed for fabric crafts.
Choose fabrics that are easy to handle and do not fray excessively.
If needed, prepare the fabric edges using a suitable method before assembling the decoration.
Craft Glue, Scissors, and Basic Tools
Most simple wall art projects require only a few tools.
Craft scissors are useful for cutting paper, cardstock, yarn, and suitable fabric.
A ruler helps measure straight edges, while a pencil allows you to sketch shapes before cutting.
You may also need craft glue, adhesive tape, or another product recommended for your materials.
Choose an adhesive suitable for the surfaces you want to join.
For example, attaching cardstock to cardboard may require a different adhesive from attaching fabric to a backing.
Avoid using excessive glue because it can cause thin paper to wrinkle or bend.
Use cutting tools carefully and supervise children when appropriate.
Optional Frames and Hanging Supplies
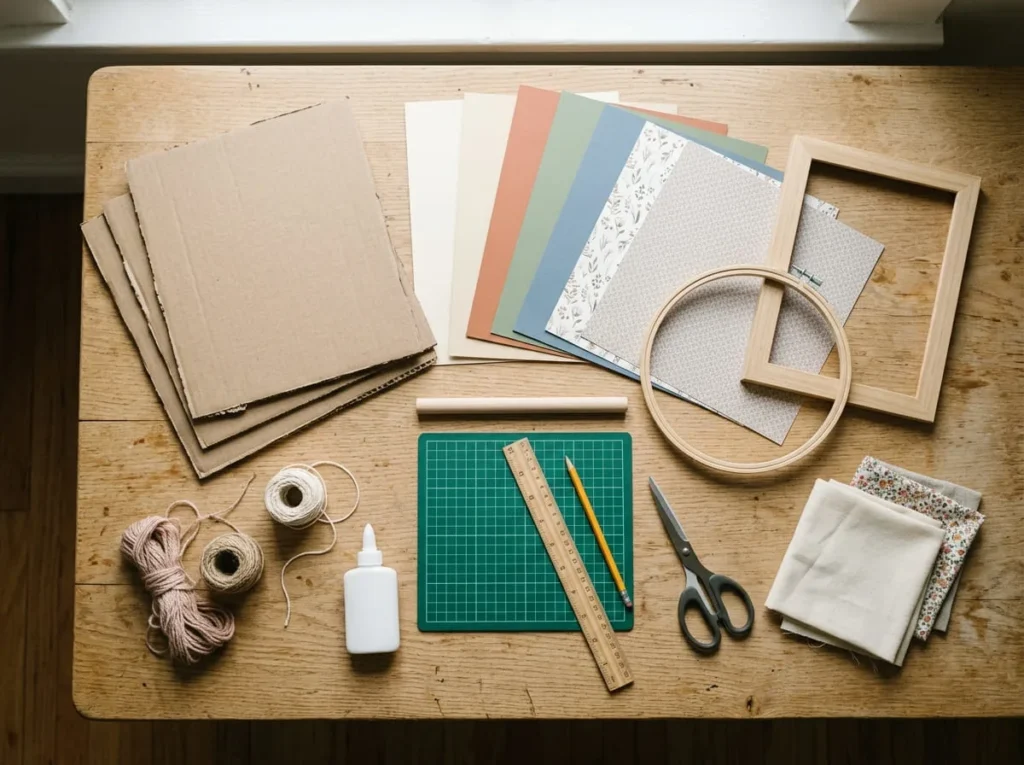
A frame can make a simple paper decoration look more finished.
You can place flat paper artwork inside a suitable picture frame or display it using an appropriate lightweight mounting method.
Some textured projects may require a frame with additional depth.
For yarn or fabric wall hangings, a wooden dowel or embroidery hoop may already form part of the display structure.
Choose hanging supplies that can safely support the finished decoration.
Check whether the mounting method is suitable for your wall surface.
Do not assume that ordinary tape or removable adhesive can support every wall art project.
How to Plan Handmade Wall Art for Your Room
Before cutting or gluing materials, spend a little time planning your design.
A simple idea can look much more attractive when the colors, shapes, and placement are chosen carefully.
You do not need to prepare a complicated drawing.
A small sketch and a few basic decisions are often enough to get started.
Choose a Simple Color Palette
Start by looking at the colors already used in your room.
Notice the walls, furniture, curtains, cushions, and decorative accessories.
Choose two to four colors that complement the space.
For example, a living room with natural wood furniture may suit cream, terracotta, and sage green.
A bedroom with soft colors may look attractive with dusty pink, ivory, and muted blue.
Using a limited palette can help different materials look coordinated.
You can include one darker accent color if you want the artwork to stand out.
Decide Where the Artwork Will Hang
Think about the location before choosing your design.
A small paper collage may look beautiful above a desk or on a bedroom wall.
A longer yarn hanging might suit a narrow wall beside a bookshelf.
A set of three simple artworks can create a decorative arrangement in a hallway.
Consider the amount of available wall space and the surrounding furniture.
Also think about light, moisture, and heat.
Paper and fabric decorations are generally better suited to dry indoor spaces away from strong heat sources.
Choose Shapes and Materials You Can Work With
For your first project, choose materials that are familiar and easy to handle.
If you enjoy paper crafts, begin with large circles, arches, and rectangles.
If you prefer fabric, try stretching a patterned piece inside an embroidery hoop.
For yarn projects, start with straight hanging strands rather than complicated knots.
Avoid choosing a design with very small pieces or difficult cutting details.
Simple shapes are easier to arrange and often create attractive results.
You can explore more complicated designs as your confidence improves.
Keep the Finished Design Balanced
Before gluing anything, arrange your materials on the backing.
Move the shapes around until the composition feels balanced.
Try placing one larger shape near the center and smaller shapes around it.
You can also overlap a few pieces to add depth.
Avoid filling every part of the background.
Leaving some empty space helps the main shapes remain visible.
Look at the artwork from a short distance before fixing the pieces in place.
If one side looks too crowded, move or remove a shape.
How to Make Layered Paper Wall Art Step by Step
Layered paper wall art is one of the easiest handmade decorations you can create with simple materials.
This project uses a sturdy cardboard backing, a cream paper background, and a few colorful cardstock shapes.
You will create a modern abstract design featuring terracotta, sage green, and muted blue.
There is no need to paint the artwork or draw complicated pictures.
The finished piece can be displayed in a suitable frame or mounted securely in a dry indoor location.
This project is especially useful for beginners because you can rearrange the paper shapes before gluing them.
Step 1: Prepare Your Workspace and Materials
Choose a clean table with enough space for cutting and arranging paper.
Cover the work surface with a suitable craft mat or protective paper.
Gather a flat piece of sturdy cardboard, cream paper, terracotta cardstock, sage green cardstock, muted blue cardstock, a pencil, ruler, scissors, and suitable craft glue.
If you plan to frame the artwork, choose a frame that fits your backing and can accommodate the finished layers.
Keep a clean cloth nearby for wiping away small amounts of unwanted glue.
Make sure your scissors are suitable for the paper you are cutting.
Place all the materials within easy reach before starting.
Step 2: Cut a Sturdy Cardboard Base
Start by choosing a clean piece of cardboard that is flat and strong enough to support the paper design.
Avoid cardboard that bends easily or has damaged edges.
Use a ruler and pencil to mark the shape of your backing.
A simple rectangle works well for this project.
If you are using a frame, measure the backing carefully so it fits the frame.
Cut the cardboard along your guidelines using appropriate scissors or another suitable cutting tool.
Check that the edges are reasonably straight.
You do not need to create a perfect professional backing, but it should be neat enough to support the artwork.
Step 3: Add a Cream Paper Background
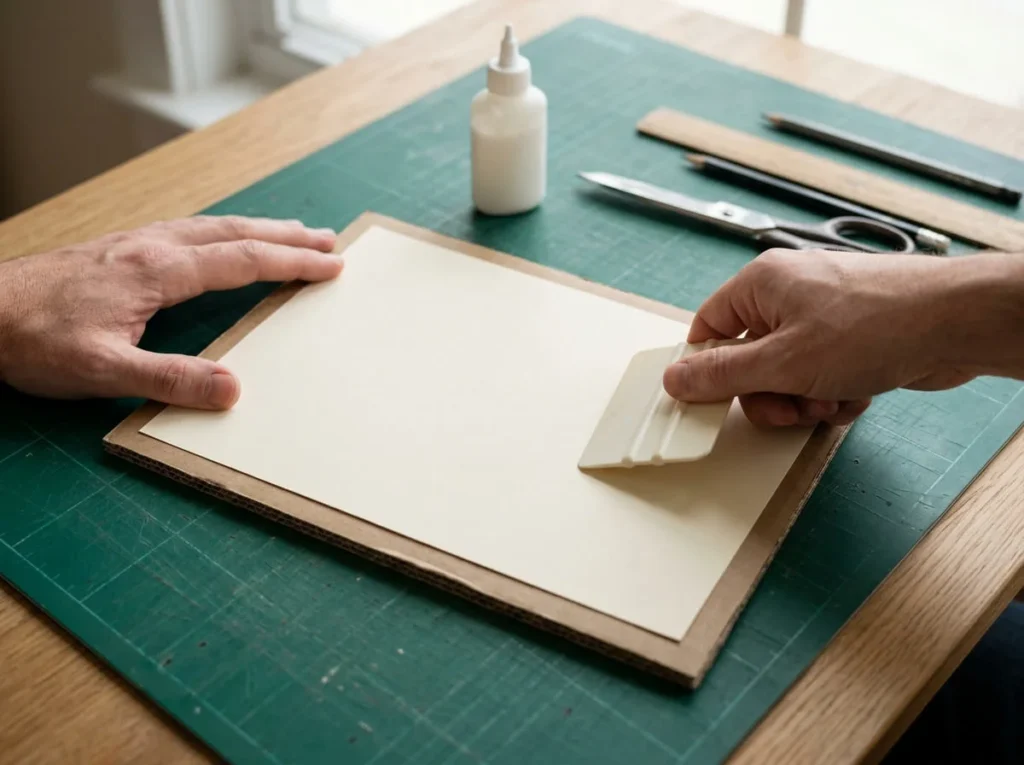
Place the cream paper over your cardboard backing.
Check that the paper covers the visible front surface.
If the paper is too large, mark and trim it carefully.
Choose a suitable adhesive recommended for attaching paper to cardboard.
Apply the adhesive evenly according to its instructions, using only the amount needed.
Position the cream paper carefully over the backing.
Start at one edge and gently smooth the paper toward the opposite side.
Work carefully to reduce trapped air and wrinkles.
Allow the background to dry as directed before adding more layers.
A smooth cream background will help the colored shapes stand out.
Step 4: Sketch Your Abstract Shapes
Now plan the colorful shapes for your artwork.
For this beginner project, use three main elements.
The first shape will be a broad terracotta arch.
The second will be a large sage green semicircle.
The third will be a smaller muted blue rounded shape.
Lightly sketch each shape on its corresponding colored cardstock.
Keep the designs simple and avoid complicated curves.
You can use a round household template for drawing smooth circles if needed, but keep food-use items separate from craft materials when appropriate.
Make sure the shapes are large enough to cut comfortably.
The goal is a balanced abstract composition, not a perfectly symmetrical pattern.
Step 5: Cut the Colored Paper Pieces
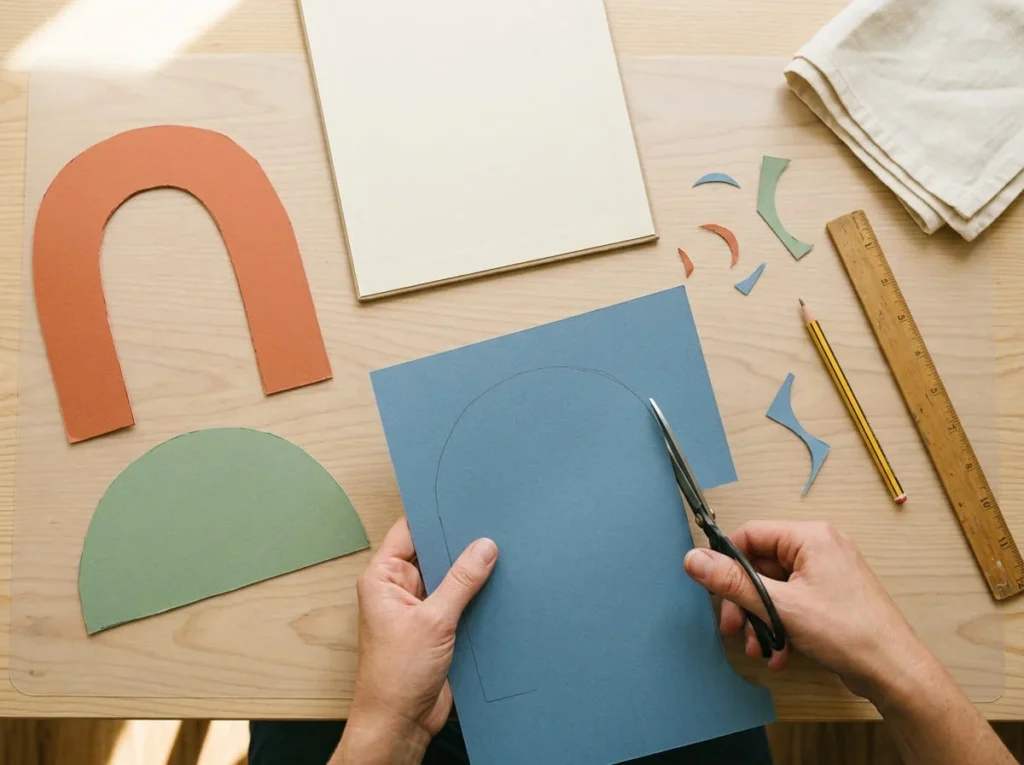
Use suitable craft scissors to cut along your pencil guidelines.
Start with the large terracotta arch.
Move the paper slowly while cutting to create a smooth curved edge.
Next, cut the sage green semicircle.
Finish by cutting the smaller muted blue rounded shape.
Check each piece for rough or uneven edges.
Small imperfections are normal in handmade paper crafts.
If a shape looks too narrow or difficult to handle, redraw it with broader curves.
Keep the leftover cardstock pieces because they may be useful for another project.
Step 6: Arrange the Shapes Before Gluing
Place your cardboard backing flat on the table.
Arrange the terracotta arch near the center or slightly to one side.
Position the sage green semicircle so that it overlaps part of the arch.
Place the muted blue shape near the opposite side to balance the composition.
Move the pieces around until you like the arrangement.
Try leaving some cream background visible around the outer edges.
You can take a photograph of the layout before gluing if you want a reference.
Do not attach the paper immediately.
Experimenting with placement is one of the easiest ways to improve an abstract design.
How to Create Depth with Layered Paper
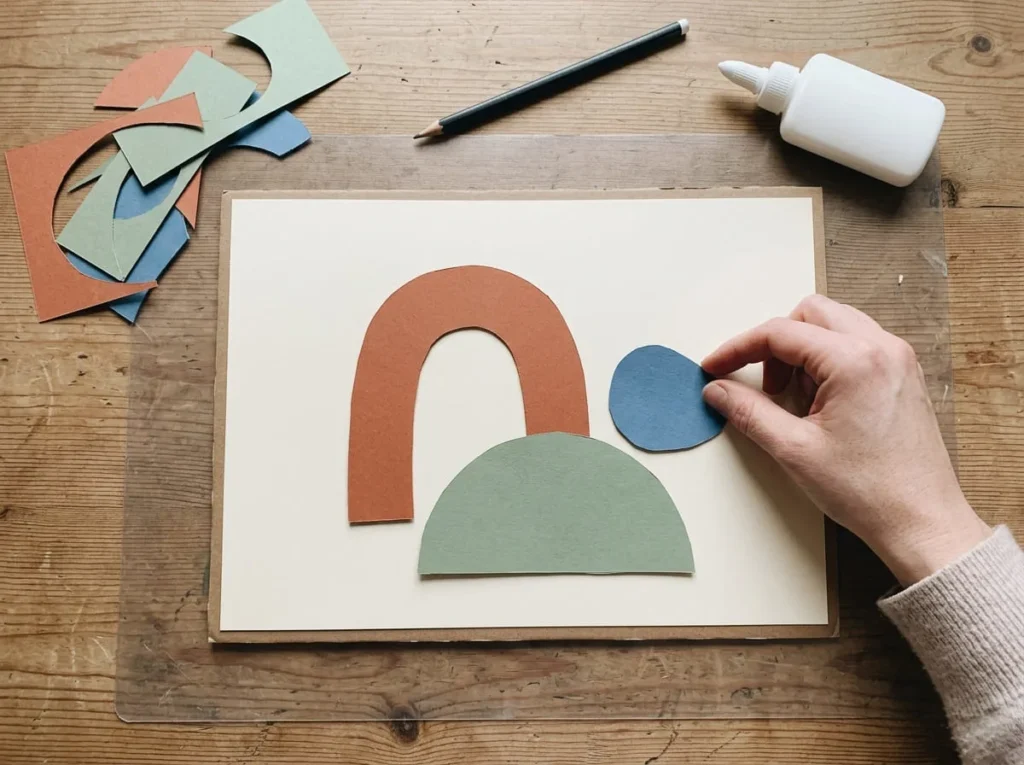
Layering is a simple way to make flat paper artwork more interesting.
Place one shape partly over another so the design has visible overlapping sections.
For example, the sage green semicircle can sit partly over the terracotta arch.
You can also add a thin, lightweight paper spacer behind one shape if your adhesive and display method are suitable.
This can create a small raised effect.
However, avoid making the artwork unnecessarily thick or unstable.
If you are planning to use a standard flat picture frame, keep the layers thin enough to fit without pressing against the glazing.
A few carefully arranged overlaps are enough to create depth.
Step 7: Glue the Shapes in Place
Once you are satisfied with the layout, begin attaching the paper shapes.
Start with the piece that sits at the back of the arrangement.
Carefully lift it and apply a suitable amount of adhesive to the reverse side.
Position the shape on the cream background.
Press it gently into place without rubbing too hard.
Continue with the remaining shapes in the correct overlapping order.
Check that the edges are attached securely.
Avoid using excessive glue, particularly on thin paper.
Too much adhesive can cause wrinkles or make the backing bend.
If any glue escapes around the edges, remove it carefully using a method suitable for the adhesive.
Step 8: Let the Artwork Dry Flat
After attaching all the shapes, leave the artwork on a clean, flat surface.
Allow the adhesive to dry according to the manufacturer’s instructions.
Avoid moving or bending the cardboard while the glue is still wet.
If the backing begins to curl, check the adhesive guidance for an appropriate drying method.
Do not place heavy objects directly on raised paper layers because they may flatten or damage the design.
Keep the artwork away from moisture and strong heat during drying.
Once everything is secure, inspect the edges and check for loose pieces.
Step 9: Add a Simple Frame if Desired
A frame can give your paper artwork a cleaner finished appearance.
Choose a frame that fits the backing without forcing it into place.
If the design includes raised layers, use a frame with enough internal depth.
Carefully position the artwork inside the frame according to its construction.
Make sure no loose paper pieces are caught between the backing and frame edges.
If you prefer an unframed look, you can display the artwork using a mounting method suitable for its material and weight.
Remember that cardboard edges may remain visible without a frame.
You can keep them neat or cover them using an appropriate decorative border.
Step 10: Hang or Display Your Handmade Wall Art
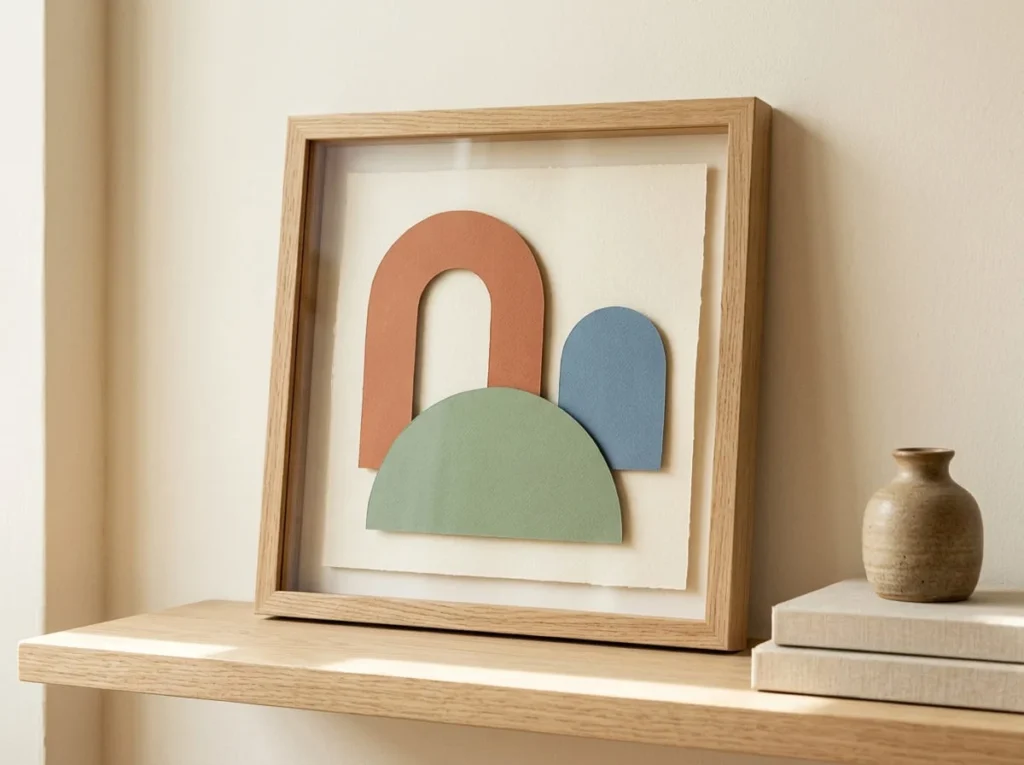
Once the adhesive is fully dry and the artwork is ready, choose a suitable display location.
This layered paper design can look attractive above a desk, beside a bookshelf, or on a bedroom wall.
For framed artwork, choose hanging hardware suitable for the frame’s weight and your wall surface.
If displaying the artwork without a frame, use a mounting method appropriate for lightweight paper-based decorations.
Do not rely on weak adhesive if the finished piece is too heavy for it.
Keep the artwork away from frequent moisture, strong heat, and areas where it could be easily knocked down.
You can also place the framed artwork on a stable shelf beside a small plant or other simple decorations.
Your layered paper wall art is now complete, with a handmade abstract design created from affordable materials and basic crafting techniques.
15 Easy Handmade Wall Art Ideas Using Simple Materials
Creating beautiful wall decorations does not require expensive supplies or advanced artistic skills. You can make attractive handmade artwork using materials such as colored paper, cardboard, yarn, fabric scraps, cotton string, and old magazines.
These DIY handmade wall art ideas with simple materials are suitable for beginners who want to decorate their bedrooms, living rooms, home offices, or hallways without spending too much money.
Each project uses basic crafting techniques that are easy to learn at home. Some designs involve cutting and gluing paper, while others focus on arranging fabric, tying yarn, or combining everyday materials.
Start with a project that matches the supplies you already have. Choose colors that complement your room, and keep the design simple until you feel comfortable trying more detailed decorations.
1. Layered Geometric Paper Wall Art
Materials: Colored cardstock, sturdy cardboard backing, craft glue, ruler, and scissors.
Layered geometric paper art is a simple way to create modern wall decorations without painting.
You can combine circles, rectangles, triangles, and other basic shapes to make an interesting abstract design.
This project works especially well with coordinated colors such as terracotta, cream, sage green, and muted blue.
Unlike detailed drawings, geometric art does not require perfect artistic skills. You only need to arrange a few shapes in a balanced composition.
How to Make Geometric Paper Wall Art
- Choose a sturdy piece of cardboard for the backing.
- Cover it with plain cream cardstock using suitable craft adhesive.
- Select three coordinated colors for your geometric shapes.
- Draw two circles, one rectangle, and one triangle on the colored paper.
- Cut out the shapes carefully using suitable craft scissors.
- Arrange the pieces on the backing without gluing them immediately.
- Allow a few shapes to overlap while leaving some background visible.
- Once you like the arrangement, attach the pieces using a suitable adhesive.
- Allow the artwork to dry flat according to the adhesive instructions.
- Display the finished piece using a suitable frame or secure lightweight mounting method.
You can make two matching geometric artworks using the same colors but different arrangements.
Beginner tip: Use large shapes and avoid excessive overlapping. Simple geometric arrangements often look more attractive when there is enough empty space between the elements.
2. Simple Yarn Wall Hanging
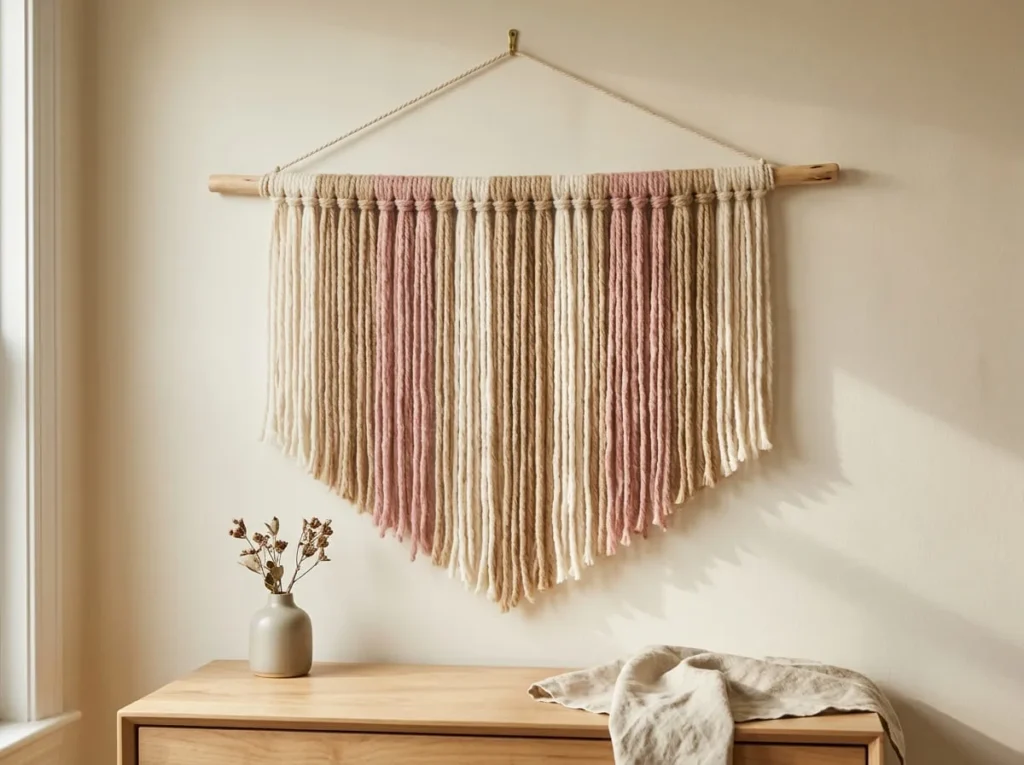
Materials: Yarn, wooden dowel, craft scissors, and suitable hanging cord.
A yarn wall hanging is a lovely way to add softness and texture to your room.
You can make one using a wooden dowel and several strands of yarn without learning complicated weaving techniques.
This project looks attractive above a small dresser, beside a bookshelf, or on a bedroom wall.
Neutral shades such as cream, beige, and dusty pink can create a soft decorative appearance.
How to Make a Yarn Wall Hanging
- Choose a smooth wooden dowel suitable for your decoration.
- Select two yarn colors that complement each other.
- Cut several strands of yarn to similar lengths.
- Fold one strand in half.
- Place the folded loop over the dowel and pull the loose ends through the loop to form a simple lark’s head knot.
- Repeat until the desired section of the dowel is covered.
- Alternate the two yarn colors to create a simple pattern.
- Arrange the strands so they hang naturally.
- Trim the bottom into a gentle V-shape using craft scissors.
- Attach a suitable hanging cord securely to the dowel and display the finished piece.
You can make the center strands longer than the outer strands to create a balanced hanging shape.
Avoid pulling the knots excessively tight if the dowel is thin or delicate.
Beginner tip: Start with two yarn colors and a simple V-shaped bottom. Complicated knots and too many colors are unnecessary for an attractive first project.
3. Easy Fabric Scrap Wall Art
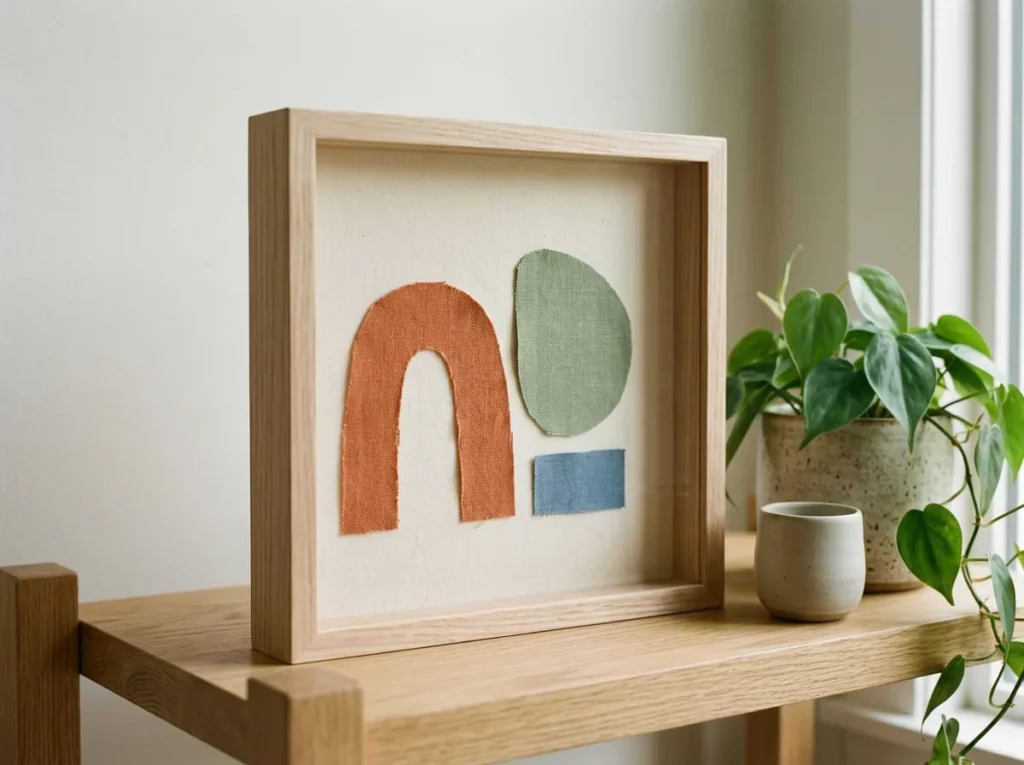
Materials: Fabric scraps, sturdy backing board, fabric-compatible adhesive, and scissors.
Fabric scrap wall art is a creative way to use leftover materials from sewing or other household projects.
You can combine different fabric colors and textures to create a simple collage.
For example, a cream fabric background with terracotta and sage green shapes can look beautiful in a modern living room.
The project does not require advanced sewing skills when you use a suitable fabric adhesive.
How to Make Fabric Collage Art
- Choose a clean, sturdy backing board.
- Select three or four fabric scraps with coordinating colors.
- Cut one piece of fabric to cover the visible background.
- Attach the background fabric using adhesive suitable for the fabric and backing.
- Cut two or three large shapes from the remaining fabric scraps.
- Arrange the shapes on the background before attaching them.
- Leave some open space around the edges of the design.
- Apply fabric-compatible adhesive according to its instructions.
- Press the shapes gently into place and allow the adhesive to dry or cure.
- Display the finished artwork in a suitable frame or secure mounting system.
You can experiment with plain cotton, linen-look fabric, or simple patterned scraps.
Choose fabrics that are easy to cut and do not fray excessively.
Beginner tip: Use large fabric shapes instead of tiny pieces. Broad circles, arches, and rectangles are easier to arrange and usually create a cleaner appearance.
4. DIY Twine Line Wall Art
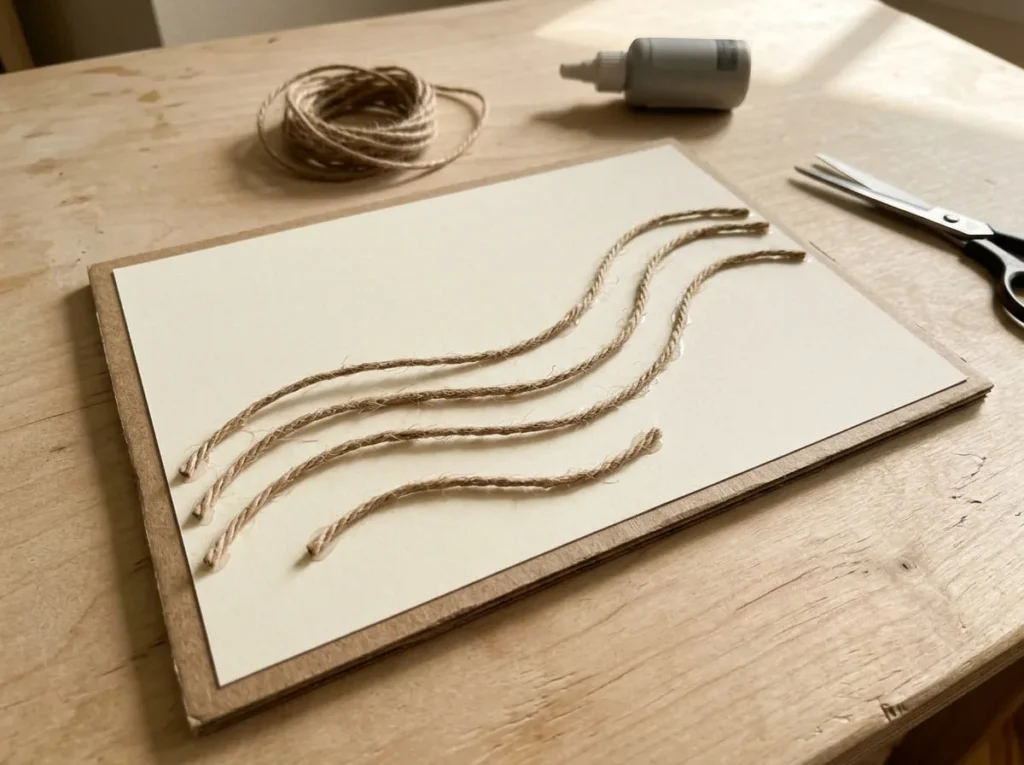
Materials: Sturdy cardboard or wooden backing, natural twine, suitable craft glue, pencil, and scissors.
Twine line art is a simple way to create textured wall decorations using ordinary craft materials.
Instead of painting lines, you arrange pieces of twine into a pattern on a flat backing.
You can make curved shapes, simple waves, or geometric designs.
Natural brown twine looks attractive against a cream background and works well with rustic or neutral home décor.
How to Create Simple Twine Patterns
- Choose a sturdy backing board that will not bend easily.
- Cover the surface with cream paper if desired.
- Use a pencil to sketch three or four gently curved lines.
- Cut twine strands slightly longer than the planned lines.
- Arrange the strands along the pencil guidelines.
- Adjust the curves until the pattern looks balanced.
- Apply a suitable adhesive along one short section of the first line.
- Carefully press the twine into the adhesive and continue working in sections.
- Repeat with the remaining strands and trim any excess twine.
- Allow the adhesive to dry completely before displaying the artwork.
You can add a few straight lines to create a simple geometric design.
Keep the twine positioned securely so loose sections do not fall away from the backing.
Beginner tip: Choose broad curves rather than complicated patterns with tiny turns. Natural twine is easier to arrange when the lines are smooth and simple.
5. Botanical Leaf Silhouette Wall Art
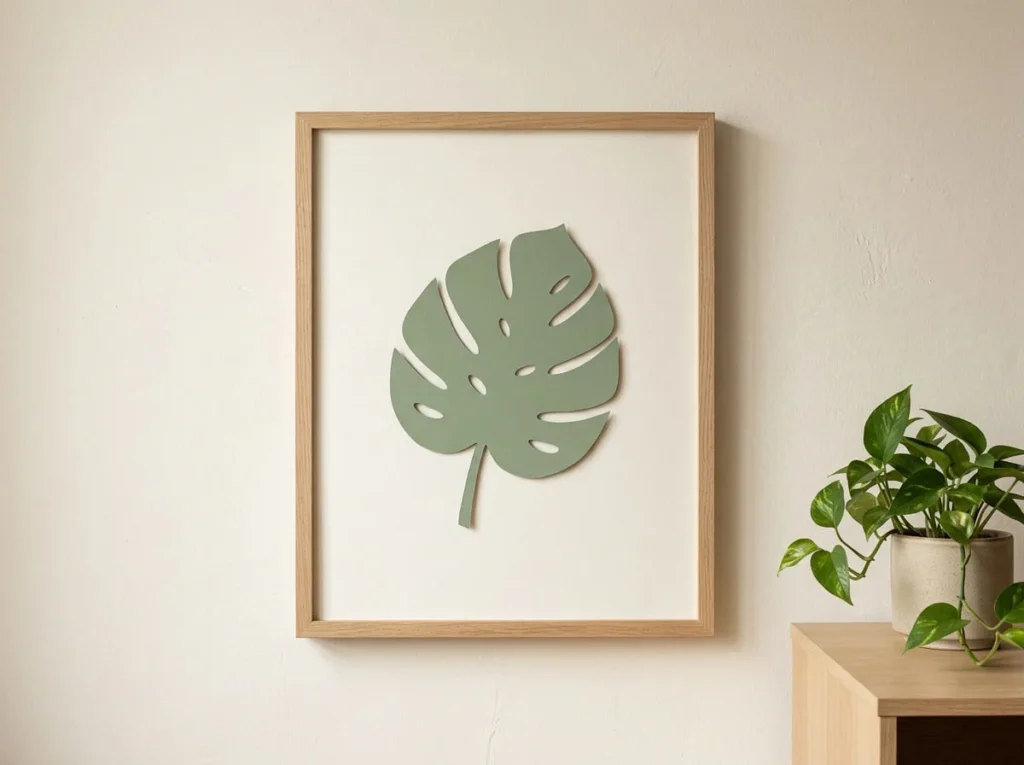
Materials: Colored cardstock, sturdy backing, pencil, craft scissors, and suitable adhesive.
Botanical leaf silhouettes are a beautiful choice for nature-inspired wall decorations.
You can create a simple leafy design using only paper and scissors.
A large sage green leaf against an ivory background can look attractive in a bedroom, living room, or reading corner.
This project is different from painting botanical artwork because the design is created entirely from cut paper.
How to Make Paper Leaf Silhouettes
- Choose a piece of sage green cardstock.
- Lightly draw one large leaf shape using a pencil.
- Add a short stem and a few broad sections along the sides.
- Carefully cut around the outer shape.
- If desired, cut two or three simple openings inside the leaf to suggest natural gaps.
- Prepare a sturdy backing with a plain ivory background.
- Position the leaf silhouette near the center.
- Adjust the placement until the artwork looks balanced.
- Attach the leaf using a suitable craft adhesive.
- Allow the artwork to dry before framing or displaying it.
You can make a matching pair by using two different leaf shapes in similar colors.
For example, one artwork could feature a broad tropical-style leaf, while another could show a simple eucalyptus-inspired branch.
Beginner tip: Choose leaves with broad sections instead of many narrow points. Very thin paper details can tear easily during cutting or handling.
6. Recycled Magazine Collage Wall Art
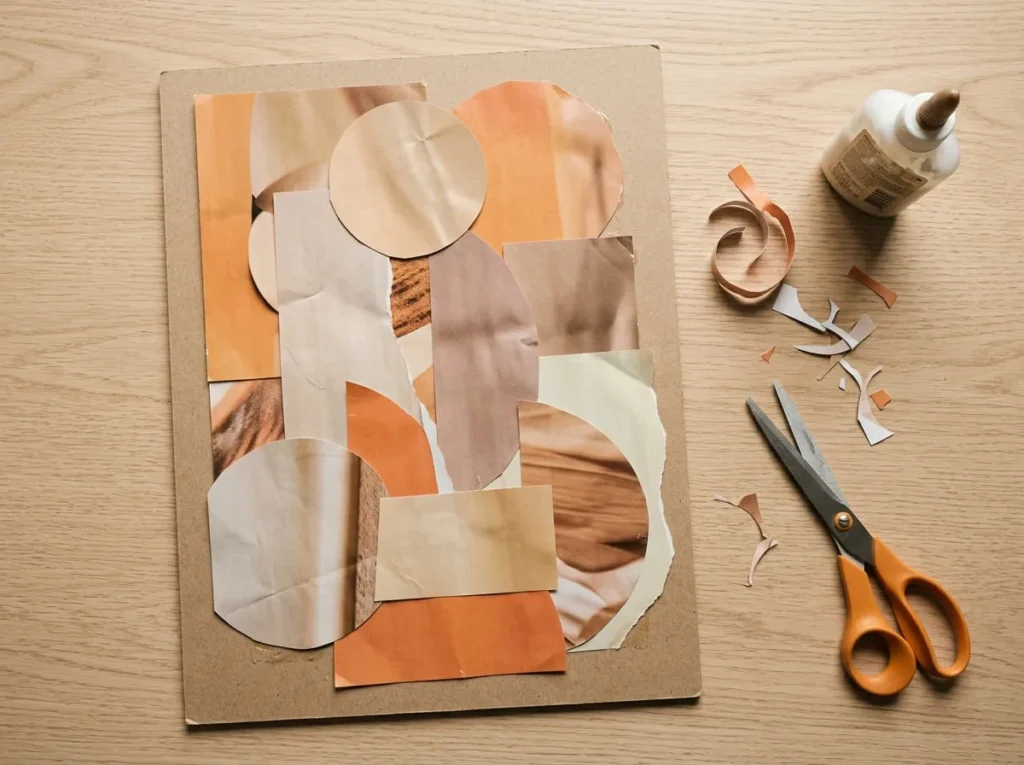
Materials: Old magazines, sturdy backing paper, scissors, and craft glue.
Magazine collage art is an affordable way to create colorful wall decorations using paper that might otherwise be discarded.
You can cut pictures, patterns, and colored sections from old magazines and arrange them into a new design.
The finished artwork can look modern and creative when you follow a consistent color theme.
For example, you might combine warm orange, beige, and brown paper pieces to create an abstract collage.
How to Make a Magazine Color Collage
- Gather a few old magazines with clean, usable pages.
- Choose a simple color palette before cutting anything.
- Look for pages containing colors or patterns that match your theme.
- Cut several large circles, rectangles, and irregular shapes.
- Prepare a sturdy cardboard backing.
- Arrange the magazine pieces on the backing without gluing them.
- Overlap a few pieces to create visual interest.
- Remove any unnecessary shapes if the design becomes crowded.
- Glue the pieces in place using an adhesive suitable for magazine paper.
- Allow the artwork to dry flat before displaying it.
You can create a more natural design using photographs of plants or landscapes.
Alternatively, choose only colorful sections without recognizable pictures.
Avoid using too much wet adhesive because thin magazine pages may wrinkle.
Beginner tip: Select your colors before cutting. A collage made with three or four coordinating shades is often easier to arrange than one using many unrelated colors.
7. Simple Embroidery Hoop Fabric Art
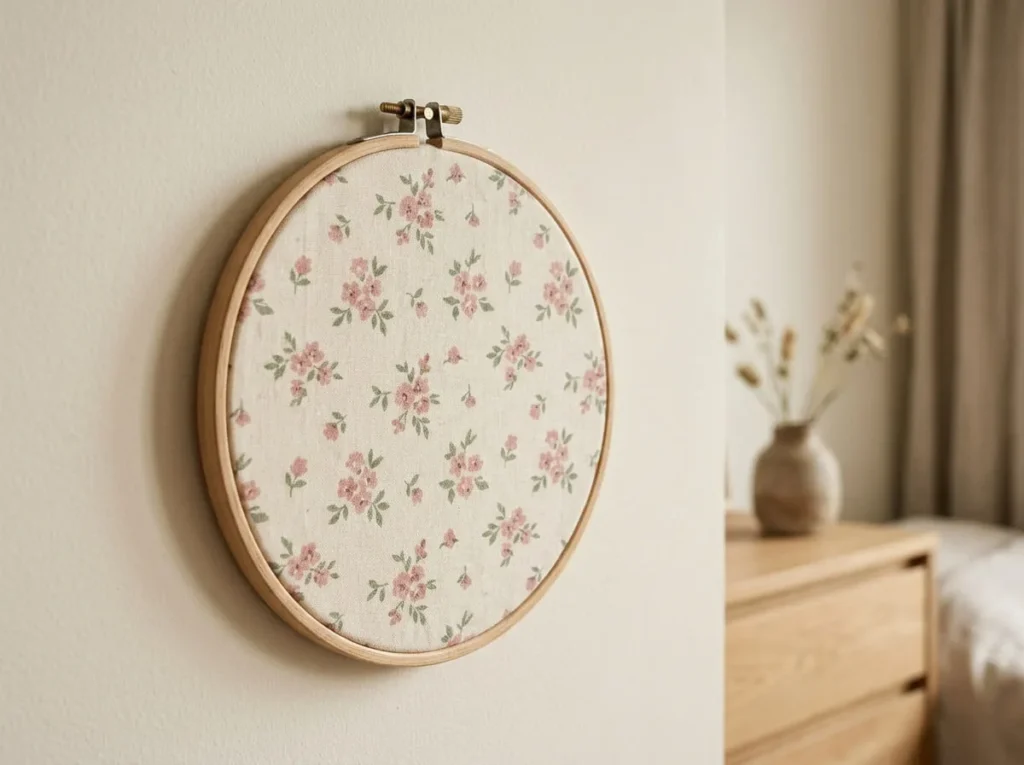
Materials: Embroidery hoop, clean fabric scrap, craft scissors, and optional ribbon.
Embroidery hoop fabric art is one of the easiest ways to turn leftover fabric into a wall decoration.
The hoop acts as a simple frame, so you do not need to build a separate backing.
You can use floral cotton fabric, small geometric patterns, or plain textured fabric.
This project works especially well in bedrooms, craft rooms, and cozy reading corners.
You do not need embroidery skills because the fabric pattern itself becomes the artwork.
How to Make No-Sew Hoop Wall Art
- Choose an embroidery hoop that is suitable for the fabric you want to display.
- Select a clean fabric scrap with a simple pattern.
- Loosen the hoop’s adjustment screw.
- Separate the inner and outer wooden rings.
- Place the fabric over the smaller inner ring.
- Position the larger ring over the fabric and press it gently into place.
- Pull the fabric carefully to remove wrinkles without stretching the pattern unevenly.
- Tighten the adjustment screw until the fabric is held securely.
- Trim the extra fabric at the back or secure it neatly using a suitable method.
- Attach an appropriate hanging method and display the hoop securely.
A small floral pattern can look beautiful inside a natural wooden hoop.
You can also create a matching pair using two fabrics with similar colors.
Beginner tip: Choose one attractive fabric pattern and let it become the main feature. You do not need additional decorations to make the hoop look finished.
8. Minimalist Black and White Paper Art
Materials: Black cardstock, white paper, sturdy cardboard backing, scissors, and craft glue.
Black and white paper art is a simple option for creating modern wall decorations.
You only need two contrasting colors, making it easier to create a balanced design.
You can use circles, arches, curved lines, or large abstract shapes.
This style works especially well in modern bedrooms, home offices, and neutral living rooms.
Because the colors are limited, the shapes and spacing become the most important parts of the design.
How to Make Monochrome Wall Art
- Choose a sturdy rectangular piece of cardboard for the backing.
- Cover the visible surface with smooth white paper.
- Allow the background adhesive to dry if needed.
- Draw two or three large abstract shapes on black cardstock.
- Cut the shapes carefully using suitable scissors.
- Arrange the black pieces on the white background.
- Experiment with different positions and overlapping sections.
- Leave enough white space around the shapes.
- Attach the black paper using a suitable adhesive.
- Allow the artwork to dry completely before placing it in a frame or displaying it securely.
You can create one artwork with large black circles and another with simple curved shapes.
Display them together to make a coordinated wall art set.
Beginner tip: Keep the design simple and avoid filling the entire background. Strong contrast and generous empty space can make basic shapes look clean and stylish.
9. DIY Textured Cardboard Wall Art
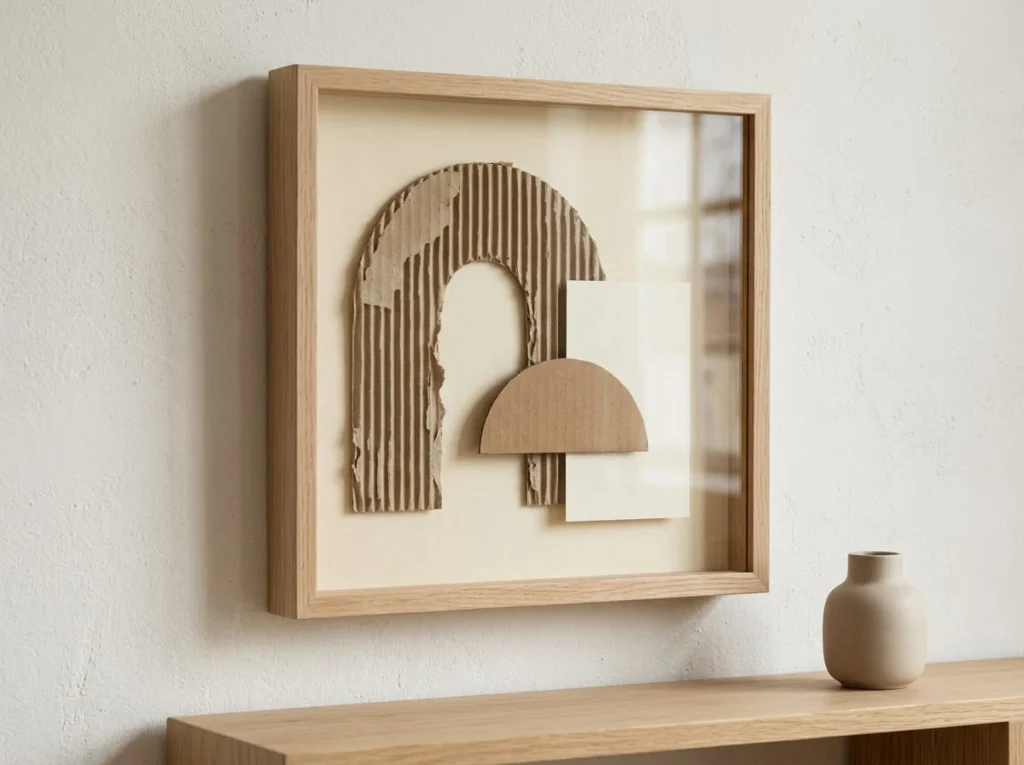
Materials: Corrugated cardboard, colored cardstock, sturdy backing board, craft scissors, and suitable adhesive.
Textured cardboard wall art is a creative way to turn ordinary packaging materials into attractive home decorations.
Corrugated cardboard has a natural ridged texture that can add depth to simple artwork. You can combine smooth cardstock with exposed cardboard to create interesting patterns.
This project works well in modern living rooms, home offices, and bedrooms with neutral decorations.
You do not need to paint the cardboard. Its natural brown color can look beautiful alongside cream, beige, and muted green paper.
How to Make Cardboard Texture Art
- Choose a clean, sturdy piece of cardboard for the backing.
- Gather a few smaller pieces of corrugated cardboard.
- Carefully expose the ridged inner layer on one piece by removing the outer paper where practical.
- Cut a large circle, rectangle, and arch from the cardboard pieces.
- Cover the backing with plain cream cardstock if desired.
- Arrange the textured shapes on the background.
- Place one smooth cardstock shape beside the corrugated pieces to create contrast.
- Attach the shapes using adhesive suitable for cardboard.
- Allow the adhesive to dry completely while keeping the artwork flat.
- Display the finished piece using a suitable frame or secure mounting method.
You can create a matching set using different arrangements of the same shapes.
Keep the cardboard layers lightweight so the backing does not bend.
Beginner tip: Combine one or two textured pieces with smooth paper shapes. Too many raised layers can make the artwork look crowded and difficult to display.
10. Easy Paper Fan Wall Decoration
Materials: Colored paper, craft glue, scissors, and suitable backing or hanging support.
Paper fan wall decorations are a simple way to add folded texture and color to an empty wall.
You can create small accordion-folded fans and arrange them into a decorative composition.
Soft colors such as dusty pink, cream, and sage green work well in bedrooms or craft rooms.
This project is useful for beginners because it involves basic paper folding rather than complicated cutting or drawing.
How to Make Folded Paper Fan Art
- Choose two or three sheets of colored craft paper.
- Place the first sheet on a clean work surface.
- Fold one edge over to create a broad, straight fold.
- Turn the paper over and make another fold in the opposite direction.
- Continue folding back and forth until the sheet forms an accordion pattern.
- Fold the completed strip in half and secure the meeting edges to create a fan shape.
- Repeat the process using the remaining paper colors.
- Arrange the fans on a sturdy backing board.
- Attach them securely using adhesive suitable for folded paper.
- Allow the adhesive to dry before displaying the decoration.
You can combine one larger paper fan with two smaller ones to create a balanced design.
Make sure the folds are reasonably even so the fans open neatly.
Beginner tip: Use broad folds and a small number of fans. Very narrow folds may be more difficult to handle and can make the project unnecessarily complicated.
11. Simple Cotton String Wall Art
Materials: Cotton string, smooth wooden dowel, craft scissors, and suitable hanging cord.
Cotton string wall art is a simple decoration that adds natural texture without using paint or paper.
Unlike a fuller yarn wall hanging, this project focuses on a minimal arrangement of straight strands and simple loops.
The finished decoration can look attractive in a neutral bedroom, hallway, or reading corner.
Natural cotton string works especially well with wooden furniture and soft-colored walls.
How to Make a String Wall Hanging
- Choose a smooth wooden dowel suitable for the finished decoration.
- Cut several pieces of cotton string to manageable lengths.
- Fold each piece in half.
- Attach the folded strings to the dowel using simple lark’s head knots.
- Leave a little space between groups of strands.
- Arrange the strings into three sections.
- Make the middle section slightly longer than the outer sections.
- Add a few simple loops near the upper section if desired.
- Trim the ends neatly using craft scissors.
- Secure a suitable hanging cord to the dowel and display the finished piece.
You can keep all the strings their natural cotton color for a simple appearance.
If you prefer more detail, use two slightly different neutral shades.
Choose a display location where children cannot reach loose hanging cords.
Beginner tip: Keep the strands straight and the knots simple. A minimal arrangement with carefully trimmed ends can look attractive without complicated macramé techniques.
12. Pressed Leaf Wall Art
Materials: Fully dried pressed leaves, cardstock backing, suitable picture frame, and appropriate adhesive or mounting materials.
Pressed leaf wall art is a beautiful way to bring natural shapes into handmade home decorations.
You can use dried leaves to create a simple botanical arrangement.
The natural veins, edges, and colors of the leaves become the main artwork.
This project looks attractive in living rooms, bedrooms, and reading corners with nature-inspired décor.
Use leaves that have already been properly dried and pressed before placing them inside a frame.
How to Frame Pressed Leaves
- Gather two or three fully dried, pressed leaves.
- Choose a clean cardstock background in cream or another neutral shade.
- Place the background on a flat work surface.
- Arrange the leaves carefully without attaching them immediately.
- Position one larger leaf near the center and smaller leaves around it.
- Leave enough empty space around the arrangement.
- Secure the leaves using a suitable archival or craft mounting method.
- Check that the leaves are completely dry and free from visible moisture or mold.
- Carefully place the artwork inside a frame that accommodates the leaves without damaging them.
- Hang the frame securely in a suitable dry indoor location.
You can make a matching pair by using different leaf shapes on similar backgrounds.
Avoid placing the artwork in strong direct sunlight because some natural leaf colors may fade over time.
Beginner tip: Use only a few leaves and leave plenty of space around them. A simple botanical arrangement often looks cleaner than a crowded collection.
13. DIY Scrapbook Paper Patchwork Art
Materials: Scrapbook paper, cardboard backing, ruler, pencil, scissors, and craft glue.
Scrapbook paper patchwork art is a colorful way to decorate walls using coordinated paper patterns.
Instead of creating one large shape, you arrange smaller squares or rectangles into a repeating design.
You can mix plain paper with patterned pieces to create visual interest.
This project works well in bedrooms, craft rooms, and home offices.
Choose papers with similar colors so the finished artwork looks balanced.
How to Make Paper Patchwork Wall Art
- Choose a sturdy rectangular cardboard backing.
- Gather three or four scrapbook paper designs with coordinating colors.
- Use a ruler and pencil to mark several equal squares.
- Cut the squares carefully with suitable scissors.
- Arrange them in simple rows on the backing.
- Alternate plain and patterned pieces to create variety.
- Check that the spacing looks reasonably consistent.
- Attach the squares one at a time using suitable craft adhesive.
- Allow the artwork to dry flat according to the adhesive instructions.
- Place the completed patchwork inside a suitable frame or display it securely.
You can use soft floral paper, simple stripes, or small geometric patterns.
Avoid combining too many bold prints because the design may become visually crowded.
Beginner tip: Keep the paper pieces the same size. Consistent shapes make the patchwork easier to arrange and help the final artwork look organized.
14. Easy Abstract Fabric Wall Hanging
Materials: Neutral cotton fabric, colored fabric scraps, fabric-compatible adhesive, wooden dowel, and suitable hanging cord.
An abstract fabric wall hanging is a creative way to use leftover fabric pieces without advanced sewing skills.
You can attach large fabric shapes to a plain cotton background and hang the finished artwork from a wooden dowel.
The combination of fabric textures can create a soft decorative appearance.
This project works especially well in bedrooms and living rooms with neutral or natural decorating styles.
How to Make an Abstract Fabric Hanging
- Choose a clean rectangular piece of neutral cotton fabric.
- Prepare the fabric edges using a suitable method to reduce fraying.
- Select two or three colored fabric scraps.
- Cut one large curved shape, one semicircle, and one smaller rounded shape.
- Arrange the shapes on the cotton background.
- Adjust their positions until the design looks balanced.
- Attach the pieces using an adhesive suitable for the chosen fabrics.
- Allow the adhesive to dry or cure according to its instructions.
- Create a secure top sleeve or another suitable attachment that allows the fabric to hang from a smooth wooden dowel.
- Attach a suitable hanging cord and display the artwork securely.
You can combine terracotta, sage green, and cream fabric for a warm modern appearance.
Keep the design lightweight so the fabric hangs naturally without pulling out of shape.
Beginner tip: Use large shapes and avoid applying excessive glue. Too much adhesive may stiffen the fabric or leave visible marks.
15. Handmade Mixed-Material Gallery Wall
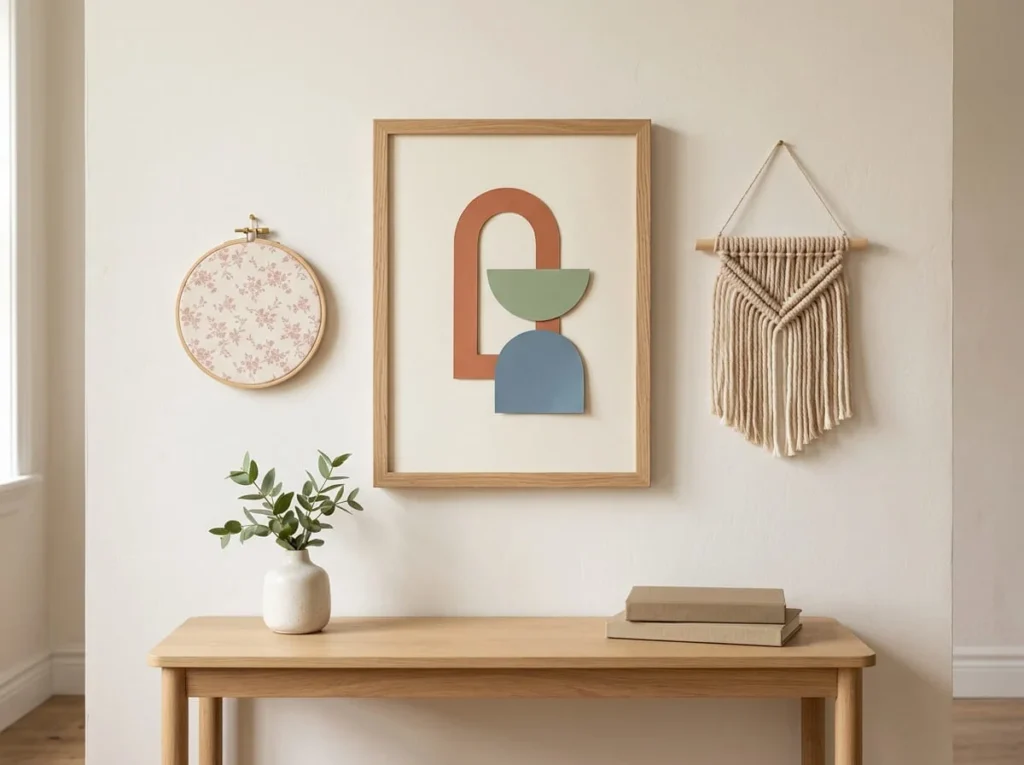
Materials: Small framed paper artwork, fabric hoop decoration, lightweight yarn or string hanging, and suitable wall mounting hardware.
A mixed-material gallery wall is a creative way to display several handmade projects together.
Instead of making one large decoration, you can combine three smaller pieces using different textures.
For example, you might display framed geometric paper art beside a fabric embroidery hoop and a simple yarn hanging.
This arrangement can look beautiful in a hallway, bedroom, or living room.
The key is choosing coordinating colors and giving each piece enough space.
How to Create a Matching DIY Gallery Wall
- Choose three completed handmade wall art pieces.
- Select projects made from different materials, such as paper, fabric, and yarn.
- Check that the colors complement each other.
- Place the pieces on the floor to test different arrangements.
- Position the largest artwork near the center of the group.
- Arrange the two smaller decorations around it.
- Leave comfortable spacing between each piece.
- Mark the intended wall positions carefully.
- Choose mounting hardware suitable for each decoration’s weight and the wall surface.
- Hang the pieces securely and check that the arrangement looks balanced.
You can add another artwork later if there is enough space.
Avoid filling the entire wall immediately.
Beginner tip: Repeat two or three colors throughout the display. Matching colors help different materials look like part of one coordinated collection.
How to Make Handmade Wall Art Look Stylish on a Budget
Handmade wall art does not need expensive materials to look attractive.
The overall appearance often depends more on color choices, texture, spacing, and display than on the cost of the supplies.
A few simple design decisions can help your artwork look organized and suitable for your home.
Use a Consistent Color Palette
Choose colors that complement the room where your artwork will hang.
For example, a living room with natural wood furniture may suit cream, terracotta, and sage green.
A bedroom with soft-colored bedding may look attractive with dusty pink, ivory, and muted blue.
Try using two or three main colors throughout your project.
You can add one darker accent if you want more contrast.
Using a consistent palette helps different materials look coordinated.
Combine Different Textures Carefully
Paper, cardboard, yarn, and fabric all have different textures.
Combining them can make handmade artwork more interesting.
However, too many textures in one small design may look crowded.
Try pairing one smooth material with one textured material.
For example, flat cardstock shapes can look attractive beside exposed corrugated cardboard.
A simple fabric hanging may also complement framed paper artwork.
Let each material contribute something different.
Keep Designs Simple and Uncluttered
You do not need to fill every part of your artwork.
Leaving some empty space can help the main shapes stand out.
For example, a single paper leaf silhouette on a cream background may look more balanced than several overlapping leaves.
Choose one main feature and arrange the supporting elements around it.
If your design feels crowded, remove a few pieces before gluing.
Simple compositions are often easier for beginners to complete neatly.
Reuse Materials Without Making the Art Look Messy
Recycled materials can be useful for affordable wall art.
However, choose clean, dry, and undamaged supplies.
Flatten cardboard before using it as a backing.
Trim paper edges neatly and remove unwanted glue marks.
Choose fabric scraps that are clean and suitable for display.
You do not need to hide every handmade imperfection, but careful preparation can improve the finished appearance.
Display Handmade Art in Coordinated Groups
Several small handmade artworks can look attractive when displayed together.
You might combine two framed paper pieces with one fabric hoop.
Use similar colors or repeated shapes to connect the designs visually.
Arrange the pieces before mounting them.
Keep the spacing reasonably consistent and avoid placing heavy decorations above lightweight pieces without secure support.
A small coordinated gallery wall can become a beautiful feature in an otherwise simple room.
How to Hang Lightweight Handmade Wall Art Safely
After finishing your artwork, choose a suitable way to display it.
Even lightweight decorations need secure mounting.
The correct method depends on the materials, finished weight, wall surface, and location.
Choose Suitable Hanging Materials
Different types of handmade wall art require different hanging methods.
A framed paper collage may use suitable picture hanging hardware.
An embroidery hoop may be displayed using an appropriate hook or securely attached hanger.
A yarn wall hanging usually needs a suitable cord attached to its dowel.
Follow the manufacturer’s instructions for any mounting products you use.
Make sure the hanging method supports the decoration without damaging it.
Check the Weight of Each Decoration
Before hanging your artwork, check how heavy it is.
A simple paper decoration may weigh very little, while a framed project with several layers can be heavier.
Choose mounting hardware rated for the finished weight.
Do not assume ordinary tape or removable adhesive strips can support every decoration.
Check that the wall surface and mounting method are compatible.
For heavier frames, use suitable fixings and installation methods.
Protect Walls and Artwork from Damage
Some adhesives and hanging products may damage painted walls or delicate artwork.
Choose mounting materials suitable for the wall finish.
Follow their preparation, application, and removal instructions.
If the manufacturer recommends testing on a small hidden area, do so before mounting the artwork.
Avoid attaching strong adhesive directly to fragile paper or fabric unless the product is specifically suitable.
A secure display should protect both the decoration and the wall.
Keep Paper and Fabric Away from Moisture and Heat
Paper and fabric decorations are generally best displayed in dry indoor spaces.
Frequent moisture can cause paper to curl, cardboard to weaken, and some fabrics to develop problems.
Direct sunlight may fade certain colors over time.
Keep handmade wall art away from heaters, open flames, and other strong heat sources.
If you want to decorate a bathroom or outdoor area, choose materials specifically suitable for those conditions.
Secure Hanging Cords and Loose Decorations
Hanging cords, yarn strands, and small decorative pieces should be attached securely.
Check knots and attachment points before displaying the finished artwork.
Keep long cords and hanging decorations away from young children.
Avoid positioning loose strings near cribs or sleeping areas used by babies and toddlers.
Choose display locations where decorations cannot easily be pulled down or knocked over.
Common Mistakes When Making DIY Handmade Wall Art
Simple wall art projects are beginner-friendly, but a few mistakes can affect the final result.
Understanding these problems can help you create decorations that look better and last longer.
Choosing Weak Cardboard Backing
Thin or damaged cardboard may bend after you attach paper or fabric.
Choose backing that is flat, dry, and strong enough to support the design.
Avoid pieces with deep creases or weak corners.
If your artwork requires additional stiffness, use a suitable stronger backing rather than adding excessive layers of weak cardboard.
Using Too Much Glue
Excess adhesive can cause thin paper to wrinkle or become uneven.
It may also leave visible marks on fabric.
Choose glue suitable for your materials and apply it according to the instructions.
Use only the amount needed to secure the pieces.
Allow each layer to dry before adding more materials when appropriate.
Combining Too Many Colors and Materials
Using too many unrelated colors and textures can make artwork look busy.
Try choosing a simple color palette before starting.
Use two or three main colors and introduce additional shades only when they improve the design.
If you combine paper, fabric, and string, make sure one material remains the main feature.
Cutting Details Too Small
Very small paper shapes can be difficult to cut neatly.
Thin leaves, tiny letters, and narrow geometric patterns may tear during handling.
Begin with broad shapes such as circles, arches, and rectangles.
As your cutting skills improve, you can experiment with smaller decorative details.
Hanging Decorations Before Adhesive Dries
Moving artwork too early may cause glued shapes to slide or separate.
Allow adhesives to dry or cure according to the manufacturer’s instructions.
Keep the artwork flat when required.
Check that all pieces are secure before lifting or hanging the decoration.
Using Unsuitable Wall Mounting Methods
A decoration may fall if the mounting method is not strong enough.
Choose hardware or adhesive systems suitable for the artwork’s weight and the wall surface.
Do not rely on weak tape for heavier frames or textured wall hangings.
Check the installation before leaving the artwork on display.
Frequently Asked Questions
What Is the Easiest Handmade Wall Art for Beginners?
Layered paper art, simple geometric collages, and embroidery hoop fabric decorations are among the easiest projects for beginners. They use basic cutting, arranging, and attaching techniques without requiring advanced drawing or painting skills.
What Materials Can You Use for DIY Wall Art?
You can use cardboard, colored cardstock, scrapbook paper, yarn, twine, cotton string, fabric scraps, and clean recycled magazine pages. Choose materials that are suitable for the decoration and light enough for the intended mounting method.
Can You Make Wall Art Without Painting?
Yes, many handmade wall art projects do not require paint. You can create paper collages, yarn hangings, fabric hoop decorations, botanical silhouettes, and layered geometric designs using simple craft materials.
How Do You Make Wall Art with Cardboard?
Start with a clean, sturdy cardboard backing. Add a decorative paper background, then arrange cut shapes or textured cardboard pieces on top. Attach the elements using suitable adhesive, allow them to dry, and display the finished artwork securely.
What Can You Make with Scrap Paper for Wall Decor?
Scrap paper can be used to make geometric collages, paper patchwork art, botanical silhouettes, and abstract designs. Choose coordinating colors and cut simple shapes that are easy to arrange on a sturdy backing.
How Do You Make a Simple Yarn Wall Hanging?
Cut several strands of yarn and attach them to a smooth wooden dowel using simple knots. Arrange the strands into a balanced pattern, trim the ends, and attach a secure hanging cord. Start with a small design and a limited color palette.
Can You Use Fabric Scraps for Wall Art?
Yes, fabric scraps can be used for collages, embroidery hoop decorations, and simple fabric wall hangings. Choose clean fabrics that are easy to handle and use attachment methods suitable for the materials.
How Can You Make Cheap Wall Art Look Expensive?
Choose a coordinated color palette, prepare materials neatly, and use simple balanced designs. Suitable frames, consistent spacing, and careful display can give inexpensive handmade artwork a more polished appearance without requiring costly supplies.
How Do You Choose Colors for Homemade Wall Art?
Look at the existing colors in your room, including walls, furniture, and textiles. Select two or three complementary shades and use them consistently. A neutral background with one or two accent colors can work well for beginner projects.
How Do You Hang Lightweight Wall Decorations?
Choose suitable mounting hardware or adhesive products based on the finished artwork’s weight and your wall surface. Follow the manufacturer’s installation instructions and make sure the decoration is secure before leaving it on display.
Can You Make Wall Art with Recycled Materials?
Yes, clean cardboard packaging, magazine pages, leftover paper, and fabric scraps can become handmade wall decorations. Select materials that are dry, undamaged, and suitable for indoor use. Prepare them carefully before cutting or attaching them.
How Do You Protect Paper Wall Art from Damage?
Keep paper artwork away from moisture, excessive heat, and prolonged strong sunlight. Use a suitable protective frame when appropriate, handle the decoration gently, and avoid cleaning it with water unless the materials specifically allow it.
Final Thoughts
DIY handmade wall art with simple materials is an affordable way to create beautiful decorations that reflect your personal style.
You can begin with layered paper shapes, a simple yarn hanging, or fabric displayed inside an embroidery hoop.
Choose materials that are easy to handle, use colors that complement your room, and keep your first designs simple.
As you become more comfortable with crafting, experiment with different textures, shapes, and combinations of materials.
Remember to allow adhesives to dry properly and display every decoration securely.
With a little creativity and patience, everyday supplies can become attractive handmade wall art that adds warmth and personality to your home.