
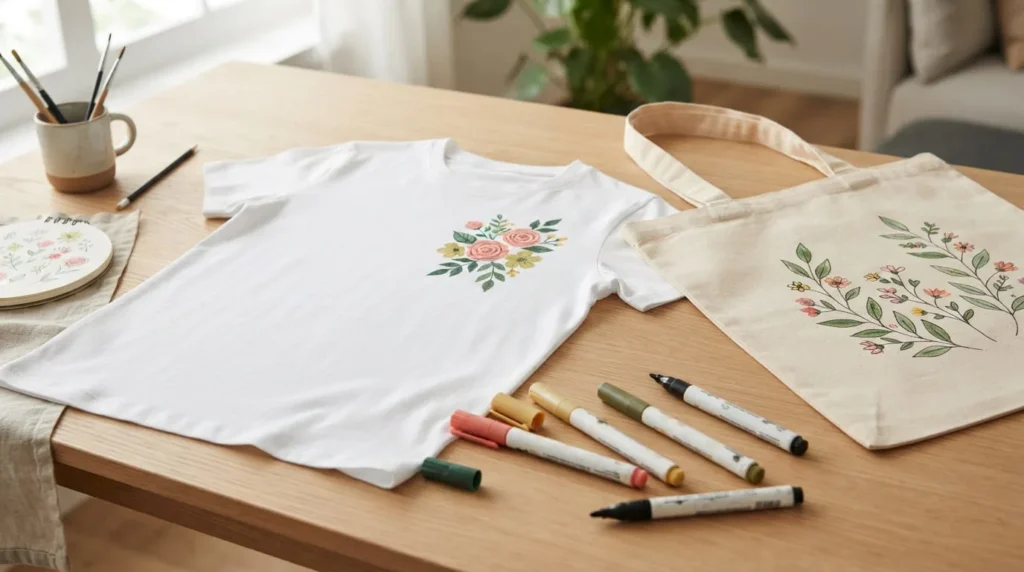
Yes, paint markers can work on fabric, but not every marker is suitable for clothing or washable textiles. Some acrylic paint markers and fabric-specific paint pens can create colourful designs on T-shirts, tote bags, denim, and other materials. However, the results depend on the paint formulation, fabric type, and how the design is applied.
A marker that looks permanent on wood or canvas may fade, crack, or wash away when used on clothing. Choosing a product designed for textiles and following its drying or heat-setting instructions can make a significant difference.
In this guide, you’ll learn which paint markers work on fabric, how different materials affect the results, and what to consider before decorating your first fabric project.
Do Paint Markers Work on Fabric?
Paint markers can be used on fabric when their formulation is compatible with the textile. They offer a convenient way to add lettering, illustrations, patterns, and decorative details without using traditional paintbrushes.
However, there’s an important difference between a marker that can leave colour on fabric and one that is designed to withstand regular washing.
Some paint markers are primarily intended for rigid materials such as wood, stone, glass, or metal. Although they may produce visible marks on fabric, the dried paint might not remain flexible enough to withstand movement and repeated laundering.
Fabric-specific paint pens are generally developed with textile applications in mind. Depending on the product, they may offer better flexibility, wash resistance, and compatibility with common clothing materials.
For example, you could use a suitable textile marker to decorate a cotton tote bag with small flowers or create a simple design on a T-shirt.
The paint needs to adhere properly to the fibres while remaining suitable for the way the fabric will be used.
Several factors influence the results:
- The marker’s paint formulation and intended use.
- The type of fabric and its surface texture.
- Whether the material contains finishing treatments or residues.
- How much paint is applied.
- The drying, curing, or heat-setting instructions.
- The washing and handling conditions.
Before using paint markers on clothing, check whether the manufacturer specifically recommends them for fabric.
If the label doesn’t mention textile compatibility, don’t assume the design will remain intact after washing.
How Paint Markers Adhere to Fabric Fibres
Fabric is made from interwoven or knitted fibres that create a flexible, textured surface.
When paint marker colour is applied, some of the liquid may enter the spaces between the fibres, while some remains closer to the fabric surface.
The balance depends on the material’s absorbency, the paint formulation, and how much colour is deposited.
Cotton, for example, can absorb liquid relatively readily. This may help certain suitable formulations penetrate the fabric, but it can also cause unwanted spreading around thin lines.
Synthetic materials may behave differently because their fibres often absorb liquids differently from natural fibres.
Some fabric finishes can also interfere with colour application.
The paint’s binder plays an important role in how the dried design behaves.
A suitable textile paint formulation is intended to remain attached under the conditions described by its manufacturer.
Some products are designed to tolerate the movement and bending that clothing experiences during normal use.
Other paint formulations may dry into a less flexible coating.
If the fabric stretches or folds repeatedly, a rigid paint layer can become vulnerable to cracking or peeling.
This is why ordinary craft paint markers aren’t always the best choice for clothing.
The amount of paint also matters.
Applying too much colour can create a thick layer on the surface, potentially making the fabric feel stiff.
For detailed designs, controlled application is generally preferable to repeatedly saturating the same area.
Testing the marker on a spare piece of the intended fabric can help you assess coverage, bleeding, texture, and flexibility before decorating the finished item.
Are Paint Markers Permanent on Fabric?
Some paint markers can create long-lasting designs on fabric, but permanence depends on the specific product and how the decorated material is used.
The word permanent doesn’t automatically mean that the paint will survive machine washing, repeated stretching, or prolonged wear.
A marker may produce a lasting mark on paper or wood without being suitable for washable clothing.
Fabric introduces additional challenges because it moves, bends, absorbs moisture, and may experience friction during washing.
For example, a design on a decorative fabric wall hanging may remain attractive for a long time because the material receives little handling.
The same design on a frequently washed T-shirt may experience more wear.
Fabric-specific paint markers are often the better choice when washability matters, provided they’re suitable for the garment.
Some textile products require heat-setting after drying, while others use different fixing or curing methods.
These requirements vary between manufacturers.
You shouldn’t assume that ironing every paint marker design will make it permanent.
Heating an incompatible paint formulation or delicate textile may damage the paint or fabric.
The manufacturer’s instructions should specify whether fixing is required and how the decorated item can be washed afterward.
Even when a product is described as washable, durability may depend on following particular care instructions.
For clothing, it’s important to consider both the marker’s recommendations and the garment’s care label.
A properly selected and applied fabric marker can provide a more reliable result than an ordinary paint marker used without checking its textile suitability.
Paint Markers vs. Fabric Markers
Paint markers and fabric markers may look similar, but their intended applications can be different.
A general-purpose paint marker is designed to dispense paint onto compatible surfaces. Depending on the product, those surfaces may include paper, wood, glass, metal, stone, or selected textiles.
Fabric markers are specifically intended for textile decoration.
However, the term fabric marker can describe different products, including textile ink pens and fabric paint pens.
Some produce translucent colour that penetrates the fibres, while others create more opaque decorative marks.
The differences depend on the formulation rather than the pen’s appearance alone.
| Feature | General Paint Markers | Fabric-Specific Markers |
|---|---|---|
| Main purpose | Decorating compatible craft surfaces | Decorating textiles |
| Fabric compatibility | Product-dependent | Intended for specified fabric types |
| Wash resistance | Not always supported | Often supported under stated conditions |
| Flexibility | Depends on formulation | Generally designed with textile use in mind |
| Colour opacity | Varies; some offer opaque coverage | Can be transparent or opaque |
| Heat-setting | Product-dependent | Some require fixing or heat-setting |
| Best applications | General craft projects | Clothing, tote bags, fabric accessories |
For a decorative canvas board, a general acrylic paint marker may be perfectly suitable if the manufacturer approves that surface.
For a cotton T-shirt that will be washed regularly, a purpose-made fabric marker is usually the more appropriate starting point.
Remember that fabric paint pens and fabric ink markers aren’t necessarily interchangeable.
Always check the product instructions before purchasing or beginning a project.
Which Paint Markers Can You Use on Fabric?
Choosing a suitable marker is one of the most important decisions when decorating fabric.
Different paint formulations offer different levels of opacity, flexibility, adhesion, and wash resistance.
Some products are specifically designed for textiles, while others can be used on fabric only under particular conditions.
The best option depends on whether you’re decorating clothing, making a fabric accessory, or creating an item that won’t need regular washing.
Acrylic Paint Markers
Acrylic paint markers contain acrylic-based paint delivered through a pen-shaped applicator.
Many are designed for craft surfaces such as paper, canvas, wood, and stone. Some manufacturers also support their use on suitable fabrics.
However, not every acrylic paint marker is intended for washable textiles.
The acrylic formulation may dry into a visible paint layer on the fabric.
Depending on the product, this can provide strong colour coverage, including on darker materials.
Acrylic paint markers can be useful for decorative lettering, floral illustrations, geometric patterns, and small fabric designs when the product is compatible with textiles.
For example, certain acrylic markers may be appropriate for decorating a cotton tote bag or creating artwork on a fabric patch.
However, the paint’s behaviour after drying is important.
Some formulations may feel stiff when applied heavily.
Others may not tolerate repeated stretching or washing as well as specialized fabric paints.
Before using acrylic paint markers on clothing, check whether the manufacturer provides specific textile instructions.
These may include washing the fabric before painting, allowing the design to dry for a recommended period, or following a particular fixing process.
Some products require heat-setting, while others do not.
If your marker isn’t explicitly approved for washable fabric, consider using a fabric-specific product instead.
Fabric-Specific Paint Pens
Fabric-specific paint pens are made for decorating suitable textiles.
They can be useful for clothing, tote bags, cushion covers, fabric patches, and other handmade accessories.
Depending on the formulation, these pens may contain fabric paint or textile ink.
Some are designed to provide opaque colour, while others produce a more transparent finish.
For projects involving darker fabrics, an opaque textile paint pen may offer better visibility than a translucent fabric marker.
Fabric-specific products can also be available with different applicator sizes.
Fine tips are useful for small lettering and outlines, while broader tips may help create larger shapes and decorative patterns.
When selecting a fabric paint pen, look for clear information about supported materials.
A product suitable for cotton may not produce the same results on polyester, silk, or highly stretchy fabrics.
Washability is another important consideration.
Some textile markers can withstand washing after the manufacturer’s fixing or curing requirements have been completed.
However, the permitted washing conditions may vary.
Check whether the product provides instructions for machine washing, water temperature, detergent use, and drying.
If you’re decorating clothing that will be worn frequently, a fabric-specific paint pen with suitable care instructions is generally a more dependable choice.
Permanent Paint Markers
Permanent paint markers are designed to produce relatively durable marks on compatible materials.
Some use oil-based or other specialized paint formulations, while others contain acrylic-based paint.
However, permanent doesn’t necessarily mean fabric-safe or machine-washable.
A marker designed to resist moisture on metal or glass may still perform poorly on clothing.
Fabric regularly bends and stretches, creating movement that rigid surfaces don’t experience.
A paint formulation that remains durable on a wooden ornament may crack or peel when applied to a flexible T-shirt.
Some permanent markers may also leave fabric feeling stiff or uncomfortable, particularly when large amounts of paint are applied.
For decorative textiles that won’t be washed, certain products may be usable if their manufacturer supports the fabric application.
For clothing and frequently washed accessories, choose a product specifically intended for textile use.
Avoid relying solely on marketing claims such as waterproof, fade-resistant, or permanent.
These terms don’t automatically establish that the marker is suitable for fabric or repeated laundering.
Look for clear instructions about fabric compatibility, fixing, and washing before beginning your project.
Which Markers Should You Avoid?
When decorating fabric, avoid using markers that don’t provide enough information about their suitability for textiles.
A marker may appear to work during application but fail after the first wash or when the fabric stretches.
General-purpose paint markers without textile compatibility claims are a poor choice for clothing that needs regular laundering.
You should also be cautious with formulations that create thick, rigid paint layers.
These may affect the softness and flexibility of the material.
Markers that require a fixing process incompatible with the garment’s care instructions should also be avoided.
For example, if a marker requires heat-setting but the fabric cannot tolerate the specified treatment, choose another product instead of improvising a different method.
Avoid products that contain unsuitable solvents or have safety restrictions that conflict with your intended project or working environment.
Always review the product’s safety information, particularly when decorating children’s clothing.
For fabric that will be worn directly against the skin, choose products specifically intended for that application.
The best marker isn’t necessarily the one with the strongest permanence claim.
It’s the one designed for your chosen textile and the way the finished item will be used.
What Types of Fabric Work Best with Paint Markers?
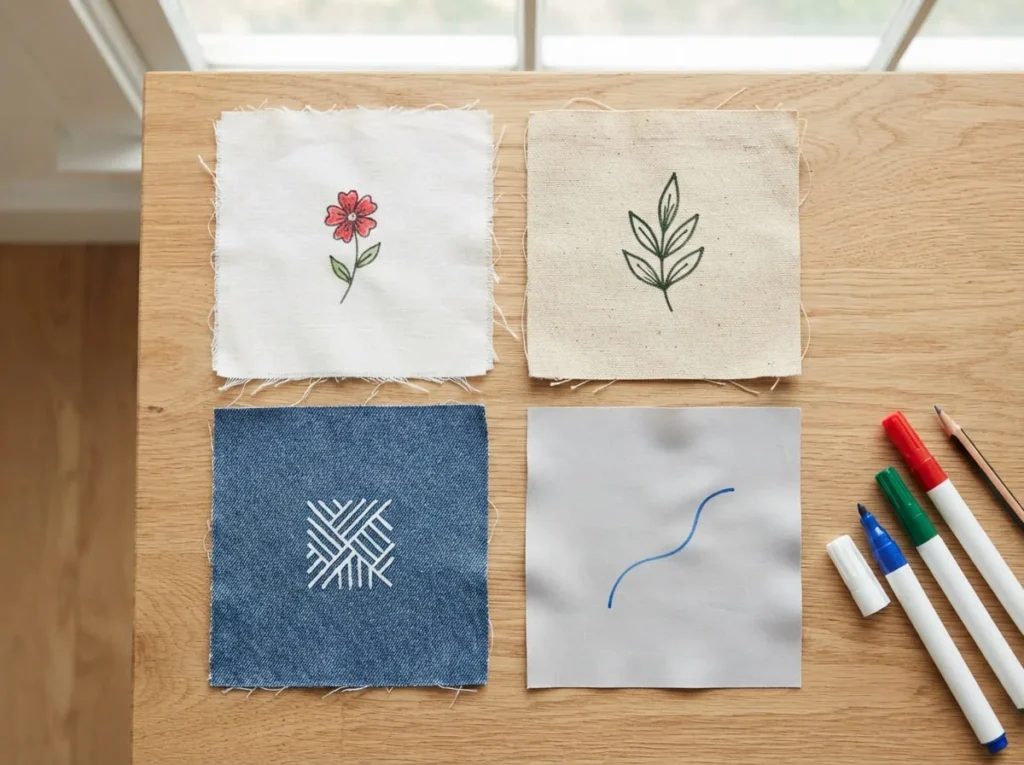
Fabric type can affect how paint markers apply, dry, and behave during use.
Some fabrics provide smooth, absorbent surfaces that are easier to decorate, while others are slippery, textured, stretchy, or sensitive to heat.
The marker formulation remains important because different products are compatible with different textiles.
Before starting, check the fabric composition and care label whenever possible.
| Fabric Type | General Painting Considerations | Main Challenge |
|---|---|---|
| Cotton | Often practical with suitable textile markers | Bleeding and uneven absorption |
| Cotton canvas | Stable and suitable for many craft projects | Coarse texture and paint buildup |
| Cotton blends | Potentially suitable with compatible products | Performance varies with fibre content |
| Polyester | Requires products suitable for synthetics | Adhesion and colour migration |
| Denim | Useful for decorative artwork | Thick texture and colour visibility |
| Stretchy knits | Require flexible textile formulations | Cracking during stretching |
| Delicate fabrics | Need specialized products and careful handling | Bleeding, staining, and heat damage |
This table provides general guidance rather than a guarantee.
Even two fabrics with similar fibre content may behave differently because of their weave, finish, colour, and previous treatments.
Testing is particularly important when decorating clothing or valuable textiles.
Cotton Fabric
Cotton is a popular starting material for fabric painting because it is widely available and used in many everyday craft items.
Cotton T-shirts, tote bags, cushion covers, and fabric patches can provide convenient surfaces for decorative designs.
Many fabric markers are developed for use on cotton, making it a practical choice for beginners.
However, cotton is absorbent, which can affect the appearance of thin lines.
If too much liquid is applied, the colour may spread along the fibres and create fuzzy edges.
This is particularly noticeable when drawing small letters or detailed outlines.
Using a marker suitable for cotton and applying colour in controlled amounts can help reduce this problem.
Prewashing may also be recommended by the marker manufacturer to remove fabric finishes or residues.
However, always check the garment’s care label and allow the fabric to dry completely before decorating it.
For T-shirts, placing a protective barrier between the front and back layers can help prevent colour from transferring through the material.
Cotton is a good option for simple lettering, small illustrations, and decorative patterns when used with suitable fabric markers.
Canvas and Cotton Blends
Cotton canvas is a heavier woven fabric commonly used for tote bags, pouches, and other practical accessories.
Its relatively stable construction can make it convenient for decorative painting.
Unlike thin clothing fabric, heavier canvas may remain flatter during application, which can help with lettering and geometric designs.
However, its woven texture may interrupt very fine lines.
The small ridges between threads can affect how a marker tip moves across the material.
For bold designs, a medium or broad fabric paint pen may be easier to use than an extremely narrow applicator.
Cotton blends require additional consideration.
Their behaviour depends on the types and proportions of fibres they contain.
A cotton-polyester blend may not absorb paint in exactly the same way as pure cotton.
Before decorating a blended fabric, confirm that the marker is suitable for its fibre composition.
Also remember that cotton canvas fabric is different from primed artist canvas.
Acrylic paint markers approved for prepared painting canvases aren’t automatically suitable for washable canvas tote bags.
For frequently used fabric accessories, choose textile-compatible markers with appropriate washing instructions.
Polyester and Synthetic Fabrics
Polyester and other synthetic fabrics can be more challenging to decorate with paint markers.
Their fibre properties differ from those of cotton, and certain textile colour formulations may not adhere or fix reliably.
Some fabric markers are designed primarily for natural fibres and may provide limited results on polyester.
Depending on the product, colour may spread, transfer, or fail to withstand washing as expected.
Synthetic fabrics can also have specialized finishes that affect how paint behaves.
For example, water-repellent treatments may make it difficult for certain colour formulations to penetrate or remain attached.
Heat-setting requires additional caution because some synthetic textiles can be damaged by excessive heat.
Never use ironing temperatures intended for cotton unless both the marker instructions and fabric care label permit them.
If you want to decorate a polyester item, choose a marker specifically recommended for that material.
Test the product on a spare sample or hidden area before applying a large design.
For washable polyester clothing, checking documented wash resistance is especially important.
Denim Fabric
Denim is a popular material for personalized clothing and accessories.
Jackets, jeans, bags, and denim patches can provide attractive backgrounds for decorative artwork.
However, denim has a relatively pronounced woven texture that can affect line control.
Fine marker tips may catch on raised threads, making small lettering or delicate outlines more difficult.
Medium-sized applicators may be more convenient for broader shapes and decorative patterns.
Denim is also available in different colours.
On dark blue or black denim, some translucent textile markers may appear faint.
If you want visible white, yellow, or colourful designs, consider opaque fabric paint pens specifically suitable for denim.
Avoid assuming that every acrylic paint marker will provide strong coverage.
Before decorating, check whether the denim needs prewashing.
Follow the manufacturer’s instructions and allow the fabric to dry fully.
For clothing, choose a paint formulation designed to withstand bending and normal wear.
Keep the design away from areas that experience excessive friction if possible.
Small floral patterns, decorative borders, and simple geometric shapes are manageable starting projects.
Delicate and Stretchy Fabrics
Delicate and stretchy fabrics require additional care because they can behave differently from stable cotton canvas or denim.
Silk, lightweight synthetic materials, and loosely woven textiles may allow colour to spread unexpectedly.
Some delicate fabrics can also be damaged by unsuitable cleaning products or excessive heat.
Stretchy fabrics introduce another challenge.
When a knitted garment stretches, a rigid paint layer may crack or separate from the fibres.
This is especially important for fitted T-shirts, leggings, and other garments that experience regular movement.
For these materials, choose markers specifically intended for the relevant fabric composition and degree of stretch.
Avoid applying unnecessarily thick layers of paint.
The manufacturer’s instructions should also clarify whether the product requires fixing and how the finished item can be washed.
If the fabric is delicate, valuable, or difficult to replace, testing a spare sample is preferable to experimenting directly on the finished garment.
For beginners, a stable cotton tote bag or other straightforward textile project is generally easier than working on silk or highly elastic clothing.
How to Use Paint Markers on Fabric Step by Ste
Using paint markers on fabric is a convenient way to personalize clothing, tote bags, and handmade accessories. However, fabric behaves differently from rigid surfaces such as wood or glass. It can absorb liquid unevenly, stretch during application, and move while you’re drawing.
For cleaner results, you need suitable textile markers, a properly prepared fabric surface, and a controlled painting technique.
The following steps explain how to use paint markers on fabric while reducing common problems such as bleeding, smudging, and uneven colour coverage.
Step 1: Choose Fabric-Compatible Markers
Before beginning, select paint markers specifically recommended for the fabric you want to decorate.
Some acrylic paint markers are suitable for textile projects, but not every acrylic formulation is designed to withstand repeated washing.
For clothing, fabric-specific paint pens are generally a more reliable starting point because they are intended for textile applications.
Check the product label for information about compatible materials, wash resistance, drying time, and fixing requirements.
For example, a marker intended for cotton may not perform equally well on polyester or highly stretchy fabric.
If you’re decorating a dark T-shirt or denim jacket, consider whether the marker provides sufficient opacity.
White and other light colours may require a product specifically designed for visible coverage on darker textiles.
Choose a tip size that matches your design. Fine tips are useful for small lettering, while broader tips may be more convenient for larger shapes.
Step 2: Wash and Prepare the Fabric
Some fabrics contain manufacturing finishes, sizing, or other treatments that can affect how paint adheres.
Prewashing may help remove these residues when recommended by the marker manufacturer.
Before washing, check the fabric’s care label.
Use an appropriate washing method and avoid adding fabric softener if the marker instructions advise against it.
Once washed, allow the fabric to dry completely.
If the material becomes wrinkled, smooth it using a method suitable for the textile.
A flat surface makes it easier to draw consistent lines and maintain accurate spacing.
For a cotton T-shirt, lay the garment flat on a clean table before beginning.
If you’re decorating a tote bag, check that the area you want to paint is free from folds and loose threads.
Avoid starting while the fabric is damp unless the product specifically instructs you to work on moist material.
Step 3: Place a Protective Layer Underneath
Fabric can allow liquid paint to pass through its fibres, especially when the material is thin or highly absorbent.
A protective layer helps prevent colour from reaching the other side of a garment or damaging your work surface.
For T-shirts, place a clean piece of cardboard or another suitable barrier between the front and back layers.
Choose a barrier that is smooth, stable, and large enough to extend beyond your design.
For tote bags, place the protective material inside the bag.
If the marker manufacturer recommends a particular barrier, follow those instructions.
Avoid using a surface that could become permanently attached to wet paint.
For example, exposed adhesive materials may create unnecessary problems during removal.
Make sure the protective layer remains flat so it doesn’t create raised areas beneath the fabric.
This simple preparation step can help reduce accidental paint transfer and make the drawing surface more stable.
Step 4: Secure and Flatten the Fabric
Unlike paper or wood, fabric can shift while you’re painting.
This movement may cause uneven lines, distorted lettering, or unwanted smudging.
Before drawing, gently smooth the fabric over your protective surface.
Remove wrinkles without stretching the material excessively.
If necessary, secure the edges using a method that won’t damage the textile.
For example, small clips may help hold a loose fabric sample against a suitable backing board.
Avoid placing clips directly over the area you’re decorating.
Stretchy fabrics require particular care.
If you pull the material tightly while painting, the finished design may change appearance when the fabric returns to its normal shape.
For most beginner projects, keeping the fabric comfortably flat is better than applying strong tension.
Choose a stable workspace with enough room to rest your hands comfortably.
This will make detailed lettering and decorative patterns easier to control.
Step 5: Test the Marker Before Decorating
Testing is especially important when using paint markers on fabric because different fibres absorb and hold colour differently.
Choose a spare piece of the same fabric whenever possible.
If you don’t have extra material, use a small hidden area that won’t affect the finished appearance.
Prepare the marker according to the manufacturer’s instructions.
Some products require shaking or priming, while others are ready to use without additional activation.
Draw a short line, a small circle, and a filled shape.
Observe how the colour behaves.
Does it spread beyond your intended lines? Does the paint appear opaque? Does the fabric become noticeably stiff after drying?
Allow the sample to dry and cure as directed.
If the product requires heat-setting, test the manufacturer’s process only when the fabric care instructions permit it.
For clothing that will be washed, consider testing the sample through an appropriate wash cycle after the complete fixing process.
This provides a more useful indication of performance than judging the fresh paint alone.
Step 6: Apply the Design in Controlled Layers
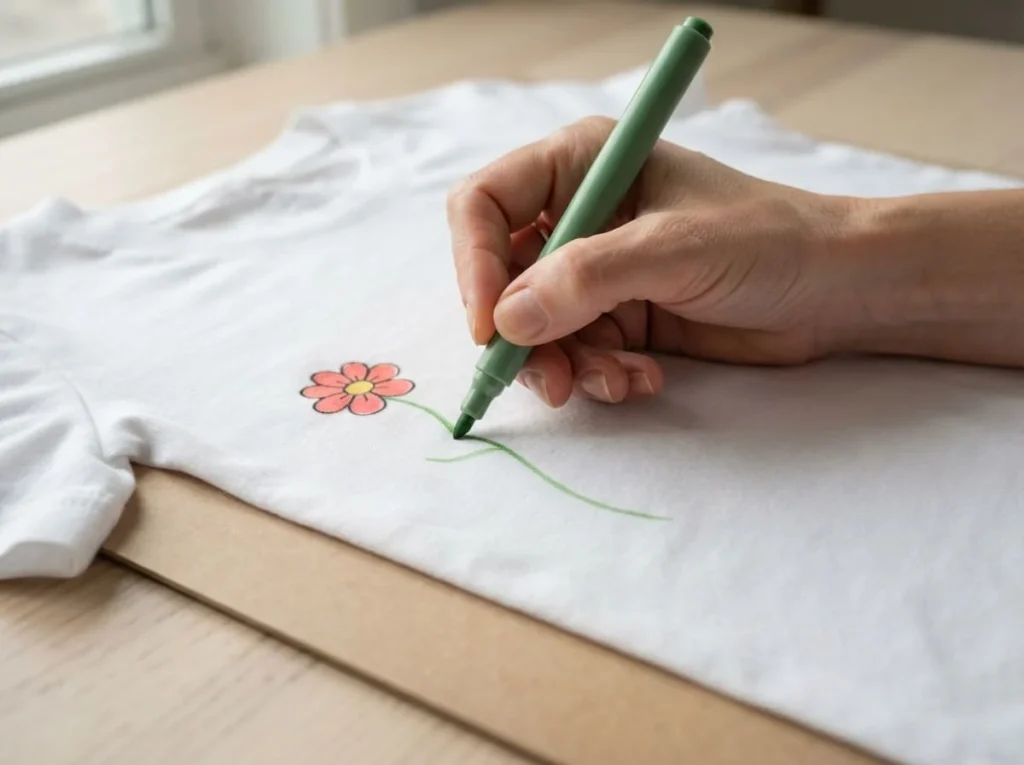
Once you’ve prepared the fabric and tested the marker, begin creating your design.
Start with the main outlines or larger shapes.
Use gentle, steady strokes and avoid pressing excessively hard against the material.
Some fabrics absorb colour quickly, so repeatedly applying paint to the same area may cause bleeding.
For small lettering, work slowly and leave enough space between letters.
If you’re filling a larger shape, use an appropriate marker tip and apply colour evenly.
Avoid saturating the fabric unnecessarily.
Heavy paint application may make the finished material stiff or increase drying time.
When using multiple colours, follow the marker manufacturer’s instructions for layering.
Some products allow additional colours after the previous application has dried.
Others may support different techniques.
If you’re unsure, allow the first colour to dry and test the combination on scrap fabric before proceeding.
For beginners, simple designs with clear outlines and limited colour overlap are often easier to manage than complicated illustrations.
Step 7: Allow the Paint to Dry and Fix It If Required
After completing your design, allow the paint to dry according to the manufacturer’s instructions.
Avoid touching, folding, or wearing the fabric while the paint is still wet.
Drying time depends on the marker formulation, fabric type, amount of paint applied, and environmental conditions.
Some textile markers require additional fixing after drying.
This may involve ironing or another manufacturer-approved process.
Other markers use different curing methods and may not require heat.
Never assume that every fabric paint marker needs ironing.
Before heat-setting, check both the marker instructions and the fabric’s care label.
If the required treatment isn’t suitable for the textile, don’t attempt to improvise an alternative.
Once the complete drying and fixing process is finished, follow the manufacturer’s recommended waiting period before washing or wearing the decorated item.
How to Heat Set Paint Markers on Fabric
Heat-setting is a fixing method used with certain fabric paints and textile markers.
Depending on the formulation, controlled heat may help develop the finished design’s intended wash resistance.
However, heat-setting isn’t appropriate for every paint marker or fabric.
The correct procedure depends on the product, and using too much heat can damage clothing, affect paint colours, or create unwanted changes in the material.
Do All Paint Markers Need Heat Setting?
No, not all paint markers require heat-setting.
Some fabric-specific markers are designed to be fixed using an iron after the initial drying period.
Others rely on different curing methods.
Certain acrylic paint markers may provide fabric-specific instructions, while general-purpose paint markers may not support washable textile applications at all.
For this reason, the product label should be your first source of information.
Check whether the manufacturer specifies a drying period before fixing.
Also look for instructions concerning ironing temperature, duration, steam settings, and protective barriers.
If the product doesn’t recommend heat-setting, don’t assume that heating it will improve durability.
Applying heat to an unsuitable formulation can damage the artwork or fabric.
The safest approach is to follow the process developed for the particular marker you’re using.
How to Heat Set Fabric Marker Designs Safely
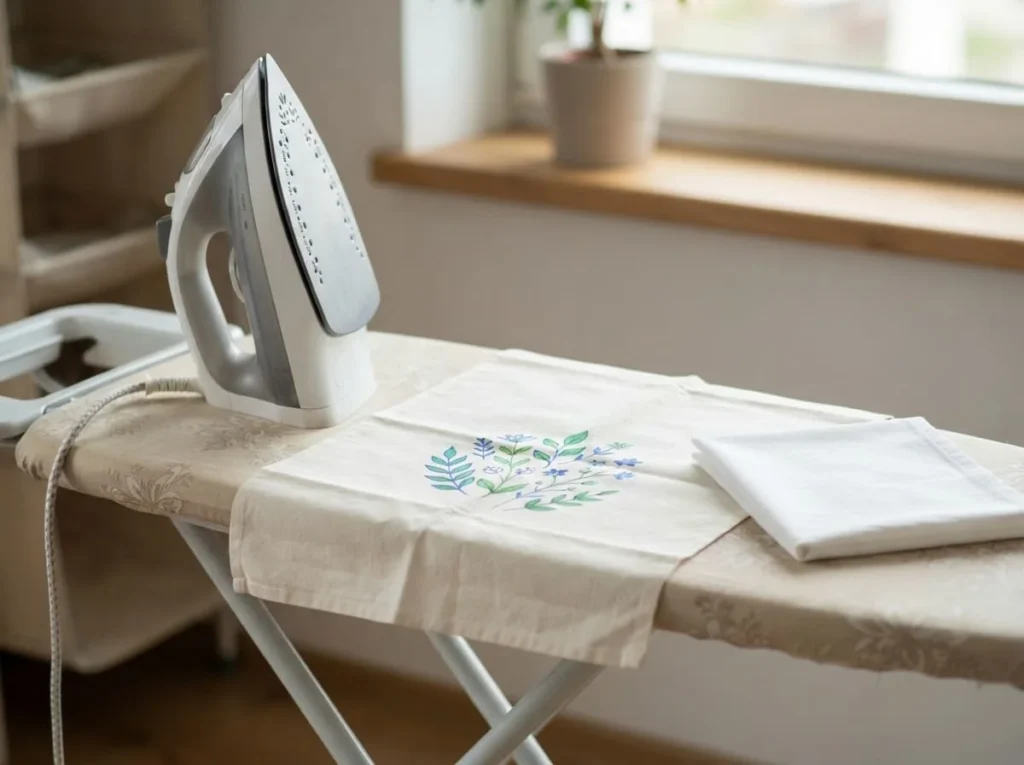
If your marker manufacturer specifically recommends heat-setting, read the complete instructions before beginning.
First, confirm that the fabric can tolerate the required treatment.
Check its care label, particularly for synthetic blends, delicate materials, and garments with special finishes.
Allow the painted design to dry for the period specified by the marker manufacturer.
Prepare a suitable ironing surface and follow the instructions regarding protective materials.
Some products require ironing from the reverse side of the fabric, while others specify a barrier between the heat source and the painted area.
Use only the approved temperature and duration.
If the manufacturer instructs you to avoid steam, make sure the iron is set accordingly.
Don’t increase the temperature or extend the heating time in an attempt to make the design more permanent.
Excessive heat can damage fibres and may affect the paint finish.
After completing the process, allow the fabric to cool naturally.
Wait for any additional curing period before washing the item.
If the marker’s heat-setting requirements conflict with the garment’s care label, use a different textile marker rather than risking damage.
Can You Use a Hair Dryer Instead of an Iron?
A hair dryer isn’t a universal substitute for ironing.
Some fabric marker manufacturers permit particular hair-dryer methods, while others specifically require ironing or another approved fixing process.
The difference matters because the amount of heat delivered to the fabric and the way it is applied can vary considerably.
A hair dryer may warm the fabric without providing the conditions required to fix a particular textile formulation.
For example, a product requiring direct, controlled heat through an approved ironing method may not achieve the same result with warm air.
Always check whether the manufacturer explicitly supports a hair-dryer method.
If the instructions only mention ironing, don’t assume that using a hair dryer for longer will produce equivalent wash resistance.
Also avoid overheating delicate materials.
For clothing that cannot tolerate the required fixing process, selecting a suitable no-heat textile product is generally the better option.
What If Your Fabric Cannot Be Ironed?
Some fabrics are sensitive to heat and shouldn’t be exposed to the temperatures required by certain textile markers.
Examples may include particular synthetic fabrics, delicate materials, or garments with heat-sensitive finishes.
If your fabric cannot be ironed, choose a marker with a fixing or curing method compatible with that material.
Look for products specifically intended for the relevant textile and follow their instructions carefully.
Don’t attempt to replace an approved heat-setting method with an untested process.
A design may appear dry and attractive even when the paint hasn’t developed the wash resistance claimed under the manufacturer’s required fixing conditions.
If no suitable marker is available, consider decorating a separate compatible fabric patch instead.
This allows you to create the design on an appropriate material and attach it to the intended item using a suitable method.
For delicate clothing, it may also be better to avoid permanent decoration altogether rather than risk damaging an important garment.
5 Easy Fabric Projects Using Paint Markers
Paint markers can be used to personalize fabric accessories and clothing when the products are specifically suitable for the textile.
For beginners, projects with relatively flat surfaces and simple designs are easier to manage.
The following five ideas use common craft materials and focus on manageable lettering, decorative patterns, and small illustrations.
Before beginning any project, confirm that your markers support the chosen fabric and follow their drying, fixing, and washing instructions.
1. Personalized Cotton Tote Bag
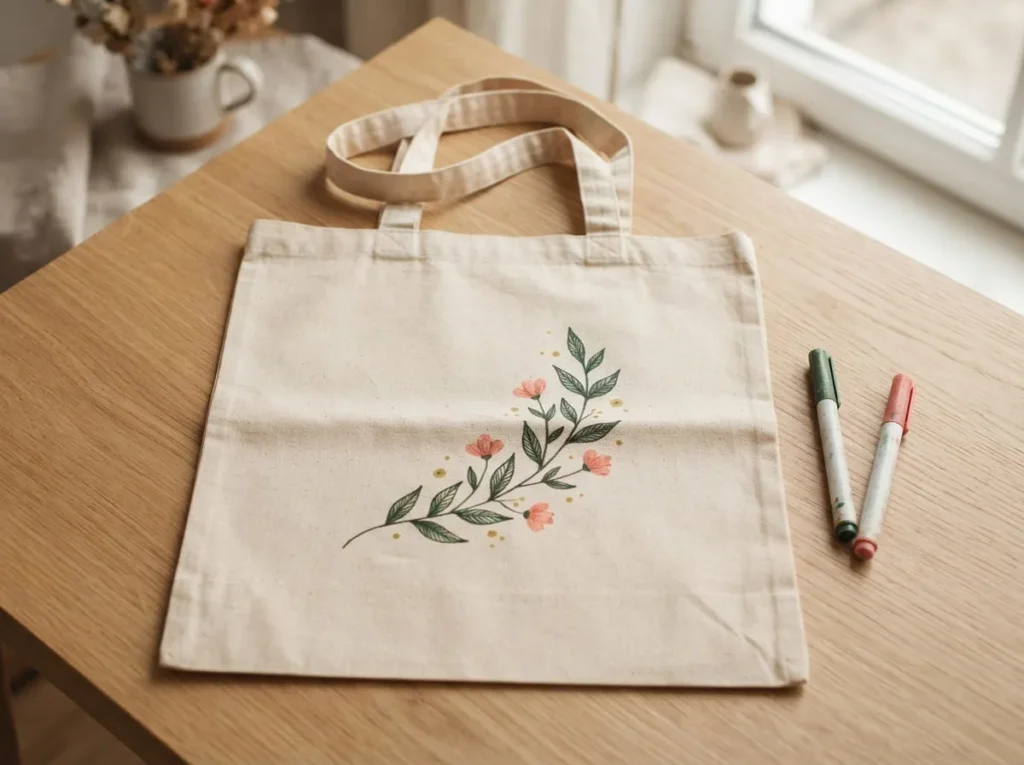
A cotton tote bag is a practical starting project because it provides a relatively large, flat area for decorative artwork.
You can create botanical illustrations, simple patterns, or personalized lettering without working on a complicated garment shape.
Materials Needed
- Plain cotton tote bag.
- Fabric-compatible paint markers.
- Protective cardboard or suitable barrier.
- Pencil or removable fabric marking tool, if appropriate.
- Clips, if needed.
- Scrap cotton fabric for testing.
How to Decorate a Cotton Tote Bag
- Check the tote bag’s fabric composition and care instructions.
- Prewash the bag if recommended by the marker manufacturer, then let it dry completely.
- Place a protective barrier inside the bag to prevent colour transfer.
- Smooth the front panel over a flat working surface.
- Test the marker on spare cotton fabric before decorating.
- Plan a simple design featuring leaves, flowers, or geometric shapes.
- Begin with the main outlines, using slow and controlled strokes.
- Add colour gradually without saturating the fabric.
- Allow the design to dry and complete any required fixing process.
- Wait until the artwork is ready before using or washing the bag.
For a simple botanical design, draw one curved branch with several leaves on either side.
You can place the illustration in the centre or near one lower corner of the bag.
If you prefer geometric artwork, combine a few circles, triangles, and short decorative lines.
Keep the design manageable and avoid applying unnecessarily thick layers of paint.
Because tote bags are frequently folded and handled, choosing a flexible, washable textile formulation is particularly important.
2. Hand-Drawn T-Shirt Design
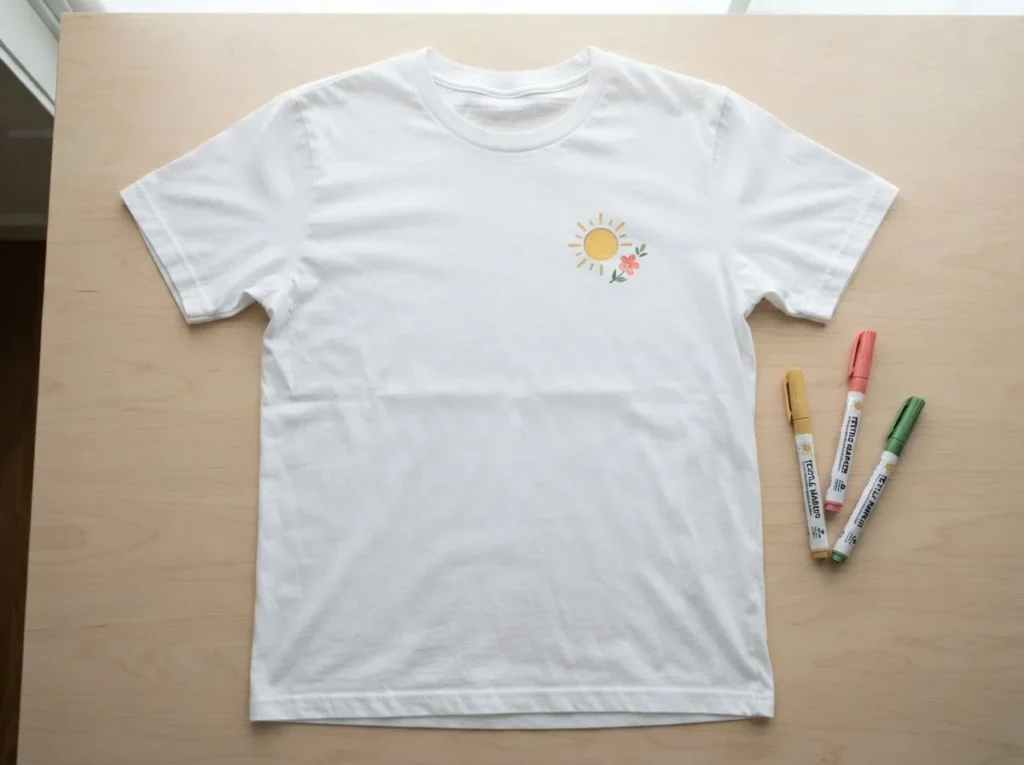
Decorating a plain T-shirt is a popular way to create personalized clothing.
Small chest illustrations and simple decorative shapes are good starting points because they require less paint and are easier to position than large, detailed designs.
Materials Needed
- Plain cotton T-shirt or another compatible fabric.
- Fabric-specific paint markers.
- Protective cardboard.
- Pencil or suitable removable fabric marking tool.
- Scrap fabric for testing.
- Flat work surface.
How to Decorate a T-Shirt
- Check the T-shirt’s fabric composition and care label.
- Wash and dry the shirt first if recommended by the marker instructions.
- Place a protective barrier between the front and back layers.
- Smooth the area you want to decorate without stretching the fabric.
- Plan a small illustration or simple geometric design.
- Test the marker on spare material to check bleeding and colour coverage.
- Begin drawing the design with controlled strokes.
- Add a small number of contrasting colours if desired.
- Allow the paint to dry completely.
- Follow the manufacturer’s fixing and washing instructions before wearing the T-shirt.
For a beginner-friendly design, draw a small flower or simple sun near the upper chest.
You can also create three or four tiny stars arranged in a neat pattern.
Avoid placing thick painted areas over sections that experience considerable stretching.
If the shirt is made from a stretchy blend, choose markers specifically designed for that fabric.
When the project is complete, remember that the finished garment may require different washing care from an undecorated T-shirt.
3. Decorative Denim Pocket Art
Denim pockets provide compact spaces for decorative patterns, miniature flowers, and simple geometric designs.
Because denim is relatively textured, the project is better suited to bold, manageable artwork than extremely delicate lines.
Materials Needed
- Denim jacket, jeans, or a separate denim fabric sample.
- Paint markers approved for denim or the relevant fabric blend.
- Protective barrier.
- Suitable fabric marking tool, if needed.
- Scrap denim for testing.
How to Decorate a Denim Pocket
- Check the denim composition and the garment’s care instructions.
- Prepare the material according to the marker manufacturer’s recommendations.
- Place a protective barrier behind the pocket fabric.
- Smooth the pocket carefully without pulling it out of shape.
- Test your chosen colours on a spare piece of denim.
- Select a small design that fits comfortably within the pocket area.
- Begin with the main decorative shapes or outlines.
- Add contrasting details after the first colour has dried, if layering is supported.
- Allow the completed artwork to dry and fix it as instructed.
- Avoid wearing or washing the garment until the required curing period has passed.
A small floral branch is a good choice for a denim pocket.
You could draw a curved stem with three leaves and two simple flowers.
For a different appearance, use a repeating geometric border near the pocket opening.
On dark denim, select opaque fabric markers that provide enough contrast to remain visible.
Avoid covering heavily stretched areas with thick paint layers, as this may affect comfort and durability.
4. Customized Canvas Pencil Pouch
A fabric pencil pouch is a small and practical project for experimenting with simple patterns.
Cotton canvas pouches are often convenient because their structure provides a relatively stable working surface.
However, the pouch’s lining, coating, and fabric composition may affect marker compatibility.
Materials Needed
- Plain cotton canvas pencil pouch.
- Fabric-compatible paint markers.
- Protective cardboard or suitable insert.
- Pencil or removable fabric marking tool.
- Scrap canvas for testing.
How to Decorate a Fabric Pencil Pouch
- Check the pouch’s fabric composition and care instructions.
- Prepare the surface according to the marker manufacturer’s recommendations.
- Place a protective insert inside the pouch if its construction allows.
- Smooth the front panel over a flat surface.
- Test the marker on suitable scrap canvas.
- Choose a simple design using repeated shapes or curved lines.
- Draw the main pattern with controlled strokes.
- Add small decorative details without applying excessive paint.
- Allow the design to dry and complete any required fixing process.
- Remove the protective insert only when it is safe to do so.
For a minimalist design, create a row of small arches across the pouch.
Another option is to draw three colourful flowers with simple stems.
Avoid painting directly over seams, zippers, or other raised areas because these can interfere with line control.
If the pouch contains a synthetic lining, make sure any required heat-setting procedure is safe for the entire item.
When heat-setting isn’t practical, choose a textile marker that supports a compatible no-heat curing method.
5. Handmade Fabric Patch Designs
Fabric patches are useful for creating small decorative designs that can later be attached to bags, jackets, or other craft items.
They also provide a manageable way to experiment with paint markers before decorating an entire garment.
Working on separate fabric pieces allows you to test colour coverage, bleeding, and curing more easily.
Materials Needed
- Small pieces of suitable cotton or other compatible fabric.
- Fabric-specific paint markers.
- Fabric scissors.
- Protective work surface.
- Pencil or removable fabric marking tool.
- Appropriate patch attachment supplies.
How to Create Decorative Fabric Patches
- Choose a fabric compatible with your paint markers.
- Prepare and wash the material first if required.
- Cut a manageable patch shape, leaving space for finishing the edges if needed.
- Place the fabric flat over a protective work surface.
- Test your marker on a spare piece of the same material.
- Draw a simple design, such as a flower, star, or small geometric pattern.
- Apply additional colours carefully, following any layering instructions.
- Allow the paint to dry and complete the manufacturer’s required fixing process.
- Finish the patch edges using an appropriate method if necessary.
- Attach the finished patch to a suitable item using a compatible sewing or attachment method.
For a beginner-friendly patch, choose a simple flower with five petals.
You could also create a small sun or a decorative leaf pattern.
Keep enough space around the artwork so that stitching or attaching the patch doesn’t interfere with the design.
If you plan to attach the patch to clothing, consider whether the decorated material and attachment method can tolerate normal movement and washing.
A fabric patch can be an enjoyable project on its own or a useful introduction to decorating larger textile items.
How to Make Paint Marker Designs Last on Fabric
Creating a design with paint markers is only the first part of decorating fabric. If you want the artwork to remain attractive after wearing, folding, or washing, you also need to consider how the paint dries, how the design is fixed, and how the finished material is cared for.
Even when a marker is described as permanent, its durability depends on the paint formulation and whether it is suitable for the particular fabric.
A design on a decorative cotton wall hanging may face very little wear, while a painted T-shirt must withstand regular movement, friction, and washing.
Following the correct care instructions can help protect your artwork and reduce common problems such as fading, cracking, and peeling.
Let the Paint Dry and Cure Properly
Allowing enough drying and curing time is one of the most important steps when working with paint markers on fabric.
Freshly applied paint may look finished before it has developed the properties needed for normal handling.
Drying generally refers to the stage when the liquid components have evaporated sufficiently for the paint to stop feeling wet.
Curing refers to the process through which the paint develops its intended final characteristics, such as adhesion, flexibility, or resistance to washing.
The exact requirements depend on the marker formulation.
Some fabric paint pens need a specific drying period before heat-setting. Others require air curing or a different manufacturer-approved process.
Avoid folding, wearing, or washing the fabric before the recommended period has passed.
For T-shirts and tote bags, keep the decorated area flat while the paint dries whenever practical.
This can reduce accidental contact between freshly painted sections.
If you’ve applied several colours or overlapping layers, check whether the manufacturer recommends additional drying time.
Don’t assume that thicker paint applications will dry at the same rate as thin lines.
Following the product’s instructions is more reliable than using a universal drying time for every fabric marker.
Follow the Correct Fixing Instructions
Fixing is the process recommended by certain textile-marker manufacturers to help the colour remain attached to the fabric.
Some products require heat-setting with an iron, while others rely on air curing or alternative methods.
The correct process depends on the formulation.
If your marker requires ironing, follow its specified temperature, duration, and protective barrier instructions.
Always check that the fabric can tolerate the recommended treatment.
For example, a marker designed for cotton may have fixing requirements that are unsuitable for delicate synthetic materials.
Never increase the temperature or extend the heating time in an attempt to make the artwork more permanent.
Excessive heat can damage fabric fibres, alter colours, or affect the paint finish.
If the marker instructions conflict with the garment’s care label, choose a different product rather than improvising a fixing method.
For products that don’t require heat-setting, allow the full recommended curing period before washing.
Remember that a marker’s wash-resistance claims may depend on completing its specified fixing process.
How to Wash Decorated Fabric
Washing is one of the biggest tests of whether paint marker artwork is suitable for clothing.
Even a design that looks attractive immediately after drying may behave differently during laundering.
Before washing, check both the marker manufacturer’s care instructions and the garment’s care label.
Follow whichever restrictions are necessary to protect the paint and fabric.
Some fabric-marker manufacturers recommend turning garments inside out before washing.
This can help reduce direct friction against the decorated area.
Others specify a maximum washing temperature or recommend particular care methods.
Use only the washing conditions supported by your marker and textile.
Avoid assuming that every permanent fabric marker is machine-washable.
Some products may be suitable for gentle washing, while others are intended for decorative textiles that aren’t regularly laundered.
If the design is newly completed, wait until the manufacturer’s required curing or fixing period has passed.
Also check whether tumble drying, ironing, or dry cleaning is permitted.
For your first project, testing a decorated fabric sample through the intended washing process can help you understand how the colours behave.
This is especially useful before decorating an expensive garment or creating multiple matching items.
How to Reduce Fading and Cracking
Fading and cracking are different problems, but both can affect the appearance of painted fabric.
Fading involves a gradual loss of colour intensity.
It may occur because of repeated washing, sunlight exposure, unsuitable cleaning products, or limitations in the marker formulation.
Cracking occurs when the dried paint layer separates into visible lines or breaks as the fabric moves.
This is more likely when a relatively rigid coating is applied to material that bends or stretches frequently.
To reduce these problems, begin with paint markers designed for the intended textile.
For clothing, look for products with appropriate wash-resistance and flexibility information.
Apply paint in controlled amounts rather than creating unnecessarily thick layers.
A heavy paint application may feel stiff and may be more vulnerable to damage when the material bends.
Allow each application to dry as directed, and complete any required fixing process.
For washable fabric, follow the recommended care instructions instead of using unnecessarily harsh washing conditions.
Avoid excessive rubbing or scrubbing over decorated areas.
For frequently stretched clothing, consider keeping designs small and placing them in areas that experience less movement.
Although these precautions can improve results, they can’t guarantee that every paint marker design will remain unchanged indefinitely.
Common Paint Marker Problems on Fabric
Fabric painting can sometimes produce unexpected results, particularly when using unfamiliar materials or paint formulations.
Bleeding, fading, cracking, stiffness, and weak colour coverage are among the most common concerns.
Understanding why these problems occur can help you choose better materials and adjust your technique before starting another project.
Why Does Paint Marker Ink Bleed on Fabric?
Bleeding occurs when colour spreads beyond the intended lines.
This can make small lettering, outlines, and decorative details appear fuzzy or uneven.
Fabric absorbency is one of the main causes.
Some textiles allow liquid colour to travel along their fibres before it dries.
Applying too much paint can increase the amount of spreading.
A highly saturated marker tip may release more colour than the fabric can hold within a narrow area.
The paint formulation also matters.
A marker intended for paper or rigid craft surfaces may behave unpredictably on textile fibres.
To reduce bleeding, select a marker specifically recommended for the fabric you’re decorating.
Test it on a spare sample before beginning.
Use gentle, controlled strokes and avoid repeatedly colouring the same area while it remains wet.
For small lettering, leave enough space between individual letters so minor spreading doesn’t make the text unreadable.
A protective layer underneath the fabric can help prevent colour from transferring to another layer, but it doesn’t necessarily stop sideways bleeding within the fibres.
If the paint continues to spread excessively, try a more suitable textile marker rather than applying additional layers.
Why Is My Fabric Paint Marker Design Fading?
A fabric paint marker design may fade when the colour formulation isn’t suitable for the textile or when the finished item is exposed to conditions beyond the manufacturer’s recommendations.
Repeated laundering can gradually affect certain colours.
Sunlight exposure may also cause some pigments or dyes to lose intensity over time.
Another possible cause is incomplete fixing.
If the marker requires heat-setting or a particular curing period, washing the fabric too early may reduce its durability.
Fabric type can influence the result as well.
A textile marker designed for cotton may not maintain the same appearance on an unsupported synthetic blend.
To reduce fading, choose markers intended for the specific fabric and its expected use.
Follow the preparation, drying, and fixing instructions carefully.
Wash decorated items according to the recommended conditions.
For fabric artwork intended for display, avoid unnecessary prolonged exposure to strong sunlight unless the product is suitable for those conditions.
If a design has already faded, adding more colour may improve its appearance temporarily, but it won’t necessarily correct an underlying compatibility problem.
For future projects, testing the paint through an appropriate wash cycle before decorating the final item is a more reliable approach.
How to Prevent Paint from Cracking or Peeling
Cracking and peeling often occur when the paint doesn’t remain securely attached to the fabric during movement or handling.
One possible cause is using a formulation that isn’t designed for flexible textiles.
Certain general-purpose acrylic paint markers may dry into a relatively rigid coating.
When the fabric bends or stretches, that coating may become damaged.
Applying too much paint can also create a thick layer that is more noticeable during movement.
Poor surface preparation may contribute to peeling.
Fabric finishes, residues, or incompatible coatings can interfere with how the paint adheres to the fibres.
To reduce cracking, choose a textile-compatible formulation intended for the amount of flexibility your project requires.
Prepare the fabric according to the marker instructions.
Apply paint evenly without building unnecessarily thick layers.
Allow the design to dry and cure fully before use.
For stretchy garments, avoid large solid painted areas unless the product is specifically suitable for that application.
If an existing design has already cracked, carefully evaluate whether repainting is appropriate.
Adding more paint over a failing layer may make it thicker without addressing the cause.
What to Do If Paint Feels Stiff on Fabric
Some paint marker designs can make fabric feel stiffer than it did before decoration.
This happens when the colour forms a noticeable coating on or around the fibres.
The effect depends on the paint formulation, amount applied, and fabric type.
For example, a thick decorative shape may feel less flexible than a few fine lines.
Not all stiffness indicates a failed project.
However, excessive rigidity can affect comfort and may make clothing less pleasant to wear.
If you’re decorating a T-shirt or another garment that touches the skin, choose textile paints designed for wearable applications.
Apply only the amount needed to achieve the intended design.
Avoid repeatedly saturating the same area.
For large decorative sections, consider whether a different textile decoration method would be more suitable.
If the paint has already dried and feels stiff, don’t attempt to soften it using unapproved solvents, soaking methods, or excessive heat.
These treatments may damage the design or fabric.
Check the marker manufacturer’s guidance for the finished texture and any recommended aftercare.
For future projects, make a sample using different application thicknesses to determine which result feels most comfortable.
Why Are My Colours Faint on Dark Fabric?
Dark fabrics can make certain paint marker colours appear less visible.
This often happens when the marker formulation is transparent or partially translucent.
The dark background influences how the applied colour appears.
For example, a pale yellow textile ink may look bright on white cotton but much less noticeable on black denim.
Fabric texture can also affect coverage.
Raised fibres and uneven surfaces may prevent the marker from applying a consistent layer.
For stronger colour visibility, choose opaque fabric paint pens specifically suitable for dark textiles.
Check the manufacturer’s coverage information before purchasing.
Test the colour on a spare piece of the intended fabric.
If the paint is designed for layering, allow the first application to dry before adding another controlled layer.
Avoid pressing excessively hard or flooding the fabric with paint in an attempt to achieve stronger coverage.
For simple designs, white or other high-contrast opaque colours may provide clearer results than subtle pastel shades.
However, actual opacity still depends on the product.
How to Choose Paint Markers for Fabric Projects
Choosing paint markers for fabric involves balancing appearance, comfort, durability, and ease of use.
A marker that works beautifully on a decorative cotton patch may not be appropriate for a frequently washed polyester T-shirt.
Instead of selecting a product based only on colour variety or the word permanent, consider the specific needs of your project.
Check Washability and Fabric Compatibility
Begin by identifying the fabric you want to decorate.
Check whether it is cotton, polyester, denim, canvas, a blend, or another material.
Then look for paint markers specifically recommended for that textile.
If the project will be washed regularly, choose a product with clear washing and fixing instructions.
Check whether the manufacturer specifies machine-washing conditions, temperature restrictions, or special handling requirements.
For decorative items that won’t be washed, you may have different options, but the paint must still be compatible with the material.
Avoid assuming that a marker’s performance on primed artist canvas establishes its suitability for cotton clothing or canvas bags.
Fabric compatibility should always take priority over general-purpose durability claims.
Choose Suitable Tip Sizes and Colour Opacity
Tip size determines how easily you can create different fabric designs.
Fine tips are useful for small lettering, simple outlines, and decorative details.
Medium tips can be convenient for everyday fabric crafts.
Broader applicators may be more practical for larger shapes, although excessive paint application should still be avoided.
Consider the texture of the material.
Very narrow tips may catch on coarse denim or canvas fibres, making consistent lines difficult.
Colour opacity is another important factor.
For white or light-coloured cotton, many compatible textile colours can appear clearly.
For dark denim or black fabric, opaque formulations designed for dark textiles may be more suitable.
Before starting, test each colour on the intended fabric to check coverage and bleeding.
Consider Paint Flexibility and Comfort
Flexibility is particularly important when decorating wearable fabric.
Clothing bends, stretches, folds, and moves throughout the day.
A paint formulation that dries into a stiff surface layer may feel uncomfortable or become damaged during use.
For T-shirts, fabric patches, and other wearable projects, choose markers specifically intended for those applications.
Look for manufacturer information about the finished feel and suitability for flexible textiles.
Avoid applying excessive paint, especially in areas that stretch repeatedly.
For decorative bags or fabric wall hangings, flexibility may be less demanding, but the coating should still suit the material.
Comfort and durability are both important when selecting paint markers for clothing.
Check Safety and Heat-Setting Requirements
Before purchasing fabric paint markers, review their safety instructions and fixing requirements.
Different formulations may contain different ingredients and require different handling precautions.
Some products need adequate ventilation during use.
Others require heat-setting after drying.
Check whether the intended fabric can tolerate the manufacturer’s recommended process.
For children’s clothing, select products specifically appropriate for the intended application and follow the manufacturer’s safety guidance.
A non-toxic label doesn’t automatically establish that a product is suitable for every use or direct skin application.
Keep paint away from food-contact surfaces and follow any warnings regarding children, ventilation, or heat.
For beginners, a fabric marker with clear application, curing, and washing instructions is generally easier to use than a product with uncertain textile compatibility.
Frequently Asked Questions
Do Acrylic Paint Markers Work on Fabric?
Yes, some acrylic paint markers can be used on fabric when their formulation is suitable for textiles.
However, not all acrylic paint markers are intended for washable clothing.
Certain products are designed mainly for paper, wood, stone, or prepared artist canvas.
For T-shirts, tote bags, and other washable items, choose a marker whose manufacturer explicitly supports the relevant fabric and provides suitable fixing and care instructions.
Will Paint Markers Wash Off Clothes?
Some paint markers may wash out, fade, or become damaged when used on clothing.
Fabric-specific markers designed for washable textiles may provide better durability when applied and fixed correctly.
The result depends on the marker formulation, fabric type, curing process, and washing conditions.
Always check the manufacturer’s wash-resistance claims and follow both the product instructions and garment care label.
Can You Use Paint Markers on Cotton T-Shirts?
Yes, cotton T-shirts can be decorated using paint markers specifically suitable for cotton fabric.
Cotton is a common material for textile craft projects, but some markers may bleed into its fibres.
Prepare the fabric as directed, place a protective barrier between the garment layers, and test your colours before beginning.
Follow any required fixing process and allow the recommended curing time before washing.
Do Paint Markers Work on Polyester?
Some paint markers can work on polyester, but suitability depends on the specific product.
Certain fabric markers are primarily designed for cotton and may not perform reliably on synthetic fibres.
Polyester can also have finishes that affect paint adhesion.
Choose a marker explicitly recommended for polyester or the relevant fabric blend, and check whether its fixing method is compatible with the garment’s care instructions.
Do You Have to Heat Set Paint Markers on Fabric?
Not always.
Some fabric paint markers require heat-setting to achieve their intended wash resistance, while others use air curing or alternative fixing methods.
General-purpose paint markers may not have any approved textile-fixing procedure.
Follow the manufacturer’s instructions rather than automatically ironing every design.
If the required heat-setting process is unsuitable for your fabric, choose a compatible alternative product.
Can You Use Paint Markers on Denim?
Yes, suitable textile paint markers can be used to decorate denim.
Denim’s woven texture may make very fine details difficult, and dark colours can reduce the visibility of translucent paints.
Choose markers compatible with denim or its fibre composition.
For dark denim, consider opaque fabric paint pens designed for darker materials.
Test the marker and follow the recommended fixing and washing instructions.
How Long Should You Wait Before Washing Painted Fabric?
The waiting period depends on the paint marker’s formulation and fixing requirements.
Some products require a particular drying period followed by heat-setting, while others need additional air-curing time.
There isn’t one universal waiting period that applies to every fabric marker.
Follow the manufacturer’s instructions before washing the decorated item.
Washing too early may affect paint adhesion, colour retention, or the finished design.
Are Permanent Paint Markers Safe for Clothing?
A permanent paint marker isn’t automatically suitable for clothing simply because it produces durable marks.
Some products contain formulations intended for rigid surfaces rather than wearable textiles.
Others may have solvent-related handling requirements or leave an uncomfortable finish.
For clothing, choose markers specifically approved for the intended fabric and application.
Read the safety information and follow the manufacturer’s instructions, particularly when decorating children’s garments.
Final Thoughts
So, do paint markers work on fabric? Yes, they can, provided you choose a suitable formulation and follow the correct preparation, application, and care instructions.
Fabric-specific paint pens and appropriately labelled acrylic paint markers can be useful for decorating cotton tote bags, T-shirts, denim accessories, fabric pouches, and handmade patches.
However, not every paint marker is designed for washable textiles.
A marker that works well on wood or artist canvas may fade, crack, or wash away when applied to clothing.
Before starting, check the fabric composition and choose markers intended for that material.
Prepare the textile properly, protect underlying layers, and test the paint on a spare sample whenever possible.
Apply colour in controlled amounts to reduce bleeding and unnecessary stiffness.
After decorating, allow the artwork to dry and complete any manufacturer-required fixing process.
For washable items, follow both the marker’s care recommendations and the garment’s instructions.
If you’re new to fabric painting, a simple cotton tote bag or small fabric patch is a practical first project.
These materials provide manageable surfaces for experimenting with lettering, floral designs, and decorative patterns.
With compatible markers, careful application, and appropriate aftercare, you can create colourful fabric decorations that are better suited to everyday use.