
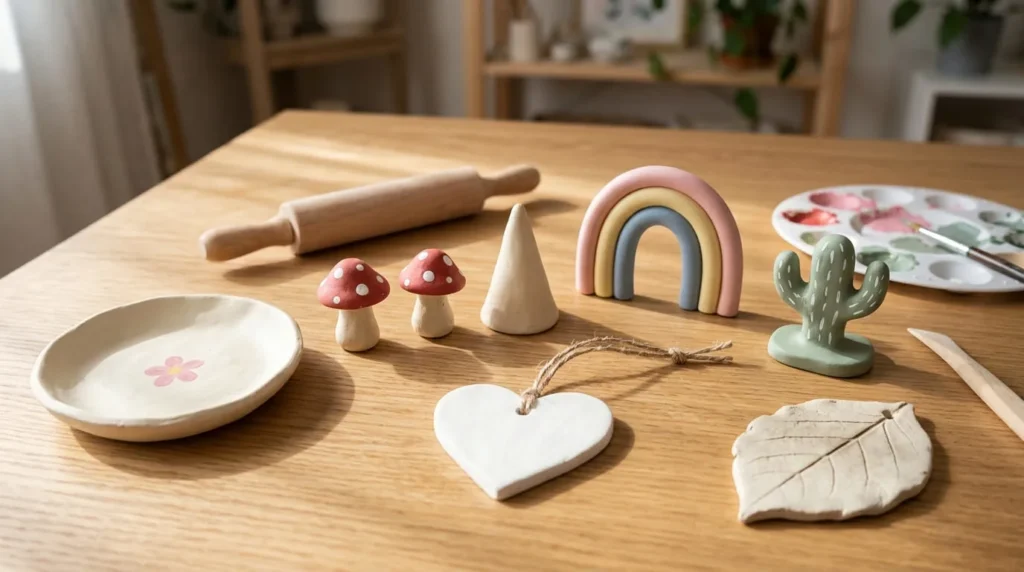
DIY clay crafts for beginners are a fun and creative way to make beautiful handmade decorations at home. You do not need expensive tools, professional pottery skills, or a special workshop to get started.
With a little air-dry clay and a few simple supplies, you can create trinket dishes, cute mushrooms, small ornaments, fridge magnets, and many other decorative pieces.
Air-dry clay is a good starting material because it hardens without needing a pottery kiln. You can shape it with your hands, use basic tools to create patterns, and decorate your finished projects with paint.
The best approach is to begin with simple shapes and learn a few basic techniques before trying more detailed designs.
In this guide, you will discover 15 easy clay craft ideas, learn how to work with air-dry clay, and follow a step-by-step tutorial for making a small decorative trinket dish.
What Is the Best Clay for Beginners?
Choosing the right clay can make your first crafting experience much easier.
Different types of clay have different properties. Some harden naturally when exposed to air, while others require baking or firing.
Before starting a project, it is important to understand which type of clay you are using and how it should be handled.
Air-Dry Clay for Easy Home Crafts
Air-dry clay is one of the easiest materials for beginner home crafts.
It is soft and workable when fresh and gradually becomes firm as moisture leaves the material.
You can use it to create small dishes, decorative shapes, ornaments, and miniature figures.
One of its main advantages is that it does not require a pottery kiln.
You can shape the clay using your hands and basic household tools, then leave it to dry according to the manufacturer’s instructions.
Air-dry clay is especially useful for decorative projects that will be kept indoors.
However, ordinary air-dry clay is not automatically waterproof or food-safe after drying.
Polymer Clay for Small Decorative Projects
Polymer clay is another popular material for handmade crafts.
It is often used for miniature decorations, beads, charms, and small decorative objects.
Unlike air-dry clay, polymer clay generally needs to be cured in an oven following the manufacturer’s specific temperature and time instructions.
It should not be left to air-dry as a replacement for proper curing.
Polymer clay is available in many colors, which can be helpful if you want to create decorations without painting every piece afterward.
However, beginners must follow the product’s safety and curing instructions carefully.
Traditional Pottery Clay for Ceramic Projects
Traditional pottery clay is commonly used for making ceramic bowls, mugs, plates, and sculptures.
It is shaped while soft and then dried before being fired in a pottery kiln.
Kiln firing changes the clay into a ceramic material.
Depending on the project, the piece may also require suitable glazing and additional firing.
Traditional pottery clay is useful for people who want to learn ceramics, but it is not always the most convenient option for simple home crafts.
A finished ceramic object cannot be made by simply leaving ordinary pottery clay to dry in the air.
Which Clay Should a Complete Beginner Choose?
For the projects in this article, air-dry clay is a practical starting choice.
It is easy to shape, does not require kiln firing, and works well for many small decorative crafts.
You can begin with a simple heart, ornament, or trinket dish before trying more complicated figures.
Choose a clay product suitable for the type of project you want to make.
Read the packaging instructions before beginning because different air-dry clay products may have different drying times, thickness recommendations, and finishing requirements.
What Supplies Do You Need for DIY Clay Crafts?
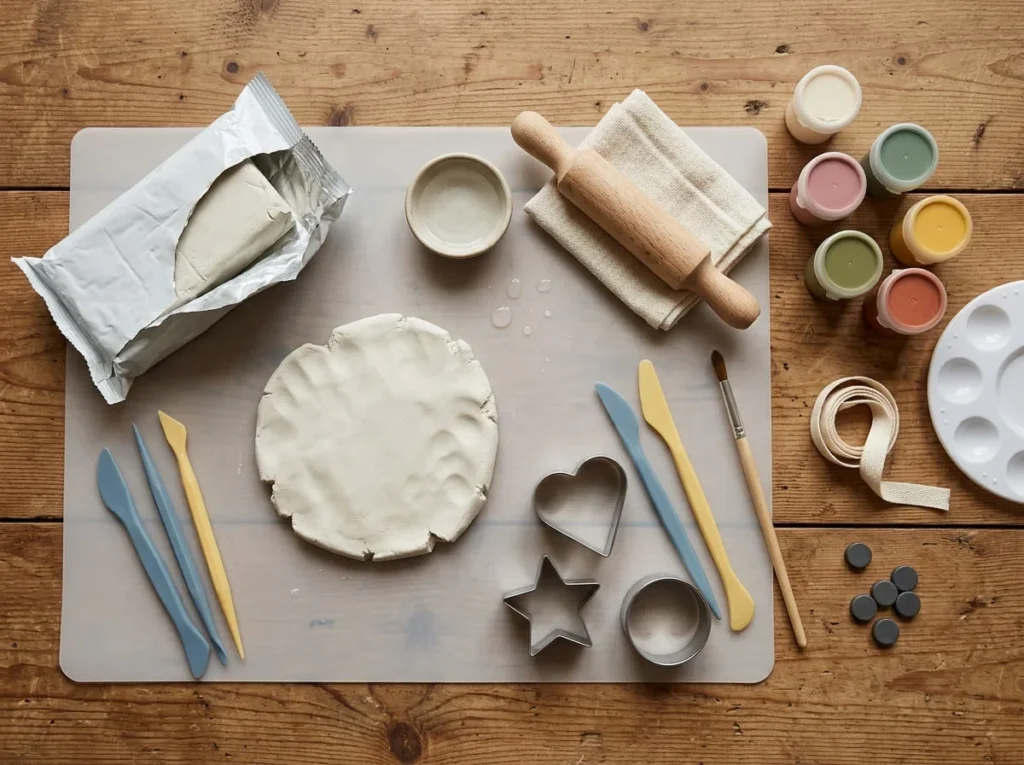
You do not need professional pottery equipment to make simple clay crafts at home.
Many beginner projects can be completed using your hands, a rolling pin, and a few ordinary craft tools.
Start with basic supplies and add more tools as you become comfortable working with clay.
Choosing Beginner-Friendly Air-Dry Clay
Choose a commercially prepared air-dry clay recommended for general craft projects.
Look for a product that is easy to shape and suitable for the decorations you want to create.
Some air-dry clays feel smoother, while others may have a slightly different texture.
Check the product instructions for handling, recommended thickness, drying, and storage.
For your first project, choose enough clay to create a few small decorations without buying an unnecessarily large amount.
Keep unused clay properly sealed so it does not begin drying before you need it.
Basic Clay Shaping Tools
A few simple tools can help you create attractive clay shapes.
A small rolling pin is useful for flattening clay into an even layer.
Plastic modeling tools can help you create lines, smooth surfaces, and shape small details.
You can also use suitable craft cutters to make circles, hearts, stars, and flowers.
A clean plastic card may help create straight edges or gently lift a clay shape from the work surface.
Choose tools that are appropriate for your clay and easy to handle.
Keep clay crafting tools separate from items used for food preparation.
Water, Soft Brushes, and Work Surface
Prepare a clean, protected surface before working with clay.
A suitable nonstick craft mat or another surface recommended for your clay can make shaping easier.
Keep a small container of water nearby if your clay manufacturer allows water to be used for smoothing.
A soft brush can help you apply a very small amount of water to rough areas.
Avoid soaking the clay or making it excessively wet.
Too much water can make some air-dry clays difficult to shape and may affect the strength of small details.
Keep a soft cloth nearby for cleaning your hands and tools.
Optional Paints and Decorative Supplies
Once air-dry clay has dried properly, you can decorate many projects using suitable acrylic paint.
For example, you might paint a small dish cream and add a pink flower in the center.
You can also create colorful clay hearts, mushrooms, and ornaments.
Other optional supplies include ribbons, simple texture stamps, decorative cords, and appropriate craft magnets.
Choose decorations that suit the finished object’s purpose.
Avoid attaching small loose parts to projects intended for very young children.
You do not need to decorate every clay craft with paint. Natural clay colors can also look beautiful.
Sanding Tools and Protective Finishes
Some dried air-dry clay projects may have slightly rough edges.
If the manufacturer allows sanding, you can smooth small imperfections carefully using suitable fine abrasive material.
Work gently to avoid breaking thin or delicate sections.
Follow the product’s dust-control instructions and avoid breathing sanding dust.
You may also choose to apply a protective finish after painting.
Use a product compatible with your clay and paint.
Remember that ordinary craft sealer does not automatically make air-dry clay waterproof, food-safe, or suitable for high temperatures.
Basic Clay Techniques Every Beginner Should Know
Before trying your first clay project, it helps to practice a few simple shaping techniques.
You do not need to master every pottery method.
Learning how to roll, cut, join, and smooth clay can make most beginner projects easier to complete.
How to Roll Clay into an Even Slab
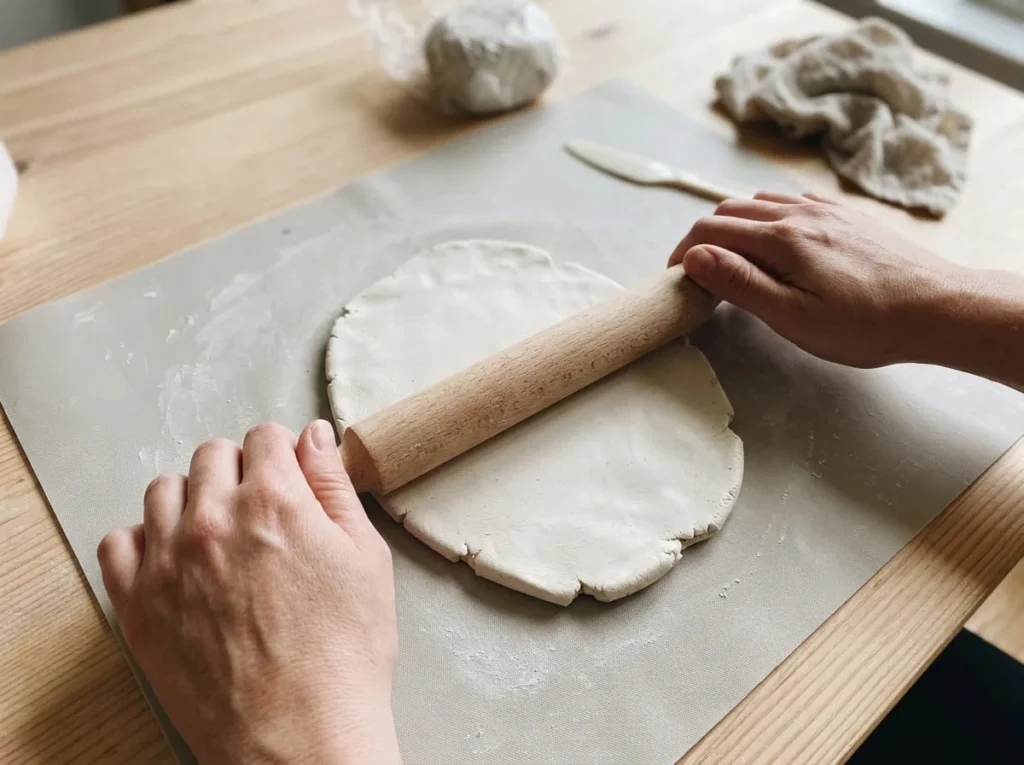
A clay slab is simply a flattened piece of clay.
Start by placing a small amount of soft clay on your prepared work surface.
Press it gently with your hands to create a thick, flat shape.
Then use a rolling pin to flatten it more evenly.
Turn or reposition the clay carefully when needed so it does not stick to the surface.
Try to keep the thickness reasonably consistent across the slab.
Avoid making the clay extremely thin because delicate sections may crack or break during drying.
Follow your clay manufacturer’s thickness recommendations.
How to Make Simple Clay Balls and Coils
Clay balls and coils are useful for creating small decorations.
To make a ball, take a small piece of clay and roll it gently between your palms.
Use light, even pressure until the shape becomes rounded.
To create a coil, place a piece of clay on your work surface and roll it back and forth with your hands.
This creates a long, rope-like shape.
You can use clay balls to make flower centers, beads, or small decorative figures.
Coils are helpful for creating rainbow decorations, raised borders, and simple patterns.
How to Create Shapes with Cutters
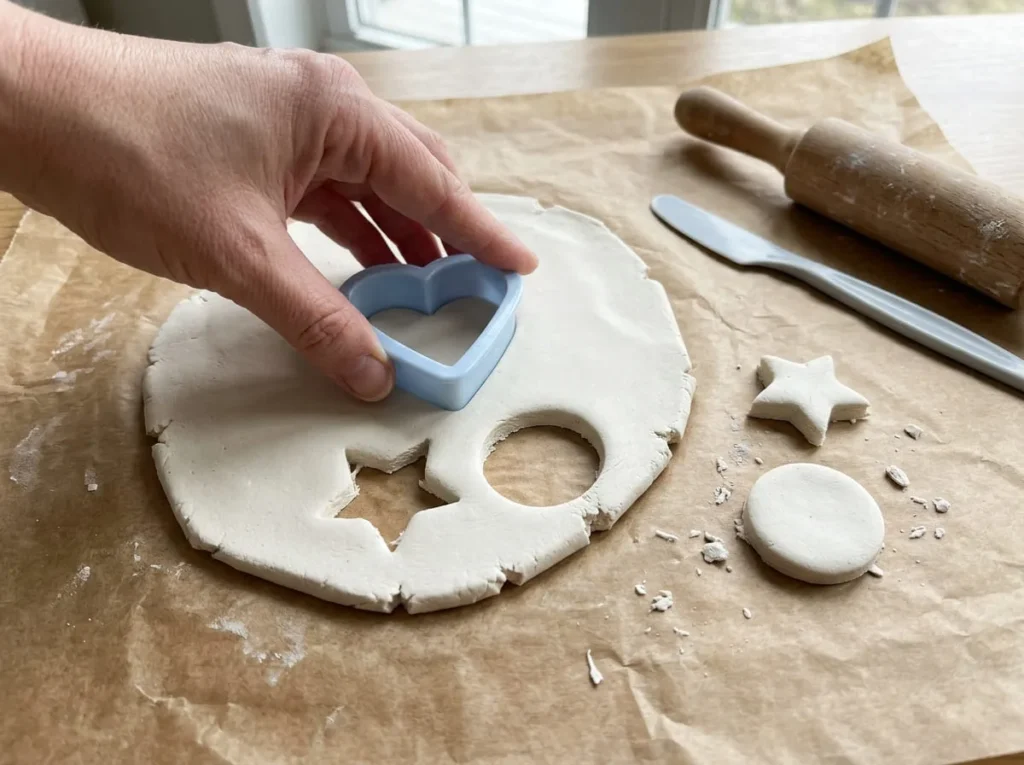
Clay cutters can help beginners create neat shapes without complicated drawing.
Start by rolling your clay into a suitable slab.
Place a clean craft cutter on the surface and press it down gently.
Lift the cutter carefully to reveal the shape.
Remove the extra clay from around the edges.
You can use this technique to create stars, hearts, circles, and flowers.
If the cut edges look rough, smooth them gently while the clay is still workable.
Avoid stretching the shape when lifting it from the work surface.
How to Join Two Pieces of Clay
Some clay projects require separate pieces to be connected.
For example, a miniature mushroom may have a stem and cap made from two different pieces.
Joining methods depend on the type of air-dry clay.
For suitable clay products, lightly roughening the surfaces where they meet may help create a stronger connection.
This is sometimes called scoring.
Some products also allow a small amount of water or clay paste to help join the pieces.
Follow the manufacturer’s recommendations rather than using excessive moisture.
Press the parts together gently and support the joined shape while it dries.
How to Smooth Clay Edges
Smooth edges can make clay crafts look cleaner and feel more comfortable to handle.
After shaping your project, check for small cracks, rough marks, or uneven sections.
Use your fingertips or a suitable modeling tool to gently smooth the clay.
If your clay instructions permit it, apply a tiny amount of water with a soft brush to help soften minor surface marks.
Avoid adding too much moisture.
For thin decorations, work carefully because excessive pressure can change the shape.
Small handmade imperfections are normal and do not need to be completely removed.
How to Keep Unused Clay from Drying Out
Air-dry clay begins losing moisture when it is exposed to air.
Take out only the amount you need for your current project.
Return unused clay to its original packaging or another storage container recommended by the manufacturer.
Seal the package carefully.
Avoid leaving clay uncovered on the worktable while you complete other tasks.
If your hands or tools become covered in dried clay, clean them according to the product instructions.
Proper storage can help keep unused material workable for future projects.
How to Make an Easy Air-Dry Clay Trinket Dish Step by Step
A small clay trinket dish is one of the easiest DIY clay crafts for beginners.
You can use it to hold dry jewelry, rings, or other lightweight decorative items.
The project uses a simple flat clay shape with gently raised edges.
You do not need a pottery wheel or kiln.
For this tutorial, we will make a small round dish and decorate it with a cream background and a simple pink flower after the clay has dried.
Remember that an ordinary air-dry clay trinket dish is intended for decorative storage, not for serving food or holding water.
Step 1: Prepare Your Clay and Workspace
Start by covering your worktable with a suitable craft mat.
Make sure the surface is clean and stable.
Gather your air-dry clay, rolling pin, round cutter or suitable template, modeling tool, and any other materials recommended for your clay.
Take a portion of clay from the package.
Keep the remaining clay sealed so it does not dry out.
Gently press the clay between your hands to make it easier to shape if the product instructions recommend doing so.
Remove any obvious air gaps or loose pieces while working.
The clay should feel suitable for rolling without crumbling or becoming overly sticky.
Step 2: Roll the Clay into a Smooth Slab
Place the clay on your prepared work surface.
Use your hands to flatten it gently into a thick, rounded shape.
Then move a rolling pin over the clay with even pressure.
Roll in different directions as needed to create a reasonably smooth slab.
Try to keep the thickness consistent.
Pay particular attention to the edges because thin sections may become fragile after drying.
If the clay sticks to your tools, use a suitable nonstick surface or another method recommended by the manufacturer.
Do not add large amounts of water simply to make the clay easier to roll.
Once the slab is even, you can begin cutting your dish shape.
Step 3: Cut Out a Simple Round Shape
Choose a round craft cutter or a clean circular template suitable for clay.
Place it gently on the flattened slab.
Press the cutter down evenly to create a circle.
If you are using a template, trace around it with a suitable modeling tool.
Carefully remove the extra clay from around the circle.
Set the leftover clay aside and keep it covered if you plan to use it again.
Check that the round shape has a smooth outline.
If any edges are uneven, gently correct them with your fingers or a modeling tool.
Try not to stretch the clay while lifting or moving it.
Step 4: Gently Shape the Dish
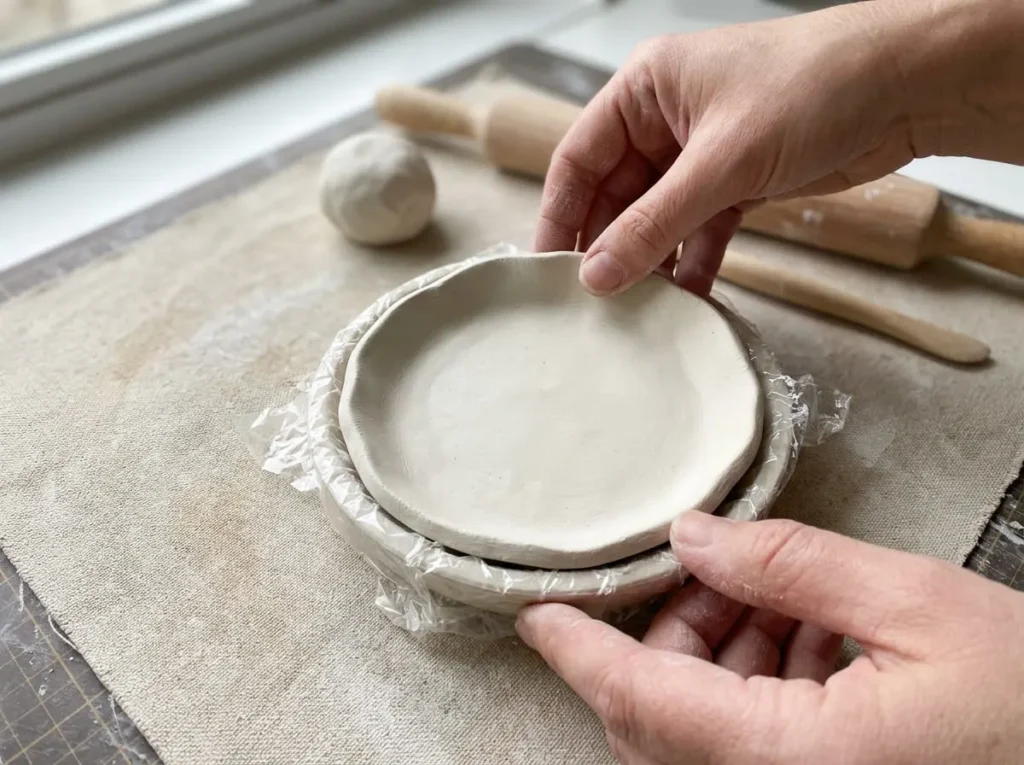
Now turn the flat clay circle into a shallow trinket dish.
Place the circle over a suitable shallow mold or form that is recommended for use with your clay.
Gently press the clay into a shallow curved shape.
You can also lift the outer edge slightly with your fingers if the clay is firm enough to hold its shape.
Work slowly around the edge so the curve remains reasonably even.
Avoid making the sides too tall or thin.
A shallow dish is easier for beginners because it requires less shaping and is less likely to lose its form.
Make sure the center remains wide enough to hold small jewelry items.
The dish should have a stable base and gently raised sides.
Step 5: Smooth the Surface and Edges
After shaping the dish, inspect the upper surface and edges.
You may notice small fingerprints, rough areas, or uneven sections.
Use your fingertips or a suitable modeling tool to smooth these areas gently.
If the clay manufacturer allows it, apply a very small amount of water with a soft brush to smooth minor marks.
Avoid soaking the dish.
Check that the edges are not extremely thin.
You can also soften any sharp-looking corners to create a comfortable rounded edge.
Do not worry about making the dish perfectly symmetrical.
A slightly handmade appearance can give your project a charming character.
Step 6: Allow the Dish to Dry Completely
Place your shaped dish in a clean location suitable for drying.
Follow the clay manufacturer’s instructions for drying conditions, support, and handling.
Some projects may need to remain supported by their mold for part of the drying process.
Other clay products may require a different method.
Avoid removing the dish from its support too early if doing so could distort its shape.
Drying time depends on the clay formulation, thickness, temperature, and humidity.
Do not assume the dish is fully dry simply because the outer surface feels firm.
Allow the project to dry completely before painting.
How Can You Reduce Cracks While Drying?
Cracks may appear when clay dries unevenly or when parts of the project are too thin.
Try to keep the dish reasonably consistent in thickness.
Avoid adding excessive water during shaping.
Do not place the project near strong direct heat unless the clay manufacturer specifically recommends that drying method.
Keep the dish properly supported while it dries.
If small surface cracks appear, check the product instructions for suitable repair methods.
Some air-dry clays can be repaired with compatible clay paste or another manufacturer-recommended material.
Step 7: Paint a Simple Decorative Design

Once the clay dish has dried completely and is ready for painting, you can decorate it.
For this project, use cream, pink, and yellow acrylic paint.
Start by painting the dish with a suitable cream background.
Use a soft brush and apply the paint in controlled layers.
Allow the background to dry before adding the flower.
Lightly mark a small circle near the center of the dish.
Paint five rounded pink petals around the circle.
Once the petals are dry enough for another color, fill the flower center with yellow acrylic paint.
You can leave the rest of the dish plain or add a few small decorative dots near the flower.
Keep the design simple so the shape of the handmade dish remains the main feature.
Step 8: Apply a Suitable Protective Finish if Needed
A protective finish may help reduce surface wear on a painted clay decoration.
However, not every air-dry clay project requires sealing.
If you choose to apply a finish, select one recommended for your clay and acrylic paint.
Allow the paint to dry or cure as directed before applying another coating.
Test the finish on a spare painted clay piece when possible.
Follow the manufacturer’s application and curing instructions carefully.
Do not assume that sealing makes ordinary air-dry clay waterproof, food-safe, or suitable for holding liquids.
For this trinket dish, the intended use remains dry decorative storage.
Step 9: Use Your Finished Trinket Dish
After the dish and any protective finish are fully ready for handling, you can display your finished project.
Place it on a stable desk, dressing table, or bookshelf.
Use it to hold lightweight dry items such as rings, small jewelry pieces, or decorative objects.
Avoid placing wet items, food, or liquids inside the dish unless the complete material and finish have been specifically approved for that purpose.
Handle the dish gently because ordinary air-dry clay can be more fragile than kiln-fired ceramic.
Your first handmade clay trinket dish is now complete, giving you a simple foundation for creating more decorative clay projects at home.
15 Easy DIY Clay Crafts for Beginners to Try
Once you have learned how to make a simple trinket dish, you can explore many other creative projects using air-dry clay.
You do not need expensive tools or advanced pottery skills to make beautiful handmade decorations. Many beginner clay crafts use simple shapes such as balls, circles, hearts, and coils.
You can create small gifts, decorative figures, ornaments, and useful accessories with a few basic supplies.
The following DIY clay crafts for beginners are easy to understand and suitable for practicing different shaping techniques.
For each project, use air-dry clay that is suitable for the intended craft. Follow the manufacturer’s instructions for joining pieces, drying, painting, and finishing.
1. Simple Clay Trinket Dish
Difficulty: Very easy
Materials: Air-dry clay, rolling pin, round cutter, optional acrylic paint.
A small clay trinket dish is one of the easiest projects for beginners because it uses a simple round shape.
You can make a shallow dish for holding rings, earrings, or other lightweight dry items.
Once you understand the basic shaping method, you can experiment with different designs.
For example, you might create a heart-shaped dish or decorate a round dish with colorful dots.
How to Make a Round Clay Trinket Dish
- Take a small amount of air-dry clay and place it on a clean work surface.
- Gently flatten the clay using your hands.
- Use a rolling pin to create an even slab.
- Cut a circle using a suitable clay cutter.
- Carefully lift the edges to create a shallow dish.
- Smooth any rough areas using a suitable modeling tool.
- Allow the dish to dry completely according to the clay manufacturer’s instructions.
- Decorate the dried dish with acrylic paint if desired.
- Apply a compatible protective finish if needed for decorative use.
You can paint small pink dots around the edge or leave the natural clay surface visible.
Keep the dish shallow so it remains easy to shape and has a stable base.
Beginner tip: Use an even clay slab and avoid making the edges too thin. A simple shallow dish is easier to shape and less likely to become damaged during drying.
2. Cute Mini Clay Mushrooms
Difficulty: Very easy
Materials: Air-dry clay, red acrylic paint, white acrylic paint, soft brown acrylic paint.
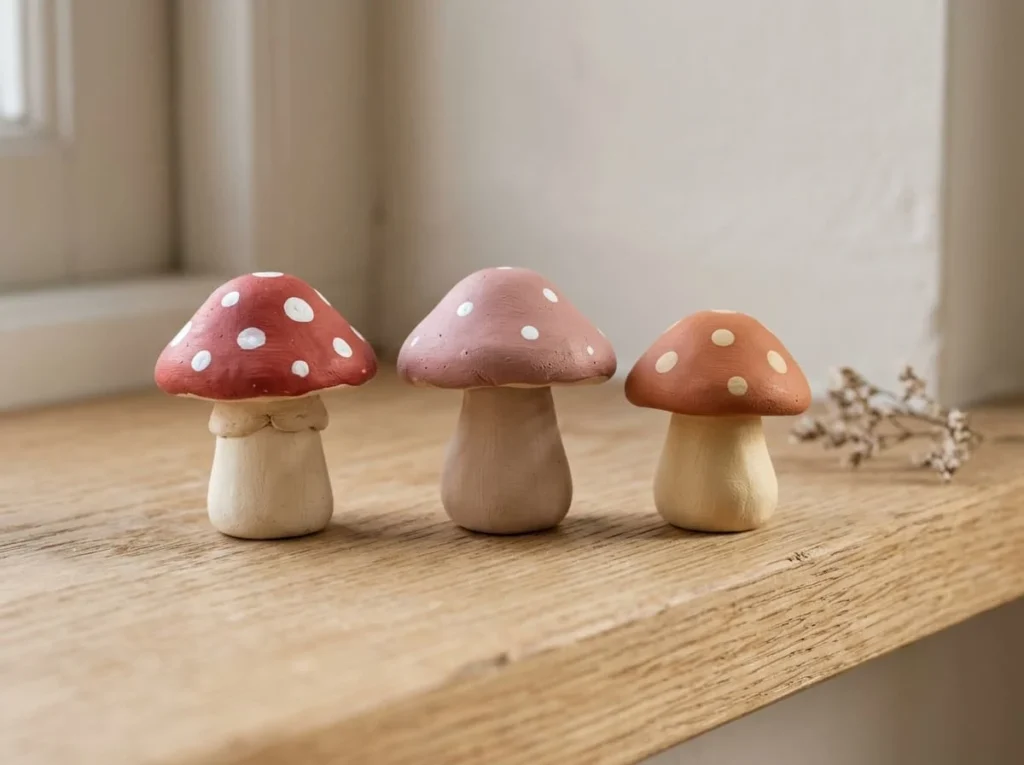
Mini clay mushrooms are cute handmade decorations that can brighten a desk, bookshelf, or small decorative display.
They are especially suitable for beginners because the basic design uses only two main shapes.
You need a short rounded stem and a simple dome-shaped mushroom cap.
After drying, you can paint the cap red and add small white dots.
How to Make Mini Clay Mushrooms
- Take a small portion of air-dry clay and roll it into a smooth ball.
- Gently shape the ball into a short, thick cylinder for the mushroom stem.
- Take another piece of clay and roll it into a slightly larger ball.
- Press the second ball gently to create a rounded mushroom cap.
- Flatten the underside of the cap slightly where it will connect to the stem.
- Join the two pieces using the method recommended for your clay, such as suitable scoring and clay paste where permitted.
- Make sure the cap rests securely on the stem.
- Allow the mushroom to dry completely.
- Paint the cap red and the stem cream or soft brown.
- Once the red paint dries, add a few small white spots using a detail brush.
You can make several mushrooms using different cap colors.
For example, one mushroom could have a red cap, while another could be painted dusty pink.
Beginner tip: Keep the mushroom stem short and reasonably thick. A tall, thin stem may be more likely to break or become unstable.
3. Handmade Clay Fridge Magnets
Difficulty: Easy
Materials: Air-dry clay, simple clay cutters, acrylic paint, suitable craft magnets, compatible adhesive.
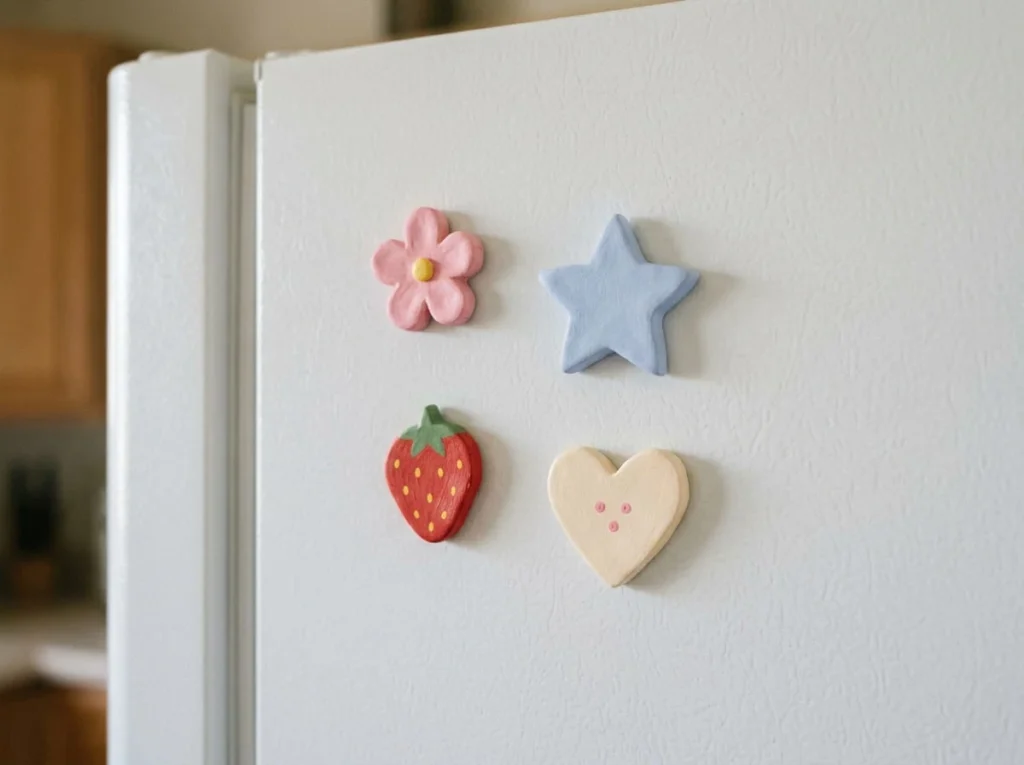
Handmade clay fridge magnets are a fun way to turn small clay shapes into decorations for suitable magnetic surfaces.
You can create hearts, flowers, stars, or simple fruit designs.
The most important thing is to keep the clay pieces small and lightweight so a suitable magnet can support them securely.
You should also choose magnets and adhesives appropriate for the finished craft.
How to Make Easy Clay Magnets
- Roll a small amount of clay into a smooth slab.
- Use a craft cutter to create a simple shape such as a heart or flower.
- Remove the extra clay and smooth the edges.
- Check that the decoration is not unnecessarily thick or heavy.
- Allow the clay shape to dry completely according to the manufacturer’s instructions.
- Paint the dried clay with your chosen acrylic colors.
- Allow the paint to dry before adding any protective finish.
- Apply a compatible finish if desired and allow it to cure.
- Attach a suitable craft magnet to the back using an adhesive recommended for the materials.
- Allow the adhesive to cure fully before placing the decoration on a magnetic surface.
Test whether the finished magnet stays securely in place.
If it slides or falls, do not continue using it on that surface.
Small magnets can be extremely dangerous if swallowed. Keep loose magnets and finished magnetic crafts away from young children and anyone who may put small objects in their mouth.
Beginner tip: Make small, lightweight clay shapes and attach the magnets securely. A heavy decoration may not stay in place even when the magnet appears strong.
4. Easy Clay Heart Decorations
Difficulty: Very easy
Materials: Air-dry clay, heart cutter, optional acrylic paint, ribbon.
Clay hearts are simple decorations that can be used for handmade gifts, hanging ornaments, or small decorative arrangements.
They are easy to make because you only need to roll the clay flat and cut out a heart shape.
You can leave the hearts plain or decorate them with pastel colors and simple patterns.
This project is a good choice for practicing smooth edges and working with clay cutters.
How to Make Clay Hearts
- Take a small piece of air-dry clay and gently flatten it with your hands.
- Roll the clay into an even slab using a rolling pin.
- Press a heart-shaped craft cutter into the clay.
- Remove the extra material from around the heart.
- Carefully lift the shape without stretching it.
- Smooth the edges with your fingers or a suitable modeling tool.
- If you want a hanging decoration, create a hole near the upper center while the clay is still workable.
- Allow the heart to dry completely.
- Paint it pink, cream, or another color if desired.
- Once the decoration and any finish are ready, thread a ribbon through the hole.
You can make several hearts with different colors and arrange them as a decorative collection.
Beginner tip: Make the hanging hole large enough for your ribbon and leave enough clay between the hole and the edge. A hole placed too close to the top may cause the decoration to break.
5. Simple Clay Ring Holder

Difficulty: Easy
Materials: Air-dry clay, optional acrylic paint.
A clay ring holder is a small decorative accessory that can help keep rings organized on a dressing table.
One of the easiest designs is a short cone-shaped holder with a flat base.
You can slide suitable rings over the narrow upper section when the clay has dried.
The shape does not need complicated details, making it a useful beginner project.
How to Make a Cone-Shaped Clay Ring Holder
- Take a suitable portion of air-dry clay and roll it into a smooth ball.
- Place the ball on a protected work surface.
- Gently press the lower section to create a broad, flat base.
- Use your fingers to shape the upper section into a rounded cone.
- Keep the tip thick enough to avoid creating a fragile point.
- Smooth the sides using gentle pressure.
- Check that the holder stands upright without wobbling.
- Allow the clay to dry completely according to the product instructions.
- Paint the ring holder if desired.
- Apply a suitable decorative protective finish if needed and allow it to cure before use.
A plain cream ring holder can look beautiful, or you can decorate it with a few small pink or gold-toned yellow dots.
Make sure the finished holder is stable before placing jewelry on it.
Beginner tip: Create a broad base and a gently rounded tip. A very thin cone may be fragile and could break during handling.
6. Miniature Clay Cactus Decorations

Difficulty: Easy
Materials: Air-dry clay, green acrylic paint, small modeling tool.
Miniature clay cacti are cheerful decorations for shelves, desks, and small indoor displays.
You can make a simple cactus using one thick rounded shape instead of creating several thin branches.
The finished decoration can be painted in different green shades with small white marks to represent cactus spines.
This project is useful for practicing simple three-dimensional shapes.
How to Make a Mini Clay Cactus
- Take a small portion of air-dry clay and roll it into a smooth ball.
- Gently shape it into a short upright oval.
- Flatten the bottom slightly so the cactus can stand securely.
- Use a modeling tool to add a few shallow vertical lines if desired.
- Avoid making deep cuts that could weaken the shape.
- Check that the cactus stands without falling.
- Allow the clay to dry completely.
- Paint the cactus using a medium green acrylic color.
- Add a few darker green lines for simple color variation.
- Once the green paint dries, use a small detail brush to paint short white spine marks.
You can make two or three cactus decorations using different green shades.
Place them together on a stable shelf to create a small decorative collection.
Beginner tip: Start with one rounded cactus body. Thin branches and complicated shapes can be difficult to join and may become fragile after drying.
7. Easy Clay Beads for Decorations
Difficulty: Very easy
Materials: Air-dry clay, suitable hole-making tool, optional acrylic paint, decorative string.
Clay beads are among the simplest crafts you can make with small leftover pieces of air-dry clay.
You can use finished beads for suitable decorative hanging projects, ornaments, or craft displays.
The basic process involves rolling small balls and creating holes before the clay dries.
You can experiment with different shapes and colors once you understand the technique.
How to Make Round Clay Beads
- Take a small amount of air-dry clay and divide it into several equal pieces.
- Roll each piece gently between your palms to create a small ball.
- Place the clay balls on a clean work surface.
- Use a suitable clay modeling tool to make a hole through the center of each bead.
- Work carefully so the beads do not become flattened.
- Check that each hole is wide enough for your chosen decorative string.
- Smooth any rough areas around the holes.
- Allow the beads to dry according to the manufacturer’s instructions.
- Paint the dried beads with simple colors or patterns if desired.
- Once the paint and any finish have cured, thread the beads onto suitable string.
You can create a matching collection using cream, pink, sage green, and pale blue.
Avoid adding very thick paint around the holes because it may block the opening.
Small beads present a choking hazard. Keep them away from young children and use them only in age-appropriate decorations.
Beginner tip: Create the holes before the clay dries. Trying to force a hole through a hardened bead may crack or break it.
8. Simple Clay Plant Markers
Difficulty: Easy
Materials: Air-dry clay, rolling pin, modeling tool, optional letter stamps and acrylic paint.
Clay plant markers are a creative way to label small indoor plants and herbs.
You can make simple flat clay labels with short plant names or decorative leaf impressions.
These markers look attractive in small indoor pots or sheltered displays.
However, ordinary air-dry clay may soften, crack, or deteriorate with repeated moisture exposure.
For this reason, basic air-dry clay markers are usually better for indoor decoration unless the complete material and finishing system is specifically suitable for outdoor use.
How to Make Clay Plant Labels
- Roll a small amount of air-dry clay into an even slab.
- Cut a simple rectangular or rounded label shape.
- If you want a stake-style marker, extend the lower section into a short, broad pointed shape.
- Smooth the edges carefully.
- Use a suitable modeling tool or letter stamps to create a short plant name.
- Choose simple words such as “MINT,” “BASIL,” or “THYME.”
- Make sure the letters are clear and not pressed too deeply.
- Allow the marker to dry completely according to the clay instructions.
- Add acrylic paint to the letters or background if desired.
- Apply a compatible finish if appropriate for its intended display location.
Use the finished markers in dry decorative holders or suitable sheltered arrangements rather than inserting ordinary unprotected air-dry clay directly into wet soil.
Beginner tip: Keep the lettering short and easy to read. Large simple letters are better than detailed handwriting on small clay labels.
9. DIY Clay Star Ornaments

Difficulty: Very easy
Materials: Air-dry clay, star-shaped cutter, rolling pin, ribbon, optional acrylic paint.
Clay star ornaments are simple handmade decorations that you can display around your home.
They are especially popular for holiday decorations, but you can also use them to decorate gift packages or create small hanging displays.
You only need a flat piece of clay, a star-shaped cutter, and a little ribbon.
You can leave the stars in their natural clay color or paint them with soft colors after drying.
How to Make Clay Star Ornaments
- Take a small amount of air-dry clay and place it on a clean work surface.
- Gently flatten the clay using your hands.
- Roll it into an even slab with a rolling pin.
- Press a star-shaped cutter into the clay.
- Remove the extra clay from around the star.
- Carefully smooth the edges and points using a suitable modeling tool.
- Make a small hanging hole near the top while the clay is still soft.
- Allow the star to dry completely according to the manufacturer’s instructions.
- Paint the dried ornament with white, cream, pale blue, or another suitable acrylic color.
- Once the paint and any protective finish are ready, thread a ribbon through the hole.
You can create several stars and hang them together as a simple decoration.
Beginner tip: Avoid making the star points extremely thin. Slightly rounded points are easier to handle and less likely to break during drying.
10. Simple Clay Flower Shapes
Difficulty: Easy
Materials: Air-dry clay, modeling tool, optional acrylic paint.
Clay flowers are a lovely choice if you enjoy handmade decorations inspired by nature.
You can create simple daisies, small blossoms, or flowers with rounded petals.
These shapes work well as decorations for shelves, craft displays, and handmade gifts.
For your first clay flower, choose a design with five rounded petals and one small center.
How to Shape an Easy Clay Flower
- Take five small pieces of air-dry clay and roll them into balls.
- Gently flatten each ball into a rounded petal.
- Place the petals in a circle on your work surface.
- Make a slightly smaller clay ball for the flower center.
- Lightly prepare the joining areas using the method recommended for your clay.
- Attach the petals and center carefully, making sure the pieces connect securely.
- Smooth the joined areas without pressing too hard.
- Allow the flower to dry completely while properly supported.
- Paint the petals pink, white, or yellow if desired.
- Add a contrasting color to the center after the petals have dried.
You can make several flowers with different colors and arrange them in a decorative collection.
Beginner tip: Keep the petals rounded and reasonably thick. Very thin petals can become fragile and may break when handled.
11. Cute Clay Rainbow Decoration
Difficulty: Easy
Materials: Air-dry clay, suitable modeling tool, acrylic paint in pastel colors.
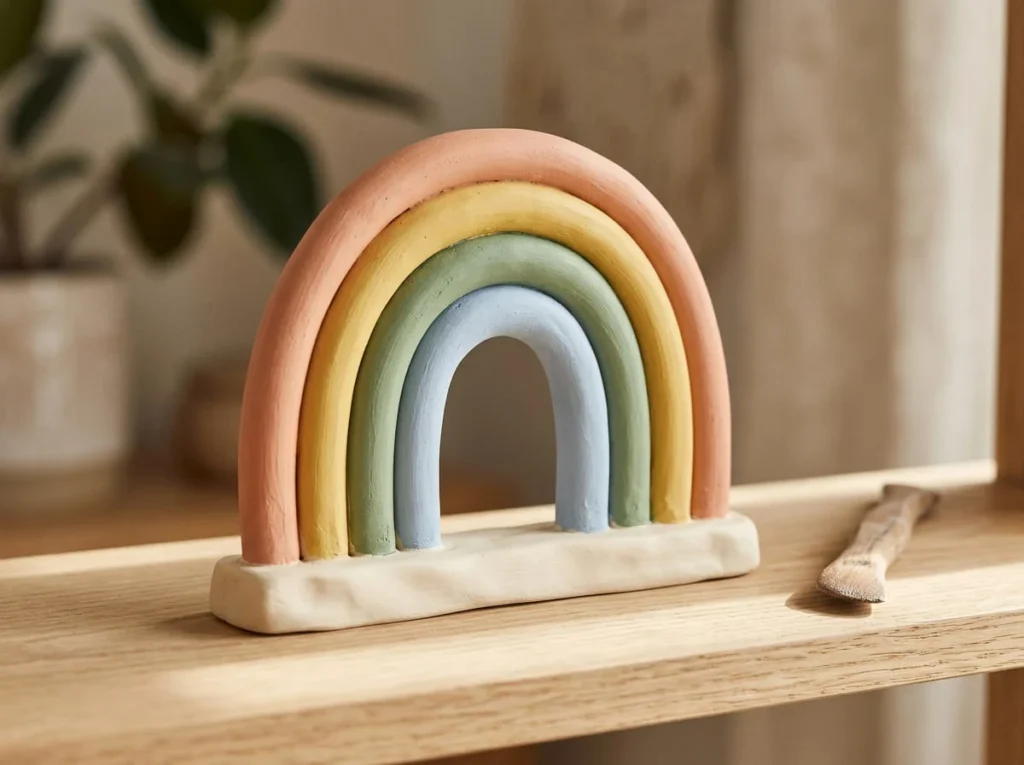
Clay rainbow decorations are cheerful projects that allow beginners to practice making coils.
You can create a small rainbow using a few curved clay pieces arranged together.
This design looks attractive on a shelf, desk, or decorative tray.
Using soft pastel colors can give the finished rainbow a simple handmade appearance.
How to Make a Mini Clay Rainbow
- Take three or four small portions of air-dry clay.
- Roll each portion into a smooth coil.
- Make the coils progressively shorter so they can form nested rainbow arches.
- Gently curve each coil into a rounded arch.
- Arrange the arches together on a stable work surface.
- Join the coils using a method recommended for your clay.
- If needed, attach them to a small flat clay base for additional support.
- Smooth the connections carefully without changing the rainbow shape.
- Allow the decoration to dry completely.
- Paint the arches using peach, yellow, sage green, and muted blue acrylic paint.
Make sure the decoration can stand securely if you want to display it upright.
You can also create a flat rainbow design that rests on a shelf without needing a separate stand.
Beginner tip: Use fewer, thicker arches rather than many thin coils. A simple rainbow is easier to assemble and generally more suitable for beginners.
12. Easy Clay Leaf Imprint Art
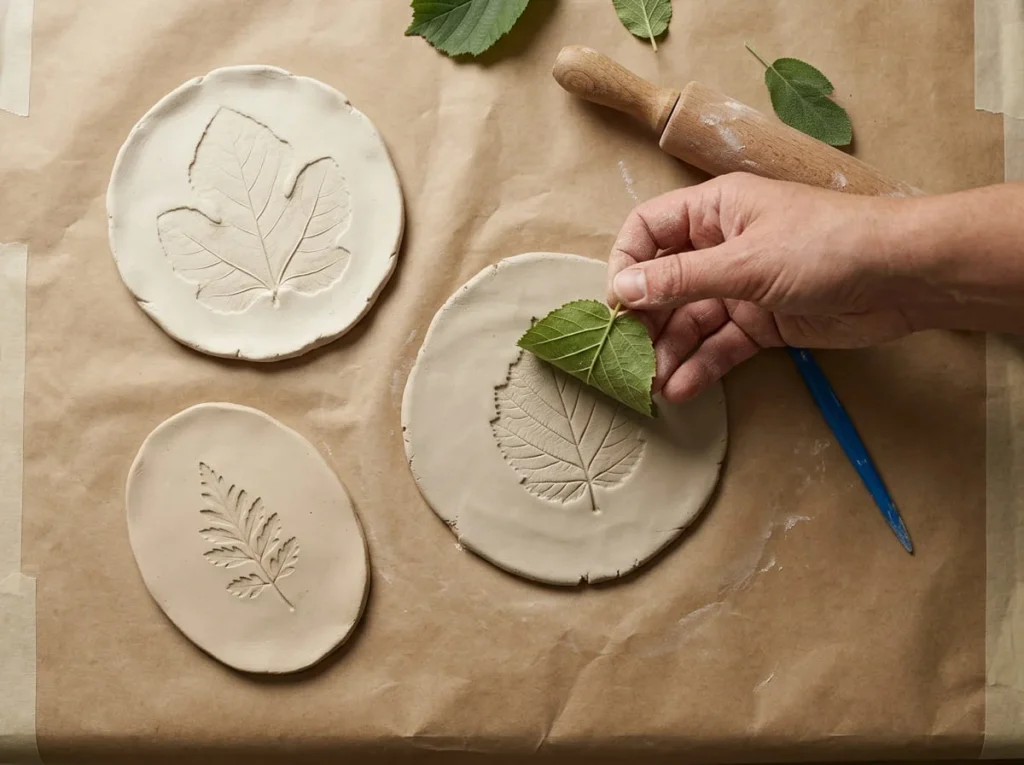
Difficulty: Very easy
Materials: Air-dry clay, rolling pin, clean textured leaf, suitable clay cutter.
Leaf imprint art is a beautiful way to bring natural patterns into handmade clay decorations.
You can use a clean leaf with visible veins to create an impression in soft clay.
The finished design can become a small decorative tile, hanging ornament, or simple display piece.
This project is easy because the leaf creates much of the pattern for you.
How to Make Leaf Impressions in Clay
- Take a small amount of air-dry clay and roll it into an even slab.
- Choose a clean, dry leaf with clear veins.
- Place the leaf on the clay with the raised vein side facing downward.
- Gently press the leaf into the surface.
- Use a rolling pin or your fingertips to apply light, even pressure.
- Carefully lift the leaf away from the clay.
- Check that the leaf pattern is visible.
- Cut the clay into a simple circle, square, or other suitable shape.
- Smooth the edges and allow the piece to dry completely.
- Leave the clay natural or add a little acrylic paint to highlight the leaf texture.
You can experiment with different leaves to create a small collection of natural patterns.
Avoid using leaves from unfamiliar plants that may irritate your skin.
Beginner tip: Choose a sturdy leaf with strong veins. Very delicate leaves may tear when you try to remove them from the clay.
13. Mini Clay House Decorations
Difficulty: Easy
Materials: Air-dry clay, rolling pin, suitable cutter, modeling tool, optional acrylic paint.
Mini clay houses can make charming decorations for a bookshelf or small home display.
You can create a simple house shape with a pointed roof and a few small window impressions.
You do not need to build a complicated hollow structure.
A flat house silhouette is easier for beginners and can still look attractive when decorated.
How to Make a Tiny Clay House
- Take a small amount of air-dry clay and roll it into an even slab.
- Use a suitable modeling tool to outline a simple house shape.
- Create a rectangular body with a pointed roof.
- Carefully cut away the extra clay.
- Smooth the edges and roof corners.
- Use a modeling tool to create shallow window and door impressions.
- Avoid pressing too deeply into the clay.
- Allow the house to dry completely on a suitable surface.
- Paint the walls cream or white and the roof terracotta if desired.
- Add simple window details after the main paint colors have dried.
You can make several small houses with slightly different roof shapes and colors.
Arrange them together on a stable shelf to create a miniature decorative village.
Beginner tip: Keep the house shape simple and reasonably thick. Thin walls and complicated hollow shapes are more difficult to construct and may crack during drying.
14. Decorative Clay Candle Plate
Difficulty: Easy
Materials: Air-dry clay, rolling pin, round cutter, optional acrylic paint.
A decorative clay candle plate can add a handmade touch to a shelf or table display.
You can make a small shallow plate using the same basic shaping skills learned in the trinket dish tutorial.
However, ordinary air-dry clay is not automatically heat-resistant or fire-safe.
For this project, use the finished plate only as a decorative display with an unlit candle or a battery-operated LED candle.
Do not place a burning candle directly on ordinary air-dry clay unless the entire finished product has been specifically verified as suitable for that use.
How to Make a Decorative Clay Candle Plate
- Prepare a clean work surface and take a suitable portion of air-dry clay.
- Roll the clay into an even slab.
- Cut a circle using a suitable clay cutter or template.
- Gently lift the outer edges to form a shallow plate.
- Smooth the surface and edges carefully.
- Check that the plate has a stable base.
- Allow the clay to dry completely according to the manufacturer’s instructions.
- Paint the finished plate cream, beige, or another soft color if desired.
- Allow the paint to dry and apply a compatible decorative finish if needed.
- Display an unlit candle or a battery-operated LED candle on the finished plate.
You can decorate the plate with simple dots, flowers, or a thin painted border.
Keep the decoration away from open flames and excessive heat.
Beginner tip: Make the plate broad and stable. Use it for decorative purposes only unless the clay and finishing materials have been specifically approved for another use.
15. Simple Clay Gift Tags
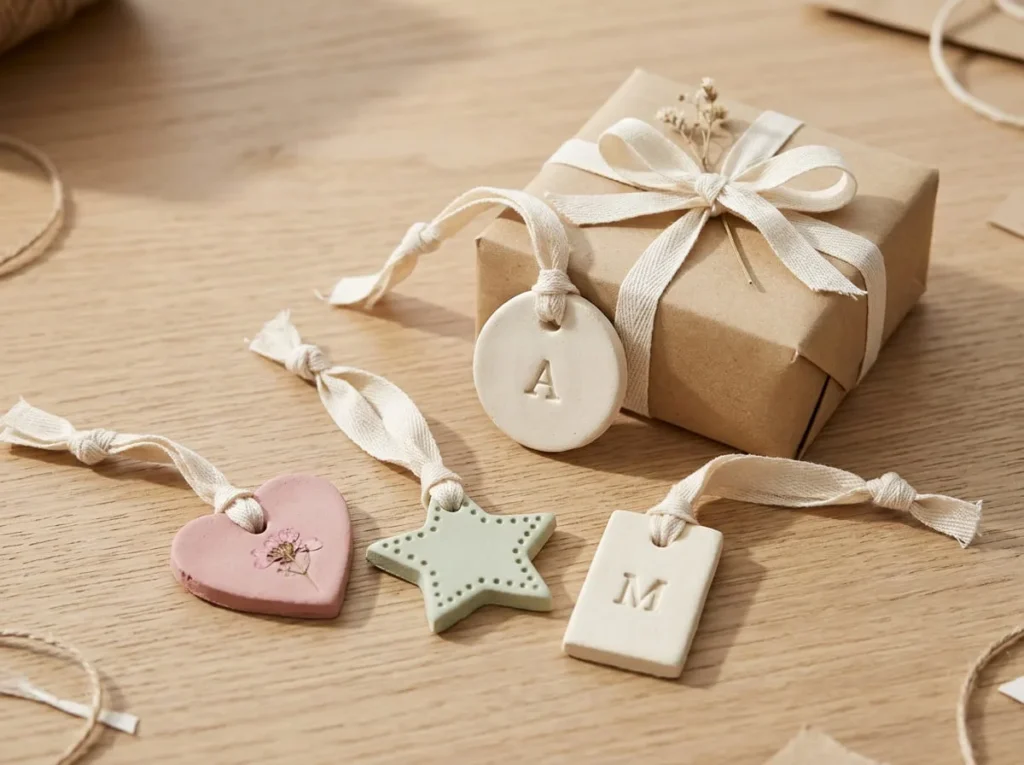
Difficulty: Very easy
Materials: Air-dry clay, small craft cutter, letter stamps, ribbon, optional acrylic paint.
Clay gift tags are a creative way to add a handmade decoration to a wrapped present.
You can make small hearts, circles, stars, or rectangular tags using air-dry clay.
Add a simple initial, short word, or decorative impression while the clay is still workable.
Once the tags are completely dry, you can attach them to suitable gift packaging with ribbon.
How to Make Personalized Clay Gift Tags
- Roll a small amount of air-dry clay into an even slab.
- Use a cutter to create a simple tag shape.
- Carefully remove the extra clay.
- Smooth the edges using your fingertips or a suitable modeling tool.
- Make a small hanging hole near one edge.
- Use letter stamps to create an initial or short word if desired.
- Allow the tag to dry completely.
- Paint the finished tag with a soft acrylic color if desired.
- Let the paint and any protective finish dry or cure as directed.
- Thread a ribbon through the hole and attach the tag to your gift.
You can create several matching tags using cream, pale pink, and sage green.
Keep the tags lightweight so they do not damage delicate gift wrapping.
Beginner tip: Use short words or single initials. Large, simple impressions are easier to create than complicated lettering on small clay surfaces.
How to Dry Air-Dry Clay Crafts Properly
Drying is an important part of making air-dry clay crafts.
Even a beautifully shaped decoration can crack or become damaged if it is handled or dried incorrectly.
The drying process depends on the type of clay, the thickness of your project, and the surrounding conditions.
Following the product instructions can help you avoid common problems.
Follow the Clay Manufacturer’s Drying Instructions
Different air-dry clay products have different drying requirements.
Some small, thin decorations may dry sooner than thick pieces.
However, there is no single drying time that applies to every clay project.
Read the instructions on your clay packaging before starting.
Pay attention to the recommended thickness, drying location, and handling requirements.
Allow enough time for the entire project to dry before painting or applying a protective finish.
Dry Your Projects on a Suitable Surface
Place your finished clay shapes on a clean surface recommended for the clay you are using.
Choose a location where the pieces will not be disturbed.
Make sure flat decorations are properly supported so they do not bend or change shape.
For curved projects, such as a trinket dish, you may need to keep the piece supported by a suitable mold during part of the drying process.
Follow the manufacturer’s guidance to reduce sticking and uneven drying.
Avoid Excessive Heat During Drying
Trying to dry clay too quickly can cause problems with certain air-dry clay products.
Strong direct heat may cause the outer surface to dry faster than the inside.
This can increase the risk of cracks or uneven shapes.
Unless the manufacturer specifically recommends it, avoid placing clay projects in a hot oven, directly beside a heater, or under intense heat.
Choose a suitable drying location and allow the process to happen naturally.
Check That Thick Pieces Are Fully Dry
Thick clay decorations can feel firm on the outside while still containing moisture inside.
For example, a small mushroom or cone-shaped ring holder may need more drying time than a thin flat ornament.
Do not rely only on surface appearance when deciding whether a piece is ready.
Follow the manufacturer’s drying guidance for the thickness of your project.
Wait until the clay is fully ready before sanding, painting, or sealing.
Handle Fragile Shapes Carefully
Some clay decorations become delicate while they are drying.
Thin petals, star points, and small joined pieces may break if handled roughly.
Avoid repeatedly moving unfinished projects.
If the product instructions recommend turning or repositioning a piece, do so carefully when it is firm enough to handle.
Support delicate areas when necessary.
Give each project enough space so nearby objects do not touch or damage it.
How to Paint and Decorate Air-Dry Clay
Painting can turn simple air-dry clay shapes into colorful handmade decorations.
You can use soft pastel colors, bright patterns, or natural shades to match your home.
The most important step is making sure the clay is fully dry and suitable for painting before you begin.
When Can You Paint Air-Dry Clay?
Many air-dry clay products can be painted after they have dried completely.
Painting too early may trap moisture or affect the finish.
Before decorating your project, follow the manufacturer’s instructions to confirm that the clay is ready.
Check for rough areas or loose particles.
If necessary, gently smooth the surface using a method suitable for the clay.
Remove any dust before applying paint.
How to Use Acrylic Paint on Clay Crafts
Acrylic paint can work well for decorating many air-dry clay projects.
Choose a product compatible with your clay.
Use a small flat brush to cover larger areas and a detail brush for smaller patterns.
Apply the paint in controlled layers.
Allow the previous layer to dry before adding another color when you need clean edges.
For example, you might paint a clay mushroom red and add white spots after the red paint dries.
You can also leave some clay surfaces unpainted for a natural handmade appearance.
How to Add Small Dots and Patterns
Simple dots, lines, and small flowers are useful decorations for clay crafts.
You can create dots using a fine detail brush or a suitable dotting tool.
For short lines, use a small brush with a controlled amount of paint.
Try decorating a clay heart with three small flowers or adding colorful dots around a trinket dish.
Avoid covering every surface with tiny details.
Simple patterns are often easier for beginners and allow the shape of the clay to remain visible.
Do Air-Dry Clay Crafts Need Sealing?
Not every air-dry clay decoration requires a protective finish.
For pieces that will be handled frequently, a compatible finish may help protect the painted surface from some wear.
However, ordinary craft sealer does not automatically make air-dry clay waterproof.
It also does not make clay suitable for holding food, liquids, or burning candles.
If you choose to seal your project, use a product recommended for the clay and paint.
Allow all materials to dry or cure according to the manufacturer’s instructions.
Keep ordinary decorative air-dry clay crafts away from prolonged moisture exposure.
Common Beginner Mistakes When Working with Clay
Making mistakes is a normal part of learning any new craft.
Some clay problems are easy to prevent when you understand how the material behaves.
The following mistakes are especially common when beginners first start working with air-dry clay.
Using Too Much Water
Some air-dry clay products allow small amounts of water for smoothing surfaces or joining pieces.
However, adding too much water can make certain clays overly soft and difficult to shape.
It may also affect the strength of delicate details.
Use water only as recommended by the clay manufacturer.
Start with a very small amount when permitted.
Making Clay Pieces Too Thin
Very thin clay sections can become fragile after drying.
This is especially important for flower petals, star points, and hanging ornament edges.
Try to keep the thickness reasonably consistent.
Follow the manufacturer’s thickness recommendations.
For beginner projects, simple shapes with sturdy edges are usually easier to handle.
Joining Pieces Without Proper Preparation
Some projects require two or more clay pieces to be connected.
If the joining surfaces are not prepared correctly, the pieces may separate as they dry.
For suitable clay products, gentle scoring and a recommended joining medium may help.
Do not assume every clay uses the same joining method.
Follow the instructions for your specific material and support delicate connections during drying.
Drying Clay Too Quickly
Trying to speed up the drying process can sometimes lead to cracks or uneven shapes.
Avoid exposing ordinary air-dry clay to strong heat unless the manufacturer recommends that method.
Allow projects to dry in appropriate conditions.
Thicker pieces may need more time than thin decorations.
Patience during drying can help protect the work you have already completed.
Painting Before the Clay Is Ready
Clay may feel firm before it is completely dry.
Applying paint too soon may affect adhesion or interfere with the remaining drying process.
Follow the clay manufacturer’s instructions before decorating.
Use paint suitable for the finished surface.
Allow each painted layer to dry properly before adding more details.
Assuming Air-Dry Clay Is Waterproof
Ordinary air-dry clay is not automatically waterproof after drying.
Repeated exposure to water may soften or damage some products.
Applying ordinary craft varnish does not guarantee permanent waterproofing.
Keep decorative projects away from prolonged moisture unless the complete material and finish are specifically rated for the intended exposure.
Using Decorative Clay for Food or Heat
A decorative clay dish should not automatically be used as a food bowl or drinking cup.
Similarly, ordinary air-dry clay decorations should not be treated as heat-resistant candle holders.
Food contact, water exposure, and open flames require materials specifically suitable for those uses.
For beginner projects, it is better to make decorative dishes for dry jewelry or use battery-operated LED candles in suitable displays.
Frequently Asked Questions
What Is the Easiest Clay Craft for Beginners?
Flat clay hearts, stars, and simple trinket dishes are among the easiest projects for beginners. These crafts use basic rolling, cutting, and smoothing techniques. They do not require advanced modeling skills or complicated tools.
Is Air-Dry Clay Good for Beginners?
Yes, air-dry clay is a practical choice for many beginner craft projects. It can be shaped by hand and does not require a pottery kiln. Follow the manufacturer’s instructions for handling, drying, and finishing.
Can You Make Clay Crafts Without a Kiln?
Yes, you can make many decorative crafts using air-dry clay without a kiln. This type of clay hardens as it dries. However, traditional pottery clay requires kiln firing to become finished ceramic, and polymer clay generally requires oven curing.
Do You Need to Bake Air-Dry Clay?
Most products sold as air-dry clay are designed to harden without baking. Follow the package instructions and avoid putting the clay in an oven unless the manufacturer specifically permits that method. Air-dry clay should not be confused with polymer clay.
How Long Does Air-Dry Clay Take to Dry?
Drying time depends on the clay product, project thickness, temperature, humidity, and drying conditions. Small, thin pieces may dry faster than thick decorations. Always follow the manufacturer’s instructions rather than assuming a fixed drying time.
Can You Paint Air-Dry Clay with Acrylic Paint?
Many air-dry clay projects can be decorated using compatible acrylic paint after the clay has dried completely. Use suitable brushes and apply paint in controlled layers. Allow the paint to dry properly before adding details or protective finishes.
How Do You Stop Air-Dry Clay from Cracking?
Try to keep the clay thickness reasonably even, avoid excessive water, and follow the recommended drying conditions. Do not force the clay to dry quickly using strong heat unless the product instructions permit it. Careful shaping and proper support can also help reduce cracking.
What Can You Make with Air-Dry Clay at Home?
You can make trinket dishes, decorative hearts, clay mushrooms, ornaments, ring holders, beads, magnets, leaf imprints, and small sculptures. Begin with simple shapes before moving to projects that require joining several pieces.
Can You Seal Air-Dry Clay to Make It Waterproof?
Some compatible coatings can improve resistance to moisture, but ordinary craft sealers do not automatically make air-dry clay waterproof. Protection depends on the clay and coating system. Avoid prolonged water exposure unless the finished product is specifically suitable for it.
Can You Make Cups or Food Bowls with Air-Dry Clay?
Ordinary air-dry clay is generally intended for decorative crafts rather than functional food containers. It should not be assumed suitable for holding drinks or serving food. Choose materials and production methods specifically approved for food-contact uses if you want to make functional tableware.
Is Air-Dry Clay Suitable for Kids?
Some air-dry clay products are designed for children’s craft activities. Choose age-appropriate materials and follow the manufacturer’s safety instructions. Adults should supervise the activity, especially when using sharp tools, small decorations, magnets, paints, or protective finishes.
How Do You Store Leftover Air-Dry Clay?
Keep unused air-dry clay sealed in its original packaging or another container recommended by the manufacturer. Avoid leaving the clay exposed to air because it may begin drying. Store it according to the product instructions so it remains workable for future projects.
Final Thoughts
DIY clay crafts for beginners are a simple way to explore your creativity and make handmade decorations at home.
Start with an easy project such as a clay heart, trinket dish, mushroom, or leaf imprint.
Use basic tools, follow the instructions for your chosen clay, and allow each project to dry completely before decorating.
Remember that handmade pieces do not need to look perfect. Small differences in shape and texture can make each decoration special.
As you become more comfortable with rolling, cutting, and joining clay, you can try more detailed projects and create your own designs.
With a little practice and patience, you can turn simple pieces of clay into beautiful handmade gifts and decorations.