
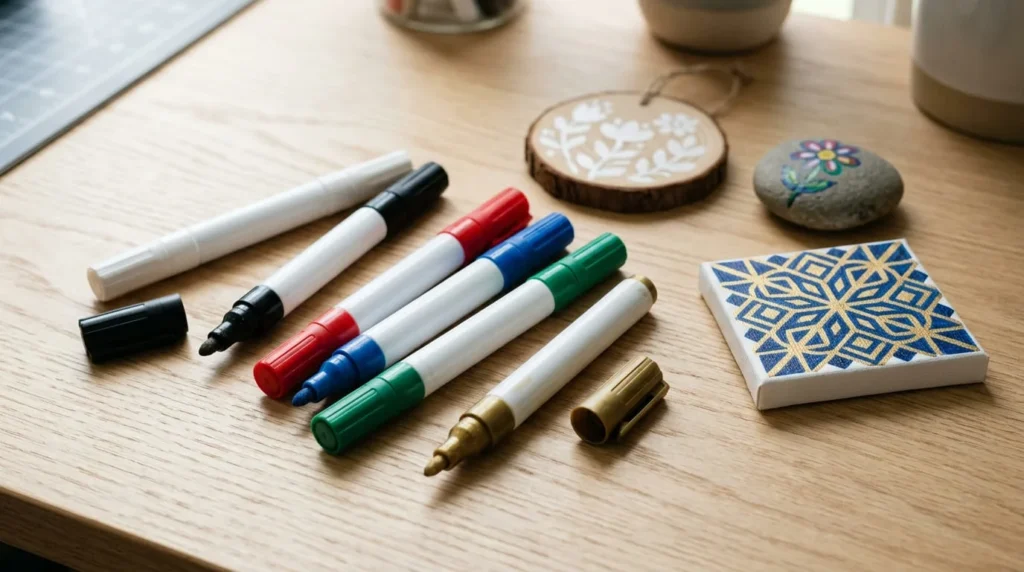
Permanent paint markers are useful tools for adding colourful designs, lettering, and decorative details to everyday objects. Whether you’re personalizing wooden decorations, painting rocks, or creating artwork on glass and metal, these markers offer a convenient alternative to traditional brushes and bottled paint.
However, not every permanent paint marker works equally well on every surface. The paint formulation, material preparation, and drying conditions all influence how well a design stays in place.
Understanding these differences can help you choose suitable markers and avoid common problems such as peeling, fading, or uneven coverage.
In this guide, you’ll learn how permanent paint markers work, explore their different types, discover which surfaces they can be used on, and find practical techniques for creating durable craft projects.
What Are Permanent Paint Markers?
Permanent paint markers are writing and drawing tools that dispense pigmented paint through a specially designed nib. They are commonly used to create decorative lettering, illustrations, labels, and painted details on a variety of compatible materials.
Unlike ordinary writing pens, paint markers contain a paint formulation that leaves a coloured layer on the working surface. Depending on the product, this paint may be oil-based, acrylic-based, or made with another specialized formulation.
Many permanent paint markers are designed to provide strong colour coverage, including on darker materials where traditional ink pens may appear faint.
They are available in different tip sizes, making them suitable for everything from fine decorative outlines to bold lettering and larger shapes.
Common uses for permanent paint markers include:
- Personalizing wooden ornaments and decorative signs.
- Adding colourful designs to rocks and stones.
- Creating lettering on suitable glass and ceramic surfaces.
- Decorating compatible metal objects and plant labels.
- Making illustrations on canvas and paper.
- Adding decorative details to plastic craft materials.
- Creating handmade gifts and personalized accessories.
Although the word permanent suggests long-lasting results, the actual durability depends on the marker and the material being decorated.
A paint marker that adheres well to unfinished wood may behave differently on smooth glass or flexible plastic.
For this reason, choosing a marker designed for your specific project is more important than relying on the word permanent alone.
How Do Permanent Paint Markers Work?
Permanent paint markers contain liquid paint inside a barrel, along with a nib that transfers the paint onto a surface.
Many products use a valve-controlled system that regulates how much paint reaches the applicator.
Before using certain markers, you may need to shake the capped barrel to distribute the pigments evenly. Some valve-activated markers also require gentle priming to bring paint into the nib.
However, preparation requirements vary between brands. Always follow the manufacturer’s instructions rather than assuming every paint marker needs the same treatment.
Once the nib contains enough paint, you can apply colour by moving it across the surface.
The paint forms a visible mark as its liquid components evaporate or the formulation undergoes its intended drying and curing process.
Several factors influence the result.
The type of paint affects its adhesion, opacity, flexibility, and resistance to moisture or abrasion.
The nib determines how much control you have over the width and shape of the marks.
Surface preparation also matters. Dust, oil, loose particles, and unsuitable coatings can interfere with adhesion, particularly on smooth materials.
For example, a clean wooden ornament may accept a compatible paint marker relatively easily, while a polished plastic object may require a specifically formulated product.
The paint layer also needs sufficient time to dry or cure before regular handling.
For beginners, the easiest way to understand a new marker is to test it on a spare piece of the intended material before decorating the finished project.
Permanent Paint Markers vs. Regular Permanent Markers
Permanent paint markers and ordinary permanent ink markers are often confused because both are intended to create relatively durable marks.
However, their formulations and typical applications are different.
Regular permanent markers generally use dye-based or pigment-based inks carried in a solvent or other liquid. They are commonly used for writing, labelling, and drawing on compatible surfaces.
Permanent paint markers dispense paint rather than conventional writing ink.
This allows many paint markers to produce more opaque marks, particularly when using white, metallic, or bright colours on dark backgrounds.
The paint may also create a more noticeable surface layer than ordinary marker ink.
However, paint markers aren’t automatically more durable in every situation. Some conventional industrial permanent markers are specifically designed for demanding applications, while certain decorative paint markers may have limited resistance to wear.
The following comparison explains their general differences.
| Feature | Permanent Paint Markers | Regular Permanent Markers |
|---|---|---|
| Colouring material | Pigmented paint formulation | Permanent ink formulation |
| Typical coverage | Often opaque | May be translucent or opaque, depending on product |
| Dark surface visibility | Many provide strong contrast | Depends on ink colour and formulation |
| Common applications | Crafts, decorative artwork, lettering | Writing, labelling, drawing |
| Surface compatibility | Depends on paint formulation | Depends on ink formulation |
| Drying and curing | Some products require extended curing | Often dry relatively quickly |
| Tip options | Fine, medium, broad, chisel and specialty tips | Fine, ultra-fine, chisel and other tips |
| Durability | Product- and surface-dependent | Product- and surface-dependent |
If you’re writing a simple label on a cardboard box, an ordinary permanent marker may be sufficient.
If you want to create opaque white lettering on a dark wooden decoration, a compatible paint marker may be the better choice.
For decorative projects, consider the finish you’re trying to achieve rather than choosing a marker based solely on its advertised permanence.
Are Permanent Paint Markers Really Permanent?
Permanent paint markers are designed to create lasting marks under appropriate conditions, but permanence is not an absolute guarantee.
A marker may resist ordinary handling while still being vulnerable to scratching, prolonged water exposure, cleaning chemicals, or sunlight.
The paint formulation is one important factor.
Some oil-based paint markers are designed to provide strong adhesion and resistance to moisture on compatible materials. Certain acrylic paint markers can also produce durable decorations when used correctly.
However, individual products vary considerably.
Surface compatibility is equally important.
On porous materials such as untreated wood or certain types of stone, paint may penetrate small surface irregularities and form a relatively strong bond.
On smooth glass or plastic, some formulations may remain primarily on the surface, making them easier to scratch or remove.
Drying and curing also influence durability.
A design can feel dry to the touch before the paint has achieved its intended final properties. Handling or washing it too early may damage the finish.
It’s also important to distinguish between different durability claims.
A waterproof paint marker may resist water under specified conditions, but that doesn’t necessarily mean it can withstand dishwashing, outdoor weather, or repeated scrubbing.
Similarly, fade-resistant paint may retain its colour better under certain conditions without being completely immune to prolonged ultraviolet exposure.
Before choosing a permanent paint marker, consider how the finished object will be used.
A decorative wooden ornament displayed indoors has different requirements from a garden marker exposed to rain, sunlight, and temperature changes.
For outdoor or frequently handled projects, look for markers whose manufacturers specifically support those conditions.
When necessary, a compatible protective coating may improve durability, but not every paint marker requires or works well with a sealer.
The safest approach is to follow the product’s instructions and allow the full recommended curing time before using the finished object.
Types of Permanent Paint Markers
Permanent paint markers are available in several formulations and applicator styles.
Understanding the differences can help you choose a product that suits your working surface, preferred technique, and intended level of durability.
The two broad categories commonly encountered in craft projects are oil-based paint markers and acrylic-based paint markers.
You’ll also find different nib sizes and shapes within both categories.
Oil-Based Paint Markers
Oil-based paint markers are commonly used for decorative lettering, industrial marking, and craft projects that require relatively opaque colour.
Their exact composition varies, but they typically contain pigments suspended in an oil-based or solvent-containing paint formulation.
Many products are designed to create visible marks on compatible materials such as metal, glass, wood, stone, and certain plastics.
However, the suitability of each surface depends on the individual marker.
Oil-based paint markers can be useful when working on dark or smooth materials because some formulations provide strong opacity and good adhesion.
White, silver, and gold are particularly popular colours for decorative lettering and personalized objects.
For example, a metallic oil-based paint marker may be used to add lettering to a suitable wooden ornament or decorative metal sign.
These markers also have limitations.
Some formulations contain volatile solvents and require adequate ventilation during use. Others may have stronger odours than water-based products.
Always check the manufacturer’s safety information, including any ventilation requirements, warnings, and recommended age restrictions.
Avoid using paint markers on food-contact surfaces unless the specific product is approved for that purpose.
You should also never assume that an oil-based marker is suitable for oven curing simply because it can write on ceramic or glass.
Heating instructions must come from the manufacturer and must be appropriate for both the marker and the object.
When selecting oil-based paint markers, focus on documented surface compatibility and durability rather than assuming every oil-based product performs identically.
Acrylic-Based Permanent Paint Markers
Acrylic-based paint markers are popular for art and craft projects because they offer paint-like colour application in a pen-shaped tool.
Many contain water-based acrylic paint, although formulations and additives vary between manufacturers.
These markers can be useful for illustrations, lettering, decorative painting, and adding details to mixed-media artwork.
Depending on the product, they may be suitable for canvas, paper, wood, prepared stone, and certain other surfaces.
Acrylic paint markers are often available in bright colours and may offer good opacity once the paint has been applied correctly.
They can also be convenient for adding small details without preparing a traditional paint palette.
For example, you might use a compatible acrylic paint marker to add a decorative border to a wooden gift tag or outline a painted design on canvas.
However, not all acrylic paint markers are intended to be permanently waterproof or weather-resistant.
Some products are designed primarily for indoor artwork, while others offer specific durability claims when used on approved materials.
On smooth surfaces such as glass and certain plastics, acrylic paint may require additional preparation or a specialized formulation to achieve reliable adhesion.
For frequently handled or outdoor objects, check the manufacturer’s recommendations for drying, curing, and protective coatings.
If you’re choosing between acrylic-based and oil-based markers, consider the intended material and working environment.
An acrylic marker designed for decorative canvas art may be ideal for that purpose, while a specialized paint marker may be more suitable for outdoor metal labels.
Neither formulation should be considered universally superior.
Fine Tip, Medium Tip, and Broad Tip Paint Markers
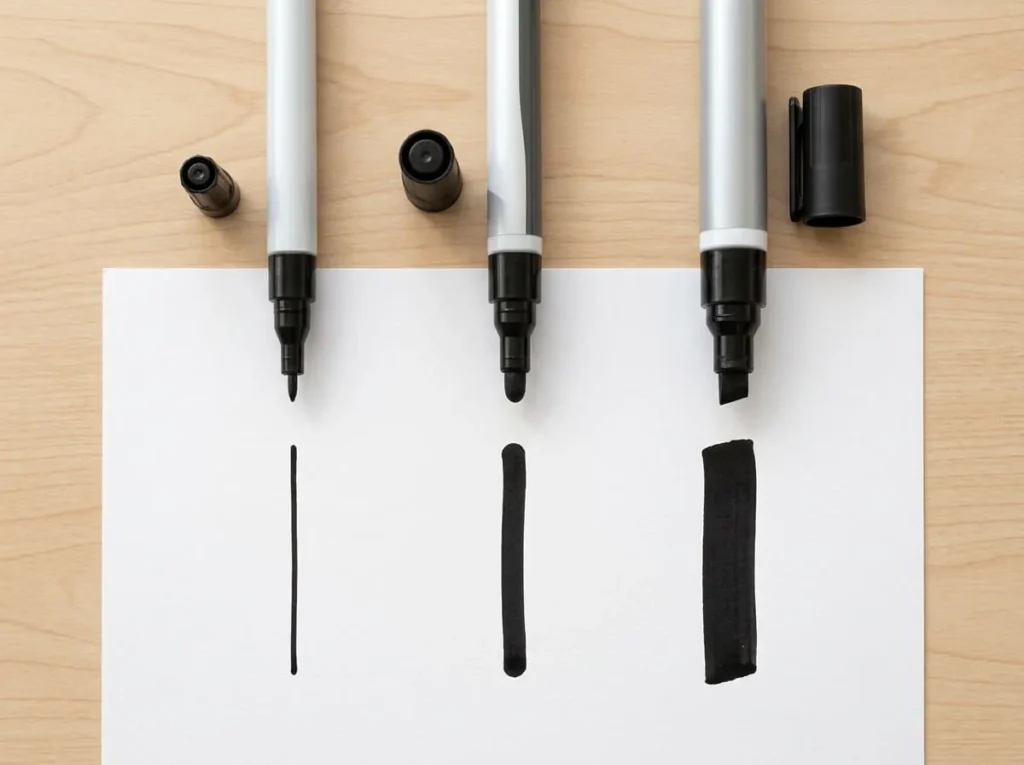
The nib size and shape of a permanent paint marker determine how precisely you can apply the paint.
Fine tips are suitable for smaller details, outlines, and decorative lettering.
They are particularly useful when working on small ornaments, miniature illustrations, and projects that require controlled lines.
Medium tips provide a balance between detail and coverage.
They are often convenient for general craft projects because they can produce visible lettering while remaining manageable for simple illustrations.
Broad tips are designed for thicker lines, bold shapes, and larger lettering.
They may be helpful when decorating signs or filling bigger areas, although covering large surfaces with a marker can still be time-consuming compared with using a brush.
Some paint markers also have chisel-shaped nibs, allowing you to vary line width by changing the angle of the applicator.
| Tip Type | Best Uses | Main Advantage |
|---|---|---|
| Fine tip | Small lettering, outlines, details | Greater precision |
| Medium tip | Everyday crafts and decorative writing | Versatile control |
| Broad tip | Large letters and bold shapes | Wider coverage |
| Chisel tip | Decorative lettering and borders | Different line widths |
| Specialty tip | Particular textures or techniques | Application-specific effects |
The actual line width can vary between brands, even when products use similar tip descriptions.
When choosing a marker, look at the manufacturer’s stated nib dimensions and examples of the marks it produces.
For beginners, a medium-tip marker is often a practical starting point.
Once you’re comfortable with controlling paint flow, you can experiment with fine or broad tips for different projects.
What Surfaces Can You Use Permanent Paint Markers On?
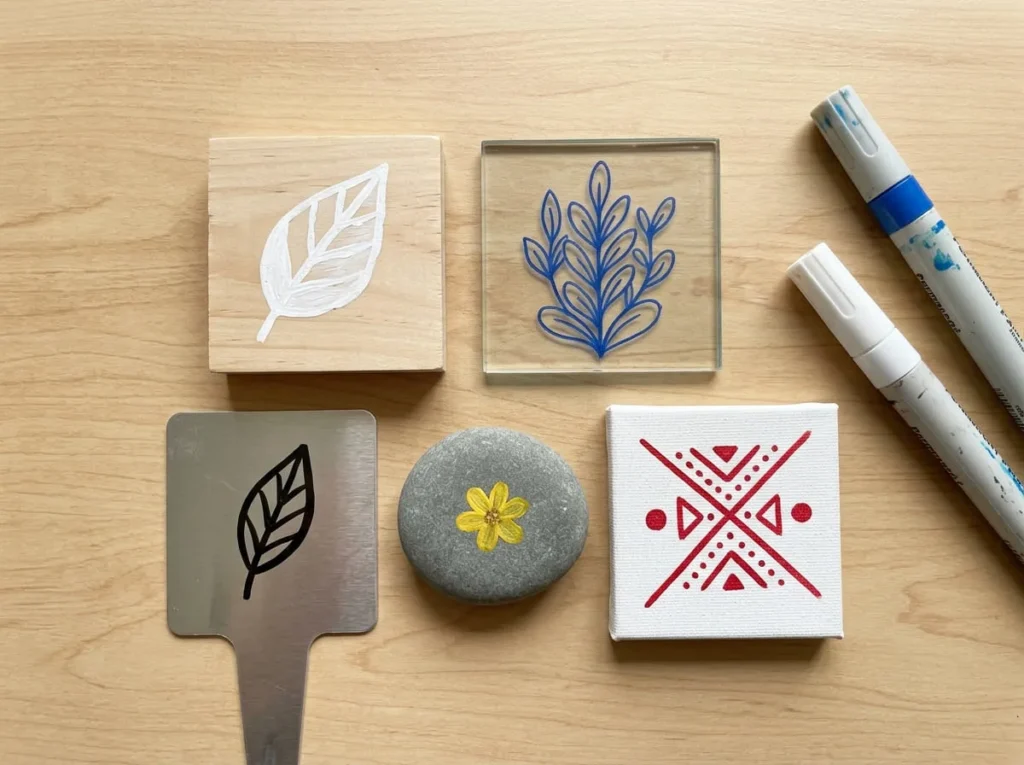
One of the main advantages of permanent paint markers is their potential to work on different craft materials.
However, surface compatibility varies between products, and using the wrong formulation can lead to peeling, fading, or marks that rub away.
Some materials absorb paint, while others have smooth finishes that make adhesion more difficult.
Before beginning a project, check that your marker is specifically recommended for the intended surface.
The following table provides a general overview.
| Surface | General Suitability | Important Consideration |
|---|---|---|
| Wood | Often suitable | Surface finish and absorbency affect adhesion |
| Glass | Product-dependent | Smooth surface may require specialized paint |
| Ceramic | Product-dependent | Glaze and washing affect durability |
| Metal | Often suitable with compatible products | Cleaning and surface finish matter |
| Plastic | Highly product-dependent | Some plastics resist paint adhesion |
| Acrylic sheets | Product-dependent | Test for adhesion and surface damage |
| Rocks and stones | Often suitable | Clean and dry the surface first |
| Canvas | Often suitable | Fabric texture affects line control |
| Paper | Often suitable | Some formulations may bleed through |
| Fabric | Requires suitable product | Washing and flexibility create additional demands |
Treat this table as a starting point rather than a guarantee.
Always follow the marker manufacturer’s surface recommendations, particularly when the finished object will be washed, handled frequently, or used outdoors.
Wood and Painted Wooden Surfaces
Wood is a popular material for permanent paint marker crafts because it can be used for ornaments, signs, gift tags, and decorative objects.
However, the type of wood and its surface finish can influence how well the paint adheres.
Unfinished wood is often absorbent. A compatible paint marker may deposit colour effectively, but the wood grain can cause lines to appear uneven or slightly feathered.
Sanding rough areas and removing dust can help create a smoother working surface.
Sealed or painted wood behaves differently.
A smooth coating may allow cleaner lettering, but certain finishes can reduce adhesion if the marker isn’t compatible with them.
For previously painted objects, make sure the existing coating is fully dry or cured and suitable for additional paint.
If you’re decorating a wooden ornament, test the marker on the back or a spare piece of similarly finished wood.
This will help you check whether the paint spreads, appears opaque, or scratches away after drying.
A compatible protective finish may be useful for frequently handled decorations, but it should only be applied after confirming that it works with the paint marker.
Glass and Ceramic
Glass and glazed ceramic provide smooth surfaces for decorative writing and illustrations.
They can be used for projects such as decorative jars, display ornaments, tiles, and other non-food-contact objects.
However, these surfaces often present adhesion challenges because they are relatively non-porous.
Some permanent paint markers are specifically formulated for glass and ceramic, while others may produce marks that can be scratched or wiped away.
Before decorating, clean the object according to the manufacturer’s recommendations and allow it to dry completely.
Avoid leaving fingerprints or oily residue on the working area.
Check whether your marker requires a specific curing process or protective treatment.
Some specialized glass and ceramic paint products have manufacturer-approved heat-setting instructions, but this does not mean that ordinary permanent paint markers should be placed in an oven.
Never improvise heating procedures.
You should also avoid decorating drinking rims, eating surfaces, or areas that contact food unless the product is explicitly approved for that use.
For a beginner project, a decorative glass jar used to hold craft supplies is more appropriate than a plate intended for serving meals.
Metal Surfaces
Metal surfaces can be useful for permanent paint marker projects such as plant labels, decorative signs, storage tags, and small accessories.
Many paint markers are designed to work on certain metals, but adhesion depends on the surface finish and paint formulation.
Smooth, polished, oily, or coated metal may require additional preparation.
Begin by removing dust, grease, and other residues using a cleaning method suitable for the material.
Make sure the surface is completely dry before applying the marker.
If the metal has a protective coating, check whether your paint marker is compatible with it.
Do not sand or remove protective coatings unnecessarily, particularly on objects where the coating prevents corrosion.
For plant labels or other outdoor projects, look for markers specifically rated for the expected environmental conditions.
A design that looks good immediately after application may not remain intact after months of rain, sunlight, or regular handling.
Allow the paint to cure fully before putting the decorated metal object into use.
Plastic and Acrylic Surfaces
Plastic can be challenging to decorate because different polymers have different surface properties.
Some smooth plastics have low surface energy, making it difficult for paint to adhere securely.
A marker may initially produce a clear design but later peel, scratch, or rub away.
Other plastics and specially prepared acrylic surfaces may accept compatible paint markers more successfully.
The important point is to choose a marker recommended for the particular material.
Before beginning, clean the surface carefully and test the paint in a small, inconspicuous area.
Check whether the colour spreads, beads up, or forms a consistent line.
After the full recommended curing period, assess whether the mark remains attached under normal handling.
Avoid using aggressive solvents or abrasive preparation methods without confirming that they are safe for the plastic.
Some cleaners can cloud, soften, or damage acrylic and other plastic materials.
For storage labels or decorative plastic objects, a surface-specific permanent paint marker is generally a better choice than an ordinary decorative pen with no plastic compatibility information.
Rocks and Stones
Rocks and stones are popular materials for paint marker crafts because they provide small, inexpensive surfaces for decorative artwork.
Permanent paint markers can be used to create patterns, letters, flowers, animals, and garden-themed designs on suitable stones.
However, rock surfaces vary considerably.
Some are smooth and relatively dense, while others are rough, porous, or dusty.
Before decorating, remove soil, grit, and other loose material.
If you wash the rocks, allow them to dry thoroughly before applying paint.
Residual moisture can interfere with certain formulations or affect how the design develops.
Smooth rocks are often easier for beginners because the marker nib can move more consistently across the surface.
Rough stones may produce interrupted lines or wear down delicate applicators more quickly.
For garden decorations, choose markers with appropriate outdoor durability claims and follow any recommended finishing process.
A product described as permanent isn’t necessarily intended to withstand prolonged rain, direct sunlight, or seasonal temperature changes.
Canvas and Paper
Canvas and paper are familiar surfaces for artists and crafters, and many permanent paint markers can be used on them.
On paper, these markers are useful for illustrations, lettering, decorative borders, and mixed-media artwork.
However, some formulations can bleed through thin sheets or cause paper to wrinkle when too much liquid is applied.
Thicker drawing paper or suitably prepared art paper may provide better results.
Always place protective material underneath the page when testing an unfamiliar marker.
Canvas has a woven texture that can affect how smoothly the nib moves.
Fine tips may catch on the fabric texture, while broader nibs may be easier to use for certain shapes and lettering.
A prepared, primed canvas often provides a different painting experience from raw canvas.
For decorative artwork, check that the marker is compatible with the canvas preparation and any existing paint layers.
Allow each colour to dry sufficiently before layering another.
If you’re planning to frame the finished artwork, follow the product guidance regarding curing and contact with glazing or protective materials.
Fabric and Other Specialty Materials
Fabric requires special consideration because it bends, stretches, and is often washed.
Although some permanent paint markers can leave visible marks on fabric, that doesn’t automatically make them suitable for clothing or washable accessories.
A paint formulation that dries into a rigid surface layer may crack or peel when the fabric flexes.
Other products may fade, bleed, or wash away.
For clothing, tote bags, and other textile projects, choose paint markers specifically labelled for fabric use.
Follow the manufacturer’s guidance regarding washing, preparation, drying, and any required heat-setting process.
Never assume that heating fabric will make an ordinary permanent paint marker washable.
If heat-setting is required, both the marker instructions and the fabric care label must permit the process.
Specialty materials such as leather, rubber, coated fabrics, and synthetic surfaces also require suitable formulations.
For these projects, choosing a material-specific product is generally more reliable than using a general-purpose permanent paint marker.
How to Use Permanent Paint Markers Step by Step
Using permanent paint markers is relatively straightforward, but achieving clean, durable results requires more than simply removing the cap and drawing. The type of surface, condition of the marker, and application technique all affect how the finished design looks and how well it lasts.
Beginners sometimes encounter problems because they skip surface preparation, apply too much paint, or handle their artwork before it has fully cured.
The following steps will help you use permanent paint markers more effectively while reducing common mistakes.
Step 1: Select the Right Marker for Your Surface
Before starting your project, choose a permanent paint marker that is specifically recommended for the material you want to decorate.
Different formulations are intended for different surfaces. A marker that performs well on paper and canvas may not adhere properly to glass, plastic, or polished metal.
Check the manufacturer’s compatibility information rather than relying only on the word permanent.
For example, if you’re decorating a wooden ornament, look for a marker suitable for wood. If you’re personalizing a metal plant label that will remain outdoors, choose a product with appropriate metal compatibility and weather-resistance claims.
Consider the tip size as well.
Fine tips are useful for small lettering and outlines, while medium or broad tips are generally more convenient for larger decorative shapes.
If you’re unsure which marker will work best, begin with a small project using a surface clearly supported by the manufacturer.
Step 2: Clean and Prepare the Material
Surface preparation can make a significant difference to paint adhesion.
Dust, grease, fingerprints, loose particles, and moisture may prevent the paint from forming a consistent bond with the material.
Begin by cleaning the surface using a method appropriate for that particular material.
For unfinished wood, gently remove loose dust and smooth rough areas if needed. For glass or metal, use a suitable cleaning method that removes surface residue without damaging the finish.
Rocks should be free from soil and loose particles before painting.
Plastic surfaces require additional care because some cleaning products can damage or cloud the material.
After cleaning, allow the surface to dry completely.
If your chosen marker requires a primer or another preparation treatment, follow the manufacturer’s instructions.
Avoid sanding, applying solvents, or altering protective coatings unless the product guidance specifically supports that process.
A clean, properly prepared surface provides a better foundation for smooth lines and lasting artwork.
Step 3: Shake and Prime the Marker If Required
Many permanent paint markers contain pigments that can settle during storage.
Some manufacturers recommend shaking the capped marker before use to distribute the paint evenly.
Valve-activated markers may also require priming before the paint reaches the nib.
To prepare a marker that requires priming, place a spare piece of suitable material on your work surface.
Follow the manufacturer’s instructions for shaking and gently pressing the tip until paint begins flowing through the applicator.
Avoid pushing the nib down forcefully or repeatedly without checking the directions. Excessive pressure can cause paint to pool around the tip or create unwanted blobs.
Once the nib is adequately saturated, make a few short practice lines.
If the paint appears too wet, allow the excess to settle before starting your design.
Not every marker requires shaking or pumping, so always follow the instructions for your particular product.
Step 4: Test the Paint on a Small Area
Testing your marker before decorating the finished object can help prevent disappointing results.
Choose a spare piece of the same material or an inconspicuous area of the object.
Draw a short line, a small circle, and a filled shape to see how the paint behaves.
Pay attention to the coverage.
Does the colour appear opaque, or can you still see the underlying surface? Does the paint spread beyond your lines? Does the nib move smoothly, or does it catch on the material?
These observations can help you decide whether the marker is suitable.
If you’re working on dark wood or stone, check whether the chosen colour provides enough contrast.
For glass, plastic, and metal, allow the test mark to cure according to the manufacturer’s instructions before assessing its adhesion under ordinary handling.
Avoid destructive scratch tests on valuable objects.
If the marker produces weak coverage or poor adhesion, consider using a different formulation rather than repeatedly applying more paint.
Step 5: Apply Smooth, Controlled Strokes
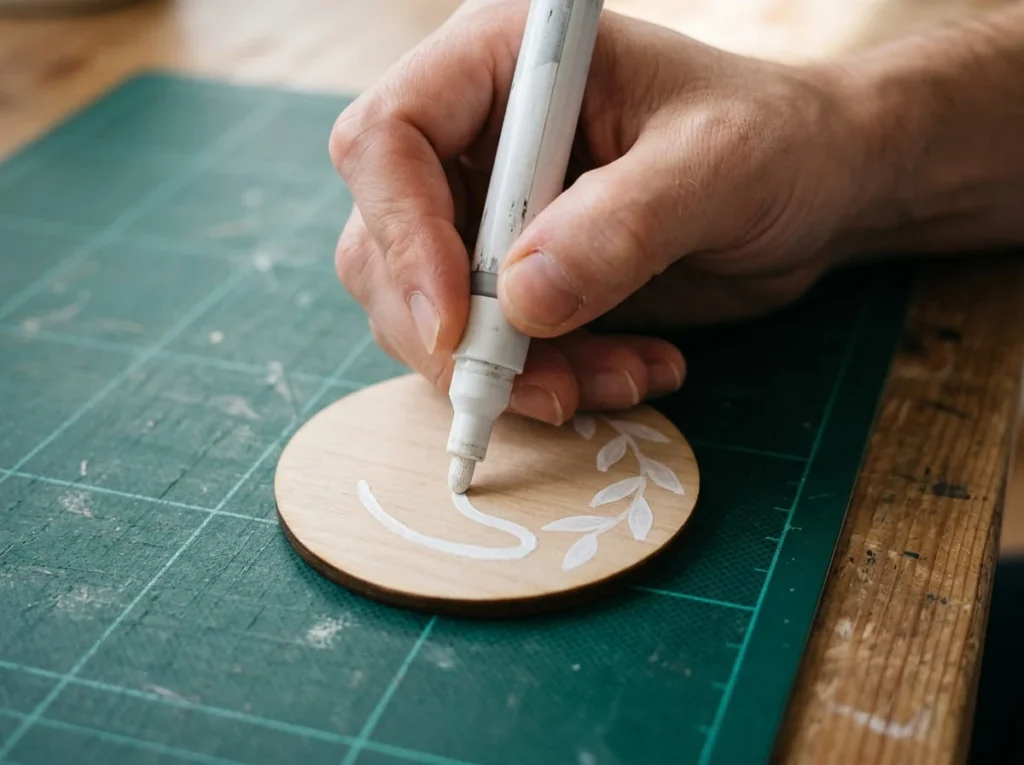
Once you’ve prepared the surface and tested the marker, begin your artwork with slow, controlled movements.
Hold the marker comfortably and keep the nib in consistent contact with the material.
Avoid pressing excessively hard, as this may release too much paint or damage the applicator.
For lettering, practise the words on paper first so you can plan their size and spacing.
When drawing outlines, use steady movements instead of repeatedly tracing over wet paint.
If you need to fill a larger shape, work in manageable sections and avoid leaving thick pools of colour.
The shape of the nib also affects your technique.
Fine tips are useful for small details, while broad tips can cover larger areas with fewer strokes.
For curved lines, move your hand gradually while maintaining a comfortable angle.
If the surface is textured, such as rough wood or stone, the nib may not glide as smoothly as it does on paper.
In these situations, use short, controlled strokes rather than forcing the marker across the texture.
Remember that a slightly imperfect handmade appearance is normal for decorative craft projects.
Step 6: Allow the Paint to Dry and Cure
After finishing your design, allow the paint to dry according to the manufacturer’s recommendations.
Drying and curing are related but different processes.
A marker design may feel dry to the touch before the paint has developed its intended adhesion and durability.
Some formulations continue to cure after the surface no longer feels wet.
The required time depends on the paint, the surface, the thickness of the application, and environmental conditions.
Avoid handling the decorated area, washing the object, or applying protective coatings before the recommended curing period has passed.
For glass and ceramic projects, do not assume that oven heating is required or safe.
Only follow heat-setting instructions when they are specifically provided for the paint marker and are compatible with the object being decorated.
Allowing sufficient drying and curing time is one of the simplest ways to reduce smudging and premature wear.
Step 7: Protect the Finished Design If Needed
Some permanent paint marker projects benefit from an additional protective finish, particularly when the decorated item will be handled regularly or exposed to demanding conditions.
However, sealing isn’t necessary or suitable for every project.
Acrylic paintings on canvas, decorative wooden ornaments, and outdoor rock designs may have different protection requirements.
Before applying any coating, check whether the marker manufacturer recommends a particular sealer.
Also confirm that the protective product is compatible with the underlying material.
Some coatings can react with paint marker pigments, causing bleeding, yellowing, lifting, or changes in appearance.
If sealing is appropriate, test the combination on a spare piece before treating the completed artwork.
Follow the protective coating’s instructions for application, ventilation, drying, and curing.
For indoor decorative projects that won’t experience heavy handling, the marker’s original finish may be sufficient.
The goal is to provide the protection your project actually needs rather than automatically adding another product.
Painting Techniques for Better Results
Permanent paint markers offer more creative control when you understand how to manage line thickness, colour coverage, and layering.
Although they are convenient alternatives to brushes, they still require attention to paint flow and surface texture.
Practising a few simple techniques can help you produce cleaner lettering, more consistent shapes, and attractive decorative details.
Creating Clean Lines and Detailed Lettering
Clean lines begin with choosing an appropriate marker tip.
Fine tips are generally better for small outlines, while medium tips are useful for lettering that needs to remain clearly visible.
Before drawing on the finished object, practise your design on paper or a suitable spare surface.
Try writing a few short words using consistent letter heights and spacing.
For decorative lettering, begin with simple capital letters rather than complicated scripts.
You can gradually experiment with rounded lettering, block capitals, and basic handwritten styles.
If you’re decorating a small wooden tag, lightly planning your design may help you avoid placing letters too close to the edges.
For surfaces where pencil guidelines are appropriate, use faint marks that can be removed or covered safely.
When writing, avoid repeatedly going over wet lines to make them thicker.
Instead, allow the first application to dry and follow any manufacturer-approved layering instructions.
If you want bold lettering, choosing a wider nib may provide better results than applying excessive paint with a fine tip.
Filling Shapes Without Streaks
Filling larger shapes can be challenging because paint markers dispense colour through relatively small nibs.
Uneven strokes may leave visible gaps, overlapping marks, or areas with too much paint.
For better results, begin by outlining the shape.
Allow the outline to settle if needed, then fill the interior using short, controlled strokes.
Try moving in one consistent direction rather than randomly colouring across the area.
Work from one side of the shape toward the other, keeping the paint application reasonably even.
Avoid pressing hard in an attempt to release more colour.
Too much paint can create blobs, slow drying, or cause the colour to spread beyond the intended outline.
If your marker doesn’t provide adequate coverage in one pass, allow the application to dry before adding another layer, provided the product supports layering.
For particularly large areas, a compatible brush-applied paint may be more efficient than a marker.
Paint markers are often most useful for details, lettering, and smaller decorative shapes.
Layering Colours Without Smudging
Layering allows you to add depth and decorative details to paint marker artwork.
For example, you might create a blue background shape and add white stars after the first colour has dried.
However, layering wet paint can cause colours to mix, smear, or transfer onto the marker nib.
Begin by applying the base colour in a thin, controlled layer.
Allow it to dry sufficiently according to the manufacturer’s instructions.
Then test whether the second colour can be applied cleanly over the first.
Some permanent paint marker formulations support layering well, while others may soften or disturb the previous coat.
If the new colour begins lifting the underlying paint, stop and check the product guidance.
Use only as much paint as needed to create the desired mark.
You can also avoid overlapping colours entirely by leaving small spaces between different sections of the design.
For beginners, simple contrasting combinations such as white on blue, yellow beside green, or metallic details against a dark background can create attractive effects without complicated techniques.
Working on Dark and Light Surfaces
The background colour of your project can dramatically affect how paint marker colours appear.
On white paper or pale wood, many colours look relatively bright because the background reflects light through or around the paint layer.
On black, dark brown, or coloured surfaces, translucent formulations may appear less vibrant.
For dark materials, choose markers specifically designed to provide opaque coverage.
White, gold, silver, and other strongly pigmented colours are often useful for creating contrast.
However, opacity varies between brands and formulations.
Test each colour before beginning, especially if you’re working on dark stone, painted wood, or black canvas.
Avoid assuming that applying more pressure will automatically make a translucent marker opaque.
If the product doesn’t provide sufficient coverage, a more suitable marker is usually the better solution.
For light surfaces, consider how different colours work together.
Bright shades can create playful craft designs, while neutral or metallic tones may give decorative objects a more understated appearance.
Choosing colours that contrast clearly with the surface can make even simple lettering look more polished.
6 Creative Projects Using Permanent Paint Markers
Permanent paint markers can be used for a wide range of craft projects, from personalized decorations to useful labels and small pieces of artwork.
The following six ideas demonstrate how different materials can be decorated using suitable paint markers.
Each project uses simple designs and beginner-friendly techniques. However, the marker formulation must be appropriate for the chosen surface, and any durability claims should be checked against the manufacturer’s instructions.
Start with a small project and build your confidence before attempting more complicated decorations.
1. Personalized Wooden Gift Tags
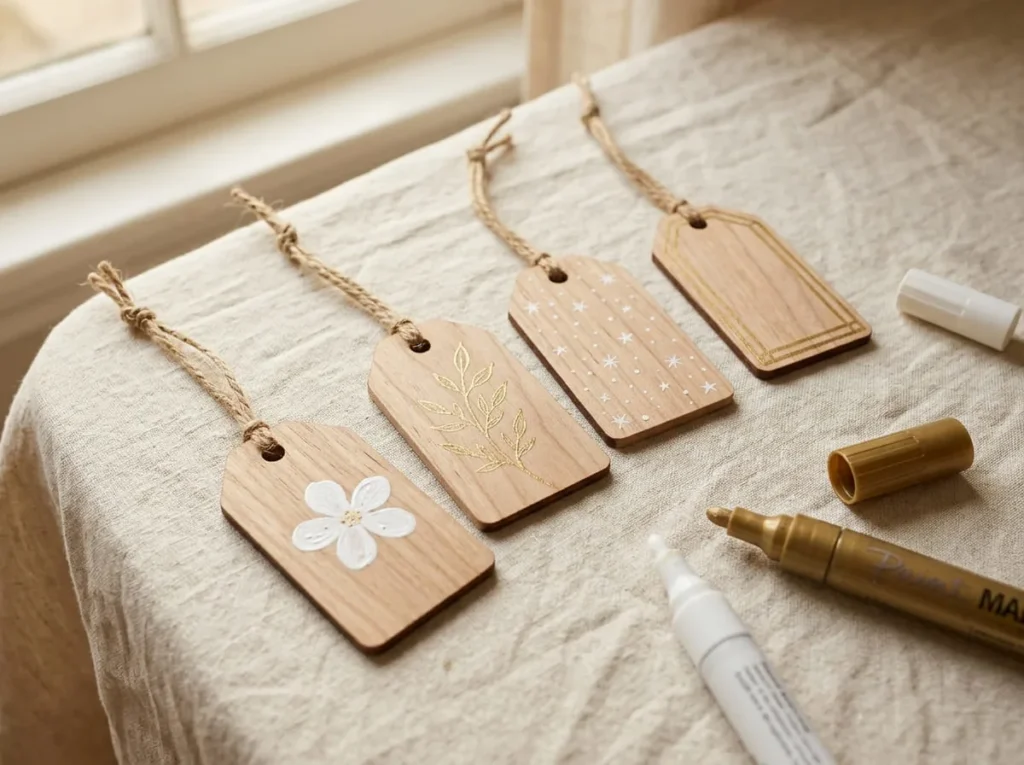
Wooden gift tags are a simple way to practise decorative lettering while creating something that can be reused for presents, ornaments, or handmade displays.
Small unfinished wooden shapes are widely available in craft shops, and their flat surfaces provide a manageable starting point for beginners.
Materials Needed
- Small wooden gift tags or ornaments.
- Permanent paint markers suitable for wood.
- Fine-grit sandpaper, if appropriate.
- Clean, dry cloth.
- Pencil for planning.
- Optional ribbon or twine.
How to Decorate Wooden Gift Tags
- Choose a wooden tag with a reasonably smooth surface and no sharp edges.
- If needed, gently smooth rough areas using suitable sandpaper.
- Remove sanding dust thoroughly and ensure the wood is dry.
- Sketch a short name, initial, or decorative design on paper.
- Test your paint marker on the back of the tag or a spare piece of similar wood.
- Write the chosen name or initial in the centre using slow, controlled strokes.
- Add simple details such as stars, leaves, or a decorative border.
- Allow the paint to dry and cure according to the manufacturer’s instructions.
- Thread ribbon or twine through the tag’s opening once the decoration is ready to handle.
For a minimalist design, use one colour and a small border.
If you prefer a brighter appearance, choose two or three complementary colours.
You can also create a matching set of tags featuring different initials or short messages.
If the tags will be handled repeatedly, check whether a compatible protective finish is recommended.
2. Decorative Glass Jar Designs
Glass jars offer a smooth surface for decorative paint marker artwork, but they require a formulation specifically intended for glass.
This project is best suited to jars used for displaying craft supplies, dried decorative materials, or other non-food-contact purposes.
Materials Needed
- Clean glass jar with a smooth exterior.
- Permanent paint markers approved for glass.
- Microfibre cloth.
- Paper and pencil.
- Optional decorative ribbon.
How to Decorate Glass Jars
- Choose a jar with no cracks, chips, or sharp edges.
- Remove labels and adhesive residue using a glass-safe cleaning method.
- Clean and dry the exterior thoroughly.
- Plan a simple design, such as flowers, leaves, stars, or a short word.
- Test the marker on a small inconspicuous area.
- Draw the main design on the outer surface using controlled strokes.
- Add small details after the previous paint has dried, if the formulation supports layering.
- Allow the design to dry and cure according to the product instructions.
- Add a ribbon around the neck of the jar if desired.
For a simple design, draw several small flowers around the lower portion of the jar.
Another idea is to add a short handwritten word and surround it with decorative dots.
Avoid decorating the rim, interior, or any area likely to contact food or drinks unless the product is specifically approved for that use.
Also remember that a permanent paint marker isn’t automatically dishwasher-safe.
If the jar needs cleaning later, follow the marker manufacturer’s care instructions rather than assuming the design can withstand soaking or machine washing.
3. Painted Rock Garden Markers
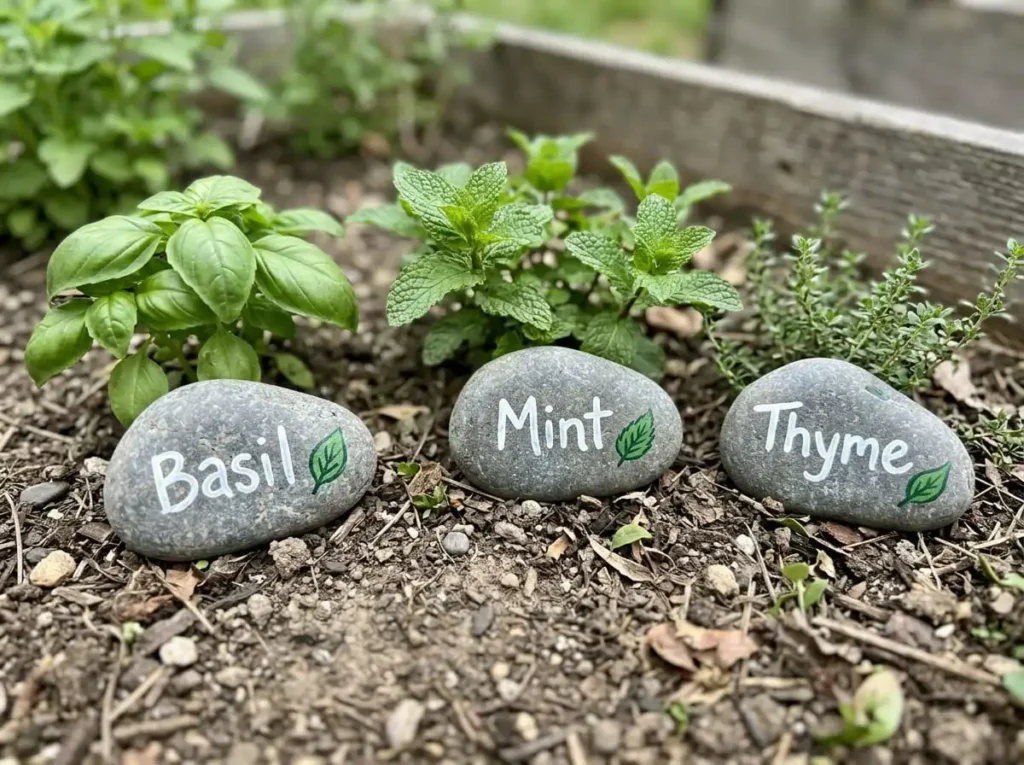
Painted rock garden markers are useful for decorating plant pots, herb gardens, and outdoor displays.
They can feature plant names, simple illustrations, or colourful patterns.
Because outdoor rocks may be exposed to sunlight and moisture, choosing appropriately rated paint markers is especially important.
Materials Needed
- Smooth rocks or stones.
- Permanent paint markers suitable for stone.
- Water and a suitable cleaning brush.
- Clean cloth.
- Optional weather-resistant protective finish compatible with the marker.
How to Make Painted Rock Garden Markers
- Select smooth stones that are large enough to hold a short plant name.
- Remove soil, grit, and loose material using an appropriate cleaning method.
- If the stones are washed, allow them to dry completely.
- Test the marker on a spare stone or an inconspicuous area.
- Write a short plant name near the centre of each rock.
- Add a simple illustration, such as a leaf, flower, or small vegetable.
- Allow the paint to dry and cure fully.
- If recommended, apply a compatible protective finish following its instructions.
- Place the completed markers near the corresponding plants.
For herb gardens, consider short labels such as Mint, Basil, or Thyme.
Use clear lettering that remains easy to read from a short distance.
A contrasting paint colour can help the words stand out against the natural stone.
If the stones will be exposed to regular watering or rain, make sure the chosen markers and any protective coating are suitable for outdoor conditions.
Decorated rocks should be placed where they won’t interfere with plant growth or create a tripping hazard.
4. Custom Metal Plant Labels
Metal plant labels can add a neat, personalized appearance to indoor planters or outdoor gardening displays.
This project is particularly useful for practising lettering on smooth, non-porous materials.
However, metal finishes vary, and some require specialized paint markers for reliable adhesion.
Materials Needed
- Smooth metal plant labels with safe, finished edges.
- Permanent paint markers suitable for the specific metal.
- Surface-compatible cleaning supplies.
- Clean cloth.
- Paper for planning the lettering.
How to Decorate Metal Plant Labels
- Choose metal labels with a stable shape and smooth writing area.
- Check whether the surface has a protective coating and whether your marker is compatible with it.
- Clean the labels using a method suitable for the material.
- Allow them to dry completely.
- Practise the plant names on paper before writing.
- Apply the lettering using slow, consistent marker strokes.
- Add a small leaf or decorative line if enough space remains.
- Allow the paint to dry and cure according to the product instructions.
- Place the labels into planters once the finish is ready for normal handling.
For small labels, use a fine or medium tip to keep the letters readable.
If the labels will remain outdoors, choose markers with documented resistance to the expected conditions.
Avoid sanding away corrosion-resistant coatings unless a product-specific preparation method requires it.
A simple black or white lettering design may be easier to read than multiple colours on a small metal surface.
5. Personalized Plastic Storage Labels
Plastic storage containers can be useful for organizing craft supplies, stationery, and small household items.
Permanent paint markers may provide decorative lettering on certain plastics, but the results depend heavily on the material.
Some smooth plastics resist paint adhesion, so testing is essential.
Materials Needed
- Plastic storage containers with suitable writing areas.
- Permanent paint markers specifically compatible with the plastic.
- Soft cloth.
- Appropriate surface cleaner.
- Paper and pencil.
How to Make Plastic Storage Labels
- Choose a container with a smooth, accessible area for lettering.
- Check the type of plastic if the manufacturer identifies it.
- Confirm that your marker is suitable for that material.
- Clean and dry the chosen area carefully.
- Test a small mark in an inconspicuous spot.
- Plan a short label, such as Brushes, Paper, or Craft Tools.
- Write the label using steady strokes.
- Add a simple border or small decorative symbol if desired.
- Allow the paint to cure fully before handling or stacking the containers.
For a clean appearance, use consistent lettering across several containers.
You can also assign different marker colours to different supply categories.
Avoid decorating areas that experience frequent friction, such as lids that slide against other surfaces.
If the marker doesn’t adhere reliably, a separate adhesive label may be more practical than repeatedly applying paint to an unsuitable plastic.
This project demonstrates the importance of matching the marker to the material rather than assuming every plastic surface accepts permanent paint.
6. Mini Canvas Lettering Art

Mini canvas lettering art is a beginner-friendly project that combines simple typography with decorative painting.
Small stretched canvases or canvas boards provide manageable surfaces for experimenting with permanent paint markers.
They can be used to create personalized decorations, short messages, or small handmade gifts.
Materials Needed
- Small primed canvas or canvas board.
- Permanent paint markers compatible with canvas.
- Pencil.
- Paper for planning the design.
- Optional ruler.
- Protective work covering.
How to Create Mini Canvas Lettering
- Choose a small canvas with a suitable prepared surface.
- Make sure the canvas is clean and dry.
- Select a short word or message for the artwork.
- Sketch the lettering arrangement on paper.
- Lightly mark the placement on the canvas if the surface allows.
- Use a medium or broad paint marker to create the main lettering.
- Allow the paint to dry before adding contrasting outlines or decorative details.
- Add simple elements such as stars, leaves, or curved borders.
- Allow the completed artwork to cure according to the marker manufacturer’s instructions.
For a simple design, choose one large word such as Create, Dream, or Inspire.
You can use a dark marker for the main lettering and add small colourful details around it.
If the canvas texture makes fine lines difficult, try using a broader nib or a smoother prepared canvas board.
Avoid forcing the marker into the fabric weave, as this can damage the nib or create uneven marks.
For a more decorative variation, paint a simple background using a compatible craft paint, let it cure as required, and then add lettering with a suitable paint marker.
This allows you to combine traditional painting with controlled pen-style details.
The finished artwork can be displayed on a shelf or incorporated into a small gallery wall.
How to Make Permanent Paint Marker Designs Last Longer
Permanent paint markers are designed to create durable marks, but the lifespan of your artwork depends on more than the word permanent on the packaging. Surface preparation, paint formulation, curing conditions, and everyday handling all influence how well a design holds up over time.
A decorated wooden ornament displayed indoors may remain attractive for years under suitable conditions, while a painted rock placed outdoors faces additional challenges from sunlight, rain, and temperature changes.
Understanding how to protect your artwork can help reduce peeling, scratching, fading, and premature wear.
Why Surface Preparation Matters
Surface preparation is one of the most important factors affecting paint marker adhesion.
Even a high-quality permanent paint marker may struggle to adhere to a surface covered with dust, grease, moisture, or incompatible coatings.
Before decorating an object, inspect the material carefully.
For wooden crafts, remove loose dust and smooth rough areas when appropriate. Unfinished wood may absorb paint unevenly, particularly when its grain is coarse or highly porous.
Glass and metal surfaces often need careful cleaning because fingerprints and oily residue can interfere with paint adhesion.
Plastic requires additional attention because some formulations have difficulty bonding to particular polymers.
Choose cleaning methods suitable for the surface rather than assuming that the same product can be used on every material.
After cleaning, allow the object to dry completely.
If the marker manufacturer recommends priming, sanding, or another preparation method, follow those instructions carefully. Avoid unnecessary abrasion that could damage a protective finish.
Testing your marker on a spare piece of the intended material is also useful.
This allows you to assess coverage and adhesion before committing to the finished project.
A few minutes of preparation can make the difference between artwork that remains intact during normal use and a design that begins lifting shortly after application.
Drying Time vs. Full Curing Time
Drying and curing are often treated as the same process, but they describe different stages in paint development.
Drying generally refers to the point when enough of the liquid components have evaporated or changed that the paint no longer feels wet.
Curing refers to the development of the coating’s intended final properties, which may include adhesion, hardness, and resistance to handling.
Depending on the formulation, the curing process may continue after the surface feels dry.
For example, lettering on a glass jar might appear touch-dry relatively quickly, but the marker manufacturer may require a longer period before the design can be handled normally or exposed to cleaning.
The exact timing varies by product, surface, paint thickness, and environmental conditions.
Avoid assuming that every permanent paint marker cures within a particular number of hours.
Instead, check the instructions supplied with your markers.
During the recommended drying and curing period, protect the artwork from moisture, friction, and unnecessary handling.
Do not wash decorated objects or apply protective coatings before the paint is ready.
For specialized glass and ceramic markers, follow only manufacturer-approved heat-setting instructions when applicable.
Never place an object in an oven simply because the marker is labelled permanent.
Allowing the paint to develop its intended finish is a straightforward way to improve the reliability of your craft projects.
When Should You Seal Paint Marker Artwork?
Sealing can provide additional protection for certain decorative projects, but it isn’t always necessary.
Some permanent paint markers are designed to provide suitable durability without an additional coating when used on approved surfaces.
Other projects may benefit from a compatible protective finish, particularly if the decorated object will experience frequent handling or exposure to moisture.
Painted wooden ornaments, garden stones, and decorative signs are examples of projects where protection may be worth considering.
However, the correct sealer depends on the paint formulation and underlying material.
A coating that works well over one acrylic paint marker may react poorly with another product.
Potential problems include smudging, colour bleeding, cloudiness, yellowing, peeling, or unwanted changes in gloss.
Before sealing, confirm that both the marker and protective coating manufacturers recommend the combination.
Test the coating over fully cured marker paint on a spare piece of material.
If the test is successful, apply the product according to its instructions, including any required ventilation and curing time.
Avoid applying thick coats in an attempt to make the artwork more durable.
More coating does not necessarily provide better results and may increase the risk of uneven drying.
For indoor decorative items that receive little handling, a separate sealer may offer limited practical benefit.
Choose protection based on the conditions your finished project will actually encounter.
Can Permanent Paint Markers Be Used Outdoors?
Some permanent paint markers are suitable for outdoor applications, but not every product is designed to withstand long-term exposure to the elements.
Outdoor decorations experience conditions that indoor artwork rarely encounters.
Rain, sunlight, humidity, changing temperatures, and repeated handling can all affect paint durability.
Ultraviolet exposure may cause certain pigments to fade over time.
Moisture can also weaken adhesion if the paint formulation is not intended for wet conditions.
On metal, underlying corrosion or coating failure may affect the appearance of the design.
Painted rocks and garden labels face additional challenges from soil, irrigation, and seasonal weather.
If you’re creating outdoor decorations, choose markers specifically rated for the material and environmental exposure.
Look for clear manufacturer information about water resistance, fade resistance, and outdoor suitability.
These claims are not interchangeable.
A water-resistant marker may tolerate occasional moisture without being suitable for continuous outdoor exposure.
Similarly, a paint marker described as fade-resistant may still change colour after prolonged sunlight exposure.
A compatible outdoor protective coating may improve durability in some situations, but it cannot guarantee that an unsuitable paint formulation will survive indefinitely.
For the best results, follow the manufacturer’s guidance and inspect outdoor projects periodically for signs of wear.
Common Permanent Paint Marker Problems and Solutions
Permanent paint markers are convenient tools, but problems can occur when paint flow becomes inconsistent, surfaces resist adhesion, or colours begin to deteriorate.
Many issues can be reduced through appropriate marker preparation and careful application.
Before attempting a solution, identify whether the problem comes from the marker, the paint formulation, or the surface being decorated.
Why Is My Paint Marker Not Working?
A permanent paint marker may stop producing paint because the nib is dry, the reservoir is empty, or the internal paint flow has become inconsistent.
Some new markers also require activation before their first use.
If your marker uses a valve-controlled system, follow the manufacturer’s instructions for shaking and priming it.
These directions may involve gently pressing the nib against a suitable test surface until paint reaches the tip.
Avoid applying excessive force or repeatedly pumping the marker without checking the instructions.
Too much pressure can cause paint to collect around the nib or leak onto your artwork.
If the marker has been stored without its cap, dried paint may interfere with the applicator.
Inspect the nib for visible damage or residue, and follow the manufacturer’s recommended cleaning procedure.
Do not use sharp tools to scrape or puncture the tip.
You can troubleshoot the problem by checking:
- Whether the marker requires shaking or priming.
- Whether the cap was closed securely after previous use.
- Whether dried paint is affecting the nib.
- Whether the marker is suitable for the chosen surface.
- Whether the reservoir may be empty.
- Whether the applicator appears damaged.
If the marker still fails to work after the recommended troubleshooting steps, replacing it may be more practical than attempting to dismantle it.
How to Fix Uneven Ink Flow and Blotchy Lines
Uneven paint flow can create streaks, faint patches, or unexpected blobs.
This may happen when the nib is not evenly saturated, the paint has settled, or excessive pressure releases more colour than intended.
Before starting your design, test the marker on a spare surface.
If the product requires shaking, follow the recommended preparation process.
For markers that release too much paint, stop pressing the nib and allow the excess to settle before continuing.
Hold the marker at a consistent angle and use steady movements.
On textured surfaces such as unfinished wood or rough stone, the nib may catch on raised areas and produce interrupted lines.
Using a smoother surface or a suitable broader tip may improve coverage.
If you’re filling a shape, work in controlled sections rather than repeatedly applying thick layers of wet paint.
Allow the first application to dry before adding another layer, provided the formulation supports it.
For detailed lettering, a marker with a smaller, consistent nib may be easier to control.
If one marker repeatedly produces blotchy results while others in the same set work normally, the problem may be specific to that product.
Why Does Paint Peel Off Smooth Surfaces?
Peeling is a common concern when using permanent paint markers on glass, plastic, metal, and other non-porous materials.
Unlike absorbent paper or certain types of wood, these surfaces may provide fewer opportunities for paint to penetrate or grip the material.
Some plastics also have surface properties that make paint adhesion particularly difficult.
If the formulation is not compatible with the material, the paint may appear to dry successfully but later lift or scratch away.
Surface contamination can make the problem worse.
Oil, dust, polish, and cleaning residues may interfere with the paint’s ability to adhere.
Handling the object before the recommended curing period has passed can also contribute to premature damage.
To reduce peeling, choose a paint marker specifically intended for the working surface.
Clean and prepare the material according to the manufacturer’s instructions.
Avoid touching the decorated area while it dries and cures.
If the product requires a primer or additional preparation, use only a compatible method.
Remember that adding a sealer over poorly adhered paint doesn’t automatically correct the underlying problem.
If the paint continues to peel, switching to a more suitable formulation may be necessary.
How to Prevent Smudging and Colour Bleeding
Smudging generally occurs when paint is disturbed before it has dried sufficiently.
Colour bleeding can happen when wet colours overlap, when excessive paint is applied, or when a porous surface absorbs liquid beyond the intended lines.
Both problems can affect the clarity of decorative designs.
Begin by testing the marker on the chosen material.
Use controlled strokes and avoid holding the nib against one area longer than necessary.
For lettering and outlines, allow the first application to dry before tracing over it.
When working with multiple colours, consider completing one section at a time.
Avoid dragging your hand across freshly painted areas.
On paper and unfinished wood, excessive paint can spread into the surface fibres, creating softer or irregular edges.
If this happens, try a more suitable marker formulation or properly prepared material.
A smoother, less absorbent working surface may provide better line control for certain projects.
On glass and metal, focus on maintaining even paint flow and allowing sufficient drying time.
If you’re unsure whether two colours can be layered successfully, practise the combination on a spare surface first.
Why Do Paint Marker Colours Fade?
Paint marker colours may fade because of sunlight exposure, environmental conditions, cleaning, abrasion, or limitations in the pigment formulation.
Some pigments are more resistant to ultraviolet light than others.
A design displayed in direct sunlight may experience more colour change than an identical piece stored indoors.
Outdoor weather can also affect the paint layer over time.
Cleaning chemicals, repeated washing, and frequent handling may gradually reduce the appearance of certain markings.
To improve colour retention, choose products with durability claims appropriate for the intended environment.
For artwork displayed near windows, consider whether the marker manufacturer provides information about lightfastness or fade resistance.
For outdoor projects, select formulations specifically intended for exposure to sunlight and weather.
Avoid unnecessary scrubbing and follow the manufacturer’s cleaning recommendations.
A compatible protective coating may help under certain conditions, but not every clear finish provides meaningful ultraviolet protection.
If you’re creating artwork intended for long-term display, pigment stability and environmental suitability are more important than the word permanent alone.
How to Clean and Store Permanent Paint Markers
Proper care helps keep permanent paint markers ready for future projects.
Although many markers are designed for convenient use, their nibs and internal paint systems can be affected by drying, contamination, and unsuitable storage conditions.
Cleaning and storage recommendations vary between oil-based, acrylic-based, and specialty formulations.
Always follow the instructions supplied with your particular product.
Keeping Marker Tips Clean
Paint marker nibs can collect dust, loose fibres, and dried paint during use.
These materials may affect paint flow and cause irregular lines.
To reduce buildup, use markers on clean surfaces and avoid dragging delicate nibs across abrasive materials.
When decorating rough stone or unfinished wood, choose an applicator suitable for the texture.
If paint begins collecting around the nib, stop and inspect it before continuing.
Follow the manufacturer’s cleaning instructions rather than soaking the applicator in an unfamiliar solvent.
Some products have replaceable or reversible nibs, but this feature isn’t universal.
Avoid pulling the tip out unless the manufacturer specifically explains how to do so.
After using the marker, replace the cap securely to reduce exposure to air.
Keeping the nib clean and protected can help maintain more consistent application during future projects.
Preventing Paint Markers from Drying Out
A marker that isn’t stored correctly may develop dried paint around its nib or experience changes in paint flow.
Always close the cap firmly after use.
Store your markers in a location protected from excessive heat, freezing temperatures, and direct sunlight.
The appropriate storage position depends on the product.
Some manufacturers recommend horizontal storage, while others provide different instructions for their particular valve or reservoir systems.
Follow the product guidance instead of assuming every paint marker should be stored upright.
Keeping markers in their original packaging or a suitable storage box can help prevent damage and lost caps.
If a marker has been unused for a long period, check the manufacturer’s instructions before attempting to reactivate it.
Avoid adding water, solvents, or other liquids directly to the barrel unless the product is specifically designed for that process.
Introducing an unsuitable liquid could damage the formulation or create a safety risk.
How to Remove Accidental Paint Marker Marks
Permanent paint marker stains can be difficult to remove, particularly from porous materials.
The correct removal method depends on the marker formulation, the affected surface, and whether the paint has dried or cured.
Fresh paint on a compatible smooth surface may sometimes be easier to remove than fully cured markings.
However, this isn’t guaranteed.
If paint accidentally reaches an unwanted area, check the manufacturer’s cleanup instructions before applying any treatment.
For certain water-based acrylic products, gentle cleaning with water may be appropriate while the paint is still wet.
Oil-based and solvent-containing formulations may require different manufacturer-approved methods.
Avoid assuming that household solvents are safe for every surface.
Strong cleaning products can damage plastics, painted furniture, coated metal, and other materials.
For skin contact, follow the product’s safety and cleanup guidance. Do not use harsh industrial solvents on skin.
Porous materials such as unfinished wood, fabric, and paper may retain permanent stains even after cleaning attempts.
For valuable or delicate surfaces, professional advice may be safer than experimenting with aggressive removal methods.
The simplest precaution is to protect your workspace before starting and test unfamiliar markers on spare materials.
How to Choose Permanent Paint Markers for Crafts
Choosing permanent paint markers becomes easier when you know what the finished project requires.
Rather than selecting a set based only on colour variety or packaging, focus on the paint formulation, intended surface, nib design, and durability information.
A small collection of suitable markers can be more useful than a larger set that doesn’t work reliably on your preferred materials.
Choose the Right Paint Formulation
Begin by deciding which material you want to decorate.
Acrylic-based paint markers can be useful for many paper, canvas, and compatible wooden craft projects.
Certain oil-based paint markers may be appropriate for decorative work on metal, glass, wood, and other supported surfaces.
However, neither formulation is universally suitable for every material.
Check the product’s surface compatibility information carefully.
If the project will be displayed outdoors or handled frequently, look for documented durability claims that match those conditions.
Also consider the working environment.
Some solvent-containing markers require additional ventilation and handling precautions.
For indoor craft sessions, choose a product that suits the available workspace and the people using it.
Consider Tip Size and Colour Opacity
Tip size affects the kinds of designs you can create.
Fine tips are useful for outlines, small details, and compact lettering.
Medium tips are versatile for general crafts.
Broad or chisel tips can help create larger lettering and fill decorative shapes.
Choose the nib based on the scale of your project rather than assuming a finer tip is always better.
Colour opacity is equally important.
If you’re decorating black paper, dark wood, or coloured stone, look for markers intended to provide visible coverage on darker backgrounds.
Test the colours before committing to a finished design.
Some paints appear different after drying, and certain formulations may require additional layers for full coverage.
For beginners, a few versatile colours and an appropriate medium tip can provide a practical starting point.
Look for Surface-Specific Durability Claims
The word permanent provides only limited information about how a paint marker will perform.
More useful product details include compatibility with the intended material and specific claims about water resistance, abrasion resistance, lightfastness, or outdoor use.
These properties describe different kinds of durability.
For example, a marker that resists occasional water contact may not withstand repeated washing.
Similarly, a fade-resistant product may still experience damage from scratching or cleaning chemicals.
If you’re decorating a frequently handled object, consider how easily the paint might wear.
For garden crafts, check whether the marker is intended for outdoor conditions.
For glass or ceramic decorations, review any product-specific curing and care requirements.
Clear, relevant manufacturer guidance is more valuable than broad marketing language.
Check Safety Information and Ventilation Requirements
Safety information should be part of choosing craft supplies, particularly when using markers indoors or around children.
Some permanent paint markers contain solvents and may require good ventilation.
Others have different formulations with their own precautions.
Read the product label and follow the manufacturer’s safety guidance.
Check the recommended age range before allowing children to use the markers.
A non-toxic label does not mean that paint is suitable for ingestion, application to skin, or contact with food.
Keep markers away from open flames and heat sources when the product warnings require it.
Avoid using paint markers on plates, drinking rims, utensils, or other food-contact areas unless the specific product is approved for those applications.
For projects involving heat-setting, follow only manufacturer-supported instructions and confirm that the decorated object is suitable for the process.
Choosing appropriate materials and working conditions allows you to focus on creativity while reducing unnecessary risks.
Frequently Asked Questions
Are Permanent Paint Markers Waterproof?
Some permanent paint markers are formulated to resist water after the paint has fully cured, but not every product is waterproof.
Water resistance depends on the paint formulation, working surface, and environmental conditions.
A marker suitable for indoor decorative artwork may not withstand prolonged rain or frequent washing.
If your project will be exposed to moisture, choose a marker whose manufacturer specifically supports that use.
Will Permanent Paint Markers Wash Off Glass?
Permanent paint markers can behave differently on glass depending on their formulation.
Some products are designed to leave durable decorations on compatible glass, while others can be removed through certain cleaning methods or repeated abrasion.
Because glass is non-porous, adhesion may be more difficult than on absorbent materials.
Always use a glass-compatible marker and follow its curing and cleaning instructions.
Do not assume that a permanent marking is dishwasher-safe or suitable for food-contact surfaces.
Can You Use Permanent Paint Markers on Plastic?
Yes, some permanent paint markers are suitable for certain plastics.
However, plastic materials vary widely, and some have surface properties that make paint adhesion difficult.
A marker that works on one type of plastic may peel or rub away from another.
Check the manufacturer’s compatibility information, clean the surface appropriately, and test the paint before decorating the finished object.
Are Permanent Paint Markers Suitable for Outdoor Crafts?
Some permanent paint markers are designed for outdoor use, including certain products intended for stone, metal, and other durable materials.
However, permanent does not automatically mean weatherproof.
Outdoor decorations may face sunlight, rain, humidity, and changing temperatures.
Choose markers with appropriate outdoor durability claims and follow any recommended preparation or protective finishing instructions.
Do Permanent Paint Markers Need Sealing?
Not every permanent paint marker project requires sealing.
Some products provide suitable durability on approved surfaces without additional protection.
Other projects, particularly frequently handled or outdoor decorations, may benefit from a compatible protective coating.
Check the marker manufacturer’s recommendations before applying a sealer.
Always test the combination because certain coatings can cause paint to smear, lift, or change appearance.
What Is the Difference Between Oil-Based and Acrylic Paint Markers?
Oil-based paint markers commonly use oil-based or solvent-containing formulations, while acrylic paint markers contain acrylic-based paint.
Their drying behaviour, handling requirements, and surface compatibility can differ.
Certain oil-based markers are designed for durable industrial or decorative marking, while acrylic markers are widely used for artwork and crafts.
However, neither type is automatically more permanent on every surface.
The best option depends on the specific formulation, material, and intended use.
Can You Remove Permanent Paint Marker Once It Dries?
Sometimes, but removal depends on the paint formulation and surface.
Fully dried or cured paint may be difficult to remove from porous materials such as wood, fabric, and paper.
On certain smooth surfaces, appropriate cleaning methods may remove some permanent paint marker formulations.
However, solvents and abrasive cleaners can damage coatings, plastics, and delicate materials.
Always consult the marker and surface manufacturers’ cleaning guidance before attempting removal.
Final Thoughts
Permanent paint markers are versatile tools for creating colourful lettering, decorative patterns, personalized objects, and handmade artwork. Their convenient applicators make it possible to add controlled details to many craft materials without using traditional paintbrushes.
However, achieving durable results depends on choosing the correct marker for your project.
The paint formulation, surface preparation, application technique, and curing time all influence how well the finished design performs.
For smooth materials such as glass, metal, and plastic, compatibility is especially important. A marker that produces attractive lines initially may not provide reliable adhesion unless it is designed for that surface.
For outdoor projects, consider the additional effects of moisture, sunlight, and changing temperatures.
A suitable protective coating may help in some circumstances, but it shouldn’t replace proper paint selection and preparation.
If you’re new to permanent paint markers, begin with a manageable project such as a wooden gift tag or mini canvas decoration. These allow you to practise lettering, colour application, and basic techniques before working on more challenging materials.
As your confidence grows, experiment with decorative glass jars, personalized storage labels, painted rocks, and other suitable craft projects.
By matching your markers to the right materials and following the recommended preparation and curing instructions, you can create attractive handmade designs that remain enjoyable for longer.