
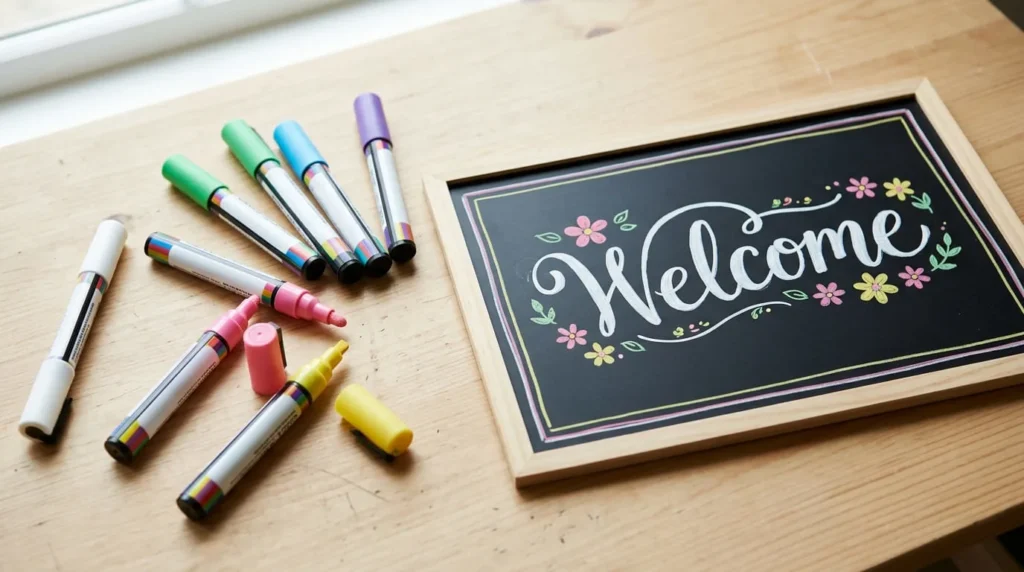
Chalk paint markers are a convenient way to create colourful lettering, decorative signs, and temporary artwork without the mess of traditional chalk. Whether you’re decorating a glass window, designing a welcome sign, or adding creative details to a mirror, these markers offer an easy way to experiment with colours and designs.
Unlike ordinary chalk sticks, chalk paint markers typically contain liquid pigments that produce smooth, vibrant marks on suitable surfaces. However, knowing where to use them is important because some materials can absorb the ink and become difficult to clean.
In this guide, you’ll learn what chalk paint markers are, how they work, which surfaces are suitable, and how to use them correctly. You’ll also discover practical techniques and creative project ideas for getting started.
What Are Chalk Paint Markers?
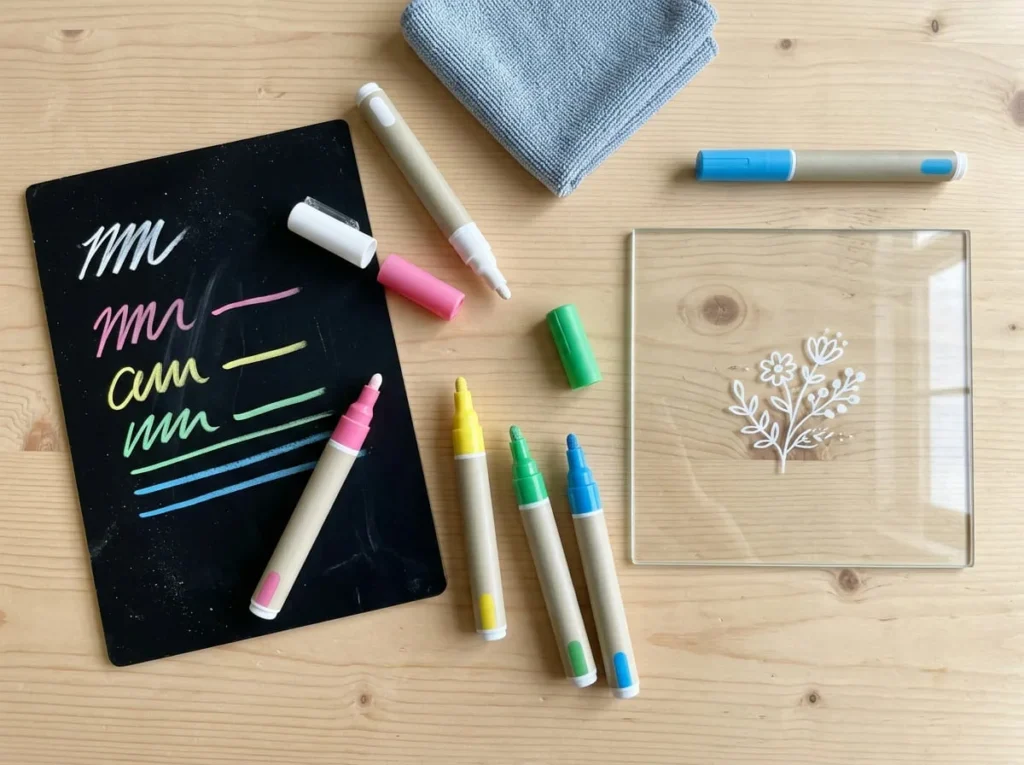
Chalk paint markers are writing and drawing tools that use liquid chalk ink to create colourful marks on compatible surfaces. They are commonly called liquid chalk markers or chalk pens and are often used for decorative lettering, temporary signs, window illustrations, and craft projects.
Unlike traditional chalk sticks, which leave dry powder on a surface, liquid chalk markers contain a fluid ink that flows through a specially designed nib.
The resulting marks can appear bright, smooth, and relatively opaque, depending on the marker formulation and the surface being decorated.
Most liquid chalk markers are designed primarily for smooth, non-porous surfaces. These may include glass, mirrors, specially coated chalkboards, and certain plastic or acrylic materials.
Many formulations can be removed from compatible surfaces using a damp cloth, although erasability varies between brands and materials.
These markers are useful for a variety of creative applications, including:
- Writing decorative messages on compatible chalkboards.
- Creating temporary seasonal illustrations on windows.
- Designing welcome signs for celebrations and gatherings.
- Adding colourful lettering to mirrors and glass displays.
- Making reusable menu boards and promotional signs.
- Decorating glass containers for non-food-contact craft displays.
- Experimenting with hand lettering and simple illustrations.
One important distinction is that chalk paint markers are different from the chalk paint commonly used to refinish furniture.
Furniture chalk paint is usually applied with a brush or roller and is intended to create a decorative painted finish. Liquid chalk markers, on the other hand, are designed for controlled writing and drawing.
Understanding this difference helps you choose the correct material for your project.
How Do Chalk Paint Markers Work?
Chalk paint markers contain liquid ink inside a plastic barrel, with a nib that transfers the colour onto the working surface.
Many liquid chalk markers use a valve-controlled system. When the nib is pressed according to the manufacturer’s instructions, the internal mechanism allows ink to flow toward the tip.
The applicator then deposits the liquid colour onto the surface as you write or draw.
Some markers must be shaken and primed before their first use, while others have different preparation requirements.
For products that require shaking, the manufacturer may instruct you to shake the capped marker to distribute the pigments evenly.
A new valve-activated marker may also require a few careful presses against scrap material before the nib becomes saturated.
However, not every chalk marker should be prepared in the same way. Always follow the instructions supplied with your particular product.
Once the ink reaches the nib, you can create lines, letters, shapes, and decorative patterns.
The appearance of the marks depends on several factors.
The marker’s tip shape influences line width, while the ink formulation affects opacity and coverage.
The drawing surface also plays an important role. On a suitable smooth surface, the liquid ink can form visible marks that dry into a relatively even layer.
On porous materials, however, the liquid and pigments may penetrate the surface rather than remain on top.
This can make the marks difficult or impossible to remove completely.
For beginners, practising on a small piece of compatible glass or a marker-safe writing board is a sensible way to understand the ink flow before beginning a larger design.
Chalk Paint Markers vs. Traditional Chalk
Chalk paint markers and traditional chalk can both be used to create writing and drawings, but they differ in application, appearance, and cleanup.
Traditional chalk is usually made from compressed mineral-based materials. It produces marks by depositing dry particles onto a surface.
Liquid chalk markers use fluid ink that passes through a nib and dries after application.
This difference affects how each tool feels and performs.
Traditional chalk is often useful for quickly writing on suitable chalkboards. It can also produce broad shaded areas by using the side of the chalk stick.
However, chalk dust can accumulate during use, and the marks may smudge when touched.
Liquid chalk markers generally produce more controlled lines and stronger colours. Their nibs allow users to create decorative lettering, borders, and illustrations with greater precision than an ordinary piece of chalk.
| Feature | Chalk Paint Markers | Traditional Chalk |
|---|---|---|
| Form | Liquid ink inside a marker | Solid chalk stick |
| Application | Marker nib | Chalk applied directly |
| Colour appearance | Often bright and relatively opaque | Usually softer and more powdery |
| Dust | Little or no loose chalk dust during normal use | Produces chalk dust |
| Lettering control | Suitable for controlled lettering and outlines | Useful for writing and shading |
| Typical surfaces | Compatible non-porous boards, glass, and mirrors | Traditional chalkboards and other chalk-compatible surfaces |
| Removal | Depends on ink and surface compatibility | Often removable from suitable chalkboards with an eraser or damp cloth |
| Main limitation | Can stain porous or unsuitable surfaces | Can smudge and leave dust |
Neither material is the right choice for every project.
If you enjoy traditional blackboard writing, quick sketches, or soft shaded effects, ordinary chalk may be more suitable.
If you’re creating colourful window artwork or detailed lettering on a compatible smooth surface, liquid chalk markers may provide greater control.
The main thing to remember is that a surface suitable for traditional chalk is not automatically suitable for liquid chalk markers.
Chalk Paint Markers vs. Acrylic Paint Markers
Chalk paint markers and acrylic paint markers may look similar, especially when they have comparable plastic barrels and felt-style nibs.
However, their intended uses can be quite different.
Liquid chalk markers are typically designed for temporary or erasable decoration on compatible non-porous surfaces.
Acrylic paint markers contain acrylic-based paint formulations that are often used for decorative artwork on materials such as wood, canvas, paper, and certain other prepared surfaces.
The exact compatibility and durability depend on the individual product.
Acrylic paint markers are often selected when the goal is to create artwork that remains in place after drying. Some acrylic paint pen projects may also require preparation or sealing, depending on the surface and intended use.
Liquid chalk markers are generally more convenient when you want to change a design regularly.
For example, a café might use compatible chalk markers to update a menu board, while a crafter might choose acrylic paint markers for a decorative wooden sign.
| Feature | Chalk Paint Markers | Acrylic Paint Markers |
|---|---|---|
| Common formulation | Liquid chalk-style ink | Acrylic-based paint |
| Typical purpose | Temporary writing and decoration | Decorative painting and illustrations |
| Suitable surfaces | Usually compatible non-porous surfaces | Varies by product, including some porous surfaces |
| Removal | Often erasable from approved surfaces | Generally intended to be more durable after drying |
| Common projects | Window art, menus, welcome signs | Painted wood crafts, canvas art, decorative objects |
| Main consideration | Surface staining and ghosting | Surface preparation, adhesion, and durability |
It’s important not to assume that all chalk paint markers are completely removable or that all acrylic paint markers are permanent on every surface.
Always check the specific manufacturer’s claims.
If you want to decorate a glass window temporarily, an appropriate liquid chalk marker may be the better option.
If you’re creating a lasting illustration on canvas or wood, a compatible acrylic paint marker is generally more appropriate.
What Surfaces Can You Use Chalk Paint Markers On?
Choosing the correct surface is one of the most important parts of working with chalk paint markers.
Although many products are marketed as erasable, this usually applies only to surfaces approved by the manufacturer.
A smooth surface may allow the ink to remain on top, making it easier to wipe away after drying.
Porous materials can absorb the liquid and pigments, potentially leaving visible marks even after cleaning.
The following sections explain which materials are commonly suitable and which require additional care.
Non-Porous Chalkboards and Writing Boards
Specially coated non-porous chalkboards are among the most common surfaces used with liquid chalk markers.
These boards are designed to provide a smooth writing area that helps prevent the ink from penetrating the surface.
When paired with compatible markers, they can be useful for reusable signs, messages, and decorative lettering.
However, not every chalkboard has a non-porous finish.
Some traditional slate boards, painted wooden boards, and chalkboard-painted surfaces can absorb liquid chalk ink.
This may cause staining or leave a faint outline of the previous design after cleaning.
Before using chalk paint markers on a board, check whether the manufacturer specifically states that it is compatible with liquid chalk markers.
If the information is unclear, test a small area in an inconspicuous location and check whether the marks can be removed after drying.
For projects where regular design changes are important, choosing a board specifically intended for liquid chalk markers can help reduce the risk of staining.
Glass, Windows, and Mirrors
Glass and mirrors are popular surfaces for chalk marker artwork because they are generally smooth and non-porous.
Liquid chalk markers designed for glass can be used to create temporary drawings, decorative messages, borders, and seasonal illustrations.
For example, you might draw snowflakes on a window during winter or create a colourful welcome message on a glass display.
Mirrors can also be decorated with short inspirational messages or simple floral designs.
Before beginning, make sure the surface is clean and dry.
Dust, grease, fingerprints, and cleaning-product residue may affect how evenly the marker applies.
Always confirm that the product is suitable for the specific glass or mirror surface.
Some windows and mirrors have coatings, films, or special treatments that may react differently to inks and cleaning products.
Test a small hidden area first, particularly when working on expensive or treated glass.
When decorating windows, avoid designs that could obstruct important views, interfere with visibility, or create safety concerns.
For mirrors, keep artwork away from damaged edges or areas where liquid could affect the backing.
Chalk markers should also be kept away from surfaces that come into direct contact with food unless the product is specifically approved for that purpose.
With appropriate preparation and a compatible formulation, glass and mirrors can provide attractive surfaces for temporary decorative artwork.
Acrylic, Plastic, and Other Smooth Surfaces
Certain acrylic sheets, plastic signboards, and other smooth materials may also be compatible with liquid chalk markers.
These surfaces can be useful for reusable craft signs, decorative displays, and temporary lettering.
However, plastic is a broad category that includes many different materials and surface finishes.
Some plastics may allow ink to wipe away relatively easily, while others may become stained, scratched, or damaged during cleaning.
Acrylic sheets can also have protective coatings or surface treatments that affect marker performance.
Before decorating acrylic or plastic, check whether the marker manufacturer lists the material as compatible.
You should also consider the cleaning method.
A liquid chalk marker may be removable with water from one plastic surface but require a different approved cleaning method on another.
Avoid using abrasive pads, harsh solvents, or aggressive scrubbing, especially on acrylic sheets, which can scratch or become cloudy.
Other smooth surfaces, such as certain glazed ceramic tiles, may work with compatible markers, but their coatings and finishes can vary.
Always test both the ink application and removal process before using the material for a finished project.
If you’re creating a decorative sign, choose a material that is explicitly recommended for liquid chalk markers rather than relying solely on its smooth appearance.
Surfaces to Avoid or Test Carefully
Some materials are particularly unsuitable for liquid chalk markers when you expect the artwork to be erasable.
Porous surfaces can absorb the ink, making complete removal difficult.
Common examples include unfinished wood, unsealed stone, ordinary paper, untreated cardboard, and some traditional chalkboards.
Chalkboard-painted walls and furniture also require caution.
Although they may look similar to commercial chalkboards, many painted finishes are porous enough to retain pigment.
This can lead to ghosting, where faint outlines or colour remain after cleaning.
Paper and cardboard can still be used creatively with certain chalk markers, but the marks should generally be treated as potentially permanent unless the product specifically states otherwise.
Unfinished wood is another material that may absorb liquid pigments.
If you want to decorate wooden objects permanently, an appropriate paint marker or another compatible painting material may be more suitable.
Use the following table as a starting guide.
| Surface | General Suitability | Important Consideration |
|---|---|---|
| Compatible non-porous chalkboard | Usually suitable | Confirm the board is designed for liquid chalk markers |
| Ordinary chalkboard | Use caution | May absorb ink and develop ghosting |
| Plain glass | Often suitable | Check product compatibility and surface coatings |
| Mirrors | Often suitable | Avoid treated surfaces and vulnerable edges |
| Acrylic sheet | Product-dependent | Test for staining and cleaning damage |
| Smooth plastic | Product-dependent | Different plastics react differently |
| Glazed ceramic tile | Product-dependent | Test both application and removal |
| Unfinished wood | Not recommended for erasable artwork | Ink may soak into the grain |
| Paper and cardboard | Suitable only for certain projects | Marks may be permanent or bleed |
| Unsealed stone | Generally unsuitable for erasable designs | Porous material can retain pigment |
| Chalkboard-painted walls | High caution | Painted finish may stain or ghost |
This table provides general guidance rather than a guarantee of compatibility.
The safest approach is to use surfaces specifically recommended by the marker manufacturer and test a small area before beginning.
How to Use Chalk Paint Markers Step by Step
Using chalk paint markers is straightforward once you understand how to prepare the surface and control the ink flow.
However, skipping preparation can lead to uneven lines, accidental stains, or frustrating results.
The following steps will help you create cleaner lettering and illustrations while reducing common beginner mistakes.
Step 1: Choose a Compatible Surface
Begin by selecting a surface that is suitable for the chalk paint markers you’re using.
For a first project, a marker-compatible non-porous writing board or an appropriate piece of plain glass can be a practical option.
Read the product instructions and confirm that the chosen material is recommended.
Avoid starting with unfinished wood, porous chalkboard paint, or an expensive decorative surface.
If you’re unsure whether the ink will erase properly, test it on a small inconspicuous area.
Let the test mark dry according to the product directions, then try removing it using the recommended cleaning method.
This helps you identify possible staining before committing to a larger design.
Step 2: Clean and Dry the Surface
A clean surface helps chalk marker ink apply more evenly.
Dust, fingerprints, grease, and leftover cleaning products can cause streaks or prevent the ink from forming consistent lines.
For compatible glass or non-porous boards, use the cleaning method recommended by the surface manufacturer.
A clean, slightly damp microfibre cloth may be sufficient for many ordinary surfaces.
If additional cleaning is needed, choose a product approved for that material.
After cleaning, allow the surface to dry completely.
Avoid applying chalk marker ink to a damp surface because moisture can affect line quality and cause unwanted spreading.
Once the surface is clean and dry, place it securely on a stable work area.
Step 3: Prepare or Activate the Marker
Some liquid chalk markers need to be activated before their first use.
The correct preparation process depends on the design of the marker.
For certain valve-activated products, the instructions may involve shaking the capped marker and gently pressing the tip against scrap material until the ink reaches the nib.
Other markers may be ready to use immediately.
Always follow the manufacturer’s directions rather than assuming every marker requires shaking or pumping.
If your marker does require priming, use a disposable sheet or another manufacturer-approved testing surface.
Press gently and give the ink time to reach the applicator.
Avoid repeatedly forcing the nib downward, as excessive pressure may release too much ink or damage the tip.
Once the applicator is evenly saturated, the marker should be ready for testing.
Step 4: Test the Marker Before Drawing
Before writing on your final surface, make a few practice marks.
Try drawing a short line, a circle, and a simple letter.
Check whether the ink flows smoothly and whether the colour appears consistent.
If the marks are faint, review the preparation instructions to see whether additional priming is required.
If too much ink appears, stop pressing the nib and allow the excess to settle before continuing.
Testing also gives you an opportunity to see how quickly the ink dries and whether the marker produces the line width you expected.
For decorative lettering, practise a few words on an appropriate test surface before beginning the finished sign.
If you’re using several colours, test each one individually.
Different pigments or marker formulations may behave slightly differently, even within the same set.
Step 5: Write or Draw with Controlled Strokes
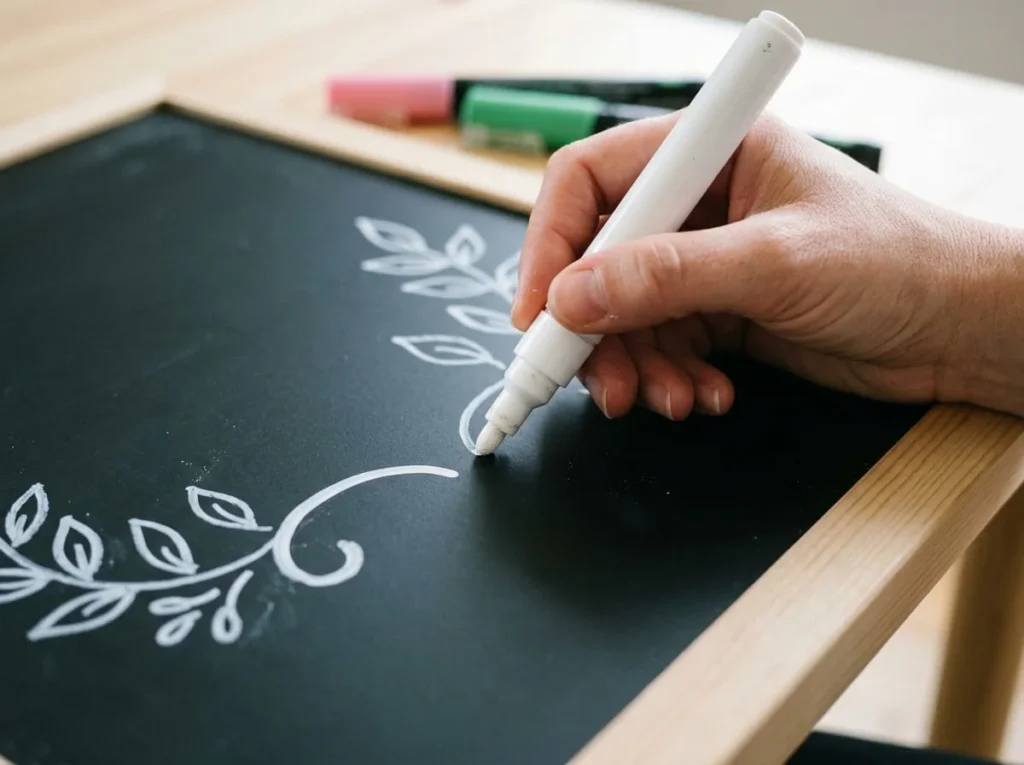
Once the marker is ready, begin your design with slow, controlled movements.
Hold the barrel comfortably and allow the nib to glide across the surface without pressing excessively.
The best angle depends on the tip shape.
Bullet tips generally work well for simple lines and rounded lettering, while chisel tips can create wider strokes when used at different angles.
For a beginner-friendly project, try writing a short word or drawing a basic flower.
If you’re creating a sign, plan the layout before adding colour.
You can practise the wording on paper first and use temporary guidelines where suitable for the surface.
When making letters, focus on consistent spacing and clear shapes rather than rushing.
Avoid repeatedly tracing over wet lines, as this may cause smudging or uneven coverage.
If you’re working with multiple colours, allow each section to dry sufficiently before adding nearby details.
For simple illustrations, start with larger shapes and add smaller decorative marks afterward.
A few carefully placed lines and colours often look more balanced than an overcrowded design.
Step 6: Allow the Design to Dry
After completing your lettering or artwork, allow the ink to dry according to the marker manufacturer’s instructions.
Drying time can vary depending on the formulation, surface, ink thickness, and surrounding conditions.
Avoid touching freshly drawn areas or placing objects against the design before it has dried.
If you’re decorating a reusable signboard, keep the surface stable during drying to prevent accidental smears.
Some markers dry to a matte, chalk-like appearance, while others may have a slightly different finish.
Once the artwork is dry, inspect it for uneven areas or missing details.
If you need to make corrections, follow the product’s guidance for layering or removing marks.
Do not assume that adding extra ink over a dried line will always produce a smooth result.
When your project is finished, replace the marker cap securely and store it according to the manufacturer’s instructions.
This helps maintain the nib and prevents unnecessary drying between craft sessions.
With a suitable surface, careful preparation, and controlled strokes, chalk paint markers can be a convenient tool for creating colourful signs and decorative artwork.
Basic Chalk Marker Techniques for Beginners
Once you’ve learned how to prepare and use chalk paint markers, the next step is exploring different techniques for creating lettering, patterns, and decorative artwork. These markers can produce smooth lines, colourful shapes, and detailed designs, making them useful for everything from simple handwritten messages to more elaborate craft projects.
The key to achieving attractive results is understanding how the marker tip interacts with the surface. Small adjustments in pressure, angle, and movement can change the appearance of your artwork.
You don’t need professional lettering skills or advanced artistic experience to get started. With a little practice, you can use chalk paint markers to create balanced designs that are easy to personalize.
Creating Smooth Lines and Bold Lettering
Smooth lines and readable lettering are among the most useful skills to develop when working with chalk paint markers. Whether you’re creating a welcome sign or decorating a window, consistent strokes can make the finished design look cleaner and more organized.
Begin by choosing a smooth, non-porous surface that is compatible with your markers. Make sure it is clean and completely dry before starting.
Hold the marker at a comfortable angle and draw a few straight lines using steady movements. Avoid pressing too hard, as excessive pressure can cause uneven ink flow or wider marks than intended.
Next, practise making curved lines, circles, and simple letters. These movements will help you understand how the nib responds when you change direction.
For decorative lettering, start with large capital letters. They are generally easier to space and align than complicated script lettering.
You can gradually experiment with different writing styles, including:
- Simple block lettering for welcome signs and menus.
- Rounded letters for playful decorations.
- Tall, narrow lettering for modern-looking designs.
- Bold capital letters for headings.
- Basic cursive lettering for personalized messages.
When creating a sign, consider the spacing between words and the amount of empty space surrounding your lettering.
A design with a clear focal point and comfortable spacing is often easier to read than one filled with unnecessary details.
If you’re unsure about the layout, sketch your wording on paper before transferring it to the final surface.
For large signs, practising the complete message beforehand can help you avoid running out of space.
Using Different Tip Sizes
Chalk paint markers come with different applicator shapes and sizes, and each type offers its own advantages.
Choosing a suitable tip can make it easier to control your artwork and achieve the effect you want.
Broad tips are useful for large lettering, thick borders, and bold decorative shapes. They can cover wider areas more efficiently than narrow nibs.
Fine tips are more suitable for smaller letters, simple outlines, and detailed illustrations, although the exact level of precision depends on the marker’s design.
Bullet tips typically produce rounded lines and work well for everyday writing and basic drawing.
Chisel tips have angled edges that can produce different line widths depending on how you hold the marker.
For example, using the broad side of a chisel tip can create thick lettering, while the narrower edge may be useful for thinner strokes.
Here is a simple comparison.
| Tip Type | Common Uses | Best Suited For |
|---|---|---|
| Fine tip | Small lettering and outlines | Detailed decorations |
| Bullet tip | General writing and drawing | Beginner projects |
| Chisel tip | Thick and thin strokes | Decorative lettering |
| Broad tip | Large shapes and bold messages | Signs and display boards |
When selecting a marker, remember that tip descriptions aren’t standardized across every manufacturer.
A tip described as fine by one brand may be wider than a similarly labelled product from another.
If you’re just beginning, a medium bullet-tip marker is often a practical option for practising letters and simple illustrations.
Once you’re comfortable using it, you can experiment with other nib shapes to create more varied designs.
Layering Colours and Adding Details
Layering colours can make chalk marker artwork more interesting, but the technique requires some care.
Unlike traditional paints that can be blended on a palette, liquid chalk marker inks are applied directly through a nib.
The way colours interact depends on the formulation, surface, and amount of ink used.
When working on a compatible non-porous surface, begin by applying your first colour in a simple shape or line.
Allow the ink to dry according to the product instructions before adding another colour nearby or over it.
For example, you might draw a white flower outline and later add yellow details to the centre.
Another option is to write a large word in one colour and surround it with smaller decorative marks in a contrasting shade.
If you apply a second colour while the first layer is still wet, the inks may mix, smear, or transfer onto the marker nib.
This can create unwanted colour contamination and make the finished design less clear.
To experiment with layering, start with simple combinations:
- White lettering surrounded by colourful dots.
- Yellow flower centres with pink or purple petals.
- Green leaves beside red or orange decorative flowers.
- Bold headings with smaller contrasting details.
- Simple borders made from alternating colours.
Avoid repeatedly tracing over the same area with a wet marker, as this may disturb the earlier layer.
Some liquid chalk formulations are not suitable for extensive layering. Always test the effect on a small area before attempting it on a finished project.
Using fewer colours thoughtfully can often produce a more attractive result than combining too many shades in one design.
Using Stencils for Clean Designs
Stencils are helpful when you want to create consistent letters, recognizable shapes, or decorative borders without drawing everything freehand.
They are particularly useful for beginners who find it difficult to maintain even spacing or produce symmetrical designs.
Start by selecting a stencil suitable for your chosen surface and marker tip.
Simple geometric shapes, large letters, stars, and floral outlines are good options for practising.
Place the stencil against a clean, compatible surface and make sure it stays steady while you work.
For reusable boards or glass, use a method of securing the stencil that won’t damage the surface or leave adhesive residue.
If you use removable tape, confirm that it is safe for the material.
Carefully trace around the stencil openings with your chalk paint marker.
Avoid applying excessive pressure or allowing large amounts of wet ink to collect along the stencil edges.
Too much liquid can spread underneath the stencil and produce blurry outlines.
Allow the ink to settle before lifting the stencil carefully. The best removal timing can vary by marker formulation and stencil material, so test the technique first.
Once you’ve removed the stencil, you can add freehand details such as dots, leaves, or decorative lines.
For example, use a large letter stencil to create the first letter of a name, then surround it with small flowers.
Another idea is to create a repeated border using a star or leaf stencil.
Stencils provide structure while leaving plenty of room for creativity, making them useful for decorative signs and simple craft projects.
7 Creative Ideas Using Chalk Paint Markers
Chalk paint markers can be used for many decorative projects, particularly when you want colourful artwork that can be updated or removed from a compatible surface.
From welcome signs to seasonal window illustrations, these markers offer a practical way to create personalized decorations without using traditional paintbrushes.
The following seven projects are designed to be approachable for beginners. Most require only a few supplies, and the designs can be adapted to suit different occasions or decorating styles.
Before starting any project, confirm that your surface is suitable for the particular markers you’re using. Even products described as erasable may leave permanent marks on porous or incompatible materials.
1. Decorative Chalkboard Welcome Sign

A decorative chalkboard welcome sign is a useful beginner project because it combines simple lettering with easy borders and small illustrations.
The finished sign can be displayed near an entrance, on a shelf, or as part of a party decoration.
Using a compatible reusable board also allows you to change the message whenever you want.
Materials Needed
- A non-porous chalkboard approved for liquid chalk markers.
- Chalk paint markers in white and two additional colours.
- Clean microfibre cloth.
- Paper and pencil for planning the lettering.
- Optional removable stencil.
How to Make a Chalkboard Welcome Sign
- Clean the chalkboard using the manufacturer’s recommended method and allow it to dry completely.
- On a separate sheet of paper, sketch your welcome message and decide how the lettering should be arranged.
- Place the word Welcome near the centre of the board, leaving enough space for a decorative border.
- Use a white chalk paint marker to write the main message with large, easy-to-read letters.
- Allow the lettering to dry before adding smaller details.
- Choose one or two contrasting colours and draw simple leaves, flowers, or curved lines around the wording.
- Leave a little empty space near the edges to prevent the design from looking overcrowded.
- Allow the completed artwork to dry before moving or displaying the board.
For a more modern appearance, use simple block lettering and a narrow border.
If you prefer a playful design, add small colourful flowers or stars around the message.
You can also personalize the sign with a family name or a short seasonal greeting.
One advantage of using a suitable erasable board is that you can refresh the design for different occasions without replacing the entire decoration.
2. Seasonal Window Decorations
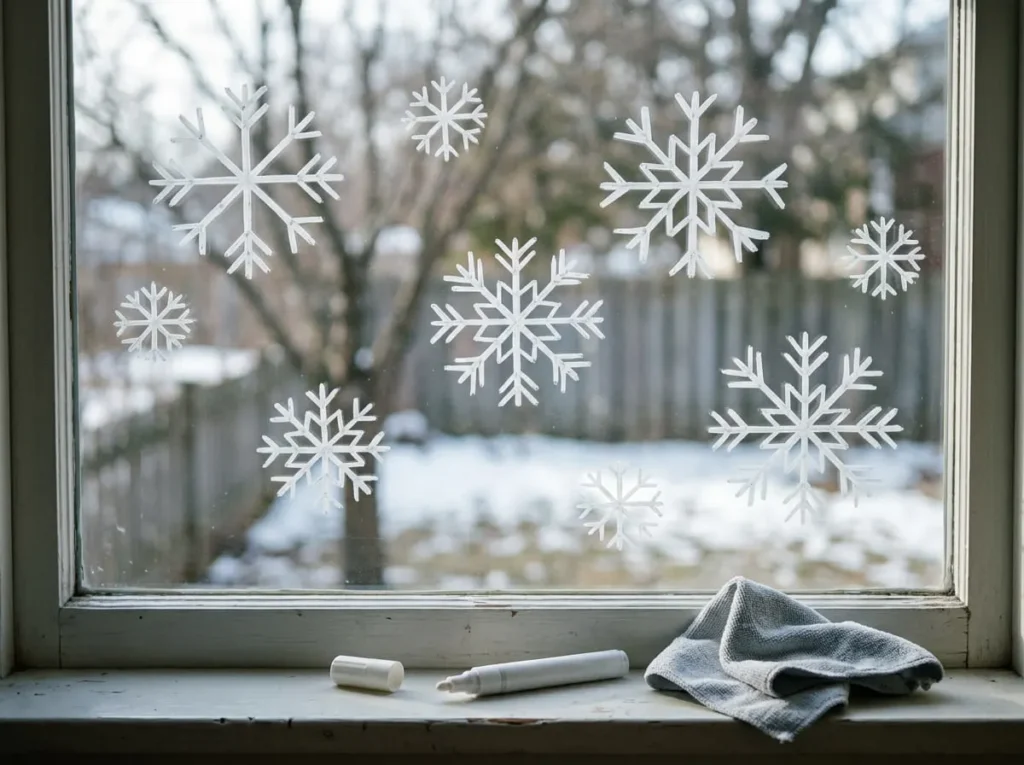
Window decorations are one of the most recognizable uses for liquid chalk markers.
A few simple drawings can transform a plain glass window into a seasonal display without requiring traditional paint or permanent adhesive decorations.
You can create snowflakes during winter, colourful flowers in spring, falling leaves in autumn, or other designs that match the occasion.
Materials Needed
- A clean glass window compatible with the chosen markers.
- Liquid chalk markers suitable for glass.
- Microfibre cloth.
- Paper for sketching ideas.
- Optional paper templates.
How to Make Seasonal Window Art
- Choose a window that is safe and easy to reach without climbing or leaning into an unsafe position.
- Confirm that the glass or any coating is compatible with your markers.
- Clean the chosen area and allow it to dry completely.
- Sketch a few simple seasonal shapes on paper before beginning.
- Start with one larger design, such as a snowflake or flower, near the centre of the decoration area.
- Add smaller illustrations around the main design, leaving enough space between each element.
- Use two or three colours to give the arrangement variety without making it too busy.
- Allow the design to dry and avoid touching it until the ink has set.
For winter decorations, try drawing a collection of white snowflakes in different sizes.
During spring, create a simple arrangement of pink flowers with green stems and leaves.
Autumn designs can include orange leaves, pumpkins, and decorative curved lines.
If you’re using a paper template behind the glass, secure it safely with a surface-compatible method, then trace the design from the opposite side.
Remember that drawing on one side of a window can make text appear reversed when viewed from the other side. Check the intended viewing direction before adding lettering.
Keep decorations away from areas where they might obstruct important views, visibility through doors, or safety-related markings.
A useful variation is to decorate only the corners of the window, leaving the middle area clear.
This creates a subtle seasonal effect without covering too much glass.
3. Hand-Lettered Glass Jar Decorations
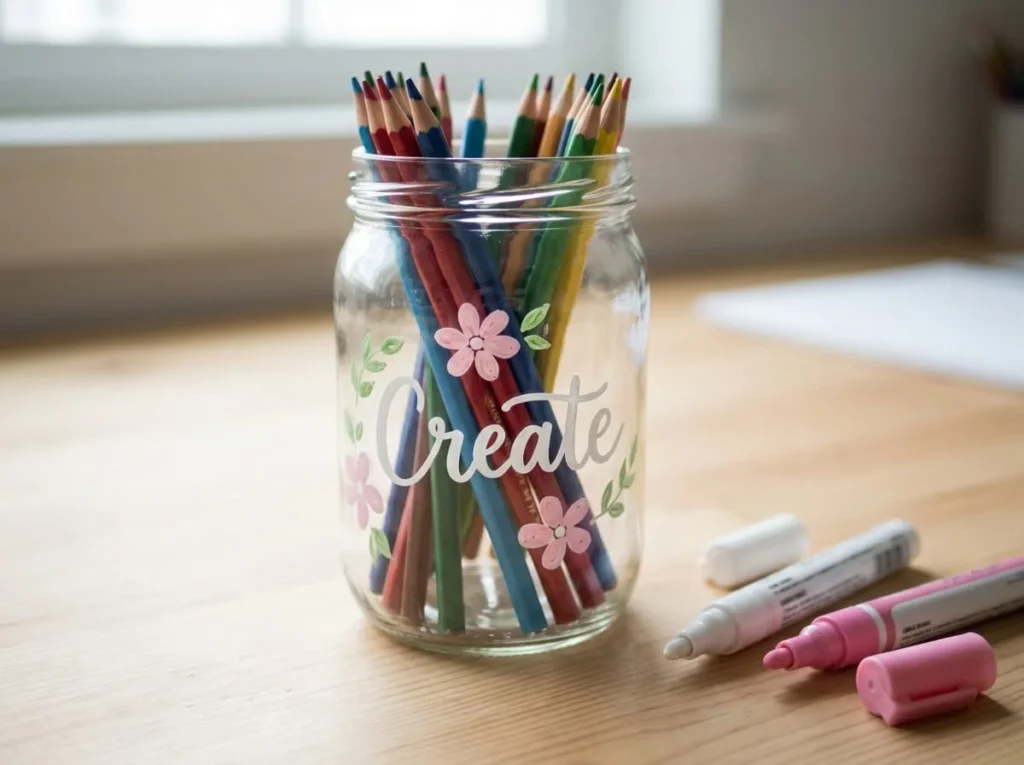
Glass jars can become attractive decorative containers when personalized with chalk marker lettering and simple patterns.
This project works well for non-food-contact displays, craft storage, and temporary decorations.
Because the design is applied directly to the exterior surface, you can create a personalized appearance without needing printed labels.
Materials Needed
- Clean, smooth glass jars.
- Chalk paint markers compatible with glass.
- Microfibre cloth.
- Paper and pencil.
- Optional decorative ribbon or twine.
How to Decorate Glass Jars with Chalk Markers
- Choose a clean glass jar with a smooth outer surface.
- Remove labels and adhesive residue using a method suitable for the glass.
- Wash and dry the jar thoroughly before decorating.
- Decide whether you want to add a word, short message, or simple illustration.
- Hold the jar securely on a stable work surface.
- Write a short word on the outside using slow, controlled marker strokes.
- Add small decorative elements such as leaves, stars, or simple dots.
- Allow the ink to dry before handling the decorated area.
- Finish with a ribbon or piece of twine around the neck of the jar if desired.
For a simple decorative project, write a word such as Create, Bloom, or Inspire on the jar.
You can surround the lettering with small floral drawings or a few coloured lines.
Another idea is to decorate several jars using matching colours and arrange them together as craft-room accessories.
Keep chalk marker artwork on the outside of the jars and away from rims or areas likely to contact food or drinks.
Unless the product is specifically approved for food-contact use, treat the finished jars as decorative items rather than food-safe containers.
Also remember that liquid chalk marker designs may not withstand repeated washing, moisture, or handling.
For decorations intended to remain in place permanently, a different glass-compatible paint product may be more suitable.
4. DIY Mirror Messages and Designs
Mirrors provide an interesting surface for decorative lettering because the reflection becomes part of the finished artwork.
A short message, delicate floral border, or simple illustration can make an ordinary mirror look more personalized.
This project works especially well when you keep the design small and leave most of the reflective surface uncovered.
Materials Needed
- A mirror compatible with liquid chalk markers.
- Chalk paint markers in one to three colours.
- Clean microfibre cloth.
- Paper and pencil for planning.
How to Make Mirror Lettering Art
- Choose a mirror with an accessible front surface and no damaged edges.
- Confirm that its finish or coating is suitable for your chalk markers.
- Clean and dry the area where you plan to draw.
- Sketch a short message on paper to decide on its size and spacing.
- Begin writing near a corner or along one side of the mirror.
- Use simple lettering with enough space between the words.
- Add a small flower, heart, or decorative border if desired.
- Allow the ink to dry before touching the artwork.
You might choose a short message such as Good Morning or Have a Lovely Day.
For a more decorative look, draw a few flowers along the lower corner of the mirror.
Try using white or pastel-coloured markers if they provide sufficient contrast against the reflected background.
Avoid decorating areas that you regularly need for visibility, particularly on bathroom or dressing mirrors.
You should also keep cleaning liquids away from damaged edges and backing materials that could be affected by moisture.
For a simple variation, create a border of small leaves around one corner instead of adding lettering.
This gives the mirror a decorative appearance without covering much of the reflective area.
5. Chalkboard Menu and Kitchen Sign
A reusable menu board is a practical way to explore decorative lettering while creating something useful for a kitchen, dining area, or small gathering.
The project combines headings, spacing, separators, and small illustrations.
You don’t need complicated calligraphy to create a clear and attractive design.
Materials Needed
- Marker-compatible non-porous chalkboard.
- White chalk paint marker.
- One or two additional colours.
- Paper and pencil.
- Clean cloth.
- Optional ruler or surface-safe stencil.
How to Create a Chalkboard Menu
- Clean your writing board and allow it to dry.
- Decide what information you want to display.
- Sketch the layout on paper before transferring it to the board.
- Write a heading such as Today’s Menu near the top.
- Add a short horizontal separator below the heading.
- Write the menu items in clear, evenly spaced lines.
- Use a second colour to highlight section headings or decorative details.
- Add a small illustration, such as a cup, leaf, or plate outline.
- Allow the artwork to dry before displaying it.
For better readability, use larger lettering for the main heading and smaller, consistent lettering for the remaining information.
Keep the layout simple and avoid placing too many decorative elements between the words.
A two-column design can work for larger boards, but a single column is generally easier for beginners.
You can also create a kitchen sign featuring a favourite recipe title or a short family message.
If the board is intended for regular updates, make sure both the surface and markers are suitable for repeated writing and cleaning.
This project provides an opportunity to practise useful lettering skills while creating a functional piece of home décor.
6. Birthday and Celebration Glass Signs
A handmade celebration sign can add a personal touch to a birthday party, family gathering, or other special occasion.
Instead of buying a printed display, you can create temporary lettering and decorations on a suitable smooth glass signboard.
This approach allows you to choose your own colours, message, and decorative style.
Materials Needed
- A stable glass display panel compatible with liquid chalk markers.
- Chalk paint markers in several colours.
- Paper and pencil.
- Microfibre cloth.
- A suitable stand or secure display support.
How to Make Celebration Signs
- Select a glass display panel with smooth, finished edges and an appropriate support.
- Clean the surface and allow it to dry completely.
- Decide on a short celebration message.
- Sketch the wording and decorative arrangement on paper.
- Write the main message in large letters near the centre of the glass.
- Add a smaller line underneath if needed.
- Decorate the edges with simple balloons, stars, flowers, or dots.
- Allow the ink to dry before placing the sign in its display position.
For a birthday sign, use a simple message such as Happy Birthday, followed by a name if desired.
For another celebration, choose wording appropriate to the occasion.
Try using two contrasting colours for the main lettering and one additional shade for decorative details.
If you’re unfamiliar with glass lettering, practise on a small compatible surface before beginning the finished sign.
You can also place a paper design behind the glass as a temporary guide while drawing.
Make sure the sign is positioned securely, especially around children or crowded party areas.
Avoid using unstable glass panels, sharp-edged materials, or displays that could easily be knocked over.
A creative variation is to draw a simple floral border around the wording rather than using party-themed illustrations.
This can give the design a more understated appearance suitable for different celebrations.
7. Simple Floral Chalk Marker Artwork
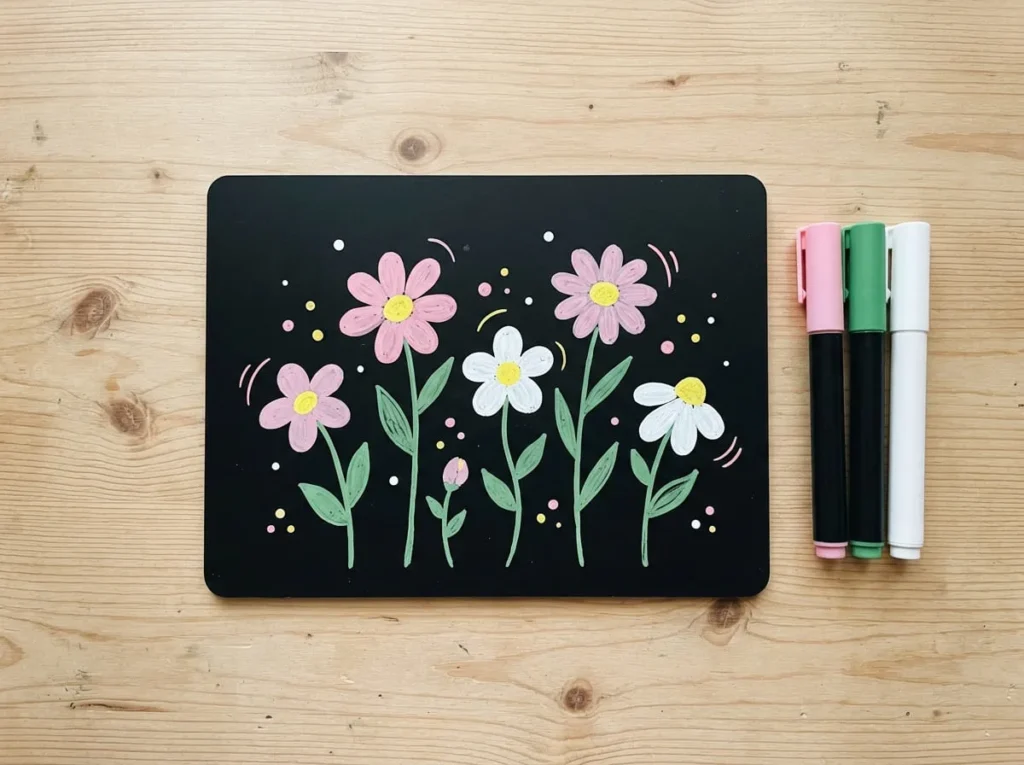
Floral artwork is an excellent final project because it combines the techniques you’ve practised throughout this section.
Simple flowers, leaves, stems, and curved lines can create a decorative composition without requiring advanced drawing skills.
The design can be made on a compatible reusable chalkboard, glass panel, or another manufacturer-approved non-porous surface.
Materials Needed
- Compatible non-porous drawing surface.
- Chalk paint markers in green, yellow, pink, white, or other preferred colours.
- Paper and pencil.
- Clean microfibre cloth.
- Optional flower stencil.
How to Draw Flowers with Chalk Markers
- Clean and dry your chosen surface.
- Sketch a simple floral arrangement on paper.
- Begin by drawing three or four flower centres, leaving enough space for the petals.
- Add rounded petals around each centre using a different colour.
- Draw thin or medium-width stems extending downward.
- Add small leaves along the stems using green.
- Use a contrasting colour to add simple dots or decorative marks around the flowers.
- Allow the artwork to dry before handling or displaying it.
For beginners, flowers with five rounded petals are a practical starting point.
You can create a daisy-inspired design using white petals and a yellow centre, or experiment with pink and purple flowers for a brighter arrangement.
Try drawing flowers of different heights so the composition feels more natural.
A few small leaves and curved stems can help connect the individual flowers into one arrangement.
If you want a more structured appearance, use a stencil for the flower outlines and complete the details freehand.
For an alternative design, draw a simple wreath by arranging leaves and small flowers around a circular guideline.
Allow the first colours to dry before adding overlapping details, and avoid repeatedly tracing over wet areas.
The finished floral artwork can be displayed as a reusable decoration on an appropriate signboard or glass surface.
You can also change the colours to suit different seasons. Soft pinks and yellows work well for spring-inspired designs, while orange and red tones can create an autumnal appearance.
This project demonstrates how simple lettering tools can also be used to make attractive decorative illustrations.
Common Chalk Paint Marker Problems and How to Fix Them
Chalk paint markers are generally easy to use, but even experienced crafters can encounter problems such as inconsistent ink flow, smudging, faint lines, or marks that remain visible after cleaning. These issues often depend on the marker’s formulation, the condition of its nib, and the surface being decorated.
Fortunately, many common problems can be prevented through proper preparation and careful application. Understanding why they occur can help you achieve smoother lettering, cleaner illustrations, and better results across different craft projects.
Before attempting any troubleshooting method, check the instructions provided with your particular markers. Different products may require different preparation, cleaning, and storage techniques.
Why Is My Chalk Marker Not Working?
A chalk marker that produces faint lines, stops writing, or fails to release ink may not necessarily be defective. In many cases, the problem is related to insufficient priming, dried ink around the nib, or interrupted ink flow.
Some liquid chalk markers use valve-activated tips that must be prepared before the first use. Depending on the manufacturer’s instructions, this may involve shaking the capped marker and gently pressing its nib against a suitable test surface until the liquid reaches the applicator.
If your marker isn’t producing colour, start by checking whether it requires this preparation process. Avoid repeatedly pushing the nib down with excessive force, as this may cause leaking or damage the internal mechanism.
A dried or contaminated tip can also affect performance. If the applicator has collected dust, dried pigment, or other material, the ink may not transfer evenly. Follow the manufacturer’s cleaning recommendations rather than using sharp objects or strong chemicals to clear the tip.
Temperature and storage conditions can influence some ink formulations. Markers exposed to excessive heat, cold, or prolonged periods without secure caps may become harder to use.
If your marker stops working, try the following checks:
- Confirm that the marker is intended for the surface you’re using.
- Follow the manufacturer’s preparation and priming instructions.
- Test the nib on a compatible scrap surface.
- Check whether the cap was securely closed after previous use.
- Inspect the tip for visible damage or dried residue.
- Avoid applying excessive pressure in an attempt to force out ink.
If the marker still produces no colour after the recommended troubleshooting steps, it may be empty, damaged, or unsuitable for continued use.
Why Does Chalk Marker Ink Smudge?
Smudging occurs when the ink moves across the surface instead of remaining within the intended lines or shapes.
One common cause is touching the design before it has dried. Although some liquid chalk markers dry relatively quickly, drying times vary depending on the formulation, the thickness of the application, and the surrounding conditions.
Applying several layers of ink in one area can also increase the chance of smudging.
For example, repeatedly tracing over a wet letter may disturb the earlier colour rather than make the line appear smoother.
Surface contamination is another possible cause. Fingerprints, grease, dust, or leftover cleaning products can prevent the liquid from forming consistent marks.
To reduce smudging, begin with a clean, completely dry surface. Apply the ink using controlled strokes and avoid placing your hand over freshly drawn areas.
If you’re creating a design with several colours, complete one section and allow it to dry before adding nearby details.
You should also avoid using excessive ink when filling large shapes. A single, even application may produce a cleaner result than repeatedly covering the same area.
Humidity, moisture, and condensation can affect certain formulations, particularly when decorating glass or windows.
If you notice that the ink remains unusually wet or spreads across the surface, stop and check whether the conditions and materials are suitable for your markers.
What Causes Chalk Marker Ghosting?
Ghosting is one of the most frustrating problems associated with liquid chalk markers.
It happens when a faint outline, stain, or coloured shadow remains visible after the main design has been removed.
This is particularly common when liquid chalk ink is used on a porous or insufficiently sealed surface.
For example, a traditional chalkboard may have tiny pores that absorb the liquid pigment. Even after the visible ink has been wiped away, some colour can remain embedded in the material.
Chalkboard-painted wooden signs and walls can be especially vulnerable if the finish has not been designed or sealed for liquid chalk markers.
However, ghosting can also occur on some coated surfaces if the finish is worn, scratched, or incompatible with the ink.
The most effective way to reduce the risk is to select a surface specifically approved for liquid chalk markers.
Before decorating a new board, make a small test mark in an inconspicuous location. Allow it to dry according to the product instructions, then try removing it using the recommended cleaning method.
Check whether the original colour disappears completely.
If a faint mark remains, avoid using that surface for designs you expect to erase.
It’s important to understand that ghosting is not always completely reversible. Once pigment has penetrated an absorbent surface, ordinary cleaning may not remove it.
Preventing the problem is generally easier than attempting to correct it afterward.
How to Prevent Uneven Lines and Streaks
Uneven lines can make lettering and illustrations appear patchy, especially when working on large signs or smooth glass surfaces.
Several factors can contribute to this problem, including inconsistent ink flow, uneven pressure, surface residue, and a damaged applicator.
Start by preparing your marker according to its instructions and testing it before drawing on the finished surface.
Hold the marker comfortably and use steady strokes rather than pressing down aggressively.
If you’re using a chisel tip, remember that changing the angle will alter the width of your line. Keeping the angle consistent can help produce more uniform lettering.
For rounded bullet tips, maintaining even contact with the surface can improve line quality.
Streaking may also occur when the nib moves across a surface that is not completely clean.
Wipe away suitable surface residue using an approved cleaning method and allow the area to dry before trying again.
When colouring a larger shape, work in controlled sections instead of repeatedly moving back and forth over wet ink.
If the marker leaves a patchy area, let it dry and check whether the manufacturer recommends applying another layer.
Not every liquid chalk marker supports layering equally well, so test this technique before using it on a finished project.
How to Remove Chalk Paint Markers Safely
Many chalk paint markers are designed to be removable from compatible non-porous surfaces. However, the word erasable doesn’t mean that every formulation can be wiped away from every material.
Cleaning success depends on the type of ink, the surface finish, how long the marks have been present, and whether the material has absorbed any pigment.
For best results, follow the marker and surface manufacturers’ cleaning instructions. Start with the gentlest suitable method and avoid strong solvents or abrasive materials unless they are specifically approved.
Cleaning Markers from Glass and Mirrors
Plain, compatible glass is often one of the easier surfaces to clean after using liquid chalk markers.
For many erasable formulations, a soft cloth dampened with water may be enough to remove the dried marks.
Begin by checking that the glass is suitable for wet cleaning and that the marker manufacturer recommends water-based removal.
Use a clean microfibre cloth to gently wipe the artwork. If the ink doesn’t lift immediately, allow a suitable amount of moisture to soften the marks before wiping again.
Avoid aggressive scrubbing or using sharp scraping tools.
On mirrors, take additional care around the edges, where moisture may affect vulnerable backing materials.
Some windows and mirrors also have protective films or specialized coatings that can be damaged by unsuitable cleaning products.
If a faint residue remains, consult the manufacturer’s recommended cleaning method rather than immediately applying household solvents.
Once the ink is removed, dry the surface with a clean cloth to reduce streaks and watermarks.
For large window decorations, work in manageable sections instead of soaking the entire surface.
Removing Chalk Marker Ink from Non-Porous Chalkboards
Cleaning a chalkboard depends heavily on its construction.
A marker-compatible non-porous chalkboard may allow liquid chalk ink to be removed with a damp cloth or another manufacturer-approved method.
Traditional slate boards, unfinished surfaces, and certain chalkboard-painted finishes may behave differently.
Before cleaning, confirm that the board is suitable for both the marker and the recommended cleaning process.
Use a soft cloth to gently wipe away the design. Avoid excessive pressure, which may wear down the writing surface.
If the marker leaves visible residue, follow the board manufacturer’s instructions for further cleaning.
Do not automatically use alcohol, vinegar, abrasive sponges, or commercial cleaning chemicals. Some products can damage the coating, reduce its erasability, or leave the surface looking dull.
After cleaning, allow the board to dry completely before writing on it again.
A clean, dry writing surface helps the next design appear more consistent.
What to Do If Chalk Markers Leave Stains
If a chalk marker leaves a stain, first identify the type of surface you’re trying to clean.
A faint mark on smooth glass may be caused by removable residue, while a coloured shadow on porous wood or chalkboard paint may indicate that pigment has penetrated the material.
These situations require different approaches.
For compatible non-porous surfaces, try the gentlest cleaning method recommended by the marker manufacturer.
If residue remains, consult the surface manufacturer’s care guidance before trying additional products.
For porous materials, avoid repeated soaking or aggressive scrubbing. These methods can spread the pigment, damage the finish, or create a larger visible mark.
If a stained surface is valuable, coated, or difficult to replace, consider seeking guidance from its manufacturer or a suitable restoration professional.
Do not assume that a cleaning method demonstrated on one type of chalkboard will work on another.
Sometimes a stain cannot be removed without altering the surface itself.
The best long-term solution is to test new marker and surface combinations before creating large designs, especially when using expensive boards, furniture, or decorative materials.
How to Store Chalk Paint Markers Properly
Correct storage helps protect the nib, maintain consistent ink flow, and reduce the likelihood of accidental leaks.
Always replace the cap securely when you’ve finished using a marker.
Leaving the nib exposed to air for extended periods can allow some formulations to dry around the applicator.
Store markers away from excessive heat, direct sunlight, and freezing conditions unless the manufacturer specifies otherwise.
The recommended storage position varies between products.
Some liquid chalk markers are intended to be stored horizontally, while others have different instructions based on their internal construction.
Follow the manufacturer’s guidance rather than assuming that every marker should be kept upright.
It’s also helpful to keep the markers in their original packaging or a suitable storage container.
Before putting them away, check for loose caps, leaking ink, or damaged nibs.
Keep them out of reach of children who are below the manufacturer’s recommended age range.
Taking a few moments to store your markers correctly can help make future craft sessions easier and reduce unnecessary waste.
How to Choose Chalk Paint Markers for Crafts
Not all chalk paint markers are designed for the same projects.
Some are intended for large decorative lettering, while others offer finer tips for illustrations and detailed writing. Ink opacity, colour selection, erasability, and surface compatibility can also vary significantly.
Choosing the right markers begins with understanding what you want to create and where you plan to use them.
Choosing the Right Tip Size
Tip size influences how easily you can write letters, draw outlines, or fill decorative shapes.
A fine tip is useful for small lettering, narrow borders, and detailed illustrations.
A medium bullet tip is often a practical starting point for beginners because it offers a balance between everyday writing and simple drawing.
Chisel tips are useful for decorative lettering because their angled edges can produce different line widths.
Broad tips are more suitable for large signs and bold displays, where thin lettering might be difficult to see.
Consider the size of your working surface before purchasing a set.
If you’re decorating a small glass jar, a narrow nib may provide better control.
For a large welcome sign, a medium or broad tip may help you create more visible lettering.
It’s also worth checking whether the nib is replaceable or reversible, as some products offer different drawing edges within one marker.
These features vary by brand, so review the product specifications rather than relying solely on the packaging description.
Erasable vs. More Permanent Formulations
One of the most important product differences is whether the ink is designed to be removable.
Many liquid chalk markers are marketed for temporary decorations on approved non-porous surfaces.
These products can be useful for menus, seasonal window art, and reusable signs.
However, not every chalk-style marker has the same removal characteristics.
Some formulations are more resistant to moisture or handling, while others are intended to wipe away relatively easily.
The surface also affects removability. A marker that wipes cleanly from glass may leave stains on an unsealed wooden board.
Before purchasing, look for clear information about approved surfaces and recommended cleaning methods.
If you’re planning a decoration that needs to remain in place permanently, consider whether a compatible paint marker is a better choice.
For temporary artwork, prioritize products that explicitly state they are removable from your intended surface.
Color Selection and Opacity
Chalk paint markers are available in a range of colours, including white, black, bright shades, pastels, and metallic-looking finishes.
The best selection depends on the background you’re decorating and the style you want to achieve.
White markers are popular for black chalkboards because they create strong contrast and a traditional chalk-inspired appearance.
Bright colours can be effective for party signs, children’s craft projects, and seasonal window decorations.
Pastel shades may work well for delicate floral illustrations or understated decorative lettering.
Opacity is another important consideration.
Some markers produce dense, highly visible lines, while others have a more translucent appearance.
If you’re working on dark surfaces, look for products designed to provide strong coverage against darker backgrounds.
Remember that colours can appear different on glass, blackboards, and other surfaces.
Lighting and the colour of the background can also affect how visible the artwork looks.
For a first set, a small selection of versatile colours may be more useful than a large collection of shades you rarely need.
Surface Compatibility and Product Safety
Before buying chalk paint markers, check that they are intended for your planned surface.
A product designed for smooth glass may not be suitable for untreated wood, traditional chalkboards, or other absorbent materials.
Read the manufacturer’s compatibility information carefully.
If the product is described as washable or erasable, check which surfaces those claims apply to.
Product safety is equally important, particularly when the markers will be used by children.
Look for clear age recommendations, safety labelling, and instructions for appropriate handling.
A non-toxic label does not mean that the ink is safe to swallow or suitable for use on skin, food, or food-contact surfaces.
For children’s craft activities, choose age-appropriate products and provide supervision according to the manufacturer’s guidance.
If you’re decorating items such as glass jars, keep the artwork away from areas that contact food or drinks unless the product is specifically approved for that purpose.
A suitable marker should match your project requirements rather than simply offer the widest colour selection or most attractive packaging.
Frequently Asked Questions
Are Chalk Paint Markers Permanent?
Many chalk paint markers are designed for temporary artwork and can be removed from approved non-porous surfaces.
However, they are not guaranteed to be erasable from every material.
Porous surfaces such as unfinished wood, certain chalkboards, and untreated paper may absorb the ink and retain visible colour.
Always check the manufacturer’s instructions and test the marker before creating artwork that you expect to remove.
Can You Use Chalk Paint Markers on Windows?
Yes, many liquid chalk markers are suitable for decorating compatible glass windows.
They are commonly used for seasonal illustrations, temporary lettering, and decorative displays.
Before beginning, check that the marker is intended for glass and that any window films or coatings are compatible.
Clean the surface, test a small area, and avoid placing designs where they could interfere with visibility or safety.
Can You Use Chalk Paint Markers on Regular Chalkboards?
Not every traditional chalkboard is suitable for liquid chalk markers.
Some ordinary chalkboards and chalkboard-painted surfaces are porous, allowing liquid pigments to penetrate and leave permanent-looking stains or ghosting.
For reusable designs, choose a non-porous board specifically approved for liquid chalk markers.
If you’re uncertain, test a small hidden area and confirm that the ink can be removed after drying.
Do Chalk Paint Markers Wash Off with Water?
Many erasable liquid chalk markers can be removed from compatible non-porous surfaces using water and a soft cloth.
However, removal depends on the formulation and material.
Some products require specific cleaning methods, and marks on porous surfaces may not wash away completely.
Follow the marker manufacturer’s instructions and avoid harsh cleaning methods that could damage the surface.
Can You Use Chalk Paint Markers on Wood?
Chalk paint markers can leave visible marks on wood, but untreated wood is generally unsuitable when you want the design to be erasable.
The wood grain may absorb the liquid pigments, making complete removal difficult.
Some sealed or coated wooden surfaces may be compatible with particular markers, but this depends on the finish.
For wooden signs intended to last, an appropriate acrylic paint marker may be a more suitable option.
Always test the material before decorating the finished piece.
Are Chalk Paint Markers Safe for Kids?
Some chalk paint markers are designed for children’s art activities, but suitability varies between products.
Check the manufacturer’s recommended age range, safety information, and intended use.
Young children should be supervised, particularly because marker caps and other components may present hazards.
Even products labelled non-toxic should not be swallowed or used on skin unless specifically approved for those purposes.
Choose age-appropriate supplies and keep the workspace protected during craft activities.
Final Thoughts
Chalk paint markers offer a creative way to make colourful lettering, decorative signs, and temporary artwork on compatible surfaces. Their liquid formulations and different nib styles make them useful for projects ranging from simple welcome messages to detailed floral illustrations.
The most important part of using these markers successfully is selecting the right surface. Smooth, non-porous materials approved by the manufacturer generally provide better opportunities for erasable artwork than unfinished wood, traditional chalkboards, or other absorbent surfaces.
Good preparation also makes a difference. Cleaning the surface, preparing the marker correctly, practising your strokes, and allowing the ink to dry can help you create neater designs while avoiding common problems.
If you’re new to chalk marker crafts, begin with a small project such as a welcome sign on a compatible writing board or a simple floral drawing on suitable glass. These projects let you practise lettering, line control, and colour combinations without requiring complicated materials.
As your confidence grows, you can experiment with seasonal window decorations, personalized glass displays, reusable menu boards, and other creative ideas.
With suitable materials and a little practice, chalk paint markers can become a versatile addition to your craft supplies, helping you create decorative artwork that is both practical and enjoyable.