
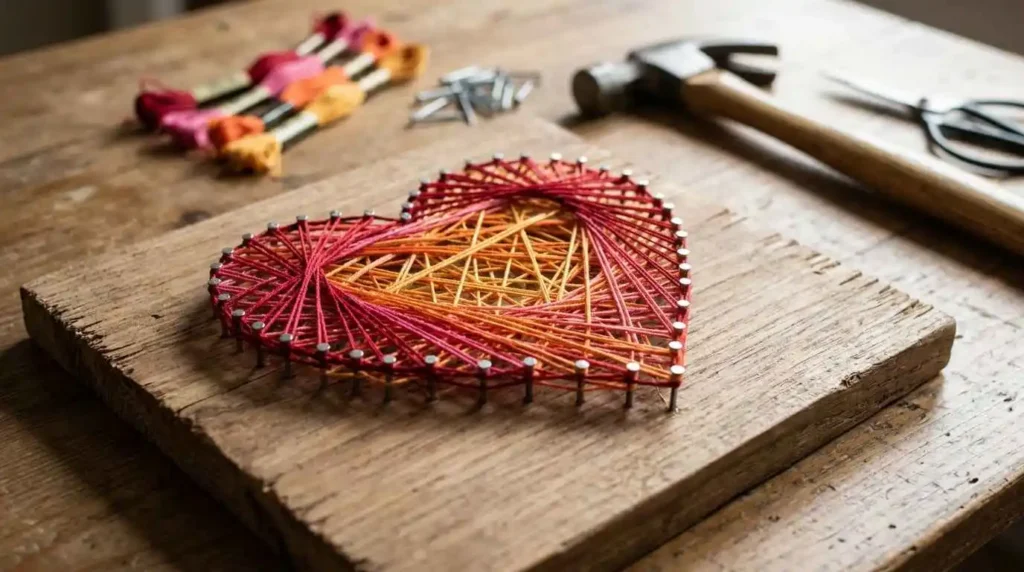
String art is a creative craft that combines simple materials like wood, nails, and colorful string to create beautiful handmade designs. From simple shapes to detailed artwork, string art allows you to turn basic supplies into unique decorations for your home.
Many people think string art looks complicated, but beginners can learn this craft by starting with easy designs and basic techniques. A simple heart, geometric pattern, or name design can be created with a few materials and some patience.
One of the best things about string art is that it does not require advanced artistic skills. You do not need to draw perfectly or have professional crafting experience. By following a pattern and carefully wrapping the string around nails, you can create attractive artwork step by step.
In this string art tutorial for beginners, you will learn what string art is, the supplies you need, and how to prepare for your first project. You will also discover helpful tips to create clean and beautiful string art designs.
What Is String Art?
String art is a handmade craft that uses nails placed on a surface and colorful string wrapped around them to create patterns, shapes, and designs.
The process usually starts with a design template placed on a wooden board. Small nails are then added around the outline of the design. After removing the template, string is wrapped between the nails to create lines and patterns.
Although string art looks detailed, the basic idea is simple. The beauty of the artwork comes from how the strings cross and overlap to create interesting shapes and textures.
Common string art designs include:
• Hearts
• Animals
• Flowers
• Names
• Geometric patterns
• Abstract designs
String art became popular as a DIY craft because it allows people to create personalized decorations using affordable materials. Many people use it to decorate their homes, create handmade gifts, or enjoy a relaxing creative activity.
Unlike some crafts that require expensive tools, string art can be started with basic supplies that are easy to find. A wooden board, nails, string, and a simple design template are enough for many beginner projects.
The final result can look modern, rustic, or colorful depending on the materials and design choices you make.
Why String Art Is Great for Beginners
String art is a great craft for beginners because it combines simple steps with creative freedom.
You do not need advanced skills to create a beautiful piece. Even a basic design can look impressive when the strings are arranged carefully.
Requires Simple Materials
One of the biggest advantages of string art is that it does not require many supplies.
Most beginner projects need only:
• Wooden board
• Nails
• String or thread
• Hammer
• Design template
These materials are easy to find and can be reused for different projects.
Allows Creative Freedom
String art gives you many ways to personalize your artwork.
You can choose:
• Different string colors
• Various patterns
• Different board sizes
• Unique designs
For example, the same heart pattern can look completely different when created with different colors and string arrangements.
Relaxing and Enjoyable Activity
Many people enjoy string art because the process is slow and creative.
Placing nails, choosing colors, and wrapping string can be a calming activity that allows you to focus and enjoy the moment.
It can be a great hobby for anyone who enjoys making handmade crafts.
Suitable for Different Skill Levels
Beginners can start with simple designs and gradually try more detailed patterns.
Easy projects like hearts and basic shapes help you understand:
• Nail placement
• String tension
• Pattern creation
As your skills improve, you can create more complex artwork with detailed designs.
Creates Beautiful Home Decorations
String art is not only fun to make, but it also creates useful decorations.
Finished pieces can be displayed as:
• Wall art
• Shelf decorations
• Bedroom decor
• Handmade gifts
Because each design is created by hand, every piece has a unique personal touch.
Supplies Needed for String Art
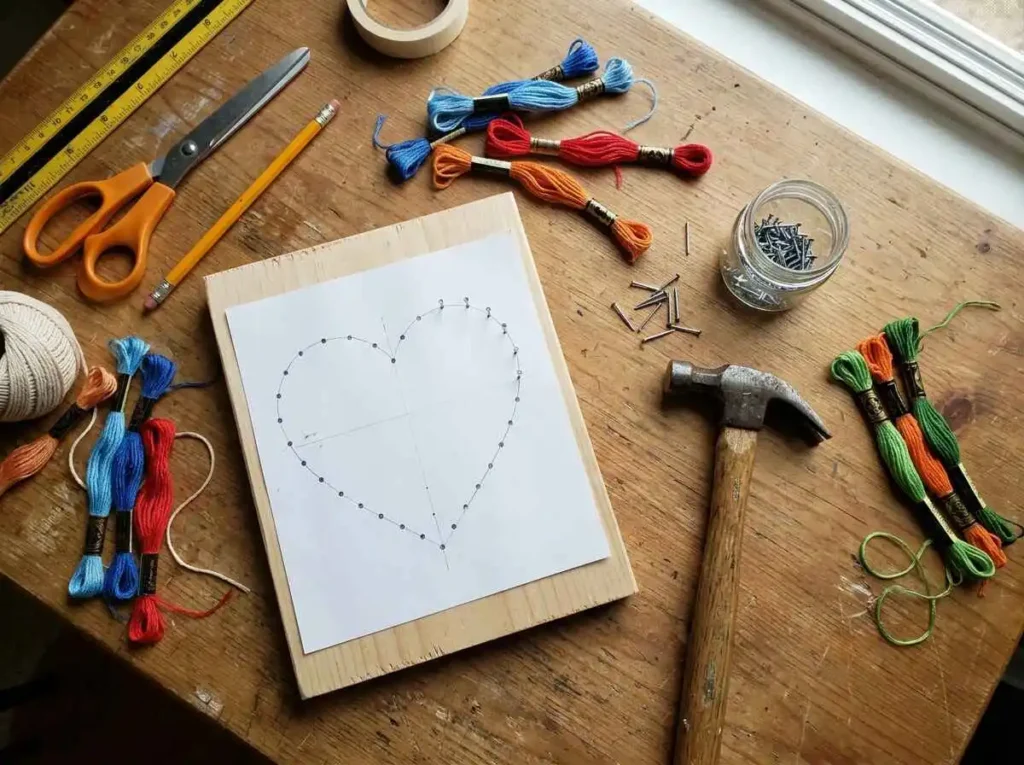
Before starting your first string art project, it is important to prepare the right materials.
Choosing good quality supplies will make the process easier and help your final artwork look cleaner.
Wooden Board
The wooden board is the base of your string art project.
You can choose different sizes depending on the design you want to create.
For beginners, a medium sized board is usually easier to handle because it provides enough space for the pattern without becoming difficult to manage.
When choosing a wooden board, look for:
• Smooth surface
• Flat shape
• Strong material
• Enough space for your design
You can leave the wood with its natural color or paint it before adding the string.
Popular background colors include:
• White
• Black
• Natural wood shades
• Pastel colors
A painted background can help the string colors stand out more.
Nails
Nails create the structure that holds the string pattern in place.
Small nails are commonly used because they are easier to place around detailed designs.
When choosing nails, consider:
• Size
• Thickness
• Spacing
• Height above the board
The nails should be strong enough to hold the string but not so large that they overpower the design.
Try to keep the nails at a similar height so the finished artwork looks more balanced.
Hammer
A hammer is needed to place the nails into the wooden board.
A small craft hammer or regular household hammer can work well for beginner projects.
When adding nails:
• Tap gently
• Keep nails straight
• Maintain even depth
Take your time during this step because accurate nail placement creates a better final design.
String or Thread
String is the main material that creates the design.
Different types of string can create different effects.
Popular choices include:
• Embroidery thread
• Cotton string
• Yarn
• Colored craft string
Embroidery thread creates detailed designs because it is thin and available in many colors.
Cotton string and yarn create thicker lines and work well for bold designs.
Choose colors that match your style and the decoration space where you plan to display your artwork.
String Art Template
A template helps you create accurate designs.
Beginners often use templates because they make it easier to know where to place nails.
You can use:
• Printable patterns
• Hand drawn designs
• Simple shapes
• Letter templates
Common beginner templates include:
• Hearts
• Stars
• Flowers
• Names
• Animals
A clear template makes the nail placement process much easier.
Other Helpful Supplies
A few extra supplies can make your string art project easier.
Useful items include:
Pencil
A pencil can help mark measurements or create your own design on the board.
Ruler
A ruler helps maintain equal spacing when planning your pattern.
Paint
Paint can be used to customize the wooden board before adding string.
Scissors
Scissors are needed for cutting string and removing template pieces.
Tape
Tape can help hold the paper template in place while placing nails.
Preparing all your supplies before starting will make the crafting process smoother and more enjoyable.
How to Make String Art Step by Step
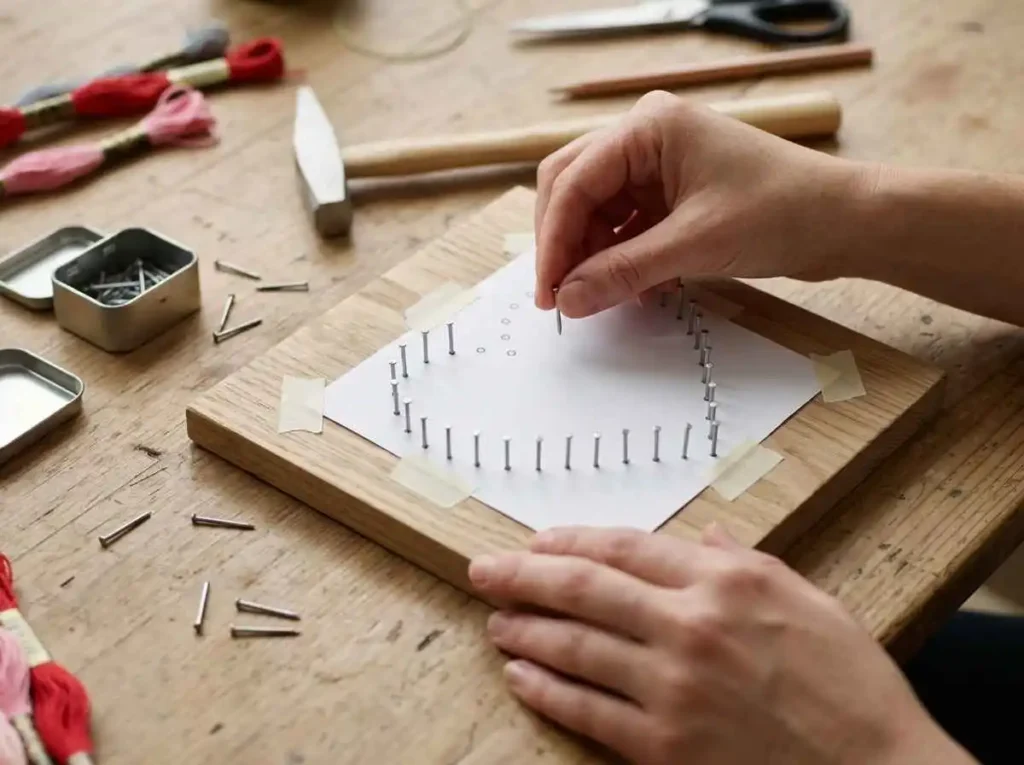
Creating string art may look complicated at first, but the process becomes simple when you follow each step carefully.
The main idea is to create a pattern using nails and then connect those nails with string to form a beautiful design.
For your first project, choose a simple design like a heart, star, flower, or basic geometric shape. These designs help beginners understand the process before moving on to more detailed artwork.
Follow these steps to create your own string art.
Step 1: Choose Your String Art Design
The first step is choosing a design that matches your skill level.
Beginners should start with simple shapes because they require fewer nails and less complicated string patterns.
Good beginner designs include:
• Heart shapes
• Stars
• Simple flowers
• Letters
• Basic geometric patterns
When selecting your design, consider the size of your wooden board and the amount of detail you want to include.
A small design is easier to complete, while a larger design gives you more space to create detailed patterns.
You can find printable templates online or create your own design by drawing a simple outline.
Remember that the outline does not need to be perfect. The nails and string will create the final artwork.
Step 2: Prepare the Wooden Board
Before adding nails, prepare your wooden board.
Start by checking the surface and making sure it is clean and smooth.
If the wood feels rough, lightly sand it to create a better working surface.
You can keep the natural wood appearance or customize the background with paint.
Popular background options include:
• White for a clean modern look
• Black for colorful string designs
• Natural wood for a rustic style
• Pastel colors for soft decorations
Allow any paint to dry completely before continuing.
A properly prepared board makes the nail placement easier and helps the finished artwork look more professional.
Step 3: Place the Template on the Board
Once your board is ready, place your chosen template on the surface.
Position the design where you want it to appear.
Make sure there is enough space around the design so the final string pattern does not feel crowded.
Use tape to hold the paper template in place.
Check the following before adding nails:
• The design is centered
• The size fits the board
• The template is secure
Taking time during this step prevents problems later.
A well positioned template helps create a balanced final design.
Step 4: Add Nails Around the Pattern
Adding nails is one of the most important parts of creating string art.
Follow the outline of your template and place nails around the edges of the design.
Try to keep the spacing between nails as even as possible.
Consistent nail placement helps create a cleaner string pattern.
While adding nails:
• Keep nails straight
• Use similar spacing
• Avoid placing nails too close together
• Leave enough height for wrapping string
Tap each nail gently with a hammer until it is secure.
Do not hammer the nails completely into the board because the string needs space to wrap around them.
For beginners, it is better to work slowly and check your design as you go.
Step 5: Remove the Template
After all nails are placed, carefully remove the paper template.
Pull the paper away slowly to avoid disturbing the nails.
If small pieces of paper remain around the nails, remove them gently.
Now you should have the outline of your design created with nails.
Take a moment to check:
• Nail positions
• Spacing
• Overall shape
If any nails look uneven, adjust them before starting the string work.
Once the template is removed, your design is ready for the most creative step.
Step 6: Start Wrapping the String
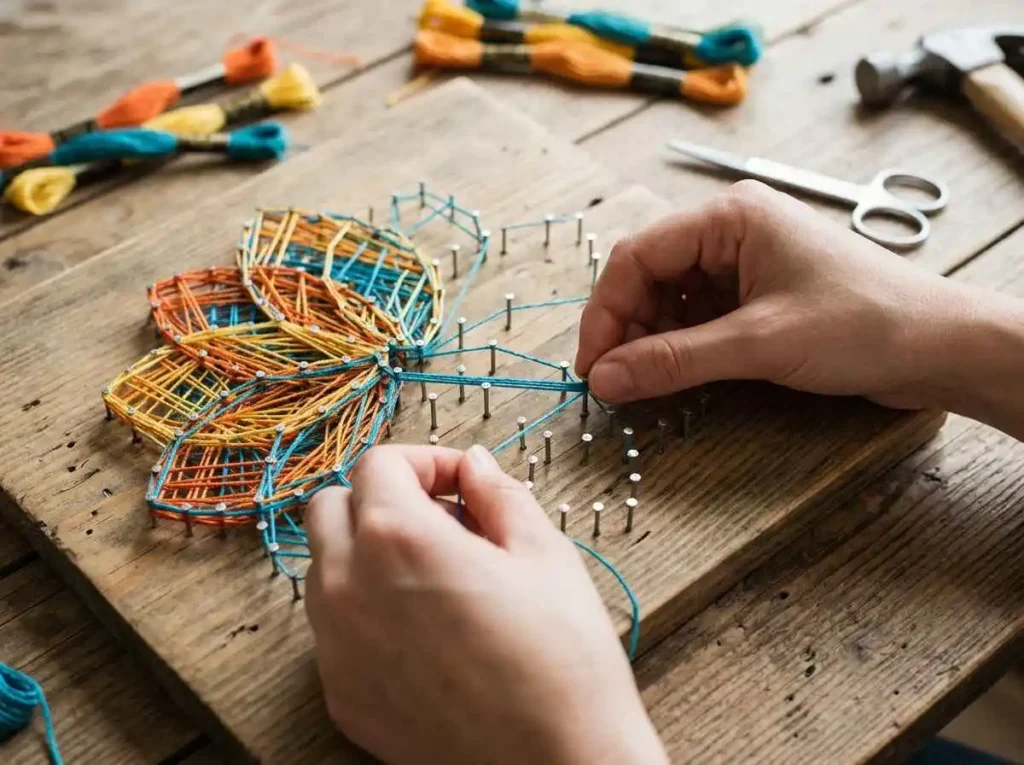
Now you can begin creating the actual string pattern.
Tie the end of your string around one nail to secure it.
Then start wrapping the string around different nails to create your design.
There is no single correct way to wrap string. Different patterns create different effects.
You can:
• Follow the outline
• Create random crossing patterns
• Fill the inside area
• Create layered designs
Keep the string slightly tight so it stays in place, but avoid pulling too hard because it can move the nails or damage the string.
As you continue wrapping, you will see the design begin to appear.
This is the most enjoyable part of string art because you can watch a simple outline transform into a detailed piece of artwork.
Step 7: Complete and Secure the Design
Continue wrapping the string until you are happy with the coverage and pattern.
Once your design is complete, tie the string securely around the final nail.
Cut any extra string carefully.
Before displaying your artwork, check:
• Loose strings
• Uneven areas
• Nail stability
You can make small adjustments by moving or adding a few extra string lines.
A finished string art piece should feel secure and balanced.
Once completed, your handmade artwork is ready to display.
Easy String Art Ideas for Beginners
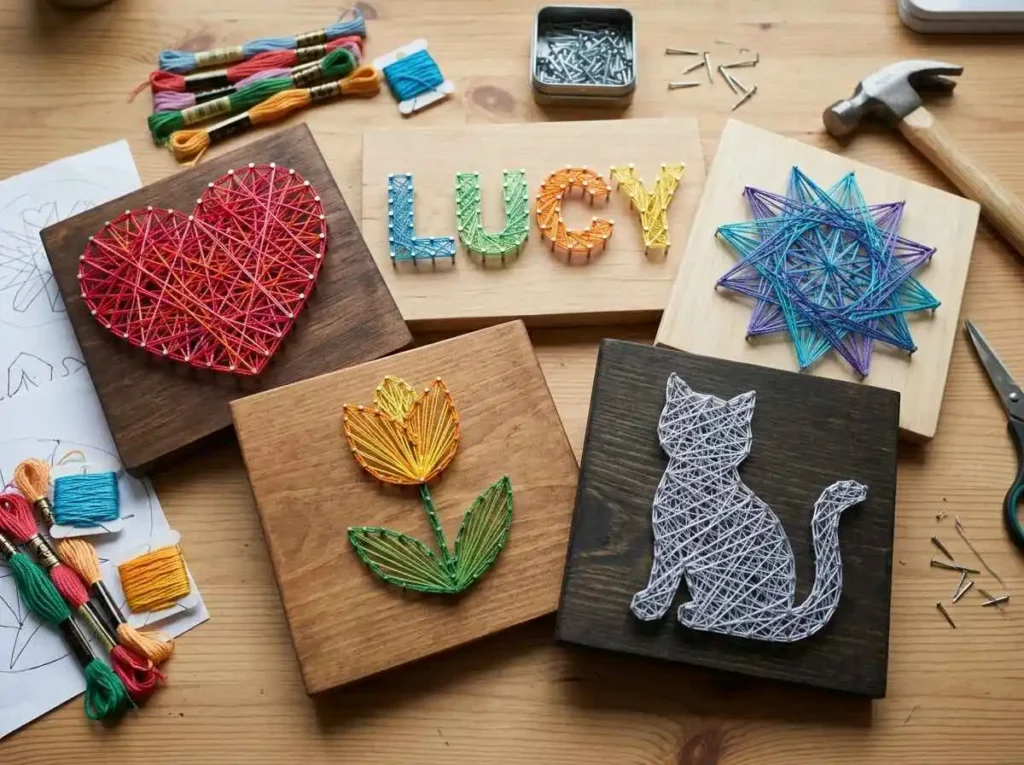
After learning the basic process, beginners can try different designs to improve their skills.
Simple patterns are a great way to practice nail placement, string control, and color combinations.
Here are some beginner friendly string art ideas.
Heart String Art
Heart string art is one of the most popular beginner designs.
It uses a simple shape and creates a beautiful finished result.
Heart designs are perfect for:
• Bedroom decorations
• Handmade gifts
• Anniversary presents
• Wall decorations
You can create a classic heart using one string color or use multiple colors for a more creative effect.
A heart design is a great first project because it helps beginners learn the basic wrapping technique.
Name String Art
Name string art is a personalized decoration that makes a thoughtful handmade gift.
You can create:
• Names
• Initials
• Short words
• Family signs
This design works well for:
• Children’s rooms
• Nursery decorations
• Personalized gifts
When creating letters, use a clear template and place nails carefully around the shape.
Different string colors can help make the name stand out.
Geometric String Art
Geometric designs are modern and stylish options for beginners.
They use shapes and patterns instead of detailed pictures.
Examples include:
• Triangles
• Circles
• Lines
• Abstract patterns
These designs are great for home decor because they create a clean and contemporary look.
Beginners can start with simple patterns and gradually create more detailed geometric artwork.
Flower String Art
Flower string art combines creativity with natural designs.
Simple flower shapes can be created using a circular center and petal outlines.
Flower designs work well for:
• Bedroom walls
• Living spaces
• Handmade gifts
You can use different string colors to create realistic flowers or colorful decorative designs.
Adding a painted background can make the flower pattern stand out even more.
Animal String Art
Animal designs are fun projects for people who enjoy creative artwork.
Beginners can start with simple animal outlines such as:
• Birds
• Cats
• Butterflies
• Dogs
The key is choosing a simple silhouette instead of a highly detailed image.
Animal string art can be used for children’s rooms, gifts, or playful home decorations.
Creative Ways to Use String Art
String art is not only a fun hobby but also a practical craft that can create beautiful decorations.
Once you complete your artwork, there are many ways to use it.
Home Wall Decoration
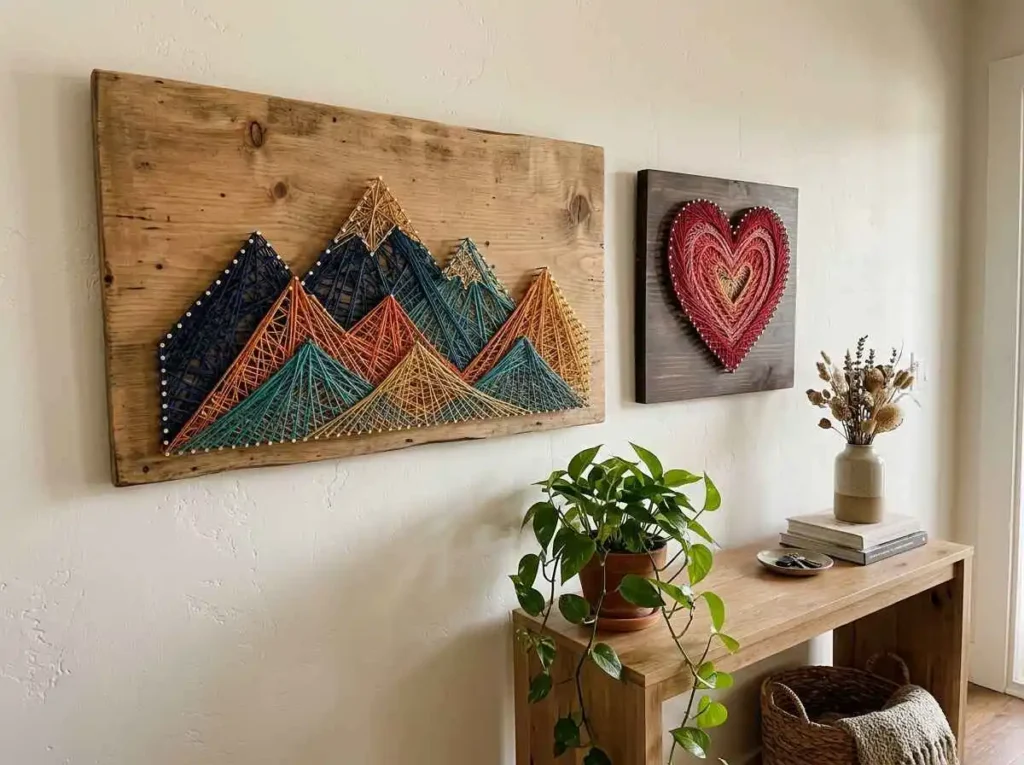
String art makes unique handmade wall decor.
You can display your artwork in:
• Living rooms
• Bedrooms
• Hallways
• Craft spaces
A handmade piece adds personality and creativity to your home.
Handmade Gifts
String art makes a thoughtful gift because it requires time and personal effort.
You can create custom designs based on the person’s interests.
Examples include:
• Name signs
• Favorite shapes
• Special dates
• Personalized artwork
Bedroom Decoration
Small string art designs can add a creative touch to bedrooms.
Popular ideas include:
• Initial designs
• Hearts
• Stars
• Simple patterns
They can be placed above desks, shelves, or bedside areas.
Party and Event Decor
String art can also be used for special occasions.
Custom designs can match themes for:
• Birthdays
• Weddings
• Anniversaries
• Celebrations
Personalized string art signs can become memorable decorations for important events.
Office or Workspace Decor
String art can bring creativity into workspaces.
Simple geometric designs or motivational words can make an office feel more personal.
Handmade decorations can create a more inspiring and comfortable environment.
Tips for Making Better String Art
Creating string art becomes easier with practice, but a few simple techniques can help beginners create cleaner and more attractive designs.
The quality of your final artwork depends on small details like material selection, nail placement, string tension, and planning.
By improving these basic skills, you can create string art pieces that look more balanced and professional.
Choose the Right String Color
The color of your string can completely change the appearance of your artwork.
Before starting, think about the style you want to create.
You can choose:
• Bright colors for a fun and playful design
• Neutral colors for modern home decor
• Multiple colors for creative patterns
• Matching shades for a smooth gradient effect
When using multiple colors, plan the color order before wrapping the string.
This helps create a more organized design and prevents the colors from looking random.
Keep Nail Spacing Even
Even nail spacing is important for creating a clean string art pattern.
If some nails are too close together and others are too far apart, the final design may look uneven.
Try to maintain similar spacing around your design outline.
Consistent spacing helps:
• Create smoother lines
• Improve pattern accuracy
• Make the artwork look more balanced
Using a ruler or marking small points before adding nails can make this step easier.
Do Not Pull String Too Tight
String tension affects both the appearance and durability of your artwork.
The string should be firm enough to stay in place but not so tight that it pulls the nails or damages the board.
When wrapping string:
• Keep steady pressure
• Avoid forcing the string
• Check the nail positions regularly
A relaxed and controlled wrapping technique creates a cleaner design.
Start With Simple Designs
Beginners often want to create detailed artwork immediately, but starting with simple designs helps build confidence.
Simple projects allow you to practice:
• Nail placement
• String wrapping
• Creating patterns
• Managing tension
Good beginner designs include:
• Hearts
• Stars
• Simple flowers
• Basic shapes
Once you understand the process, you can move toward more complex patterns.
Use Good Quality Materials
Good materials can make the crafting process easier and improve the final result.
Choose:
• A strong wooden board
• Quality string that does not break easily
• Suitable nails
• A clear template
Using poor quality materials may make the project more difficult and affect the finished appearance.
Plan Your Pattern Before Starting
Planning your design before adding nails can save time and prevent mistakes.
Before starting, decide:
• The size of your artwork
• The string colors
• The design placement
• The wrapping style
A little preparation helps create a smoother crafting experience.
Common Mistakes Beginners Make in String Art
String art is easy to learn, but beginners may face some common challenges during their first projects.
Knowing these mistakes in advance can help you avoid problems and create better results.
Using Weak Wood
A weak or thin wooden board may not hold nails properly.
If the board is too soft or damaged, nails may become loose while wrapping the string.
Choose a strong, flat wooden surface that can support your design.
Uneven Nail Placement
Uneven nail placement can affect the entire pattern.
If nails are placed inconsistently, the string lines may not create the desired shape.
Take your time when placing nails and check the spacing before removing the template.
Choosing Difficult Designs
Starting with a complex design can make the process frustrating.
Detailed patterns often require more nails, more time, and better control.
Beginners should practice with simple designs before attempting advanced artwork.
Loose String Wrapping
If the string is too loose, the design may look messy and unfinished.
Keep gentle and consistent tension while wrapping.
The string should stay secure around the nails without pulling too strongly.
Using Too Many Colors
Using many colors can sometimes make the design look crowded.
For beginner projects, try using one or two colors first.
Once you understand color combinations, you can experiment with more detailed designs.
Frequently Asked Questions
Is string art easy for beginners?
Yes, string art is beginner friendly when you start with simple designs.
The process mainly involves placing nails, following a pattern, and wrapping string around the nails.
With practice, beginners can create beautiful handmade artwork.
What materials are needed for string art?
Basic string art requires a few simple materials:
• Wooden board
• Nails
• String or thread
• Hammer
• Design template
Additional supplies like paint, rulers, and pencils can help customize your project.
What type of string is best for string art?
Embroidery thread, cotton string, and yarn are commonly used for string art.
Embroidery thread works well for detailed designs, while thicker string creates bold patterns.
The best choice depends on the size and style of your artwork.
Can kids make string art?
Yes, kids can enjoy string art with proper guidance.
Simple designs can help children practice creativity and patience.
Adults should supervise activities involving hammers and nails to ensure safe crafting.
How long does string art take?
The time required depends on the design size and complexity.
A simple beginner project may take a short time, while larger designs with many nails can take several hours.
As you gain experience, you will complete projects more quickly.
What wood is best for string art?
A smooth and flat wooden board is usually the best choice for string art.
The wood should be strong enough to hold nails securely and large enough for your chosen design.
Can string art be used as wall decoration?
Yes, string art is a popular choice for handmade wall decoration.
Finished pieces can be displayed in:
• Living rooms
• Bedrooms
• Offices
• Craft areas
Custom designs can add a personal handmade touch to any space.
Do I need a template for string art?
Templates are helpful, especially for beginners, because they guide nail placement.
However, experienced crafters can also create designs by drawing patterns directly on the board.
Final Thoughts
String art is a creative and enjoyable craft that allows beginners to create beautiful handmade artwork using simple materials.
You do not need advanced skills to get started. With a wooden board, nails, string, and a little patience, you can turn a simple idea into a unique decoration.
The key to improving your string art skills is practicing basic techniques and starting with simple designs. As you become more comfortable, you can experiment with different colors, patterns, and creative ideas.
Whether you want to decorate your home, create a handmade gift, or enjoy a relaxing hobby, string art is a rewarding craft that anyone can try.
Start with a simple pattern, take your time, and enjoy the process of creating your own handmade string art design.