
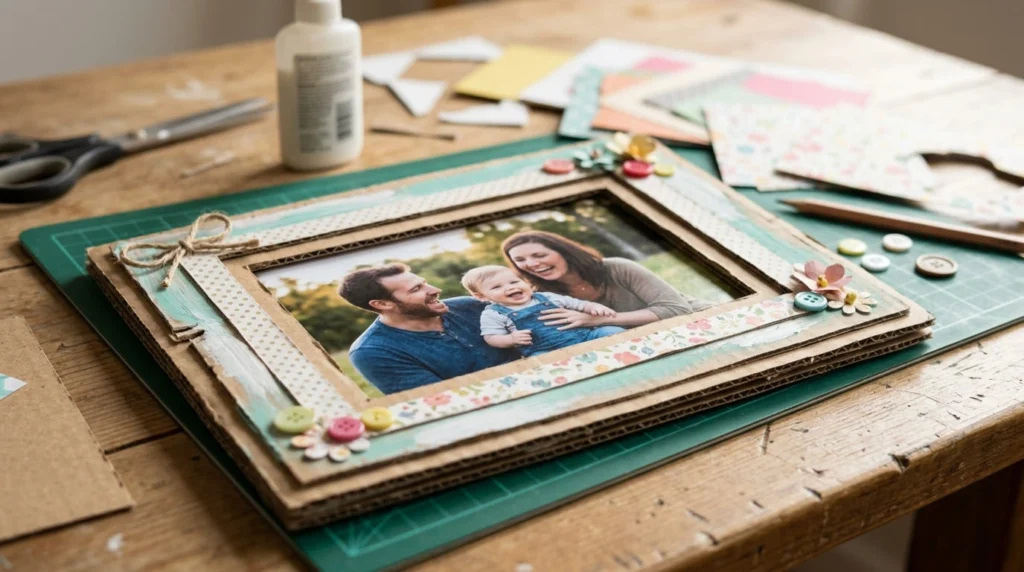
A photo frame does not always need to come from a store. With a simple piece of cardboard and a little creativity, you can create a beautiful handmade frame that gives your favorite pictures a special place to display.
A DIY cardboard photo frame is an easy craft project that beginners, children, and craft lovers can enjoy. It uses simple materials that are often already available at home, making it an affordable way to create useful decorations.
The best part about making a cardboard photo frame is that you can customize it in your own style. You can paint it, cover it with decorative paper, add ribbons, use recycled materials, or create a design that matches your room.
Handmade photo frames are also meaningful gifts because they show personal effort and creativity. Instead of buying a ready made frame, you can create something unique that holds a special memory.
In this DIY cardboard photo frame guide, you will learn why cardboard frames are a great craft idea, what supplies you need, and how to prepare everything before creating your own handmade photo frame.
Why Make a Cardboard Photo Frame?
Creating a photo frame from cardboard is a simple way to turn an everyday material into something useful and decorative.
Many cardboard boxes are thrown away after use, but they can be transformed into creative crafts with just a few additional materials. Making a photo frame from cardboard gives old materials a new purpose while allowing you to create personalized home decor.
Unlike store bought frames, handmade cardboard frames can be designed exactly the way you want. You can choose your own colors, decorations, and styles to match the photo or the place where you want to display it.
Cardboard photo frames are also beginner friendly because they do not require advanced crafting skills. With basic cutting, measuring, and decorating techniques, anyone can create a beautiful frame.
They are suitable for many occasions, including:
• Family photo displays
• Handmade gifts
• School craft projects
• Room decorations
• Memory boards
• Party decorations
Whether you want to create a simple frame for your desk or a colorful decoration for your wall, cardboard provides an easy base for many creative ideas.
Benefits of Making Cardboard Photo Frames
Making your own cardboard photo frame offers many advantages beyond just creating a place to display pictures.
Budget Friendly Craft Project
One of the biggest benefits of cardboard photo frames is that they are inexpensive to make.
Most of the materials needed are affordable and easy to find. You can even reuse cardboard from packages or old boxes that you already have at home.
Instead of spending money on expensive decorations, you can create something attractive using simple supplies.
This makes cardboard photo frames a great option for:
• Beginners
• Students
• Families
• DIY craft lovers
Eco Friendly Use of Materials
Using cardboard for crafts is a great way to reuse materials that might otherwise be discarded.
Recycling cardboard into a photo frame helps reduce waste and encourages creative thinking.
You can give old boxes a new purpose by turning them into:
• Photo frames
• Wall decorations
• Gift displays
• Craft projects
This makes cardboard crafts a fun way to combine creativity with responsible reuse.
Fun Family Activity
Cardboard photo frame making is an enjoyable activity for families.
Children can participate by choosing colors, decorating the frame, and adding creative details.
This type of craft helps children develop:
• Creativity
• Hand coordination
• Planning skills
• Patience
Parents can guide children through cutting and assembly while allowing them to create their own designs.
Easy to Customize
A cardboard photo frame can be decorated in countless ways.
You can customize it according to:
• Your favorite colors
• Room style
• Special occasions
• Personal interests
Some popular decoration ideas include:
• Painted designs
• Paper flowers
• Buttons
• Ribbons
• Beads
• Fabric pieces
Every handmade frame can look different depending on the creativity of the person making it.
Creates Meaningful Handmade Gifts
A handmade photo frame can become a thoughtful gift for someone special.
Adding a favorite picture inside makes the gift even more personal.
You can create cardboard photo frames for:
• Birthdays
• Anniversaries
• Mother’s Day
• Father’s Day
• Friendship gifts
A handmade gift often feels more meaningful because it includes time, creativity, and personal effort.
Supplies Needed for a DIY Cardboard Photo Frame
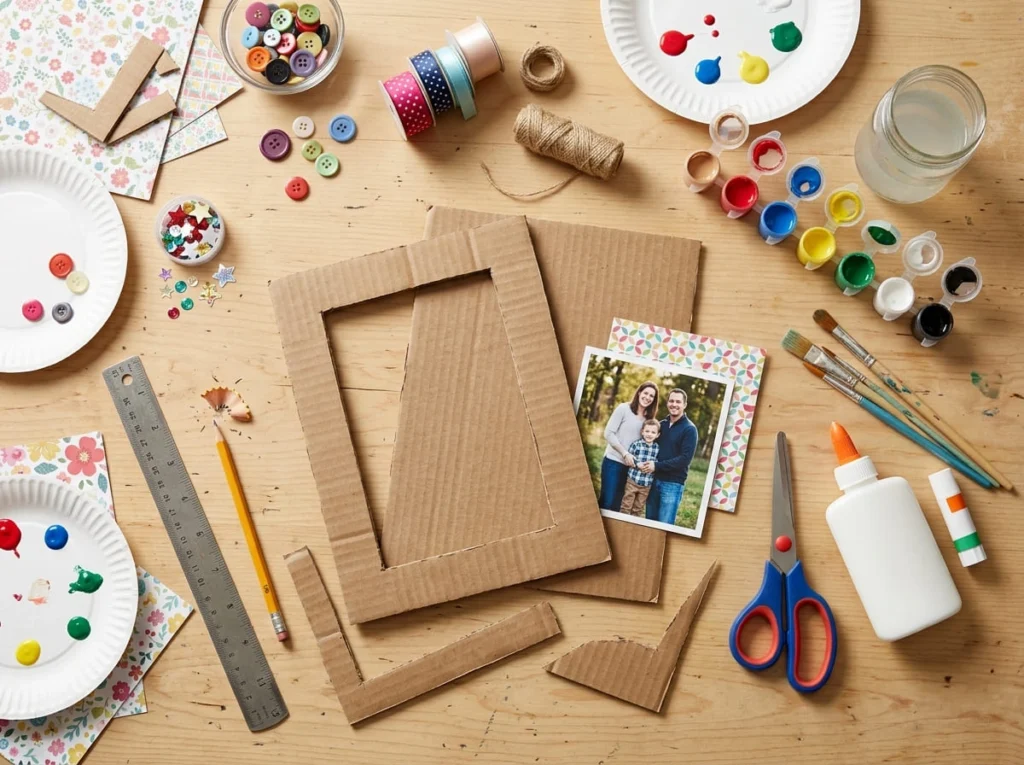
Before starting your cardboard photo frame project, preparing all the necessary supplies will make the crafting process easier.
The good thing about this project is that most materials are simple and commonly available at home.
The exact supplies may change depending on your design, but the basic materials are enough to create a strong and attractive frame.
Cardboard
Cardboard is the main material used to create the frame structure.
You can use cardboard from:
• Shipping boxes
• Packaging boxes
• Old folders
• Recycled cardboard sheets
Choose cardboard that is strong enough to hold its shape.
Thin cardboard may bend easily, while very thick cardboard can be difficult to cut.
For beginners, medium thickness cardboard is usually the easiest option.
Before using the cardboard:
• Remove any unwanted labels
• Clean the surface
• Flatten the material
• Check for damage
A smooth and clean cardboard surface will make cutting and decorating easier.
Photo
The photo you want to display will help determine the size of your frame.
Before cutting the cardboard, decide:
• Photo size
• Frame shape
• Border width
Common photo sizes can be used as a guide, but you can also create custom frames for different picture shapes.
It is helpful to keep the photo nearby while measuring so the opening is the correct size.
Cutting Tools
Cutting tools are needed to shape the cardboard frame.
Useful options include:
• Scissors
• Craft knife
• Cutting mat
• Ruler
Scissors work well for simple designs, while a craft knife can help create cleaner cuts for detailed shapes.
Always use cutting tools carefully, especially when children are involved.
Glue and Adhesives
Glue helps attach the different cardboard pieces and decorations.
Common options include:
• Craft glue
• White glue
• Hot glue
• Double sided tape
The best choice depends on the type of frame you are making.
For heavier decorations, stronger adhesive may be needed to keep everything secure.
Decoration Materials
Decorating the frame is where you can show your creativity.
You can use many different materials, such as:
• Paint
• Colored paper
• Ribbons
• Buttons
• Beads
• Stickers
• Fabric scraps
• Small craft flowers
The decoration style depends on the look you want to create.
A simple painted frame can look modern, while adding handmade details can create a more playful design.
How to Make a DIY Cardboard Photo Frame Step by Step
Making a cardboard photo frame is a simple process when you follow each step carefully.
The main idea is to create a strong cardboard structure, add a photo opening, and decorate the frame according to your style.
Before starting, prepare your workspace and organize all your materials. Having everything ready will make the process easier and help you create a cleaner finished frame.
Follow these steps to make your own handmade cardboard photo frame.
Step 1: Choose and Prepare the Cardboard
The first step is choosing the right cardboard for your project.
Select a piece of cardboard that is flat, clean, and strong enough to support the photo frame.
If you are using an old cardboard box, carefully separate the useful sections and remove any damaged parts.
Before cutting, prepare the surface by:
• Removing stickers or labels
• Cleaning dust from the cardboard
• Flattening folded areas
• Checking the cardboard strength
A smooth surface will make measuring and decorating much easier.
You can also paint the cardboard before assembling the frame if you want a specific background color.
Allow the paint to dry completely before moving to the next step.
Step 2: Measure Your Photo
Accurate measurements are important because the photo needs to fit properly inside the frame.
Place your photo on the cardboard and decide how much border space you want around it.
You can create:
• A thin border for a simple look
• A wide border for more decoration
• A custom shape around the photo
Use a ruler to mark the correct measurements.
Make sure the photo opening is slightly smaller than the actual photo so the picture does not fall through.
Taking time during this step helps prevent mistakes when cutting the cardboard.
Step 3: Cut the Frame Shape
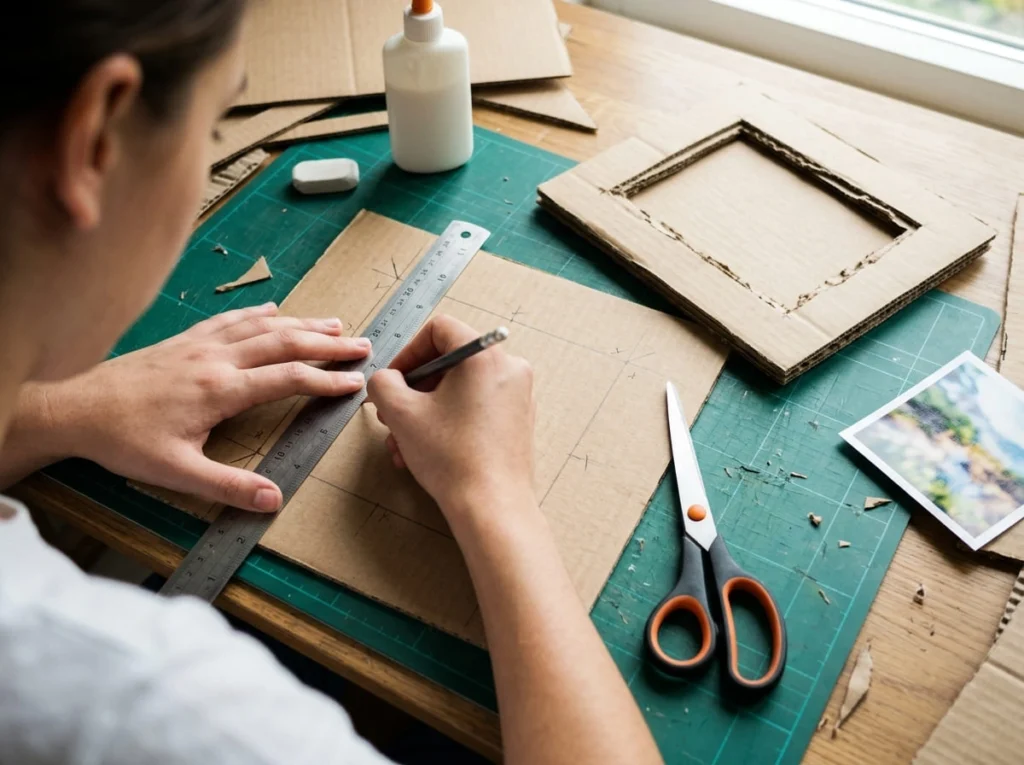
After measuring, it is time to cut the main frame shape.
Start by creating the outer shape of the frame. A rectangle is the easiest option for beginners, but you can also try other shapes.
Popular frame shapes include:
• Rectangle
• Square
• Circle
• Heart shape
After cutting the outer section, mark the area where the photo will be placed.
Carefully cut the inner opening.
When cutting:
• Use a ruler for straight edges
• Cut slowly
• Avoid damaging the cardboard edges
Clean cuts will make the finished frame look more professional.
Step 4: Create the Back Support
A photo frame needs a strong back section to hold the picture in place.
Cut another piece of cardboard slightly larger than the photo opening.
This piece will act as the backing of the frame.
You can also create a stand if you want the frame to sit on a table.
For a standing frame:
• Cut a small cardboard support piece
• Fold it into a triangle shape
• Attach it securely to the back
For wall hanging frames, add a simple hanging loop using string or ribbon.
Step 5: Attach the Frame Pieces
Once the front and back pieces are ready, connect them together.
Apply glue around the edges of the back cardboard piece and attach it behind the front frame.
Leave one side open if you want to insert and remove photos easily.
Make sure:
• The edges match properly
• The glue covers enough area
• The pieces stay aligned
Press the pieces together gently and allow the glue to dry.
A strong connection will help your frame last longer.
Step 6: Decorate the Cardboard Frame
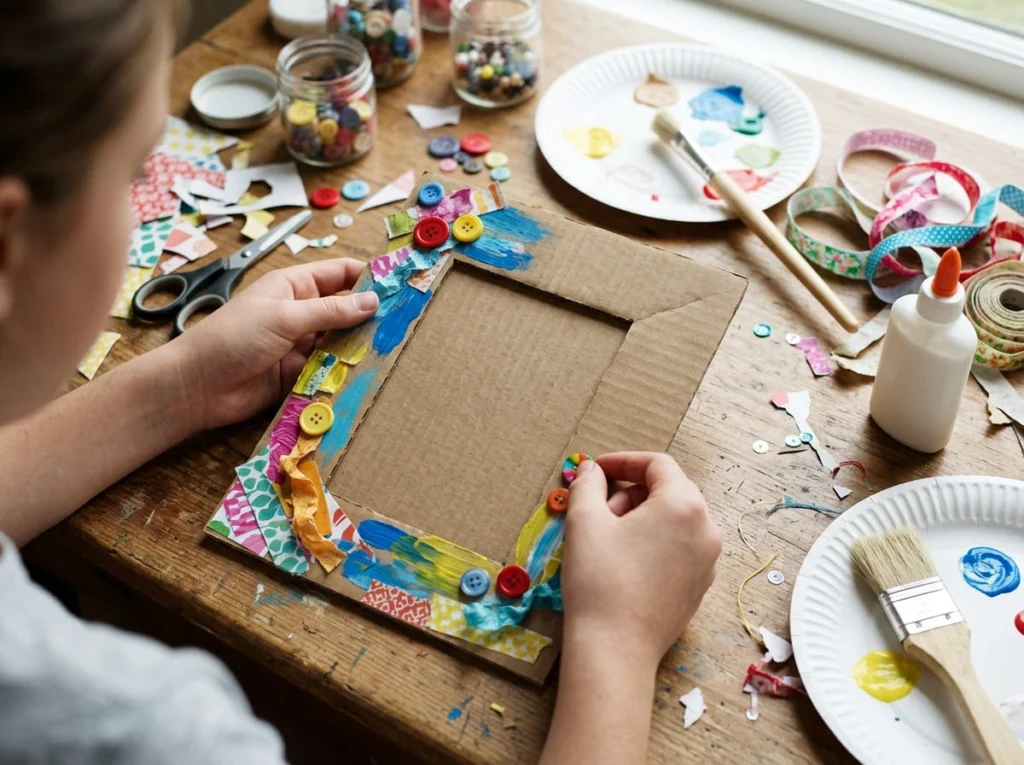
Decorating is the most creative part of making a DIY cardboard photo frame.
You can design your frame in any style you like.
Some popular decoration ideas include:
Paint the Frame
Painting is one of the easiest ways to customize cardboard.
You can use:
• Solid colors
• Patterns
• Designs
• Decorative details
Acrylic paint works well because it covers cardboard smoothly and creates a bright finish.
Add Decorative Paper
Covering the frame with decorative paper can create a clean and attractive look.
You can use:
• Patterned paper
• Scrapbook paper
• Colored craft paper
Simply cut the paper to match the frame shape and attach it carefully.
Add Small Craft Details
Small decorations can make a simple cardboard frame look unique.
You can add:
• Buttons
• Beads
• Ribbons
• Fabric pieces
• Paper flowers
• Stickers
Try to balance decorations so the frame looks creative without becoming too heavy.
Step 7: Add the Photo
After the frame is completely assembled and decorated, add your chosen photo.
Carefully place the picture inside the opening and secure it using:
• Small pieces of tape
• Glue dots
• Cardboard tabs
Make sure the photo is straight and positioned correctly.
You can choose:
• Family pictures
• Travel memories
• Artwork
• Special moments
A handmade frame makes every photo feel more personal.
Step 8: Display Your Handmade Frame
The final step is displaying your finished cardboard photo frame.
Depending on the design, you can place it in different locations.
Ideas include:
• Desk decoration
• Bedroom shelf
• Living room table
• Wall display
• Gift presentation
A handmade cardboard frame can add a personal touch to any space.
If you create multiple frames, you can arrange them together to make a creative memory wall.
Easy Cardboard Photo Frame Decoration Ideas
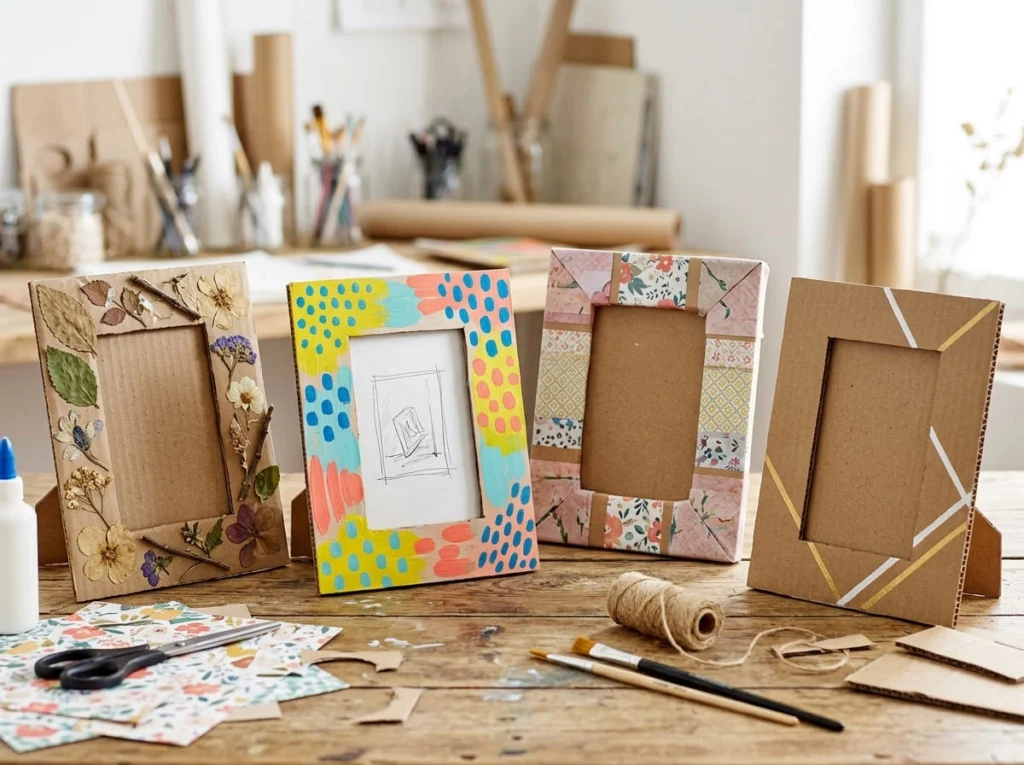
Once you understand the basic process, you can experiment with different decoration styles.
The beauty of cardboard crafts is that there are unlimited ways to customize the final design.
Here are some beginner friendly cardboard photo frame ideas.
Colorful Painted Cardboard Frame
A painted cardboard frame is one of the easiest designs for beginners.
You can choose colors that match:
• Your room
• The photo
• The occasion
Bright colors can create a fun and playful design, while neutral colors can create a modern look.
You can also add simple patterns like:
• Dots
• Lines
• Flowers
• Shapes
Painting allows you to completely transform plain cardboard into an attractive decoration.
Paper Covered Photo Frame
Decorative paper can give cardboard frames a cleaner and more finished appearance.
You can use:
• Floral paper
• Geometric patterns
• Handmade paper
• Gift wrapping paper
This idea is great for beginners because it does not require advanced painting skills.
A paper covered frame can also match different decoration themes.
Nature Inspired Cardboard Frame
A nature inspired frame uses natural looking decorations to create a unique design.
You can add:
• Paper leaves
• Small flowers
• Wooden details
• Natural colors
This style works well for home decoration because it creates a warm handmade feeling.
Kids Craft Photo Frame
Cardboard photo frames are perfect for children’s craft projects.
Kids can decorate frames using:
• Bright colors
• Stickers
• Drawings
• Fun shapes
These frames make great school projects and allow children to express their creativity.
Minimal Modern Cardboard Frame
A simple design can also look stylish.
For a modern frame, use:
• One or two colors
• Clean edges
• Minimal decorations
A simple cardboard frame can look elegant while still keeping the handmade charm.
Creative Ways to Use Cardboard Photo Frames
A DIY cardboard photo frame is not only a craft project but also a useful decoration that can be used in many different ways.
Because cardboard frames are easy to customize, you can create designs for different spaces, occasions, and purposes.
Whether you want to display memories, create handmade gifts, or decorate your home, cardboard photo frames offer many creative possibilities.
Handmade Gifts
A handmade cardboard photo frame can become a thoughtful gift for someone special.
Adding a meaningful photo inside the frame makes the gift more personal and memorable.
You can create custom frames for:
• Birthdays
• Anniversaries
• Friends
• Family members
• Teachers
You can choose colors and decorations based on the person’s style or interests.
A simple handmade frame often feels more valuable because it shows time, creativity, and personal effort.
Home Decoration
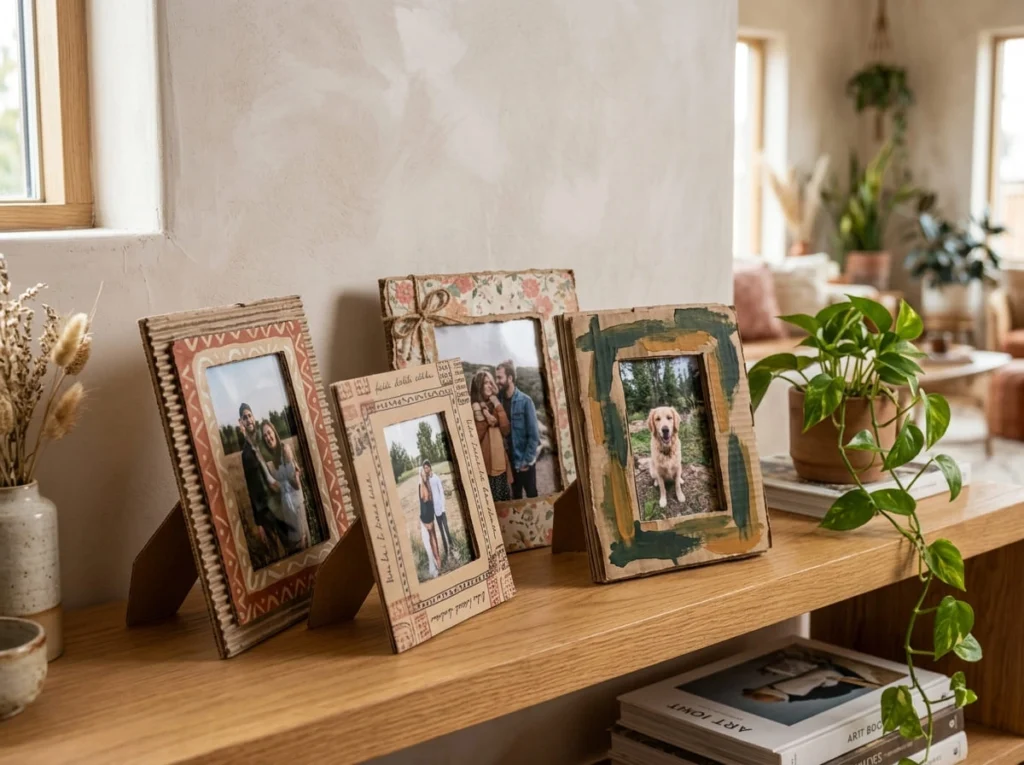
Cardboard photo frames can add a handmade touch to your home.
You can display them in different areas, including:
• Living room shelves
• Bedroom tables
• Study areas
• Hallways
• Craft corners
Creating multiple frames with different designs can help you build a personalized photo display.
You can also match the frame colors with your room theme to create a more connected look.
Memory Wall Display
Instead of keeping photos hidden in albums, you can create a memory wall using handmade cardboard frames.
A collection of different sized frames can display:
• Family memories
• Travel photos
• Special occasions
• Children’s artwork
You can arrange the frames in different patterns to create an attractive wall display.
Adding handmade frames makes the display feel more creative and personal.
Classroom Projects
Cardboard photo frames are excellent craft activities for classrooms.
Students can create their own frames while learning about:
• Creativity
• Recycling
• Design
• Handmade crafts
Teachers can use this project for art classes or special activities.
Children can decorate their frames using their own ideas, making every project unique.
Party Decorations
DIY cardboard photo frames can also be used for parties and celebrations.
You can create themed frames for:
• Birthday photo areas
• Wedding events
• Family gatherings
• Holiday celebrations
Guests can use decorative frames for pictures, creating fun memories from the event.
Tips for Making a Strong Cardboard Photo Frame
A well made cardboard photo frame should not only look attractive but also stay strong over time.
Following a few simple tips can help you create a frame that is durable and visually appealing.
Use Thick Cardboard
The quality of your cardboard affects the strength of your frame.
Thin cardboard may bend easily, especially if you add decorations or a heavier photo.
Choose cardboard that:
• Holds its shape
• Does not bend easily
• Has a smooth surface
Strong cardboard creates a better base and helps the frame last longer.
Measure Carefully
Accurate measurements are important when making a photo frame.
Before cutting, always check:
• Photo size
• Frame border width
• Opening placement
Taking extra time to measure prevents mistakes and helps create a balanced design.
A small measurement error can make the photo opening too large or too small.
Strengthen the Edges
The edges of a cardboard frame can become weak after cutting.
You can make them stronger by:
• Adding an extra cardboard layer
• Covering edges with paper
• Using strong glue
Reinforced edges help the frame keep its shape and improve the overall appearance.
Let Glue Dry Completely
Allowing glue to dry properly is an important step that many beginners overlook.
Moving the frame too quickly can cause pieces to shift or decorations to fall off.
Wait until:
• The frame pieces are secure
• Decorations are attached firmly
• The glue has completely dried
This helps create a cleaner and stronger final result.
Keep Decorations Balanced
Adding decorations can make your frame beautiful, but too many details can make it look crowded.
Try to create a balanced design.
Use:
• A few main decorations
• Matching colors
• Proper spacing
A simple design can often look more attractive than a frame covered with too many materials.
Protect the Finished Frame
Once your cardboard photo frame is complete, protect it from damage.
Keep it away from:
• Water
• Excessive moisture
• Rough handling
You can also add a protective coating or cover certain areas if needed.
Proper care helps your handmade frame stay in good condition.
Common Mistakes When Making Cardboard Photo Frames
Beginners may face a few challenges while creating cardboard photo frames.
Understanding common mistakes can help you avoid problems and create better results.
Using Weak Cardboard
Using very thin or damaged cardboard can make the frame unstable.
The frame may bend or lose its shape after adding decorations.
Always choose a strong cardboard base for better results.
Incorrect Measurements
Incorrect measurements can cause problems when inserting the photo.
If the opening is too large, the photo may not stay secure.
If it is too small, the picture may not fit properly.
Always measure twice before cutting.
Adding Too Many Decorations
While decorations make the frame more creative, adding too many items can make it look messy.
Large decorations may also make the frame heavier.
Choose details that improve the design without overwhelming it.
Not Supporting the Back Properly
The back support is important, especially for standing frames.
Without proper support, the frame may fall or lean incorrectly.
Make sure the backing is attached securely.
Rushing the Glue Drying Process
Moving the frame before the glue has dried can damage the structure.
Give each layer enough time to set before continuing with the next step.
Patience helps create a stronger and cleaner frame.
Frequently Asked Questions
Can you make a photo frame from cardboard?
Yes, cardboard can be used to create a simple and attractive photo frame.
With basic materials like cardboard, glue, and decorations, you can create a handmade frame for displaying photos.
What cardboard is best for photo frames?
Medium thickness cardboard is usually a good choice for photo frames.
It should be strong enough to hold its shape but easy enough to cut and decorate.
Recycled packaging cardboard often works well for this type of craft.
Is cardboard photo frame making good for kids?
Yes, cardboard photo frame making is a fun activity for children.
It encourages creativity and helps children practice crafting skills.
Adults should assist with cutting tools when needed.
How do you decorate a cardboard frame?
You can decorate a cardboard frame in many ways.
Popular options include:
• Painting
• Decorative paper
• Ribbons
• Buttons
• Stickers
• Paper flowers
The design can be customized according to your style.
How long does a cardboard photo frame last?
A cardboard photo frame can last a long time when it is made with strong materials and protected properly.
Keeping it away from moisture and rough handling helps maintain its condition.
Can cardboard photo frames be recycled?
Yes, cardboard photo frames can usually be recycled if they do not contain materials that cannot be recycled.
Using cardboard crafts is also a good way to reuse old materials before disposal.
Can I hang a cardboard photo frame on a wall?
Yes, lightweight cardboard photo frames can be displayed on walls.
You can add a hanging loop or use suitable lightweight mounting methods.
Make sure the frame is secure before hanging it.
What glue works best for cardboard crafts?
Craft glue, white glue, and hot glue can work well for cardboard crafts.
The best option depends on the thickness of the cardboard and the decorations being added.
Final Thoughts
Creating a DIY cardboard photo frame is a simple and creative way to turn basic materials into a meaningful decoration.
With just cardboard, a few craft supplies, and some imagination, you can create a handmade frame that displays your favorite memories in a unique way.
This project is perfect for beginners because it does not require advanced skills or expensive materials. It is also a great way to reuse cardboard and explore your creativity.
Whether you make a frame as a gift, a home decoration, or a fun family activity, the result will always have a personal touch.
Start with a simple design, experiment with different decorations, and enjoy the process of creating your own handmade cardboard photo frame.