
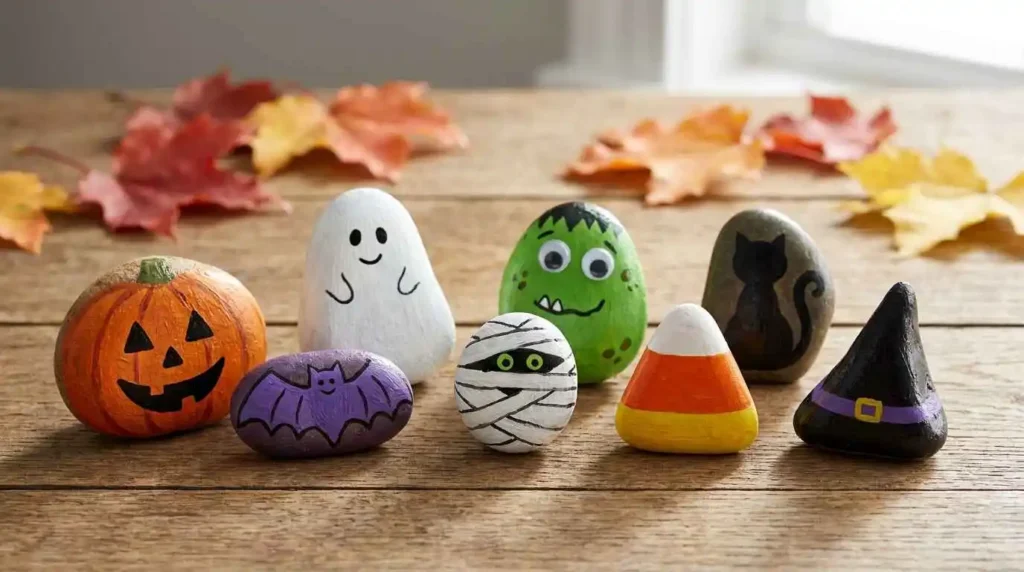
Halloween is a perfect time to turn simple stones into fun and spooky decorations. You do not need to be an artist to enjoy these Halloween rock painting ideas. With a few basic colors and a little imagination, you can create pumpkins, ghosts, monsters, bats, witches, and many other Halloween designs.
Painted rocks are also a fun activity for kids and beginners because most designs use simple shapes. You can make cute Halloween rocks for your home, garden, porch, classroom, or Halloween party. You can also paint several rocks together and create your own small Halloween collection.
In this guide, you will find easy ideas that you can copy or change to match your own style. Start with a simple design, enjoy the painting process, and do not worry about making every rock perfect.
What You Need for Halloween Rock Painting
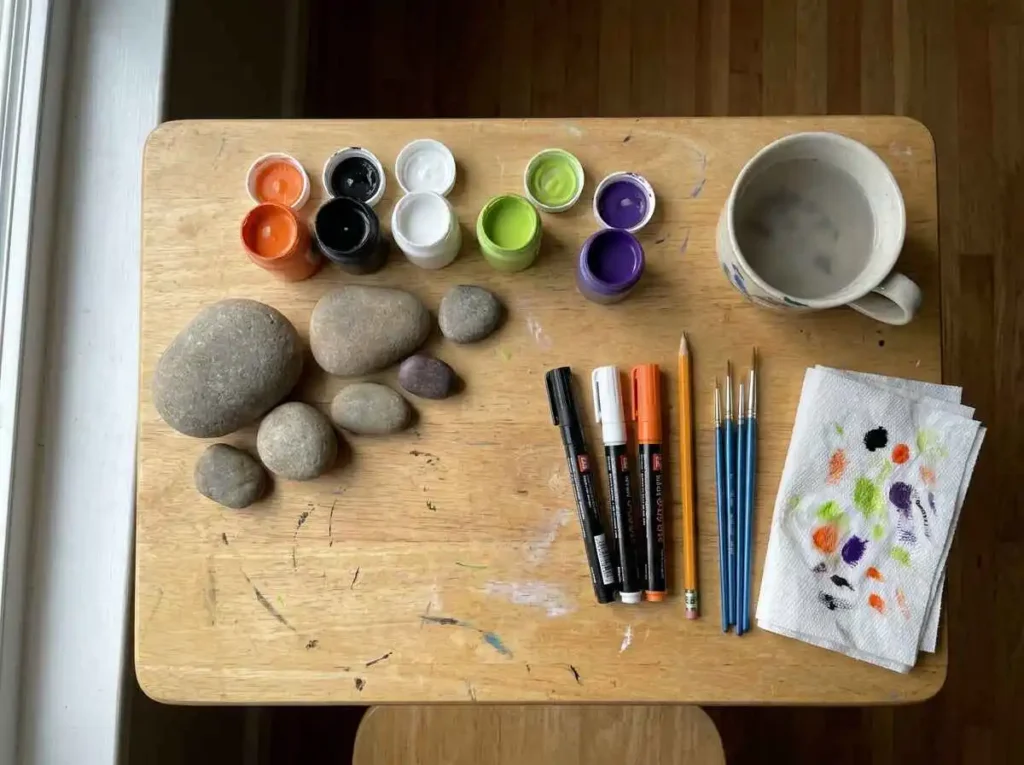
You do not need a large collection of art supplies to start painting Halloween rocks. A few simple items are enough for most designs.
Choose smooth rocks when possible. A flat surface makes it much easier to draw faces, shapes, and small details. Wash the rocks before painting so dirt and dust do not mix with the paint.
Acrylic paint works well because it gives strong color and dries quite quickly. You can use small paint brushes for larger areas and paint pens for eyes, mouths, outlines, spider webs, stitches, and other tiny details.
You may also want a pencil for making a light sketch before you paint. Keep a small cup of water and some paper towels nearby while you work.
If you plan to display your finished rocks outside, you may also want to protect them after the paint has dried. Our guide about how to seal painted rocks outdoors explains this process in more detail.
If you enjoy adding small details, you can also read our guide to the best paint pens for rock painting before choosing your pens.
Best Colors for Halloween Painted Rocks
You can make many Halloween designs with only a few colors.
Orange is perfect for pumpkins and candy corn.
Black works well for bats, cats, spiders, witches, and outlines.
White is useful for ghosts, skeletons, skulls, teeth, and eyes.
Green is a good choice for monsters, zombies, witches, and Frankenstein faces.
Purple adds a fun Halloween look to hats, backgrounds, potions, and magical designs.
Yellow can be used for moons, glowing windows, eyes, and small details.
Red can add color to vampire designs, monster mouths, candy, and other spooky details.
You do not need every color at once. Start with black, white, orange, and green if you want to keep things simple.
How to Paint Halloween Rocks
Halloween rock painting can be very simple. The basic process stays almost the same for most designs.
If this is your first time painting stones, our complete guide on how to paint rocks with acrylic paint explains the full process in more detail.
Choose and Clean Your Rocks
Look for smooth rocks that match the design you want to create.
A round rock can become a pumpkin or eyeball. A tall rock can work well for a ghost. A wide flat stone gives you more space for monsters, houses, or Halloween scenes.
Wash each rock with water and remove any dirt. Let it dry fully before you start painting.
Sketch Your Halloween Design
Use a pencil to lightly draw the main shapes on the rock.
Do not press too hard. You only need a simple guide.
For example, a pumpkin may only need a few curved lines and a face. A ghost can start with a basic white shape. A monster may only need large eyes and a funny mouth.
Simple sketches make painting much easier for beginners.
Paint the Main Colors
Start with the largest areas of color.
If you are making a pumpkin, paint the rock orange first. For a ghost, start with white. For a monster, choose green, purple, blue, or any color you like.
Let the first coat dry before adding another coat. Some colors may need more than one layer to look bright and even.
Add Small Details
Once the main color is dry, add the eyes, mouth, teeth, lines, spots, scars, webs, or other small details.
A thin brush works well, but paint pens can make this step easier. They give you more control when you need to draw tiny shapes or clean outlines.
Try to keep your details simple. A few clear features can make a rock look better than too many small marks.
Let the Paint Dry
Give every layer enough time to dry before painting over it.
If you add wet colors on top of each other, they may mix and make the design look messy.
You can work on several rocks at the same time. Paint one rock, place it aside to dry, and start another one.
Protect the Finished Rock
Once your Halloween rock is completely dry, decide where you want to keep it.
Indoor rocks may not need much protection. Rocks placed outside can face rain, moisture, dirt, and changing weather.
A clear sealer can help protect the painted surface. Make sure the paint is completely dry before adding any protective coating.
30 Easy Halloween Rock Painting Ideas
Now comes the fun part. These Halloween rock painting ideas start with very simple designs and slowly move into more creative options.
You can copy the ideas as they are or change the colors, faces, and details to make each rock your own.
Cute and Easy Halloween Rock Painting Ideas
These first designs are great for beginners, children, or anyone who wants a quick Halloween craft.
1. Smiling Pumpkin Rock
A smiling pumpkin is one of the easiest Halloween rocks to paint.
Choose a round or oval rock and cover it with orange paint. Once the orange layer dries, add a small green stem at the top.
Use black paint to make two simple eyes and a smiling mouth. You can also add a few curved lines from top to bottom to make the rock look more like a pumpkin.
Keep the face friendly if you want a cute decoration for children.
2. Friendly Ghost Rock
A ghost rock needs very few colors and is perfect for beginners.
Choose a smooth stone and paint most of it white. After the paint dries, add two black eyes and a small mouth.
You can make the face happy, surprised, sleepy, or silly.
For a little more detail, paint a black or purple background first and add the white ghost on top.
3. Candy Corn Rock
Candy corn rocks are bright, simple, and easy to recognize.
Look for a stone with a slightly pointed shape if possible.
Paint the bottom section yellow, the middle section orange, and the top section white.
Let each color dry so the edges stay clean.
You can leave the rock plain or add two small eyes and a smile to turn your candy corn into a cute Halloween character.
4. Silly Monster Rock
Monster rocks are great because there are no strict rules.
Paint the rock green, purple, orange, or another bright color. Add one eye, two eyes, or even five eyes.
Give your monster sharp teeth, a silly smile, spots, horns, or funny hair.
Children can enjoy this design because every monster can look completely different.
The goal is to have fun rather than create a perfect character.
5. Mummy Rock
A mummy rock may look detailed, but it is very easy to paint.
Start with a dark base color such as black or gray.
When it dries, paint white lines across the rock to look like mummy bandages. Let some of the lines cross over each other.
Leave a small dark space near the top and add two bright eyes.
You can make the mummy cute by using large round eyes instead of a scary face.
6. Black Cat Rock
A black cat rock is a simple choice for Halloween and works especially well on round stones.
Paint the rock black and let it dry.
Add two bright eyes in yellow, green, or white. Then paint a small nose, whiskers, and tiny ears near the top.
You can keep the design as a simple cat face or add a curved tail if the shape of the rock gives you enough space.
If you enjoy painting animals, our cute animal rock painting ideas guide has many more designs you can try.
7. Bat Rock
A bat is another classic Halloween design that only needs a few simple shapes.
Paint the rock black or use a dark purple background.
Draw a small bat body in the centre and add wide wings on both sides. You can make the wings from simple curved lines instead of trying to paint every detail.
Add two small eyes if you want the bat to look cute.
A yellow moon behind the bat can make the design stand out even more.
8. Witch Hat Rock
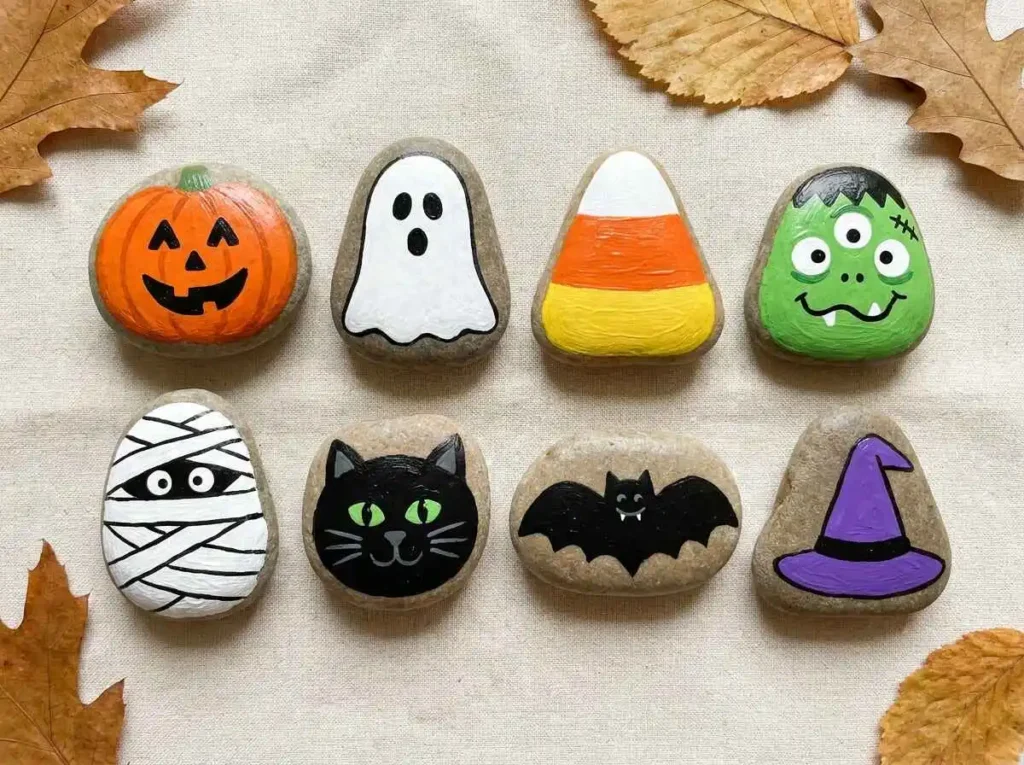
A witch hat is a good choice if you do not want to paint a face or character.
Start with a purple, orange, or dark background.
Paint a large black triangle for the top of the hat. Add a wide black shape underneath it for the brim.
You can decorate the hat with a purple or orange band, small stars, dots, or a tiny buckle.
Try making several witch hat rocks with different colors and patterns. Together, they can create a fun Halloween decoration.
Classic Halloween Painted Rock Ideas
These classic designs are perfect if you want your painted rocks to have a traditional Halloween look. Most of them use simple shapes, strong colors, and faces that are easy to change.
You can make them spooky, funny, or cute depending on who will see them.
9. Jack O Lantern Rock
A Jack O Lantern rock is one of the most popular Halloween designs.
Choose a round or oval stone and paint it orange. Let the paint dry completely before adding the face.
Use black paint for triangle shaped eyes and a simple nose. Then add a wide mouth with a few square teeth.
You can make the face happy, scary, surprised, or silly.
Add a small green stem at the top if you want the rock to look more like a real pumpkin.
Try painting several pumpkin rocks with different faces. A small group of them can look great on a table, windowsill, or porch.
10. Frankenstein Rock
A Frankenstein face is easy to create because you only need a few basic details.
Paint the whole rock green and let it dry.
Add black hair across the top. You can make the hair straight, messy, or pointed.
Next, paint two eyes, a nose, and a simple mouth. Add a few black stitches on the forehead or cheeks.
Small bolts on each side of the face can make the design easier to recognize.
Do not worry about making both sides exactly the same. Small differences can give your character more personality.
11. Vampire Rock
A vampire rock can look spooky without being too difficult to paint.
Start with a white, light gray, or pale purple face.
Paint dark hair near the top of the rock. Add two eyes and a small mouth.
The most important detail is the pair of white fangs.
You can add a little red near the mouth if you want a scarier look, or leave it out to make the vampire more suitable for younger children.
A black cape shape near the bottom can also make the character look more complete.
12. Spider Web Rock
A spider web is a good Halloween rock painting idea if you enjoy simple patterns.
Paint the rock black, purple, orange, or another dark color.
Once the base is dry, use white paint or a white paint pen to draw several lines moving out from one point.
Connect these lines with small curved lines to create the web.
You do not have to make every section equal.
Add a tiny spider in one corner if you want more detail.
Spider web rocks also look good when placed beside pumpkin or ghost rocks.
13. Spider Rock
A small round stone can quickly become a Halloween spider.
Paint the rock black and let it dry.
Add two large white eyes or several smaller eyes for a fun monster style.
Paint thin legs coming from each side of the rock. You can make them straight, curved, or slightly bent.
For a cute spider, add a little smile.
For a spooky spider, use smaller eyes and a darker background.
You can also add small dots or stripes to make the spider more colorful.
14. Skeleton Rock
A skeleton design works best on a long or flat stone.
Start with a black background.
Use white paint to create a simple skull near the top. Then add a thin body, arms, legs, and a few short lines for the ribs.
Keep the shapes simple.
You do not need to paint every bone in the body. A few clear white lines are enough for people to understand the design.
You can also paint the skeleton dancing, waving, or holding a tiny pumpkin.
15. Skull Rock
A skull rock can be much easier than painting a full skeleton.
Paint the rock white or light gray.
Once the base is dry, add two dark eye shapes, a small nose, and a simple line for the mouth.
You can add short lines across the mouth to look like teeth.
If you want a softer design, make the eyes round and friendly.
For a more spooky look, use larger dark eye areas and add small cracks around the top of the skull.
16. Zombie Rock
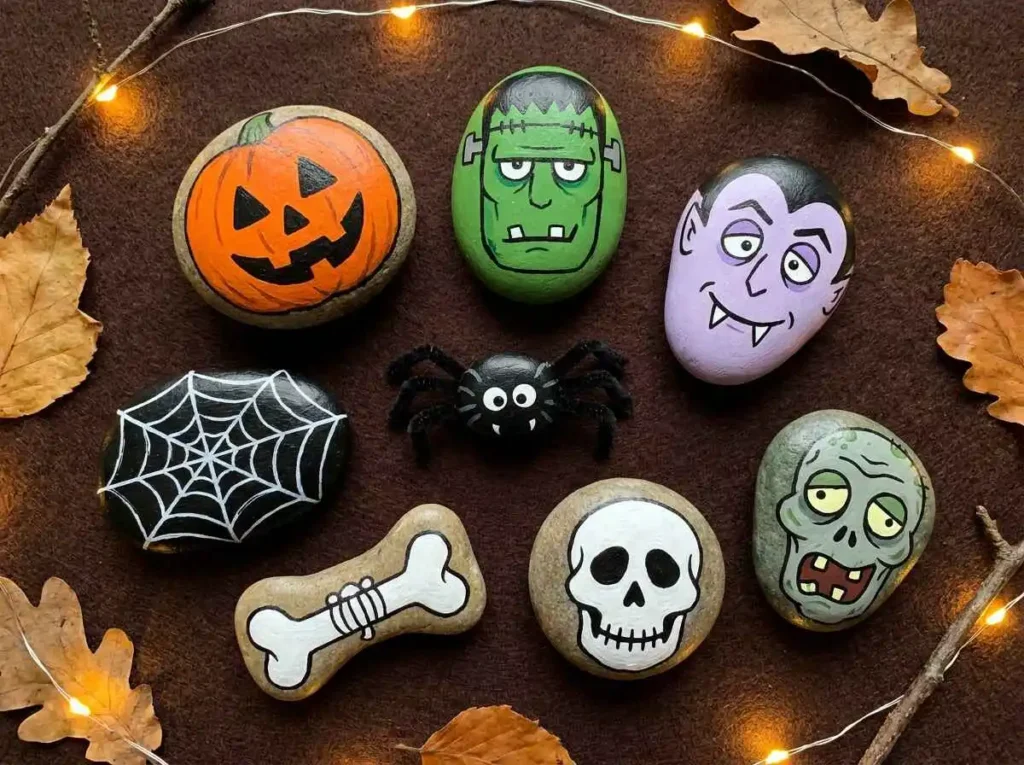
Zombie rocks are fun because they can look messy on purpose.
Start with a green or gray base.
Add uneven eyes, messy hair, and a crooked mouth.
Paint a few stitches, scratches, or small patches in different colors.
One eye can be larger than the other to make the face look funny.
You can also add purple around the eyes or a darker green around the edges of the face.
A zombie rock does not need perfect lines. In fact, a slightly messy design can make it look even better.
Creative Halloween Rock Painting Ideas
If you have already tried pumpkins, ghosts, and monsters, these ideas give you a chance to create something a little different.
They are still simple enough for beginners, but they allow you to add more details and use your imagination.
17. Creepy Eyeball Rock
Round stones are perfect for eyeball designs.
Start by painting the rock white.
Add a large colored circle in the center. Green, blue, yellow, or purple can all work well.
Paint a smaller black circle inside it for the pupil.
You can add thin red lines around the white area to make the eye look creepy.
For a cute version, skip the red lines and add a tiny shine mark inside the pupil.
Several eyeball rocks placed together can make a funny Halloween display.
18. Haunted House Rock
A haunted house gives you a chance to create a small Halloween scene on one rock.
Choose a flat stone with enough space for the design.
Paint the background dark blue, purple, or black.
Add a simple black house shape with a pointed roof.
Paint a few yellow windows so it looks like there are lights inside.
You can add a moon, small bats, a tree, or a tiny ghost around the house.
Do not add too many details if your stone is small. A simple house and glowing windows are often enough.
19. Gravestone Rock
Some rocks already have a shape that looks like a small gravestone.
Paint the stone gray and let it dry.
Add a darker gray edge or a few small cracks.
You can write a short spooky word in the center or draw a simple skull, ghost, or spider web.
Add a little green near the bottom to look like grass.
A few gravestone rocks can be placed together to create a tiny Halloween graveyard display.
20. Magic Potion Rock
A magic potion design is a colorful choice for Halloween.
Start with a dark background such as black or purple.
Draw a simple bottle shape in the middle.
Fill the bottle with bright green, purple, blue, or orange paint.
Add small bubbles above the bottle to make the potion look magical.
You can also paint stars, dots, or tiny sparkles around it.
This design is a good way to use bright colors while still keeping a Halloween theme.
21. Witch Cauldron Rock
A witch cauldron is another fun design that works well on flat stones.
Paint a black pot near the bottom of the rock.
Add green or purple paint inside the top of the pot to look like a bubbling potion.
Paint several circles above it for bubbles.
You can also add a little fire underneath the cauldron using orange and yellow paint.
For extra detail, add stars, smoke, or a tiny spoon sticking out of the pot.
22. Moon and Bats Rock
This design can look beautiful even though it uses only a few shapes.
Paint the rock dark blue, purple, or black.
Add a large yellow or pale white moon.
Once the moon is dry, paint small black bats flying across it.
A bat can be made with a tiny body and two simple curved wings.
You can add a few stars around the moon if there is enough space.
This is a good idea for anyone who wants a Halloween rock that looks more decorative than scary.
23. Halloween Candy Rock
Halloween is full of colorful sweets, so candy can be a fun theme for painted rocks.
Paint small wrapped sweets, lollipops, chocolate pieces, or candy shapes across the stone.
Use orange, purple, yellow, green, and white to give the design a Halloween look.
You can also turn one whole stone into a single piece of candy.
Add a smiling face if you want it to look cute.
These rocks can be especially fun for children because the designs are bright and simple.
24. Boo Word Rock
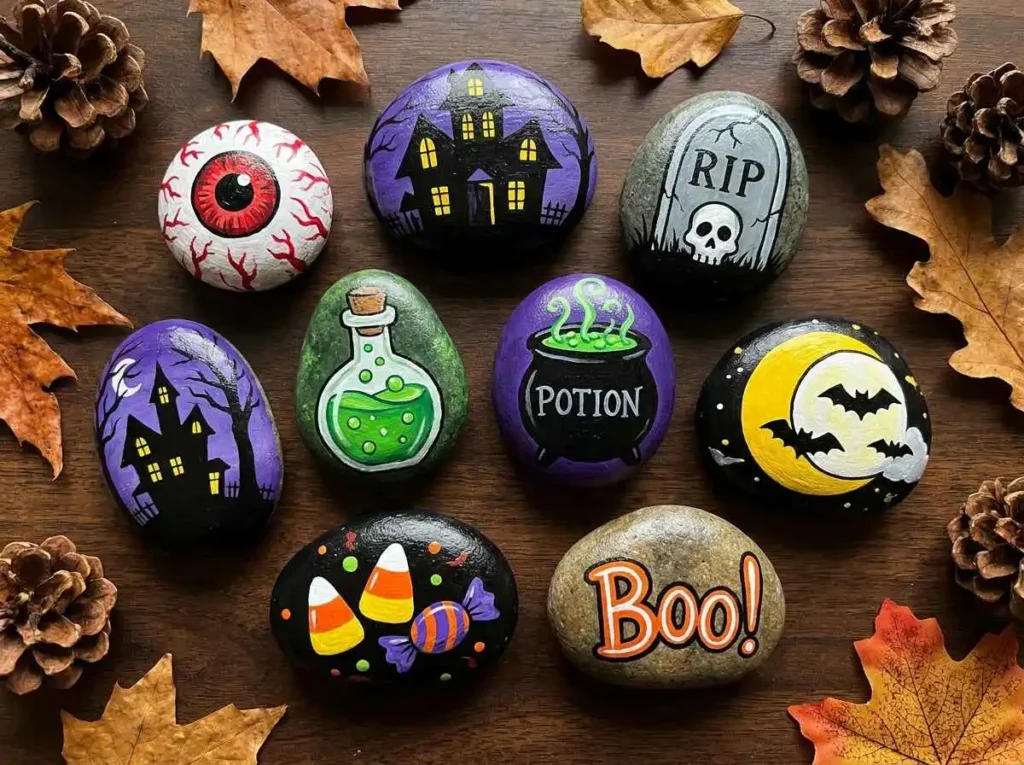
You do not always need to paint a character.
A simple word can create an easy Halloween decoration.
Paint the rock orange, black, purple, white, or green.
Once the background dries, write the word Boo in the center.
Use a color that stands out clearly from the background.
You can leave the design simple or add small ghosts, stars, dots, spider webs, or bats around the word.
This idea is useful for beginners who feel more comfortable writing simple letters than painting detailed characters.
Very Easy Halloween Rock Painting Ideas for Kids
These ideas are simple, colorful, and fun for children. Younger kids may need help with small details, but they can still enjoy choosing colors and creating their own faces.
25. Fingerprint Monster Rocks
Fingerprint monsters are a fun way to turn small rocks into colorful Halloween characters.
Paint the rock with a light background color and let it dry.
Dip a fingertip into washable craft paint and press it gently onto the rock. Each fingerprint can become a tiny monster.
Once the prints are dry, add small eyes, mouths, teeth, or funny hair.
Children can make each monster different. One can have one eye, another can have three eyes, and another can have a huge smile.
This activity is simple and gives children plenty of freedom to be creative.
26. One Eyed Monster Rock
A one eyed monster is one of the easiest Halloween designs for kids.
Paint the rock green, purple, orange, or blue.
Add one large white circle in the middle for the eye. Paint a smaller black circle inside it.
Then add a funny mouth underneath.
You can give the monster teeth, spots, horns, or messy hair.
There is no correct way to paint a monster, which makes this idea perfect for beginners.
27. Polka Dot Pumpkin Rock
A polka dot pumpkin gives the classic pumpkin design a playful look.
Paint a round stone orange and let it dry.
Add small dots in black, white, purple, yellow, or green.
Then paint a tiny green stem at the top.
You can also add a simple smiling face if you want.
This design is useful for children who are still learning how to control a paint brush because dots do not need to be perfect.
28. Funny Witch Face Rock
A witch face can be spooky or silly.
Start by painting the rock green.
Add two large eyes, a small nose, and a funny smile. Paint black or purple hair around the sides.
You can add a small black witch hat near the top if there is enough room.
A crooked smile, freckles, or different sized eyes can make the witch even more fun.
Children can choose their own colors and create a witch that looks completely different from anyone else’s.
29. Happy Skeleton Face Rock
Skeletons do not always need to look scary.
Paint the rock white and let it dry.
Add two round black eyes, a tiny nose, and a wide smile.
Draw a few short black lines across the mouth to make simple teeth.
You can add pink cheeks or a small bow to make the face even more cheerful.
This is a good Halloween rock painting idea for younger children who enjoy Halloween but do not like scary designs.
30. Halloween Story Stones
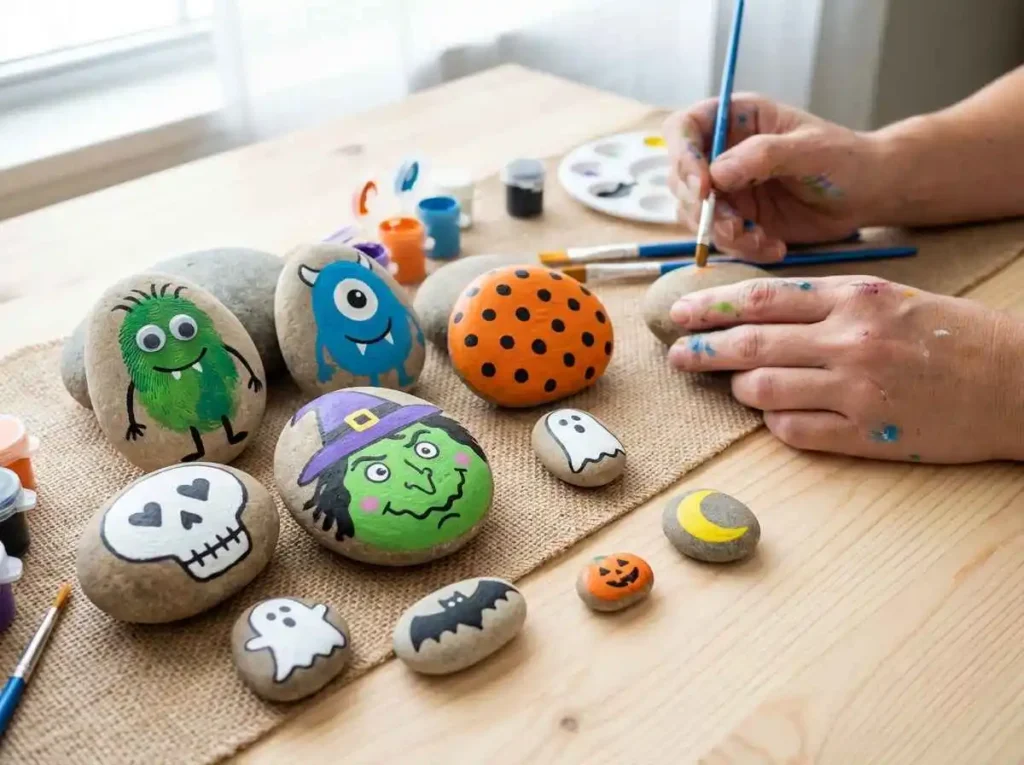
Halloween story stones are more than decorations. Children can also use them for play.
Paint several small rocks with simple pictures such as a pumpkin, ghost, bat, witch, moon, cat, spider, and haunted house.
Once the rocks are dry, place them in a bag or basket.
Children can pick a few stones and use the pictures to create their own Halloween story.
This activity mixes painting, imagination, and storytelling.
If your child enjoys simple craft projects like these, our Rock Painting Ideas for Kids guide has even more easy designs to try.
Which Halloween Rock Painting Ideas Are Easiest for Kids?
The easiest Halloween rock painting ideas for kids use simple shapes and only a few colors.
Pumpkins are a great place to start because children only need orange paint and a simple face. Ghosts are also easy because the main shape can be painted white with two eyes and a mouth.
Candy corn rocks are another good option because children can divide the stone into three color sections.
One eyed monsters are especially fun because there are no rules about how the monster should look.
Simple bats, fingerprint monsters, and happy skeleton faces are also good choices.
Choose a design that matches the child’s age and skill level. The goal should be enjoying the activity rather than creating a perfect finished rock.
Fun Ways to Use Halloween Painted Rocks
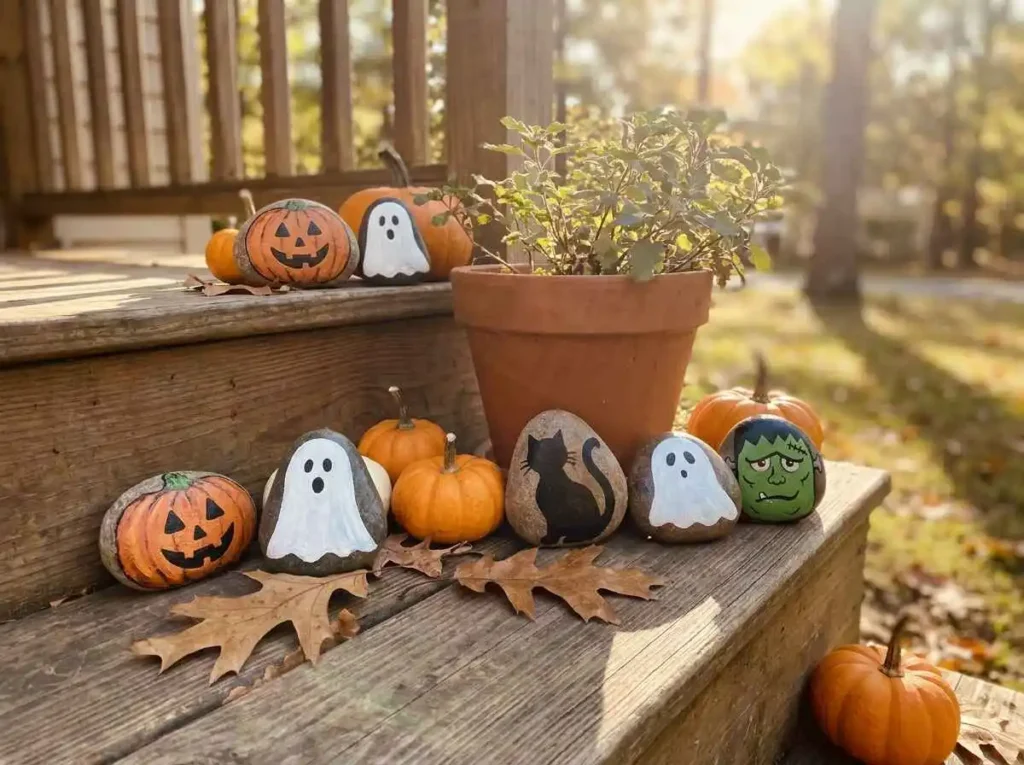
Halloween painted rocks can be used in many ways after the paint dries.
Decorate Your Porch
Place a few pumpkin, ghost, bat, and monster rocks near your front door.
You can group them around real pumpkins or plant pots to create a simple Halloween display.
If the rocks will stay outside, make sure they have suitable protection from the weather.
Add Them to a Halloween Table
Small painted rocks can make easy decorations for a Halloween table.
Place them around bowls, candles, pumpkins, or other decorations.
Choose rocks with different designs so the table feels colorful and fun.
Create a Halloween Treasure Hunt
Hide painted rocks around your home or garden and let children search for them.
You can give each rock a different picture and ask children to find a ghost, pumpkin, bat, monster, or spider.
This can be a fun Halloween party activity.
Use Them as Story Stones
Paint several Halloween characters and objects on separate stones.
Children can choose a few rocks and create a story using the pictures they pick.
A ghost, castle, cat, pumpkin, and moon can quickly become part of a funny or spooky story.
Decorate Plant Pots
Small Halloween rocks can look cute around indoor plant pots.
Try placing a pumpkin rock, ghost rock, or black cat rock near the base of a plant.
Make sure the painted surface stays away from very wet soil if the rock has not been protected.
Give Them as Handmade Gifts
A painted rock can make a simple handmade Halloween gift.
Children can paint a special design for a friend, teacher, or family member.
Add the person’s favorite Halloween character or use their favorite colors.
Use Them for a Halloween Party Activity
Place clean rocks, paint, brushes, and simple design examples on a table.
Guests can choose a stone and create their own Halloween character.
For children, keep the designs simple and make sure an adult helps with any materials that need extra care.
Tips for Better Halloween Painted Rocks
A few simple habits can make rock painting easier and help your designs look cleaner.
Match the Rock Shape to the Design
Look at the shape of the stone before choosing your picture.
A round rock can become a pumpkin, spider, or eyeball.
A long stone may work well for a ghost or skeleton.
A wide flat stone gives you more room for a haunted house or Halloween scene.
Let the shape of the rock help you choose the design.
Keep Your First Designs Simple
Start with easy shapes if you are new to rock painting.
A pumpkin face or ghost can look great without lots of details.
Once you feel more comfortable, you can try haunted houses, skeletons, potions, and other detailed designs.
Let Every Paint Layer Dry
Do not rush from one color to the next.
Wet paint can mix and make your lines look messy.
Let the base color dry before adding eyes, mouths, outlines, and decorations.
Use Paint Pens for Tiny Details
Paint pens can make small details easier.
They are useful for eyes, teeth, spider webs, stitches, letters, and thin outlines.
If you are unsure which type to choose, our Best Paint Pens for Rock Painting guide explains what to look for.
Add Outlines at the End
A simple black or white outline can help parts of your design stand out.
Wait until the other colors are dry before adding the outline.
You do not need to outline every part of the rock. Use it only where it makes the picture clearer.
Seal Rocks That Need Protection
If you plan to keep your Halloween rocks outdoors, they may need extra protection.
Rain, dirt, and moisture can slowly affect the painted surface.
Our guide about How to Seal Painted Rocks Outdoors explains the process in more detail.
Common Halloween Rock Painting Mistakes
Most rock painting mistakes are easy to avoid.
Painting Rocks Before Cleaning Them
Paint may not stick well to dusty or dirty stones.
Wash the rocks first and allow them to dry fully.
Using Too Much Paint at Once
A thick layer of paint can take longer to dry and may leave an uneven surface.
Use thin layers and add another coat if you need stronger color.
Adding Details Before the Base Color Dries
Small details can mix into wet paint.
Wait until the main color feels completely dry before adding eyes, mouths, lines, or patterns.
Choosing a Design That Is Too Detailed
Beginners sometimes choose a complicated picture and become frustrated.
Start with a simple ghost, pumpkin, monster, or candy corn rock.
You can try harder designs once you feel more confident.
Sealing the Rock Too Soon
Do not add sealer while the paint is still wet.
Give the rock enough time to dry before protecting the surface.
Trying to Make Every Rock Perfect
Painted rocks do not need perfect lines or matching shapes.
Small differences can make each design look unique.
Enjoy the process and allow your Halloween characters to have their own personality.
Frequently Asked Questions
What paint is best for Halloween rocks?
Acrylic paint is a popular choice for painting rocks. It comes in many bright colors, dries fairly quickly, and works well for simple Halloween designs.
Can I use paint pens on Halloween rocks?
Yes. Paint pens are useful for drawing eyes, mouths, spider webs, letters, teeth, and other small details. They can be easier to control than a tiny brush.
What are the easiest Halloween rocks to paint?
Pumpkins, ghosts, candy corn, simple monsters, bats, and one eyed monster faces are some of the easiest designs for beginners.
Can kids make Halloween painted rocks?
Yes. Halloween rock painting can be a fun craft for children. Choose simple designs and suitable craft materials, and provide adult supervision when needed.
Do Halloween painted rocks need to be sealed?
It depends on where you want to keep them. Indoor rocks may not need much protection. Rocks placed outdoors may benefit from a clear protective sealer.
How can I make Halloween painted rocks last outdoors?
Allow the paint to dry fully and use a suitable protective sealer. Keeping the rocks away from very harsh weather can also help them last longer.
Do I need to prime rocks before painting them?
Not always. Many smooth and clean rocks can be painted directly with acrylic paint. A base coat can help when you want a lighter or more even background.
We will cover rock preparation in much more detail in our upcoming guide about how to prepare rocks before painting.
What colors are best for Halloween rock painting?
Orange, black, white, green, purple, yellow, and red are useful Halloween colors. You can still use any colors you enjoy, especially when painting cute monsters or children’s designs.
What can I do with Halloween painted rocks?
You can use them as porch decorations, table decorations, handmade gifts, story stones, treasure hunt pieces, plant pot decorations, or Halloween party crafts.
Final Thoughts
Halloween rock painting ideas can be as simple or creative as you want them to be. You can start with an easy pumpkin, ghost, candy corn rock, or silly monster and then try more detailed designs as your confidence grows.
Do not worry about making every line perfect. The fun comes from choosing a rock, adding your own colors, and turning it into something special.
Kids and adults can enjoy this craft together, and every finished stone can look different. Once you have tried a few Halloween designs, you may also want to explore our 50 Easy Rock Painting Ideas for Beginners for even more inspiration throughout the year.