
Disclosure: This article contains affiliate links. If you buy something through these links, we may earn a small commission at no extra cost to you.
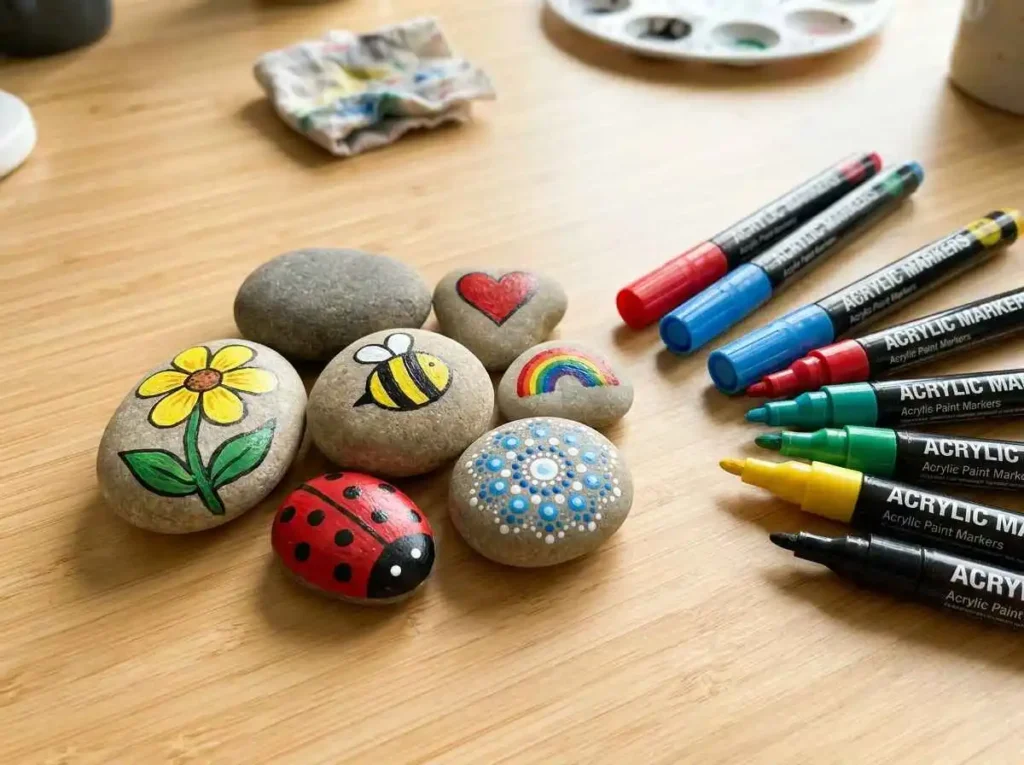
Paint pens can make rock painting much easier, especially when you are just starting. You do not need to keep dipping a brush into paint, and it is much easier to make small lines, dots, letters, flowers, faces, and other simple designs.
The difficult part is choosing the right pens. Some paint pens have thick tips. Others are made for tiny details. Some use acrylic paint, while others use oil based paint. A pen that works well for filling a large area may not be the best choice for writing a small word on a rock.
The best paint pens for rock painting should give you good control, clear colours, and paint that works well on stone. Beginners should also look for pens that are simple to prepare and easy to hold.
In this guide, we will look at eight useful options. Each one has a different strength, so you can choose the type that matches the rocks you want to paint.
Quick Look at the Best Paint Pens for Rock Painting
If you want a quick answer, this table gives you a simple comparison of our selected paint pens.
| Paint Pen | Best For | Paint Type | Tip | Beginner Friendly |
| POSCA PC 5M | Best overall | Water based paint | 1.8 to 2.5 mm bullet tip | Yes |
| TOOLI ART Double Sided Paint Pens | Starter set | Acrylic paint | Extra fine and medium tips | Yes |
| ARTISTRO Precision Dual Tip Markers | Easy use | Acrylic paint | Fine and dot tips | Yes |
| POSCA PC 1MC | Fine details and lettering | Water based paint | 0.7 to 1 mm tip | Yes |
| MOLOTOW ONE4ALL 127HS | Refillable option | Acrylic based paint | Around 2 mm | Yes |
| Montana Acrylic Marker 0.7 mm | Tiny details | Acrylic paint | 0.7 mm tip | Better for careful work |
| Sharpie Oil Based Paint Markers | Oil based option | Oil based paint | Fine point | Yes |
| Pébéo 4ARTIST Marker | Glossy finish | Oil based paint | Several tip sizes | Yes |
You do not need to buy all of them. For most beginners, one good medium tip set and one fine tip pen can cover a large number of rock painting projects.
What Are Paint Pens for Rock Painting?
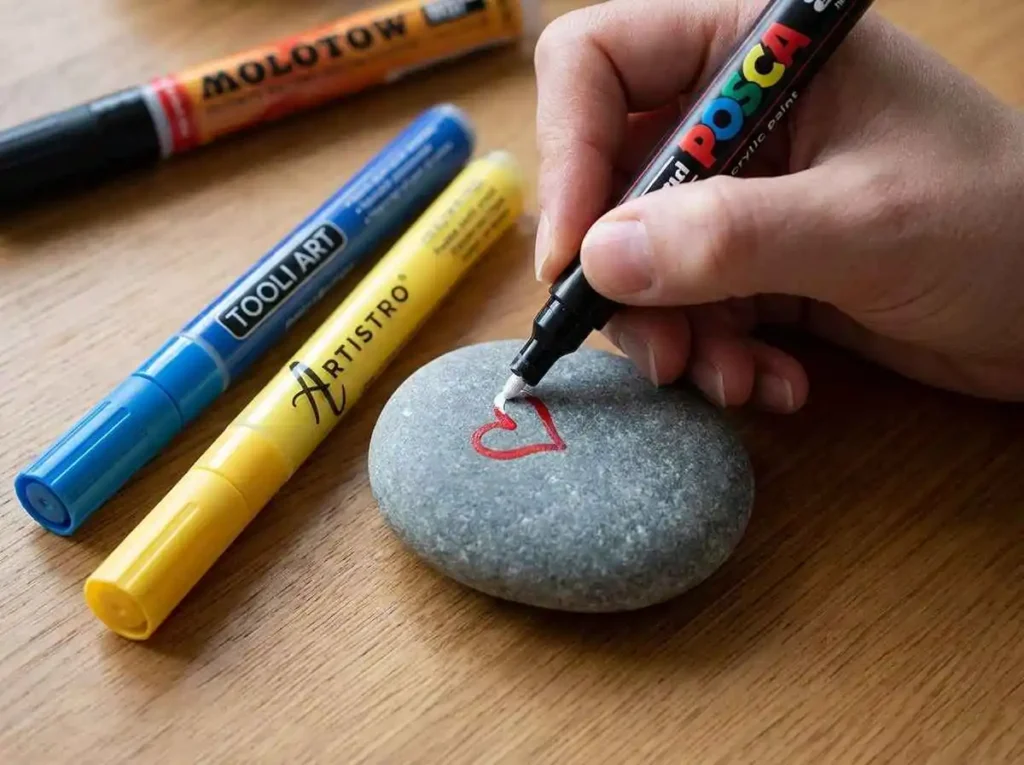
Paint pens look a little like normal markers, but they contain paint instead of regular marker ink.
The paint moves through a small tip at the end of the pen. You use that tip directly on the rock. This makes it easier to control where the paint goes.
Paint pens are useful when you want to create things such as:
Flowers
Small animals
Names
Short messages
Eyes and faces
Dots
Lines
Borders
Mandala patterns
Simple pictures
They are especially helpful for beginners because holding a pen often feels easier than controlling a small paintbrush.
Most paint pens used for rock art contain acrylic or water based paint. These types can give good colour coverage on a prepared rock. Some paint markers use oil based paint instead. Oil based options can also work well on stone, but they may feel and behave differently from acrylic pens.
A paint pen is not automatically better than a brush. Brushes are still useful for backgrounds, large areas, blending, and soft effects. Paint pens become especially useful when you need clean shapes, controlled lines, or small details.
That is why many people use both brushes and pens in the same project.
How We Chose These Paint Pens
We chose these paint pens by looking at the features that matter most for rock painting. Our goal was to find useful options for beginners as well as people who want more control for small details.
We compared each product based on paint type, tip size, ease of use, colour coverage, and how well it works on stone. We also looked at whether the pens are suitable for lettering, dots, simple designs, or very small details.
For some products, we also considered refill options, outdoor guidance, and how easy they are to find in the UK and USA.
We did not choose products only because they are popular. Each paint pen included in this guide has a clear reason for being recommended and is suited to a specific type of rock painting.
Our Top Paint Pens for Rock Painting
The following products were chosen for different types of rock painting. Instead of giving every pen the same praise, we have focused on what each one is best suited for.
1. POSCA PC 5M: Best Overall Paint Pens for Rock Painting
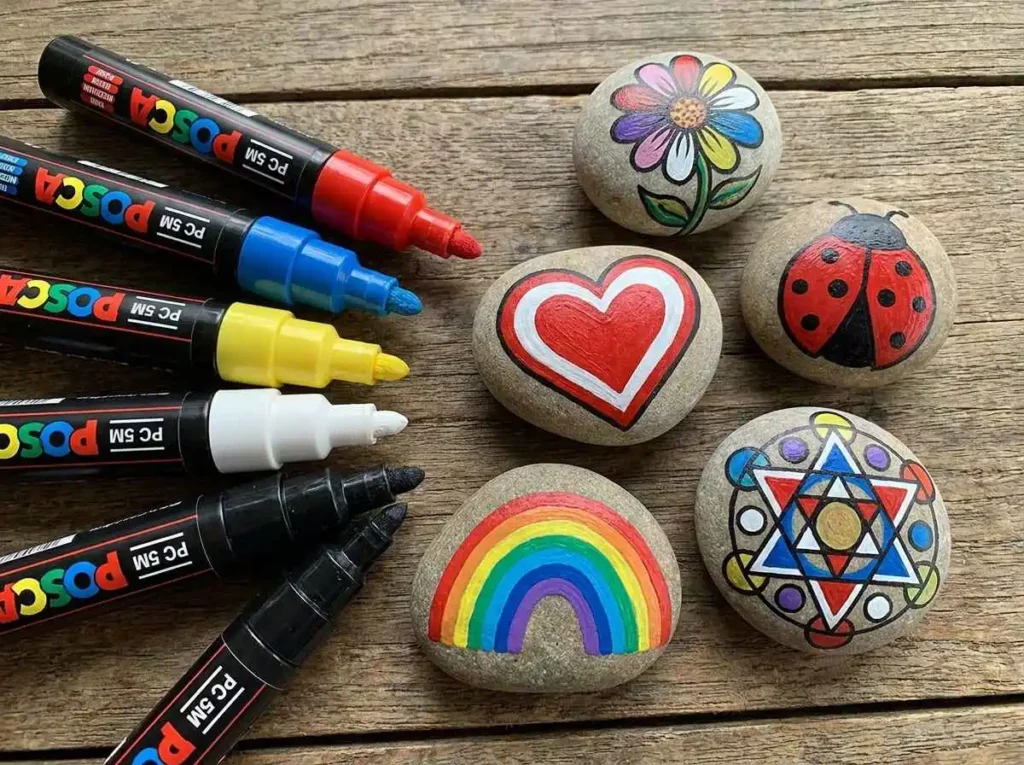
The POSCA PC 5M is a strong choice for someone who wants one paint pen that can handle many different rock painting jobs.
Its bullet tip is about 1.8 to 2.5 mm wide. That size gives you enough control for simple lines and shapes, but it is also large enough to colour small sections without taking too long.
POSCA lists stone as one of the surfaces that these markers can be used on. The paint is water based and opaque, which means it can cover the colour underneath better than a weak transparent marker.
For a beginner, the PC 5M is useful for designs such as flowers, hearts, animals, simple patterns, names, and colourful shapes.
It is not the smallest POSCA tip, so it may feel too wide when you are trying to paint very tiny eyes or very small letters. For those jobs, the PC 1MC is a better choice.
Best for: Someone who wants a simple all round paint pen for many types of rock designs.
What makes it useful: The medium tip gives a good balance between control and coverage.
Keep in mind: You may still want a smaller pen for very fine details.
2. TOOLI ART Double Sided Acrylic Paint Pens: Best Starter Set
A beginner may not know whether to buy thick pens or thin pens first. A double sided marker can make that decision easier.
The TOOLI ART Double Sided Acrylic Paint Pens give you two tip choices in the same marker. One end can be used for smaller details, while the other can cover larger parts of the design.
This is useful when you are learning because one project often needs both.
For example, you may use the medium side to paint the body of a ladybug. Then you can turn the marker around and use the smaller tip for spots, eyes, and lines.
A starter set with several colours also gives you enough choice for beginner projects without needing to buy many separate pens.
These pens are a good fit for simple flowers, rainbow rocks, animals, words, and easy patterns.
Best for: Beginners who want several colours and more than one tip size.
What makes it useful: Two tips give you more ways to paint without changing to another set.
Keep in mind: Large marker sets can contain colours you may not use often. Start with the colours that match your favourite designs.
3. ARTISTRO Precision Dual Tip Acrylic Paint Markers: Easiest to Use
ARTISTRO Precision Dual Tip Acrylic Paint Markers are another beginner friendly choice because they combine a fine tip with a larger dot style tip.
The fine tip is useful for lines, outlines, letters, and small details. The larger tip can be useful for dots and wider marks.
One useful feature of this product line is that the nibs are designed to be ready for use without the long priming process found on some traditional pump style paint pens.
That can make the first painting session feel simpler.
These pens can work well for projects such as mandala rocks, flowers, decorative dots, simple animals, and short messages.
The dot tip also gives beginners an easy way to make repeated circles without using a separate dotting tool.
Best for: Beginners who want simple dual tip pens.
What makes it useful: You can make both fine lines and larger dots with the same marker.
Keep in mind: ARTISTRO sells different set sizes, so check which colours and tips are included before buying.
4. POSCA PC 1MC: Best for Fine Details and Lettering
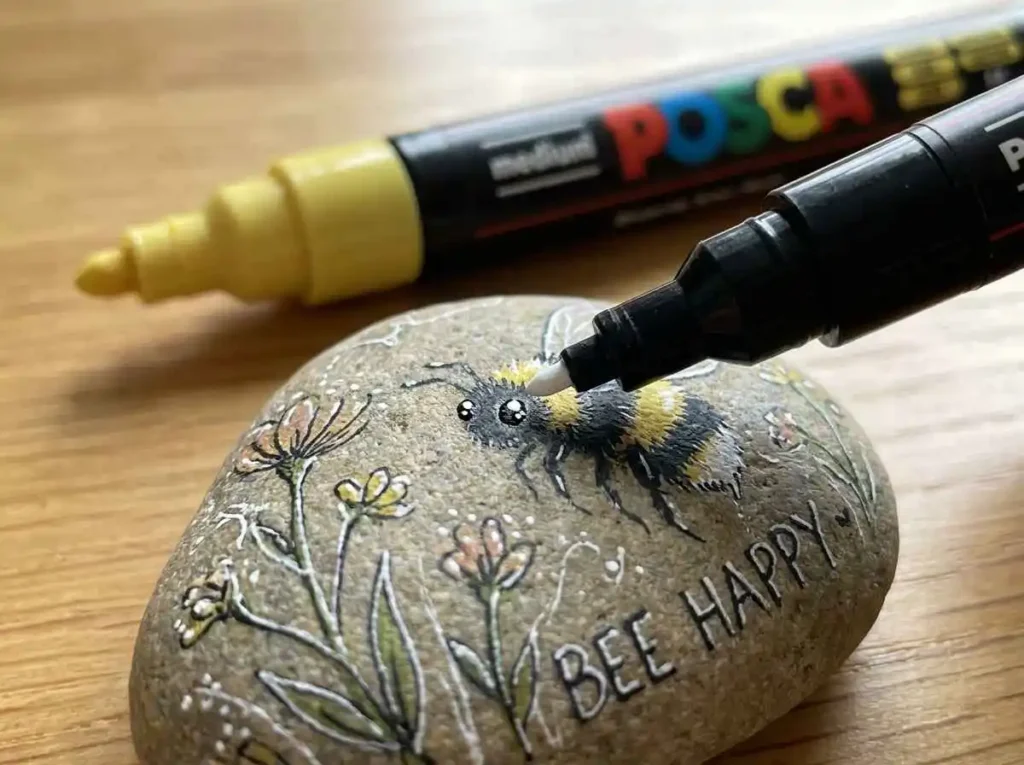
The POSCA PC 1MC is much smaller than the PC 5M.
Its extra fine bullet tip is around 0.7 to 1 mm. This makes it better for detailed work.
Imagine you have already painted a small bee on a rock. The body and wings are finished, but now you need thin antennae, tiny eyes, and small lines on the wings. A large marker can make those details difficult.
This is where the PC 1MC becomes useful.
It can also work well when you want to write names, short words, dates, or small messages on a rock.
You can use a larger marker for the main picture and then switch to the PC 1MC for the finishing details.
Best for: Fine lines, outlines, small letters, eyes, faces, and tiny patterns.
What makes it useful: The narrow tip gives better control when there is very little space.
Keep in mind: It will take longer to fill large areas because the tip is small.
5. MOLOTOW ONE4ALL 127HS: Best Refillable Paint Pen
Many paint pens are thrown away when the paint runs out. MOLOTOW ONE4ALL takes a different approach.
The marker can be refilled, and the tip can also be replaced. This may appeal to someone who paints rocks often and wants to keep using the same marker body.
The ONE4ALL system uses acrylic based paint with strong coverage. A tip around 2 mm is useful for normal rock painting designs, outlines, shapes, and small areas of colour.
Being refillable does not automatically make it the best choice for every beginner. Someone painting only a few rocks may prefer a simple ready made set.
However, if you enjoy the hobby and expect to keep painting, a refillable pen can become more useful over time.
Best for: People who paint regularly and like reusable art tools.
What makes it useful: Refillable paint and replaceable tips can extend the life of the marker.
Keep in mind: Refilling adds one more step compared with a basic disposable paint pen.
6. Montana Acrylic Marker 0.7 mm: Best for Tiny Details
The Montana Acrylic Marker 0.7 mm is made for very small and controlled marks.
A 0.7 mm tip is useful when your rock design has tiny parts that would be difficult to create with a normal medium tip marker.
You might use it for thin flower stems, small eyelashes, tiny patterns, narrow borders, or very small writing.
This type of marker makes the most sense after the larger parts of your design are already finished.
The marker uses water based acrylic paint and is part of a refillable system.
For outdoor work, extra protection may still be needed. If a painted rock will stay outside, follow the product instructions and use a suitable protective finish when required.
Best for: Very small details and careful line work.
What makes it useful: The narrow 0.7 mm tip gives a high level of control.
Keep in mind: It is not designed for quickly colouring large spaces.
7. Sharpie Oil Based Paint Markers: Best Oil Based Option
Not every paint pen uses acrylic paint.
Sharpie Oil Based Paint Markers use oil based paint and can also be used for rock painting.
The fine point is useful for writing, outlines, small shapes, and simple details. Sharpie describes the paint as resistant to water, fading, and abrasion.
An oil based marker can be useful when you want a different type of finish from a normal water based acrylic pen.
However, beginners should understand that oil based paint and water based acrylic paint are not exactly the same. Drying, smell, cleaning, and surface behaviour can be different.
For younger children, always follow the product instructions and any safety guidance from the manufacturer.
Best for: People who specifically want an oil based paint marker.
What makes it useful: Fine control combined with oil based paint.
Keep in mind: It may not be the first type of paint pen every beginner needs.
8. Pébéo 4ARTIST Markers: Best for a Glossy Finish
Pébéo 4ARTIST markers are useful when you want a more glossy and polished looking finish.
These markers use oil based paint and come in different tip sizes. The 4 mm version can work well for bolder lines, shapes, and larger details.
The paint is opaque, which helps the colour stand out.
One important thing to understand is that rocks are porous. This means the surface can absorb some paint. On an untreated porous rock, the glossy effect may not look as strong as it would on a smoother prepared surface.
Preparing the rock properly can help you get a cleaner result.
Best for: Decorative rocks where a glossy look is important.
What makes it useful: Opaque oil based paint with a glossy finish.
Keep in mind: The final shine can depend on how the rock surface has been prepared.
Paint Pens Comparison Table
Here is a closer look at how the eight choices compare.
| Product | Main Strength | Paint Type | Tip Size or Style | Good for Beginners | Best Use |
| POSCA PC 5M | Balanced performance | Water based | 1.8 to 2.5 mm | Yes | General rock painting |
| TOOLI ART Double Sided | Two tips in one pen | Acrylic | Extra fine and medium | Yes | Starter projects |
| ARTISTRO Precision Dual Tip | Easy control | Acrylic | Fine and dot | Yes | Dots and details |
| POSCA PC 1MC | Fine control | Water based | 0.7 to 1 mm | Yes | Lettering and details |
| MOLOTOW ONE4ALL 127HS | Refillable | Acrylic based | Around 2 mm | Yes | Regular painting |
| Montana Acrylic Marker | Very small tip | Acrylic | 0.7 mm | Yes | Tiny details |
| Sharpie Oil Based | Oil based paint | Oil based | Fine point | Yes | Lines and writing |
| Pébéo 4ARTIST | Glossy finish | Oil based | Different sizes | Yes | Decorative designs |
How to Choose Paint Pens for Rock Painting
You do not need the most expensive paint pens to make beautiful rocks. What matters more is choosing pens that fit the kind of design you want to create.
Choose the Right Paint Type
Acrylic paint pens are one of the easiest choices for beginners.
Acrylic paint dries into a coloured layer on the surface. It can work well for simple rock art, patterns, lettering, and small pictures.
Water based paint markers are also easy to work with and are common in rock painting.
Oil based markers are another option. They can give strong colour and a different finish, but they may not feel exactly the same as acrylic markers.
If this is your first rock painting project, acrylic or water based paint pens are usually a simple place to start.
Look at the Tip Size
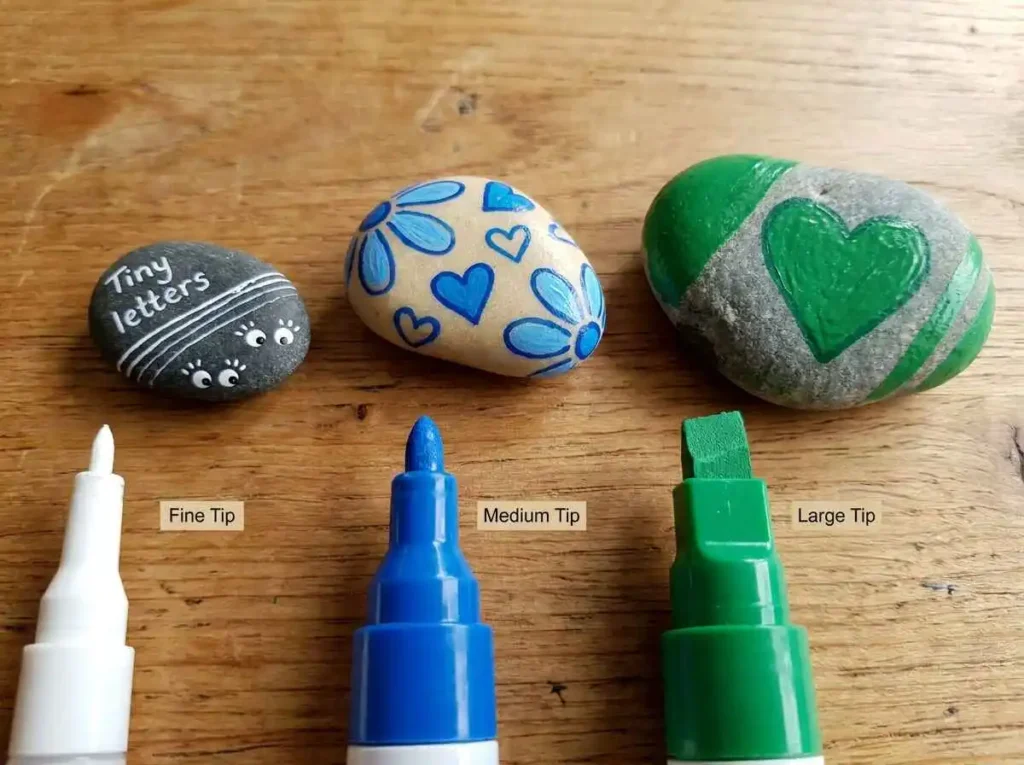
Tip size changes what you can paint.
A fine tip is useful for:
Small letters
Eyes
Thin lines
Outlines
Tiny flowers
Small patterns
A medium tip is useful for:
Hearts
Animals
Normal sized flowers
Shapes
Simple pictures
Colouring small areas
A larger tip is better when you need to cover more space.
For many beginners, a medium tip is the easiest first choice. You can then add a fine tip marker when you want more detail.
Check the Paint Coverage
Good coverage means that the paint can hide the rock colour underneath.
This becomes especially important when you paint a dark rock.
Yellow, white, pink, and other light colours may look weak if the paint is too thin. A more opaque paint can make these colours appear clearer.
Sometimes one layer is enough. Other times, you may need to let the first layer dry and then add another.
Do not keep going over wet paint because this can make the surface messy.
Think About the Colours You Need
A set with fifty colours may look exciting, but a beginner does not always need that many.
You can create many simple designs with basic colours such as:
White
Black
Red
Blue
Yellow
Green
Pink
Orange
Purple
A smaller useful set can sometimes be better than a huge set filled with colours you rarely use.
Think about what you actually want to paint before choosing the set.
Check How Easily the Paint Flows
Paint should come through the tip in a controlled way.
If too little paint comes out, your lines may look dry and broken.
If too much comes out, you may get thick blobs.
Some paint pens need to be shaken and pressed before use. Others have a simpler ready to use design.
Always test a new pen on scrap paper or an old rock before using it on your finished design.
This helps you see how quickly the paint comes out.
Think About Indoor or Outdoor Rocks
A rock kept on a shelf inside your home does not face the same conditions as a rock placed in a garden.
Outdoor rocks can be exposed to:
Rain
Sunlight
Heat
Cold
Moisture
Even when a manufacturer says a paint has good outdoor resistance, protecting the finished design can still be useful.
We will explain sealing in more detail later in this guide.
Consider Your Skill Level
Beginners do not need the smallest professional art marker available.
Start with something that feels easy to control.
A medium tip can help you learn how paint pens work. Once you feel comfortable, you can add smaller tips for details and lettering.
If you already enjoy detailed drawing, a 0.7 mm marker may be useful from the beginning.
The best paint pens for rock painting are not always the pens with the biggest colour set or the highest price. The best choice is the one that gives you the right tip, paint type, and level of control for the designs you actually want to make.
Acrylic Paint Pens vs Regular Markers for Rocks
Acrylic paint pens and regular markers may look similar, but they do not always give the same result on rocks.
Acrylic paint pens contain paint. Regular markers usually contain ink.
Paint can sit on the surface of a rock and create a stronger layer of colour. Marker ink may soak into a porous rock or look lighter than expected.
Here is a simple comparison.
| Feature | Acrylic Paint Pens | Regular Markers |
| Main material | Paint | Ink |
| Colour coverage | Usually stronger | Can vary |
| Works on dark rocks | Often better | May look weak |
| Fine details | Very good | Very good |
| Large colour areas | Good with the right tip | Usually limited |
| Rock painting use | Very suitable | Depends on the marker |
| Sealing | May be useful | May be useful |
Acrylic paint pens are often easier when you want bright flowers, animals, patterns, dots, or colourful words.
Regular markers can still be useful for drawing outlines or planning a design. However, not every regular marker is made to stay on stone.
If you are buying pens mainly for rock painting, choosing a paint marker that lists stone or similar surfaces is a safer choice than using an ordinary writing marker.
How to Use Paint Pens on Rocks
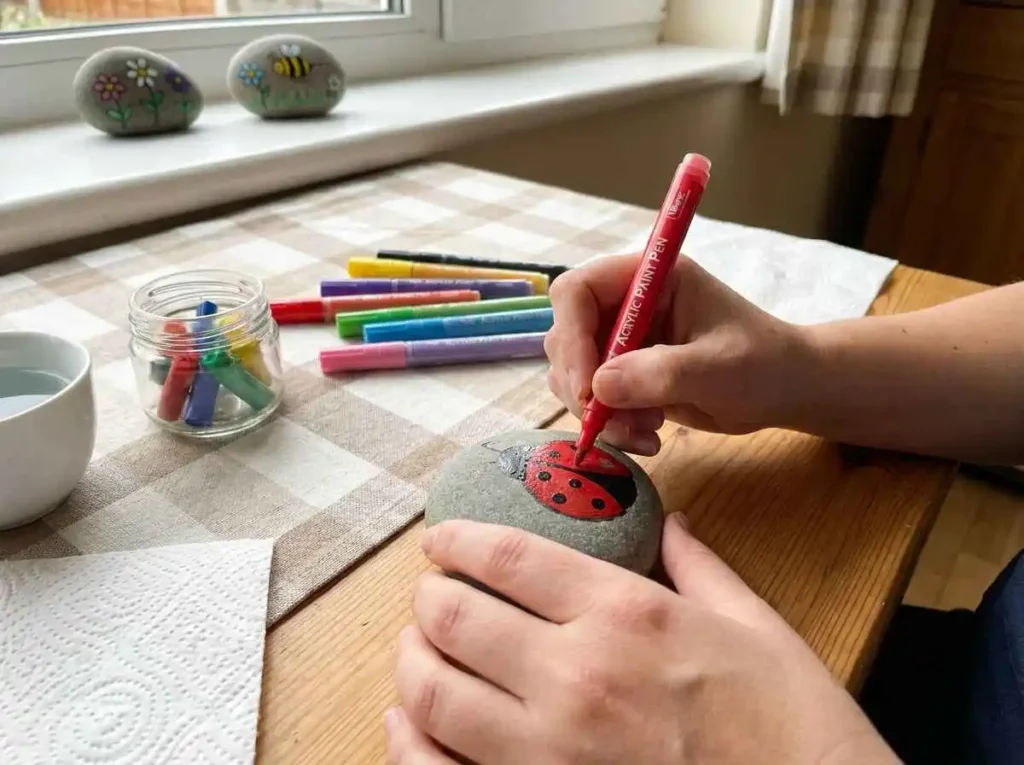
Using paint pens is simple, but preparing your rock first can make a big difference.
If you are completely new to this craft, our guide on how to paint rocks with acrylic paint explains the full process of choosing, cleaning, painting, and protecting rocks.
Here is the basic method when using paint pens.
Step 1: Choose a Smooth Rock
Start with a rock that has a fairly smooth surface.
It does not need to be perfectly flat.
A few natural bumps are fine, but very rough rocks can make it difficult to draw clean lines.
A flat rock is especially useful for lettering, faces, flowers, and detailed patterns.
Step 2: Clean and Dry the Rock
Wash away dirt, dust, and loose material before painting.
A little soap and water is usually enough for normal cleaning.
Rinse the rock and let it dry completely.
Do not start painting while the surface is still damp. Paint may not stick as well to a wet surface.
Step 3: Prepare the Paint Pen
Different paint pens work in different ways.
Some need to be shaken before use.
Some also need you to gently press the tip on scrap paper until paint begins to flow.
Other pens may already be ready to use.
Always follow the instructions that come with your marker.
Step 4: Test the Pen First
Do not start immediately on your finished rock.
Test the pen on a piece of paper or an old rock.
This lets you see:
How much paint comes out
How thick the line is
How quickly you need to move the pen
Whether the colour looks as expected
Testing can save you from getting a large blob of paint in the middle of your design.
Step 5: Start Painting
Begin with the larger parts of your picture.
For example, if you are painting a ladybug, you may first add the main red body.
Then you can add the black head, spots, eyes, and other details.
Try not to press the tip harder than needed.
Let the paint flow naturally.
Step 6: Let Each Layer Dry
Patience is important.
If you paint one colour over another while the first colour is still wet, they may mix or smear.
Let one section dry before adding details over it.
This is especially important when using light colours over dark colours.
Step 7: Add Small Details
Once the main colours are dry, use a fine tip marker for small details.
You can add:
Eyes
Thin outlines
Dots
Small flowers
Letters
Patterns
Highlights
A fine tip pen can make a simple rock look much more complete.
Step 8: Let the Rock Dry Completely
Do not seal or handle your finished rock too quickly.
Give the paint enough time to dry.
Drying time can vary depending on the marker, the amount of paint, and the conditions in the room.
Follow the instructions provided by the paint pen maker when possible.
Step 9: Seal the Rock if Needed
If your painted rock will be handled often or placed outdoors, a protective finish may help.
Make sure the paint is fully dry before adding any sealer.
Do You Need to Seal Paint Pens on Rocks?
You do not always need to seal a painted rock.
A rock that stays on a shelf inside your home may remain protected without much extra work.
Outdoor rocks are different.
They can face rain, sunlight, moisture, dirt, and changing temperatures. These conditions can slowly affect the painted design.
A suitable clear sealer can add another layer of protection.
Sealing can be especially useful for:
Garden rocks
Rocks placed near plants
Painted stones kept outside
Rocks that are touched often
Decorative stones given as gifts
Before sealing, let the paint dry properly.
Applying sealer too early may cause smearing or damage the design.
You should also check the instructions for both the paint pen and the sealer. Not every product works in exactly the same way.
Do not assume that adding sealer makes every painted rock permanently waterproof. The final result depends on the paint, surface preparation, sealer, weather, and where the rock is placed.
Common Paint Pen Problems and How to Fix Them
Even good paint pens can sometimes be difficult to use.
Most problems are easy to fix once you understand what is happening.
Paint Is Not Coming Out
First, check the instructions for your marker.
Many paint pens need to be shaken before the first use.
A pump style marker may also need you to press the tip gently against scrap paper until the paint reaches the nib.
Do not press extremely hard.
Give the paint a little time to move through the pen.
Too Much Paint Comes Out
Too much pressure can cause a large amount of paint to collect around the tip.
Stop using the pen for a moment.
Wipe away extra paint if the manufacturer allows it, then test the pen again on scrap paper.
Use less pressure when you return to your rock.
The Tip Keeps Drying
Always replace the cap after using your paint pen.
Leaving the marker open can allow paint around the nib to dry.
If the tip becomes dry, follow the cleaning instructions provided by the manufacturer.
Do not use random cleaning liquids because they may damage the marker.
Colours Look Weak on Dark Rocks
Some colours need more than one layer on a dark surface.
Let the first layer dry.
Then add another thin layer.
White can also be used as a base under certain light colours if your design needs stronger coverage.
Paint Smears When Adding Another Colour
This usually happens because the first layer is still wet.
Wait longer before adding the next colour.
Touching or rubbing the design too early can also cause smearing.
The Pen Makes Thick Blobs
Test the marker before touching the rock.
A large blob often appears when too much paint has collected in the tip.
Using gentle pressure and testing first can help you control the flow.
Easy Rock Painting Ideas to Try With Paint Pens
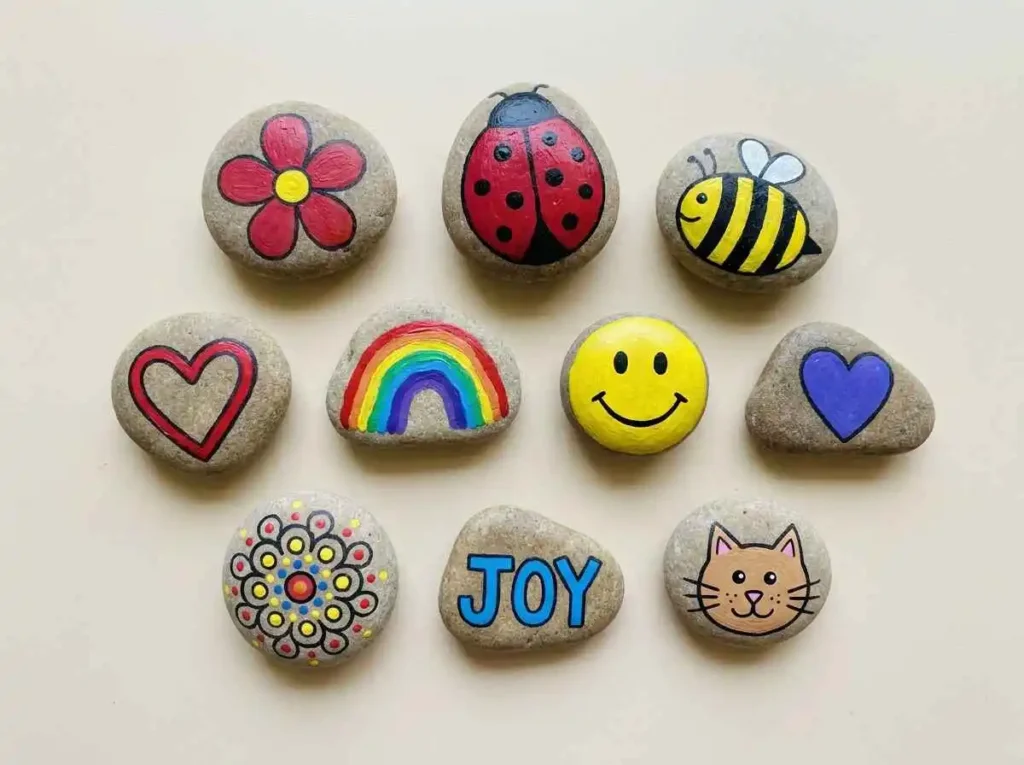
You do not need complicated designs when you are learning.
Simple pictures are often the best way to practise using your new pens.
Flowers
Start with a small circle in the middle.
Add simple petals around it.
You can add a green stem and leaves when the flower is dry.
Ladybugs
Paint a red body.
Add a black head, black spots, and two small eyes.
Ladybugs are simple because the shapes do not need to be perfect.
Bees
Use yellow and black stripes for the body.
Add white wings and a small face.
A fine tip pen can help with the eyes and antennae.
Hearts
Hearts are one of the easiest designs for beginners.
Try one large heart or several small hearts in different colours.
Rainbows
Draw curved lines using several bright colours.
A white cloud at each end can finish the design.
Smiley Faces
Paint two eyes and a simple smile.
You can create different expressions by changing the mouth or eyebrows.
Mandala Patterns
Start with one dot in the middle.
Add circles of dots around it.
Keep building the pattern slowly.
You do not need a complicated design to create a beautiful mandala rock.
Inspirational Words
Short words work best when you are learning lettering.
Try words such as:
Smile
Hope
Love
Kind
Dream
Joy
Use a fine tip marker if the rock is small.
Animals
Simple animal faces are easier than full detailed animals.
Try a cat, panda, frog, fish, or owl.
Start with large shapes and add small details at the end.
Common Mistakes When Using Paint Pens on Rocks
Knowing what not to do can save you time.
Painting Dirty Rocks
Dust and dirt can stop paint from sitting properly on the surface.
Clean the rock before you begin.
Pressing the Tip Too Hard
More pressure does not always mean more control.
It can release too much paint and create a blob.
Use gentle pressure.
Adding Another Colour Too Soon
Wet colours can mix together.
Let each important layer dry before painting over it.
Using the Wrong Tip Size
A large tip can make tiny lettering difficult.
A very small tip can make filling a large shape slow and frustrating.
Choose the tip based on the job.
Applying Too Many Thick Layers
Several heavy layers can make the design uneven.
Thin layers usually give you more control.
Sealing Before the Paint Is Dry
This can damage your finished design.
Wait until the paint has dried properly before applying protection.
Leaving Paint Pens Uncapped
Paint around the tip can dry when the cap is left off.
Close each pen when you finish using it.
Frequently Asked Questions
What are the best paint pens for rock painting?
The best choice depends on what you want to paint.
POSCA PC 5M is a useful overall option for beginners because its medium tip can handle many common rock designs. Fine tip pens such as POSCA PC 1MC or Montana 0.7 mm are better when you need tiny details.
Are acrylic paint pens good for rocks?
Yes. Acrylic paint pens can work very well on rocks when the surface is clean and properly prepared.
They are useful for bright colours, outlines, details, lettering, dots, and simple pictures.
Do paint pens stay on rocks?
Paint pens can stay on rocks well when the surface is prepared correctly and the paint is allowed to dry.
Outdoor conditions can be harder on painted rocks. A suitable protective finish may help the design last longer.
Do you need to seal paint pens on rocks?
Not always.
Indoor decorative rocks may not need much protection.
Sealing is more useful when rocks will be handled often or kept outdoors.
Always allow the paint to dry before applying a sealer.
What tip size is best for rock painting?
A medium tip is a good starting choice for beginners.
It can create normal lines, shapes, flowers, and small areas of colour.
A fine tip is better for small writing, eyes, thin outlines, and detailed patterns.
Many people eventually use both.
Can you use paint pens on dark rocks?
Yes.
Opaque paint pens can show up well on dark rocks, but some light colours may need more than one layer.
Allow the first layer to dry before adding another.
Are paint pens easier than brushes for beginners?
Paint pens can be easier for lines, lettering, dots, and small details because you hold them like normal pens.
Brushes can be better for backgrounds, large areas, blending, and softer effects.
Using both gives you more options.
How long do paint pens take to dry on rocks?
There is no single drying time for every paint pen.
It depends on the product, thickness of the paint, number of layers, temperature, and other conditions.
Check the instructions from the manufacturer and give the paint enough time to dry before touching, layering, or sealing it.
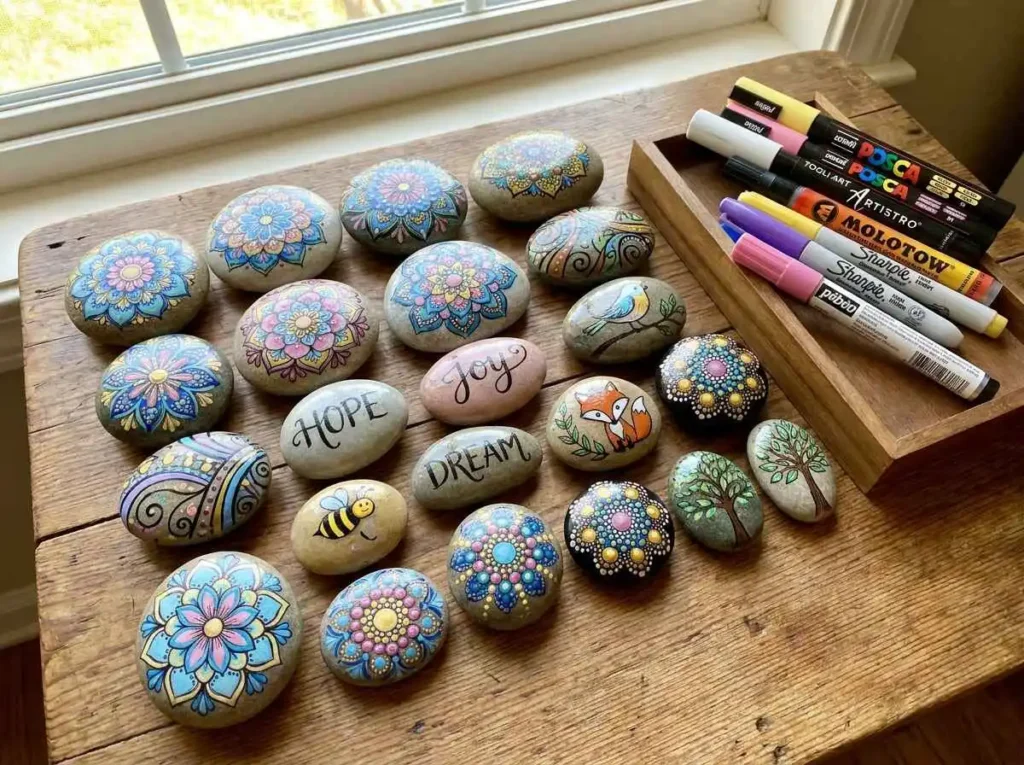
Final Thoughts on the Best Paint Pens for Rock Painting
You do not need a huge collection of art supplies to start painting rocks.
A good medium tip paint pen can handle many beginner designs. Add a fine tip pen when you want to create smaller letters, thin lines, eyes, and detailed patterns.
POSCA PC 5M is a strong all round choice, while TOOLI ART and ARTISTRO give beginners useful tip options in one set. Fine tip markers such as POSCA PC 1MC and Montana 0.7 mm are better when your designs become smaller and more detailed.
The most important thing is to choose pens that match the type of art you want to make.
Start with simple designs. Test your pens before painting. Give each layer time to dry. As your control improves, you can move from easy hearts and flowers to lettering, mandalas, animals, and more detailed rock art.
A few suitable paint pens and a smooth rock are enough to begin.