
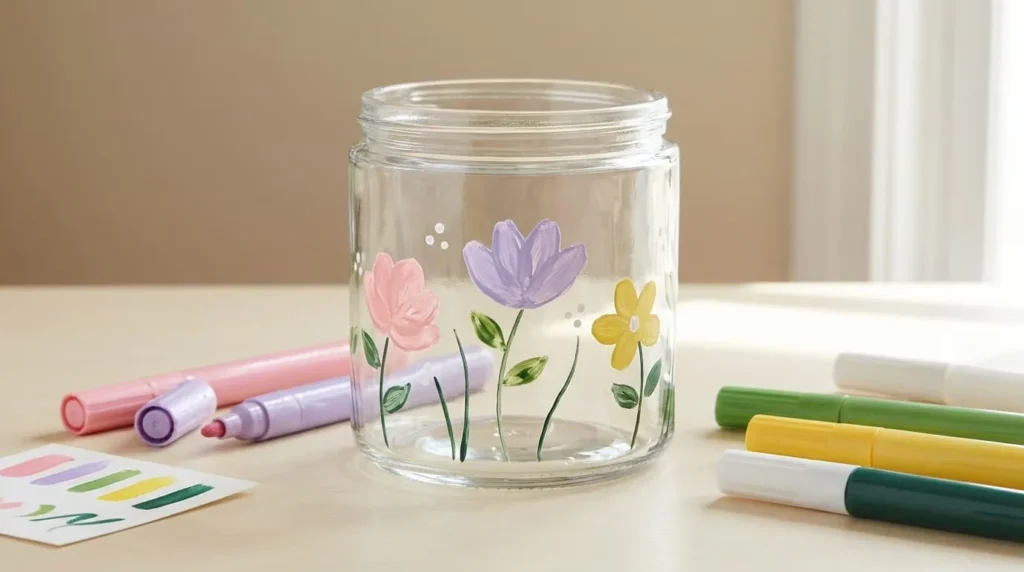
Acrylic paint pens on glass make it easy to turn plain jars, vases, bottles, and other glass objects into colorful handmade decorations. You can draw flowers, create simple patterns, add small details, or decorate glass pieces without using traditional paintbrushes.
However, painting on glass is different from painting on paper or wood. Glass has a smooth surface that does not absorb paint, so colors may smudge, peel, or come off if you use the wrong markers or skip important preparation steps.
The good news is that beginners can achieve beautiful results by choosing suitable acrylic paint pens and following a few simple instructions.
In this guide, you will learn how to prepare glass, apply acrylic paint pens correctly, create colorful designs, and protect your finished artwork when needed. You will also discover how to avoid common mistakes and make your glass painting projects more enjoyable.
Can You Use Acrylic Paint Pens on Glass?
Yes, you can use acrylic paint pens on glass, but the results depend on the type of marker you choose.
Many acrylic paint markers can create colorful designs on smooth glass surfaces. However, some are intended mainly for temporary decorations, while others are formulated to provide better adhesion and durability.
Glass does not absorb paint like unfinished wood or paper. This means the paint stays on the surface instead of soaking into it.
Because of this, cleaning the glass and choosing compatible markers are especially important.
Before starting your project, check whether the manufacturer recommends your acrylic paint pens for use on glass.
Do Acrylic Paint Pens Stick to Glass?
Acrylic paint pens can stick to glass when the paint formulation is suitable and the surface has been prepared correctly.
However, glass is a nonporous material. It does not contain the tiny openings found in materials such as wood or paper.
This makes it more difficult for some paints to form a strong bond with the surface.
If the glass contains fingerprints, grease, or cleaning residue, the paint may struggle to adhere properly.
For better results, use markers that are compatible with glass and clean the surface thoroughly before painting.
Allow the artwork to dry or cure according to the product instructions before handling it.
Are Acrylic Paint Pens Permanent on Glass?
Some acrylic paint pens can create durable designs on glass, but not every marker produces a permanent finish.
Certain markers are made for temporary window decorations and can be removed using appropriate cleaning methods.
Other products are designed for longer-lasting decorative artwork and may require a special curing process.
Even markers described as permanent may not withstand scratching, repeated washing, or dishwasher cleaning.
The durability of your design depends on the paint formulation, surface preparation, curing instructions, and how the finished object is used.
If you want a decoration that lasts longer, choose a marker specifically intended for durable glass painting rather than assuming ordinary acrylic pens will provide the same result.
Are Regular Acrylic Paint Pens Different from Glass Paint Markers?
Regular acrylic paint pens and glass paint markers may look similar, but they are not always designed for the same purpose.
General acrylic paint pens are often intended for drawing and decorating materials such as paper, wood, canvas, and certain craft surfaces.
Some of these markers also work on glass, although the paint may be easier to remove or scratch.
Glass paint markers are specifically formulated for use on glass and other compatible nonporous materials.
Depending on the product, they may offer different adhesion, drying, curing, or cleaning requirements.
Always read the marker instructions before beginning.
Choosing a product suitable for your project is more important than simply choosing one labeled as an acrylic paint pen.
What Types of Glass Can You Decorate with Acrylic Paint Pens?
You can decorate many glass objects with suitable acrylic paint pens.
The best choice for beginners is usually a sturdy glass item with a smooth surface and enough space for a simple design.
However, different glass objects have different shapes, uses, and safety considerations.
Before painting, think about whether your project is purely decorative or will be handled, washed, or used around food.
Clear Glass Jars
Clear glass jars are a convenient starting point for beginners.
Their smooth surfaces are useful for creating flowers, dots, leaves, and small decorative patterns.
You can turn a plain jar into a colorful decoration for a shelf, craft room, or table.
Choose a clean jar without cracks or sharp edges.
Decorate the outside and keep the design away from areas that may come into direct contact with food unless your paint is specifically approved for that use.
If you are decorating a jar that will be handled frequently, consider how the paint will withstand touching and cleaning.
Glass Vases
Glass vases provide a beautiful surface for simple floral and geometric designs.
You can decorate the outside with colorful flowers, leafy branches, or small repeating patterns.
Clear vases are especially interesting because light can pass through the glass and make the artwork visible from different angles.
Keep your first design simple and avoid covering the entire vase with thick layers of paint.
If the vase will hold fresh flowers, keep paint away from areas where it may contact water unless the product is approved for that exposure.
A finished decorative vase can add a handmade touch to a shelf, windowsill, or table.
Glass Bottles
Glass bottles can be decorated with acrylic paint pens to create small handmade displays.
You might add stars, colorful dots, flowers, or simple patterns around the outside.
However, curved bottles can be more challenging to paint than flat surfaces.
The bottle may roll while you work, and drawing straight lines around its curved body can take practice.
Place the bottle securely on a protected surface before beginning.
Use gentle pressure and rotate the bottle carefully when moving to another section.
For beginners, small designs are usually easier to manage than painting around the entire bottle.
Mirrors and Glass Panels
Some acrylic paint pens can be used on mirrors and flat glass panels when the manufacturer confirms compatibility.
These surfaces are useful for drawing small decorative borders, flowers, and simple patterns.
For example, you could decorate one corner of a mirror with delicate leaves or create a small seasonal design along the edge.
Because mirrors are smooth and reflective, fingerprints and streaks may be especially noticeable.
Clean the painting area thoroughly and avoid touching it after preparation.
If you want temporary artwork, choose markers intended for removable glass decoration.
For longer-lasting designs, check whether your chosen paint can safely adhere to the mirror or glass coating.
Drinking Glasses and Other Glassware
You may see drinking glasses, mugs, and other glassware decorated with colorful paint markers.
However, it is important to understand that decorative acrylic paint is not automatically safe for food contact.
Even if the paint dries completely, it may not be suitable for areas that touch food, drinks, or your mouth.
For drinking glasses, avoid decorating the rim, inside surface, or other contact areas unless the product is specifically certified for that use.
Do not assume that sealing or baking ordinary acrylic paint makes it food-safe.
If you want to create functional decorated glassware, choose products explicitly approved for the intended application and follow their instructions.
For beginners, decorative jars and vases are generally easier projects because they avoid many of these concerns.
Supplies You Need for Using Acrylic Paint Pens on Glass
You do not need a large collection of painting tools to start decorating glass.
A few suitable supplies and a clean workspace are enough for most simple projects.
The most important thing is choosing markers that work on glass and preparing the surface correctly.
Choosing Suitable Acrylic Paint Pens
Start by selecting acrylic paint pens whose manufacturer recommends them for glass surfaces.
Some pens create temporary decorations, while others are designed for more durable artwork.
Think about how you plan to use the finished object before choosing your markers.
Fine-tip pens are useful for small flowers, lettering, dots, and outlines.
Medium-tip pens are convenient for everyday drawing and filling smaller shapes.
Broad-tip markers can help cover larger sections, although they may be harder to control on curved glass.
You can also choose between opaque and more transparent paint effects, depending on the products available.
Opaque colors usually hide more of the surface underneath, while transparent colors allow more light to pass through.
For your first project, a few compatible colors are enough.
Basic Glass Painting Supplies
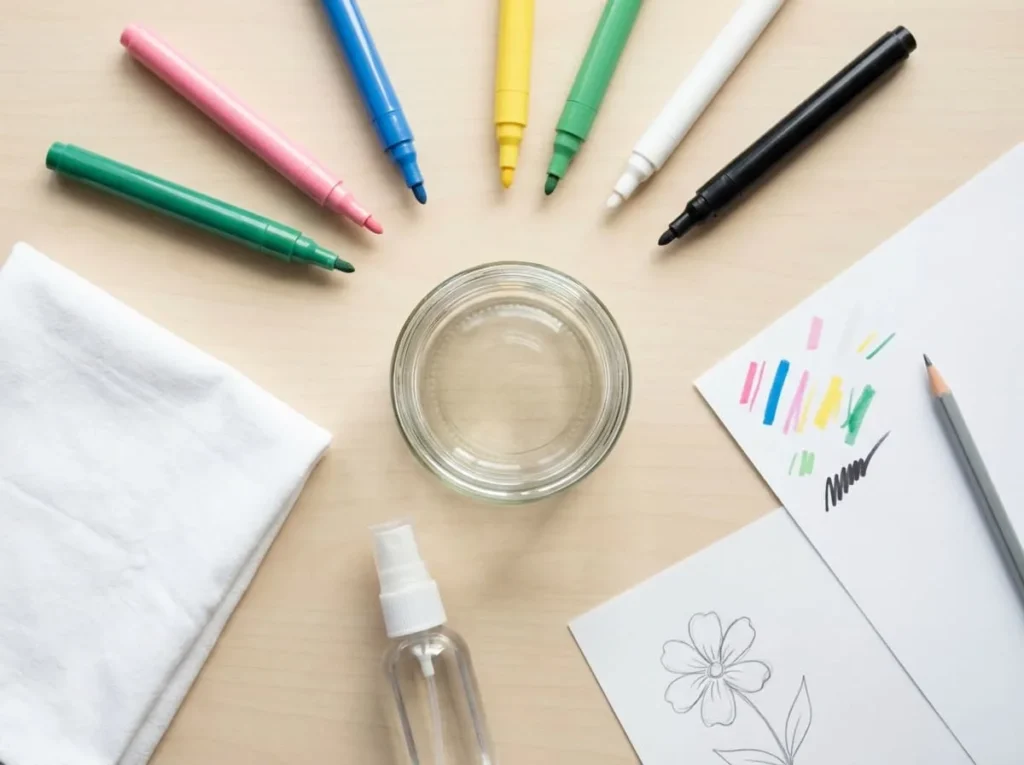
Gather these materials before starting:
- A clean glass jar, vase, or other suitable object
- Acrylic paint pens compatible with glass
- A cleaning product suitable for the glass and markers
- A clean lint-free cloth
- Scrap paper for testing the pens
- Plain paper and a pencil for planning designs
- Protective paper for your worktable
- A suitable protective finish if recommended for your project
You may also find a soft cloth or stable support helpful when working with curved glass objects.
Not every project needs primer, sealing, or special curing equipment.
Choose the materials according to the paint manufacturer’s instructions and how you intend to use the decoration.
How to Prepare Glass for Acrylic Paint Pens
Preparing glass properly is one of the most important parts of creating a successful painted design.
Even good acrylic paint markers may produce disappointing results if the glass contains grease, dust, fingerprints, or cleaning residue.
Because glass is smooth and nonporous, surface contamination can make it harder for paint to form a reliable bond.
These preparation steps will help you create a cleaner painting surface.
Step 1: Choose a Clean and Undamaged Glass Surface
Start by selecting a sturdy glass object that is suitable for your project.
For beginners, a smooth glass jar or simple vase is usually easier to decorate than a delicate object with an unusual shape.
Inspect the glass carefully before using it.
Avoid objects with cracks, sharp chips, or damaged edges because they may cause injuries while you handle or paint them.
If you are using a glass bottle or jar, remove any labels and adhesive residue when appropriate.
Check that the surface is free from raised stickers or leftover glue that could interfere with your design.
A simple, undamaged glass object provides a better starting point for practicing your painting skills.
Step 2: Remove Dirt, Fingerprints, and Grease
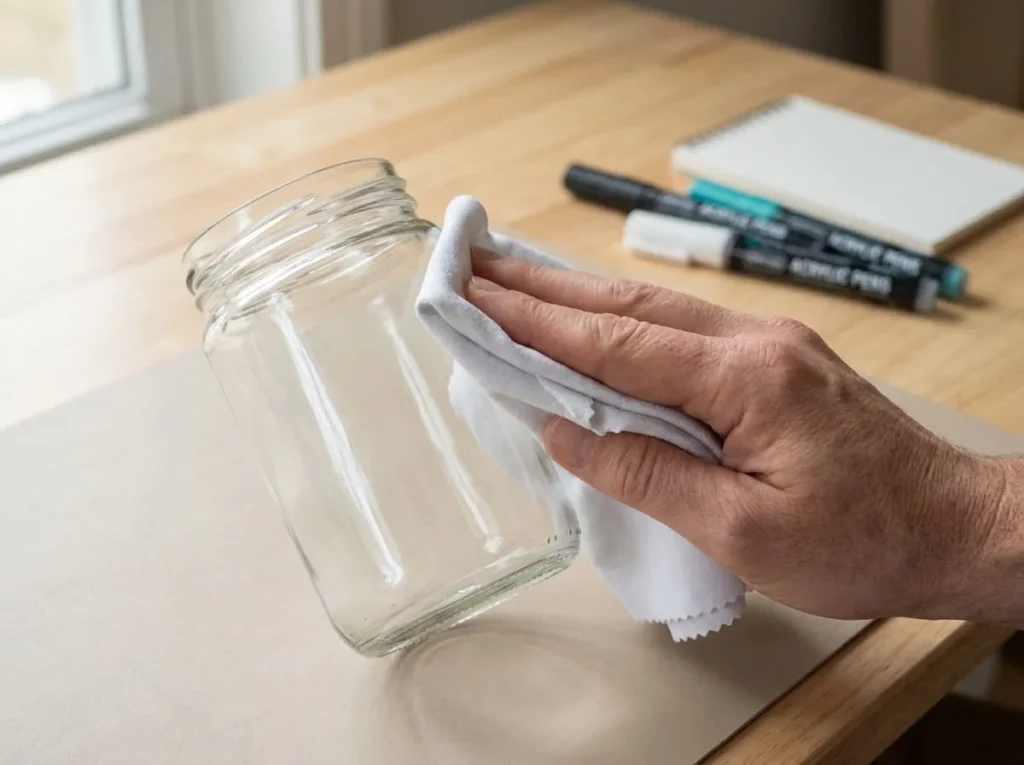
Glass can collect oils and fingerprints even when it looks clean.
These residues may interfere with paint adhesion and cause uneven coverage.
Use a cleaning method recommended by the paint marker manufacturer.
For some products, washing the glass with mild dish soap and water is an appropriate first step.
Other markers may recommend a particular cleaner or additional surface preparation.
If you use a cleaning product, make sure it is suitable for the glass and any existing coatings.
Gently clean the area you plan to decorate, paying attention to places where fingers commonly touch the surface.
Avoid abrasive pads that could scratch delicate glass or damage special coatings.
Step 3: Dry the Glass Completely
After cleaning, make sure the glass is completely dry before painting.
Leftover water or cleaning residue can prevent paint from applying evenly.
Use a clean, lint-free cloth to remove moisture from the surface.
Check the corners, edges, and any decorative grooves where water may collect.
Allow the glass to air dry if necessary.
Look at the surface under good lighting to make sure there are no visible streaks or water spots.
Painting on dry glass helps reduce the risk of unwanted smudging and uneven marks.
Step 4: Avoid Touching the Painting Area
Once the glass is clean, try not to touch the area where you plan to paint.
Your fingers naturally contain oils that can transfer onto the surface.
These oils may reduce paint adhesion, particularly when working with markers that require a completely clean surface.
Hold the jar, vase, or glass panel by an area that will remain undecorated.
If you need to reposition the object, use clean hands and avoid touching the prepared painting area.
For larger projects, you can rest the glass on a clean cloth while working.
Keeping the surface free from new fingerprints helps maintain the preparation you have already completed.
Step 5: Test the Paint on a Small Area
Before decorating the entire glass object, test your acrylic paint pen on a small, less noticeable area or a spare piece of similar glass.
Prepare the marker according to its instructions and draw a short line or small shape.
Check whether the paint flows evenly.
Look for signs of the paint separating, forming unwanted droplets, or failing to cover the glass consistently.
Allow the test mark to dry or cure according to the manufacturer’s recommendations.
Once the paint is ready, check whether it appears properly attached to the surface using a method that will not unnecessarily damage the sample.
If the paint does not perform as expected, check the marker’s surface compatibility and preparation requirements before continuing.
Testing first can help you avoid problems on your finished project.
How to Use Acrylic Paint Pens on Glass Step by Step
Once your glass is clean and your markers are ready, you can begin creating your design.
The process is beginner-friendly, but glass requires a little patience because the paint stays on its smooth surface rather than soaking into the material.
For your first project, choose a simple glass jar with a flower or leaf design.
The following steps will help you move from a plain glass object to a colorful handmade decoration.
Step 1: Choose a Simple Glass Painting Design
Start with a design that does not require complicated drawing skills.
Flowers, hearts, stars, leaves, dots, and basic geometric patterns are good choices for beginners.
A simple design also makes it easier to understand how your markers behave on glass.
For example, you could decorate a small glass jar with three colorful flowers and a few green leaves.
Avoid filling every part of the glass with paint during your first attempt.
Leaving some clear areas can make the finished decoration look lighter and more balanced.
Step 2: Plan the Design Before Painting
Before applying paint, sketch your idea on plain paper.
This helps you decide where the flowers, leaves, or other shapes should appear.
If you are decorating a clear glass jar or vase, you can sometimes place the paper sketch inside the object.
Position the drawing so it is visible through the glass.
You can then use it as a guide while painting on the outside.
Make sure the paper stays secure and does not move while you work.
For curved objects, keep your design small enough to follow comfortably.
Planning the layout first helps reduce mistakes and makes the painting process more enjoyable.
Step 3: Prepare and Test Your Acrylic Paint Pens
Before painting, prepare your acrylic paint pens according to the instructions provided with the product.
Some markers need shaking or gentle priming before paint reaches the nib.
Other markers may use a different activation method.
Test each color on scrap paper before touching the glass.
Check that the paint flows consistently without releasing large drops.
If the marker is not working properly, follow its troubleshooting instructions.
Avoid repeatedly pressing a pump-action tip directly against your glass project because this may release too much paint.
If you are unfamiliar with activating paint markers, our article How to Use Acrylic Paint Pens explains the basic process in more detail.
Step 4: Position the Glass Object Securely
Place your glass object on a clean, stable, protected work surface.
If you are decorating a jar or vase, make sure it cannot roll or slide while you paint.
You can use a folded soft cloth to support certain objects, provided it keeps them stable.
Work in a comfortable position where you can see the painting area clearly.
Avoid gripping fragile glass too tightly or applying unnecessary pressure.
If you need to rotate the object, move it carefully and avoid touching wet paint.
For a larger design, it may be easier to complete one section and allow it to dry before turning the glass to another side.
Keeping your object stable helps you create more controlled lines and reduces accidental smudging.
Step 5: Draw the Main Outlines
Start by following the design you planned.
Hold the acrylic paint pen comfortably and apply gentle, steady pressure.
Move the nib slowly across the glass to create your main outlines.
Unlike paper, glass does not absorb the liquid paint. Because of this, you may notice that the paint feels different as you move the pen.
Avoid pressing too hard or repeatedly drawing over the same wet line.
For a flower design, begin with the center and carefully draw the surrounding petals.
You can then add stems or leaves.
If the lines appear uneven, test your marker again before continuing.
Take your time rather than trying to finish the entire design quickly.
Step 6: Fill the Design with Color
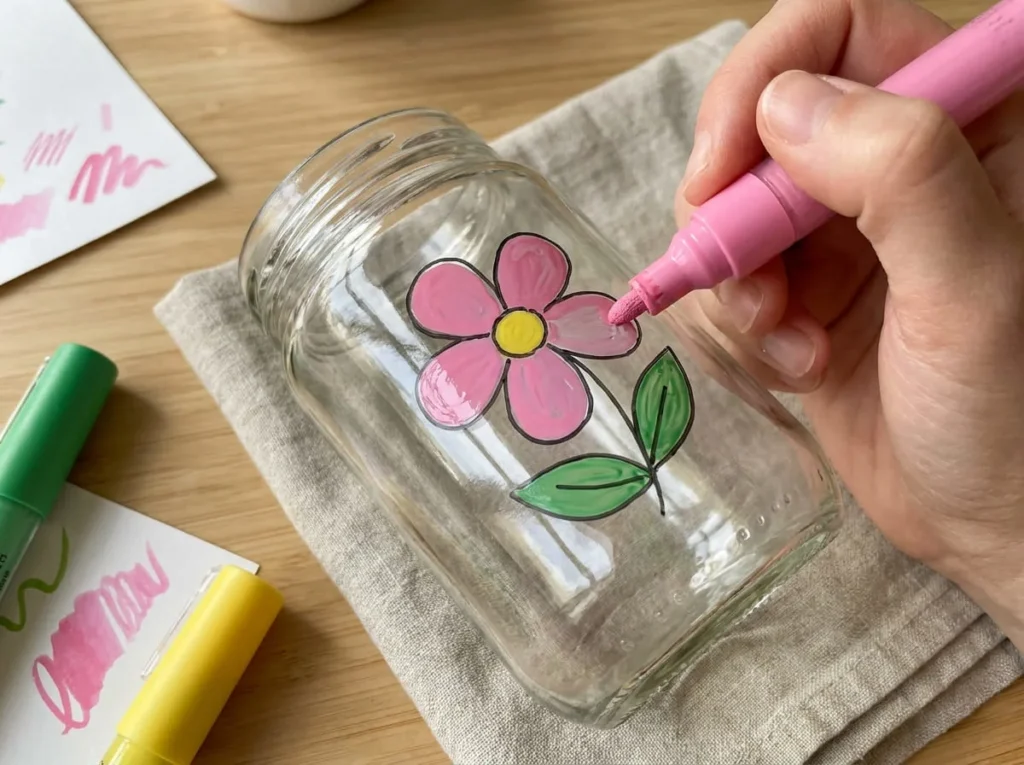
Once your main outlines are ready for additional paint, begin filling the shapes with your chosen colors.
Work slowly in small sections.
For example, if you are coloring flower petals, fill one petal at a time using short, controlled strokes.
Try not to drag the marker repeatedly through wet paint.
Because glass is smooth, too much paint may collect in one area or create streaks.
Use a suitable medium-tip pen for filling small shapes.
If you are working on a curved vase or bottle, keep the object positioned so wet paint does not run into unwanted areas.
Some acrylic paint pens provide strong coverage in one layer, while others require additional coats.
Follow the product instructions and allow the paint to dry before adding more color when necessary.
Step 7: Allow the First Layer to Dry
After applying your first colors, place the glass object somewhere safe and allow the paint to dry.
Avoid touching the painted areas during this time.
If you apply another color too soon, the new paint may disturb the layer underneath.
Drying time depends on the marker formulation, the thickness of the paint, room temperature, and humidity.
Paint on smooth glass may behave differently from paint applied to absorbent materials.
Follow the manufacturer’s drying recommendations rather than assuming that every acrylic paint marker dries at the same speed.
If your design covers several sides of a jar or vase, wait until the painted section is ready to handle before rotating the object.
Step 8: Add Another Coat if Needed
Once the first layer has dried sufficiently, check the color coverage.
Some painted areas may appear lighter or more transparent than you expected.
If your markers support layering, carefully apply another thin coat to improve the appearance.
For example, you may want a second layer of pink paint to make flower petals look more even.
Use gentle pressure and avoid repeatedly rubbing the nib over the same area.
Not every design needs additional paint.
If the first coat already looks smooth and colorful, you can leave it as it is.
Remember that different paint markers have different coverage and layering requirements.
Step 9: Add Small Details and Final Touches
When the main colors are dry, you can add smaller details to complete your design.
A fine-tip acrylic paint pen can be useful for drawing outlines, tiny dots, thin stems, and delicate patterns.
For example, you could add a yellow center to each flower, small white dots around the petals, or dark green lines inside the leaves.
Keep the decorations simple so the design does not become crowded.
When working on clear glass, remember that some parts of the artwork may also be visible from the opposite side.
Take a moment to look at your decoration from different angles before deciding whether it needs more details.
Allow each new painted area to dry as recommended.
Step 10: Let the Finished Glass Painting Dry or Cure
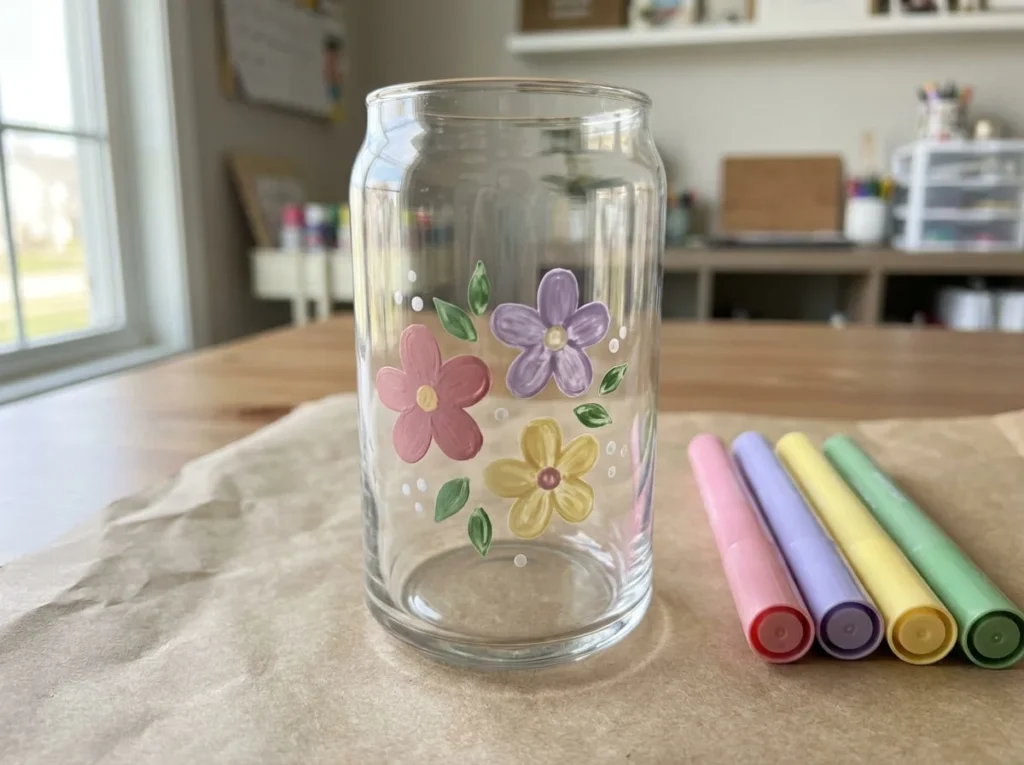
After completing your artwork, place the glass object somewhere clean and protected.
Allow the paint to dry or cure according to the manufacturer’s instructions.
Drying and curing are not always the same thing.
Paint may feel dry to the touch before it has reached the durability intended by the manufacturer.
Certain glass paint products need additional air curing or another approved finishing process.
Do not bake, heat, or seal ordinary acrylic paint pens unless the exact product instructions specifically allow that method.
Avoid washing, scratching, or heavily handling the glass before the paint is ready.
Once the artwork has completed its required drying or curing process, you can decide whether additional protection is appropriate for your particular project.
How to Make Acrylic Paint Pens Last Longer on Glass
Acrylic paint pens can create beautiful designs on glass, but keeping those designs in good condition requires a little care. Because glass has a smooth surface, some paints can scratch, peel, or wash away more easily than they would on paper or wood.
The durability of your artwork depends on the type of marker, how you prepare the glass, and what happens after painting.
These simple practices can help you protect your designs and avoid common problems.
Choose Markers Designed for Glass
Not every acrylic paint pen is made for long-lasting glass decoration.
Some markers work well for temporary designs, while others are formulated to adhere more strongly to glass.
Before buying or using your markers, check whether the manufacturer recommends them for glass surfaces.
If you want to decorate an object that will be handled regularly, look for a product with suitable durability instructions.
Remember that a marker described as permanent is not necessarily waterproof, scratchproof, or dishwasher-safe.
Choosing the right product from the beginning is more reliable than trying to make unsuitable paint permanent afterward.
Keep the Glass Clean Before Painting
Paint is more likely to adhere properly when the glass is free from dirt, fingerprints, and grease.
Even a small amount of oil from your fingers can interfere with paint application.
Before starting, clean the surface using a method recommended for your markers.
Allow the glass to dry completely and avoid touching the painting area afterward.
If you accidentally leave fingerprints on the prepared glass, clean that area again before applying paint.
Allow Proper Drying and Curing
One common mistake is handling painted glass before the artwork is ready.
Acrylic paint may feel dry on the surface while still needing additional time to develop its intended durability.
Some glass paint markers require air curing, while certain specialized products have other finishing instructions.
Always follow the drying and curing directions for your specific marker.
Avoid washing, stacking, or wrapping your painted glass object before the paint is ready.
Avoid Excessive Scratching and Rubbing
Even properly dried paint can become damaged through repeated scratching or rough cleaning.
Avoid using abrasive sponges, sharp tools, or harsh cleaning products on painted areas unless the manufacturer specifically allows them.
For decorative glass objects, gentle handling can help reduce unnecessary wear.
If the product supports cleaning, follow its recommended method rather than assuming the finished design can withstand ordinary dishwashing.
Use a Compatible Protective Finish When Appropriate
Some acrylic paint pen projects may benefit from a protective coating.
However, a sealer is not suitable or necessary for every type of paint marker.
Certain glass markers are designed to remain removable, while others use a specific curing process to achieve their intended durability.
If the manufacturer recommends a protective finish, choose a compatible product and test it before applying it to your completed artwork.
How to Seal Acrylic Paint Pens on Glass
Sealing acrylic paint pens on glass may help protect certain decorative projects from scratches and occasional handling.
However, the correct method depends on the type of paint marker and the glass object you are decorating.
Some products can be protected with a compatible clear coating. Others require a special curing process or are not designed to be sealed at all.
Before applying any protective finish, check the instructions for both your paint pens and the sealer.
Do Acrylic Paint Pens Need Sealing on Glass?
Not every acrylic paint pen project needs sealing.
For example, temporary window decorations are often designed to be removed when you no longer want them.
Adding a permanent protective coating would defeat the purpose of using removable markers.
Some glass paint markers are formulated to achieve their intended durability after following the manufacturer’s curing instructions.
Other acrylic paint pens may require a suitable clear coating if you want to protect decorative artwork.
The need for sealing depends on the marker formulation, intended use, and how frequently the finished object will be handled.
For a glass vase that will remain on a shelf, the requirements may be different from those of a regularly handled decorative jar.
What Type of Sealer Can You Use on Glass?
Some manufacturers recommend compatible clear varnishes or protective coatings for their acrylic paint markers.
Depending on the product, a suitable water-based clear finish may be an option.
However, not every water-based varnish adheres properly to glass or works safely over every acrylic marker.
Protective finishes may also change the appearance of your artwork.
A glossy coating can make colors look more reflective, while a matte finish may reduce shine or affect the glass’s clarity.
Before choosing a sealer, check that it is suitable for glass and compatible with your paint.
Avoid assuming that a product labeled clear will leave the glass completely transparent.
Always test the combination on a separate sample.
How to Apply a Protective Finish
If your paint marker manufacturer recommends or permits sealing, follow these general preparation steps.
The exact application method must come from the protective coating’s instructions.
Step 1: Check Paint and Sealer Compatibility
Start by reading the instructions for your acrylic paint pens and the protective finish.
Confirm that the sealer is suitable for glass and for use over the particular paint.
Some coatings may soften, dissolve, or lift the painted design.
If compatibility is unclear, do not apply the product directly to your finished artwork.
Step 2: Allow the Paint to Dry or Cure
Before applying a protective coating, allow the paint to reach the condition required by its manufacturer.
Touch-dry paint may not be ready for sealing.
If the marker requires additional curing, complete that process according to its instructions before considering a protective finish.
Avoid rushing because applying another product too early may disturb the artwork.
Step 3: Test the Finish on a Separate Glass Sample
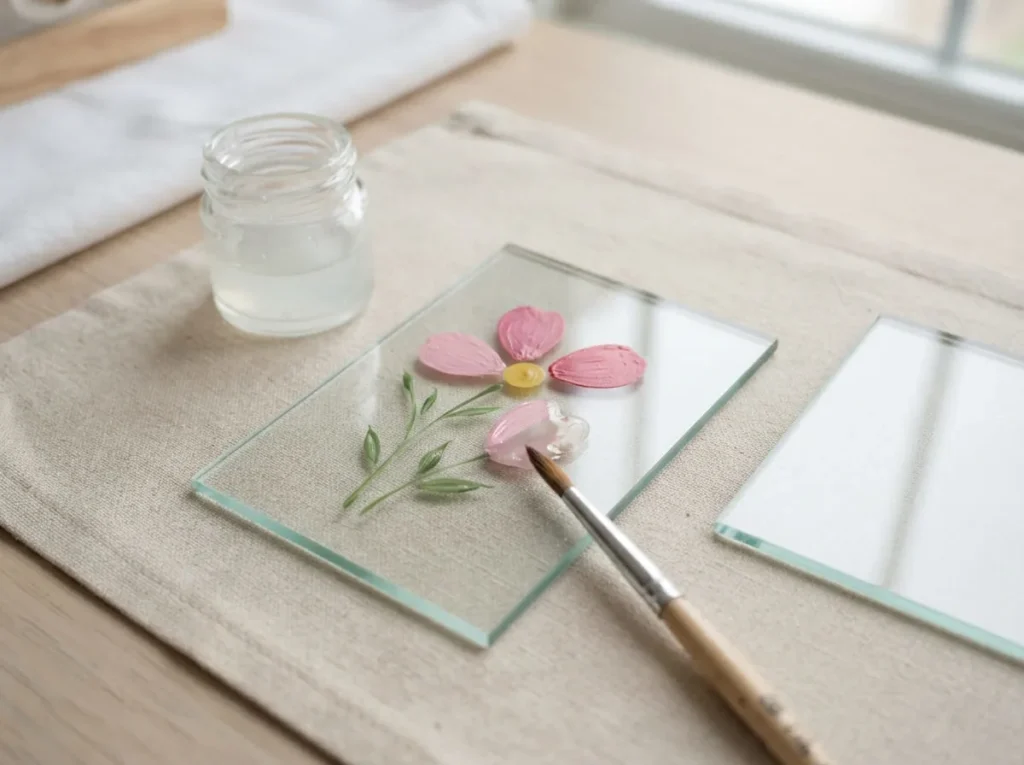
Use a spare glass object or a small sample prepared with the same paint and cleaning method.
Apply a simple painted design and allow it to dry or cure properly.
Then apply the proposed protective finish according to its instructions.
Check whether the paint smears, lifts, changes color, or becomes cloudy.
Allow the sample to cure before judging the result.
If the coating damages the test design, choose a different manufacturer-approved finishing method.
Step 4: Apply the Finish According to Its Instructions
Once you have confirmed that the products are compatible, apply the protective finish using the method recommended by its manufacturer.
Some coatings are applied with a brush, while others use a spray.
Follow all safety precautions, including ventilation and protective equipment where required.
Avoid applying unnecessarily thick layers because they can create drips or uneven coverage.
If multiple coats are recommended, follow the specified waiting time between applications.
Keep the coating away from food-contact areas unless the complete product system is specifically approved for that use.
Step 5: Allow the Protective Finish to Cure
After applying the sealer, place your glass object somewhere clean and safe.
Allow the protective finish to dry and cure according to its instructions.
Do not wash or heavily handle the object before the coating is ready.
Avoid stacking painted objects because contact between surfaces may damage a finish that has not fully cured.
Once the coating is ready, follow its recommended cleaning and care instructions.
Can You Bake Acrylic Paint Pens on Glass?
Some specialized glass paint markers are designed for oven curing, but ordinary acrylic paint pens should not be baked unless the exact product instructions specifically recommend it.
Baking unsuitable markers can damage the paint, release unwanted fumes, or create other safety concerns.
The glass itself must also be suitable for oven use.
Not all decorative jars, bottles, vases, or drinking glasses are designed to withstand oven temperatures.
Sudden temperature changes can cause some glass objects to crack or break.
If your markers require oven curing, follow the manufacturer’s complete instructions, including glass compatibility, temperature, heating method, and cooling process.
Do not use a general baking temperature or time found for a different paint brand.
If your product does not provide oven curing instructions, do not attempt to bake it.
Does Sealing Make Glass Paint Waterproof?
A protective coating may improve moisture resistance, but sealing does not automatically make acrylic paint on glass completely waterproof.
Some products can tolerate occasional moisture, while others are intended only for dry indoor decoration.
Water resistance is also different from being safe for repeated washing or dishwasher cleaning.
Even if a painted surface survives occasional contact with water, detergents, heat, and repeated scrubbing may damage the finish.
Only describe your finished project as dishwasher-safe when the exact paint and finishing system is specifically approved for that use.
A protective sealer also does not automatically make decorative acrylic paint safe for food contact.
For beginners, it is usually best to treat painted glass objects as decorations unless the products are clearly approved for another purpose.
Easy Glass Craft Ideas Using Acrylic Paint Pens
Once you understand how to paint on glass, you can use acrylic paint pens to create different handmade decorations.
You do not need advanced artistic skills to make attractive designs.
Start with simple patterns and sturdy glass objects that are easy to hold and decorate.
Painted Glass Jar Decorations
Plain glass jars are an excellent choice for beginner craft projects.
You can decorate the outside with small flowers, colorful dots, leaves, or simple borders.
For example, try painting three pink flowers with yellow centers on one side of a clear jar.
Add a few green leaves and leave the remaining glass transparent.
This creates a simple decoration without covering the entire surface.
You can display the finished jar on a shelf or use it for suitable decorative items.
If you plan to place objects inside the jar, make sure they will not damage the painted areas or create an unsafe use.
Handmade Glass Vases
A glass vase can become a colorful handmade decoration with a few carefully placed designs.
Try painting small white flowers around the lower outside area of a clear vase.
You can add green stems, simple leaves, and a few yellow dots.
Another option is to create a repeating pattern of blue and lavender flowers.
Keep the design balanced so the transparent glass remains part of the finished appearance.
If you use the vase for fresh flowers, avoid painting inside it unless the product is approved for contact with water.
Decorative Glass Bottles
Glass bottles can be decorated with simple patterns and displayed as handmade decorations.
Choose a clean, sturdy bottle with a smooth surface.
You might paint small stars around the upper section or create colorful dots along one side.
For a seasonal decoration, use a small group of leaves in warm autumn colors.
Because bottles have curved surfaces, work on one section at a time and allow the paint to dry before rotating the object.
Avoid overly detailed designs during your first attempt.
Painted Mirror Corner Designs
A mirror can look more decorative with a small painted design near its edge.
If your paint markers are suitable for mirrors, try drawing a simple leafy branch in one corner.
You can also create small flowers or a delicate border that follows part of the mirror’s shape.
Keep the design away from the main viewing area so the mirror remains practical to use.
If you want the decoration to be temporary, choose removable markers specifically intended for glass or mirror surfaces.
Remember that some mirrors have special coatings, so test compatibility before painting.
Simple Glass Ornaments
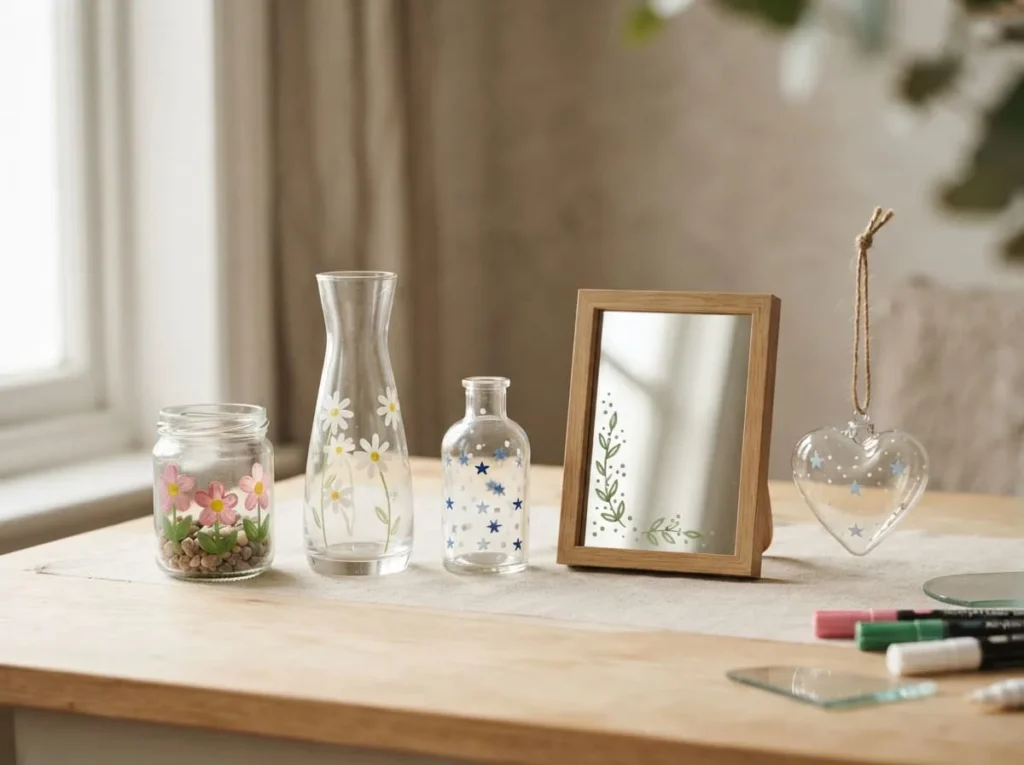
Small glass ornaments can be decorated with acrylic paint pens to create handmade seasonal decorations.
You can paint tiny stars, dots, snowflakes, or simple flowers on the outside.
Choose sturdy ornaments and handle them carefully because thin glass can break easily.
For a simple project, decorate a clear ornament with scattered white dots and small blue stars.
Allow one section to dry before turning the ornament to paint another area.
Keep the finished ornament away from rough handling, and follow the paint manufacturer’s recommendations for drying and protection.
Common Problems When Using Acrylic Paint Pens on Glass
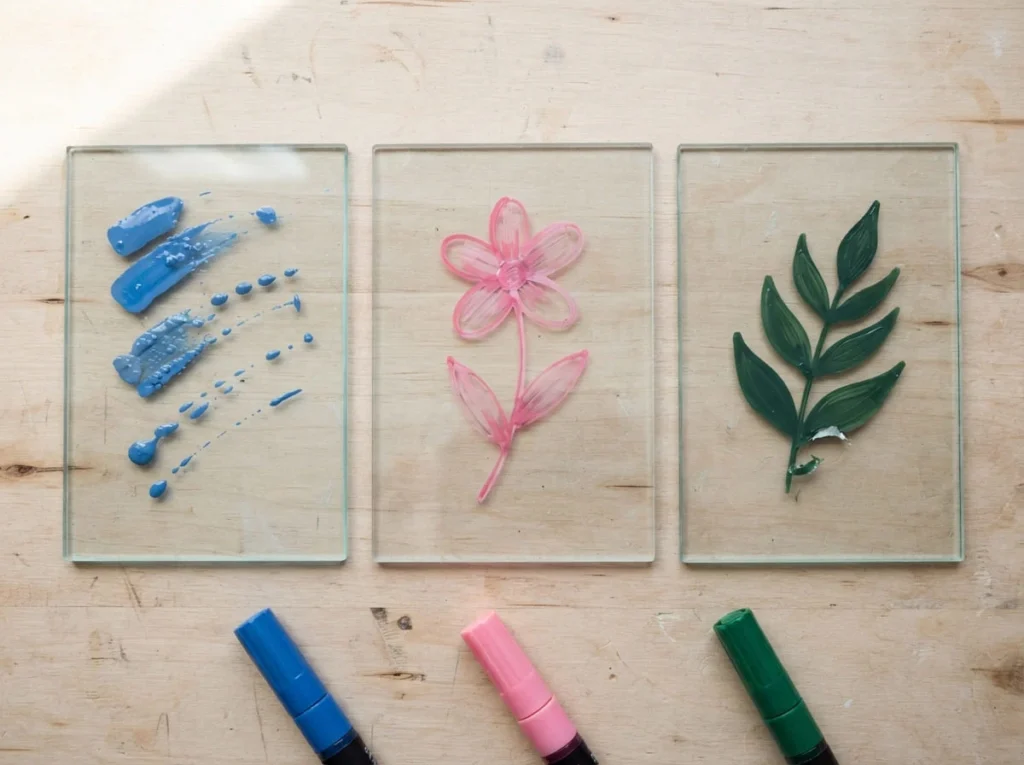
Glass painting can sometimes be frustrating because the surface behaves differently from paper, wood, or canvas.
Paint may form uneven marks, peel away, or smear when you add another color.
These problems do not always mean your painting skills are poor.
Often, the issue comes from marker compatibility, surface preparation, drying time, or how the paint is applied.
Understanding these common problems can help you improve your results.
Acrylic Paint Pens Keep Sliding on Glass
If paint does not stay where you apply it, the glass may contain oil, moisture, or cleaning residue.
Another possibility is that your marker is not suitable for nonporous glass surfaces.
Start by checking the manufacturer’s compatibility instructions.
Clean the glass using an approved method and allow it to dry completely.
Test the marker on a small area.
If the paint continues to separate or slide, try a different marker specifically intended for glass rather than repeatedly applying more paint.
Paint Looks Streaky or Uneven
Streaky paint can happen when a marker provides limited coverage or when the nib repeatedly moves through wet paint.
Because glass does not absorb the paint, uneven application may be more noticeable.
Try working in small sections with gentle, controlled strokes.
Avoid pressing the nib too firmly against the surface.
Allow the first layer to dry before applying another coat if the marker supports layering.
Some colors and paint formulations naturally provide more opaque coverage than others.
If the result remains uneven, check whether the marker is suitable for the glass surface.
Acrylic Paint Peels Off Glass
Peeling often happens when paint does not adhere properly to the glass.
Possible causes include leftover grease, an incompatible marker, insufficient curing, or damage from handling.
If the paint has already started peeling, adding more color over the loose area may not solve the problem.
Instead, follow the manufacturer’s approved removal method, clean the affected surface, and allow it to dry.
Then test a compatible marker before repainting.
If the paint still fails to adhere after proper preparation, the product may not be suitable for your project.
Paint Smudges When Adding Another Color
Smudging can happen when you apply another color before the previous paint layer is ready.
For example, adding a dark outline around a wet flower may cause the colors to mix.
To prevent this, allow the first color to dry according to the marker instructions.
Use gentle pressure when adding outlines or small details.
Avoid dragging the pen repeatedly across the same painted area.
If a mistake occurs, follow an appropriate correction method for your marker rather than rubbing the paint immediately.
Paint Scratches Off After Drying
Paint that feels dry is not always fully cured.
Some markers need additional time before they reach their intended durability.
However, scratches may also indicate weak adhesion or an unsuitable paint formulation.
If your artwork scratches easily, check whether you followed the recommended drying or curing process.
Avoid testing the design with sharp objects because this may permanently damage it.
For future projects, choose markers with durability appropriate for your intended use.
Remember that even durable decorative paint may not withstand rough or repeated handling.
Paint Smears During Sealing
Sealer-related smudging can occur when the paint has not dried sufficiently or when the protective coating is incompatible with the marker.
Some finishes may soften or disturb the painted design.
If a protective coating causes smearing, stop applying it to the finished project.
Test the coating on a separate painted glass sample to identify whether the problem is related to drying or product compatibility.
Follow the paint and sealer manufacturers’ instructions carefully.
If the products are incompatible, choose another approved finishing method rather than applying additional coats.
How to Remove Acrylic Paint Pen Mistakes from Glass
Making mistakes while painting on glass is normal, especially when you are trying acrylic paint pens for the first time. You might draw a line in the wrong place, accidentally smudge a flower, or notice unwanted paint marks after finishing your design.
The good news is that some acrylic paint pen mistakes can be corrected. However, the best removal method depends on the type of marker, how long the paint has been drying, and whether the artwork has already been cured or sealed.
Glass is a smooth surface, but that does not mean every type of paint can be removed easily.
Removing Fresh Paint Marks
Fresh acrylic paint marks may be easier to remove before they dry, depending on the marker formulation.
If you notice a mistake, stop painting and check the manufacturer’s cleaning instructions.
Some water-based acrylic markers allow fresh paint to be gently removed using a clean, slightly damp cloth.
However, rubbing the area too much can spread the color and create a larger smudge.
For small mistakes, carefully clean only the affected area using a method approved for your markers.
Avoid touching nearby parts of your design that are still wet.
Once the glass is clean, allow the area to dry completely before painting again.
Removing Dried Acrylic Paint
Removing dried acrylic paint from glass can be more difficult than removing fresh marks.
Some temporary glass markers are designed to wash away after drying, while other products create more durable finishes that resist ordinary cleaning.
If your artwork has already been cured or sealed, removal may require a different method.
Start by checking the paint manufacturer’s recommended cleaning or removal instructions.
Test the method on a small area before working on a larger section.
Avoid using strong solvents or sharp tools without confirming that they are safe for the glass, its coatings, and the paint.
If the dried paint cannot be removed without damaging the surface, it may be better to leave the design unchanged rather than risk scratching the glass.
Cleaning Glass Without Scratching It
Glass can become scratched when cleaned with abrasive materials or unsuitable tools.
To protect your project, avoid rough cleaning pads and aggressive scraping.
Use a soft, clean cloth and a cleaning product recommended for your type of glass and paint marker.
If you are working with a mirror, tinted glass, or a glass object with a special coating, take extra care because some cleaning methods may damage the finish.
Always test the cleaning method on a small, inconspicuous area first.
After removing unwanted paint, clean away any remaining residue and let the surface dry before starting a new design.
Tips for Better Acrylic Paint Pen Results on Glass
Creating neat designs on glass becomes easier when you use suitable materials and work patiently. These simple tips can help you avoid common problems and make your glass painting projects more enjoyable.
Start with a Small Glass Project
Choose a simple glass jar or sturdy vase for your first project.
Small flowers, dots, hearts, and leaves are easier to control than complicated patterns.
Starting with a simple design helps you practice without feeling overwhelmed.
Use Paint Pens Suitable for Glass
Always check whether your acrylic paint pens are recommended for glass surfaces.
Markers designed for paper or other materials may not provide the same adhesion on glass.
Choose products that match your project’s intended use.
Keep the Painting Surface Free from Fingerprints
Clean the glass before painting and avoid touching the prepared area.
Fingerprints and oils can make it harder for paint to stick properly.
Hold the object by an unpainted section whenever possible.
Draw with Gentle and Steady Pressure
Use light pressure when drawing on glass.
Move the marker slowly enough to control your lines without repeatedly going over wet paint.
If the pen releases too much color, test it on scrap paper before continuing.
Allow Enough Time Between Layers
Let each painted section dry before adding another color unless your marker’s instructions support a different technique.
Working over wet paint too soon can create smudges and uneven coverage.
Follow the manufacturer’s recommendations for drying and layering.
Handle Finished Projects Carefully
Even after the paint has dried, avoid unnecessary scratching, rubbing, or washing.
Some products need additional curing time before they reach their intended durability.
Follow the recommended care instructions to help keep your glass decorations looking their best.
Frequently Asked Questions
Can You Use Regular Acrylic Paint Pens on Glass?
Yes, some regular acrylic paint pens can be used on glass, but not every product is suitable for this surface. Glass is smooth and nonporous, which can make paint adhesion difficult. Always check the marker manufacturer’s recommendations and test the paint before decorating your project.
Are Acrylic Paint Pens Permanent on Glass?
Some acrylic paint pens create durable designs on glass, while others are intended for temporary decoration. Permanence depends on the paint formulation, surface preparation, and any required curing process. Even a permanent marker may not be resistant to scratching, repeated washing, or dishwasher cleaning.
Do Acrylic Paint Pens Wash Off Glass?
Some acrylic paint pens can be washed off glass, especially products designed for temporary window or mirror decorations. Other markers may create finishes that are harder to remove after drying or curing. Follow the manufacturer’s cleaning instructions rather than assuming that every acrylic marker is washable.
Do You Need to Prime Glass Before Using Acrylic Paint Pens?
Not every glass painting project requires primer. Many glass-compatible paint markers are designed to work on properly cleaned glass without an additional preparation coat. However, some products may have special surface preparation requirements. Check the manufacturer’s instructions before applying primer because an unsuitable product could affect paint adhesion or transparency.
How Long Do Acrylic Paint Pens Take to Dry on Glass?
Drying times vary depending on the marker formulation, paint thickness, temperature, and humidity. Thin paint marks may become touch-dry sooner than thickly painted areas. Some products also require additional curing time before handling or cleaning. Always follow the specific drying and curing recommendations for your markers.
Can You Seal Acrylic Paint Pens on Glass?
Yes, certain acrylic paint pen designs can be protected with a compatible clear sealer when the manufacturer recommends or permits it. However, not every protective coating works with every marker. Always test the sealer on a separate painted glass sample and allow the paint to dry or cure properly before applying it.
Can You Put Acrylic Paint Pen Glassware in the Dishwasher?
Most decorative glass painting projects should not be considered dishwasher-safe unless the exact paint product and finishing process are specifically approved for dishwasher use. Hot water, detergents, and repeated washing can damage some finishes. For decorative objects, follow the manufacturer’s recommended cleaning method rather than placing them in the dishwasher.
Can You Bake Acrylic Paint Pens on Glass?
Only bake acrylic paint pen artwork when the exact paint product specifically requires or permits oven curing and the glass itself is oven-safe. Ordinary acrylic paint pens may not be designed for heating. Never use baking instructions from another marker brand because temperatures, curing methods, and safety requirements can differ.
Are Acrylic Paint Pens Safe for Drinking Glasses?
Acrylic paint pens are not automatically food-safe simply because they can be used on glass. Decorative paint should generally be kept away from drinking rims, interior surfaces, and other food-contact areas unless the product is specifically approved for that use. Baking or sealing ordinary acrylic paint does not automatically make it safe for food contact.
Can You Use Acrylic Paint Pens on Mirrors?
Yes, certain acrylic paint pens can be used on mirrors when the manufacturer confirms compatibility with the surface. You can create small flowers, decorative borders, or seasonal patterns. However, removal and durability depend on the marker formulation. Test the paint in a small area first, especially if the mirror has a special coating.
Final Thoughts
Acrylic paint pens on glass offer a simple way to decorate jars, vases, bottles, and other glass objects with colorful handmade designs. With suitable markers and proper preparation, beginners can create attractive decorations without needing advanced painting skills.
Start with a clean glass surface, choose a simple design, and apply the paint using gentle, controlled strokes. Allow enough drying or curing time and protect the finished artwork only when the product instructions recommend it.
Remember that not every acrylic paint pen is permanent, waterproof, or suitable for food-contact surfaces.
With patience and practice, you can turn ordinary glass objects into beautiful handmade decorations.