
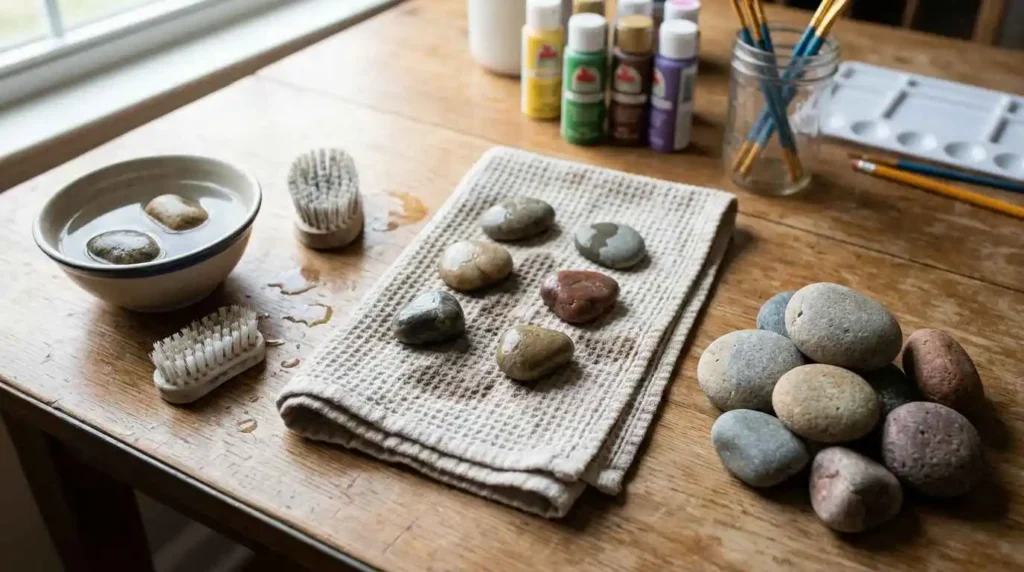
Preparing rocks before painting is an important step that can make a big difference in the final result. Many beginners focus on choosing colors and creating designs, but the quality of the rock surface also plays a major role in how easily the paint applies and how long the artwork lasts.
A clean and properly prepared rock provides a smoother surface for painting. It allows acrylic paint to stick better, makes small details easier to create, and helps your finished artwork look brighter and more professional.
Whether you are creating cute animal rocks, colorful mandala designs, holiday decorations, or simple painted stones with messages, starting with the right preparation can make the entire process easier.
Rock preparation does not need to be complicated. With a few simple steps, you can turn ordinary outdoor stones into the perfect surface for your next painting project.
In this guide, you will learn how to choose the right rocks, clean them properly, dry them, smooth rough areas, and prepare them for beautiful acrylic rock painting.
If you are new to this craft, you can also learn the complete painting process in our guide about how to paint rocks with acrylic paint.
Why Preparing Rocks Before Painting Is Important
Preparing rocks before painting helps create a better foundation for your artwork. A little extra time spent cleaning and preparing the surface can improve the way your paint looks and make your designs easier to create.
A rock collected from outside may look ready for painting, but it can contain dirt, dust, moisture, or rough areas that affect the painting process.
Proper preparation helps with:
- Better paint coverage
- Cleaner designs
- Easier brush movement
- Longer lasting artwork
This step is especially important if you plan to place your painted rocks outdoors where they will be exposed to weather conditions.
Helps Paint Stick Better
One of the main reasons to prepare rocks before painting is to create a surface where paint can properly attach.
Dirt, dust, and natural oils on rocks can prevent acrylic paint from spreading evenly. When paint is applied to an unclean surface, it may look patchy or may start peeling over time.
Cleaning the rock removes unwanted materials and gives the paint a better surface to hold onto.
This is especially helpful when creating designs with multiple layers, such as animal faces, detailed patterns, or colorful Christmas and Halloween designs.
Creates a Smoother Painting Surface
A smooth rock makes painting much easier, especially for beginners.
When the surface is even, brushes can move more freely and small details become easier to add. This is important for designs that include:
- Small eyes
- Thin lines
- Detailed patterns
- Fine decorations
For example, a mandala design requires a smoother surface because the pattern depends on creating clean and balanced details.
You can explore more detailed patterns in our guide about easy mandala rock painting tutorial.
Helps Your Artwork Last Longer
Proper preparation can also improve the durability of painted rocks.
A clean and dry surface allows paint to bond better with the stone. This becomes especially important when rocks are displayed outside in gardens, pathways, or outdoor decorations.
After painting, using a protective sealer can provide additional protection against:
- Rain
- Sunlight
- Dirt
- Outdoor conditions
You can learn more about protecting finished artwork in our guide on how to seal painted rocks outdoors.
How to Choose the Right Rocks for Painting
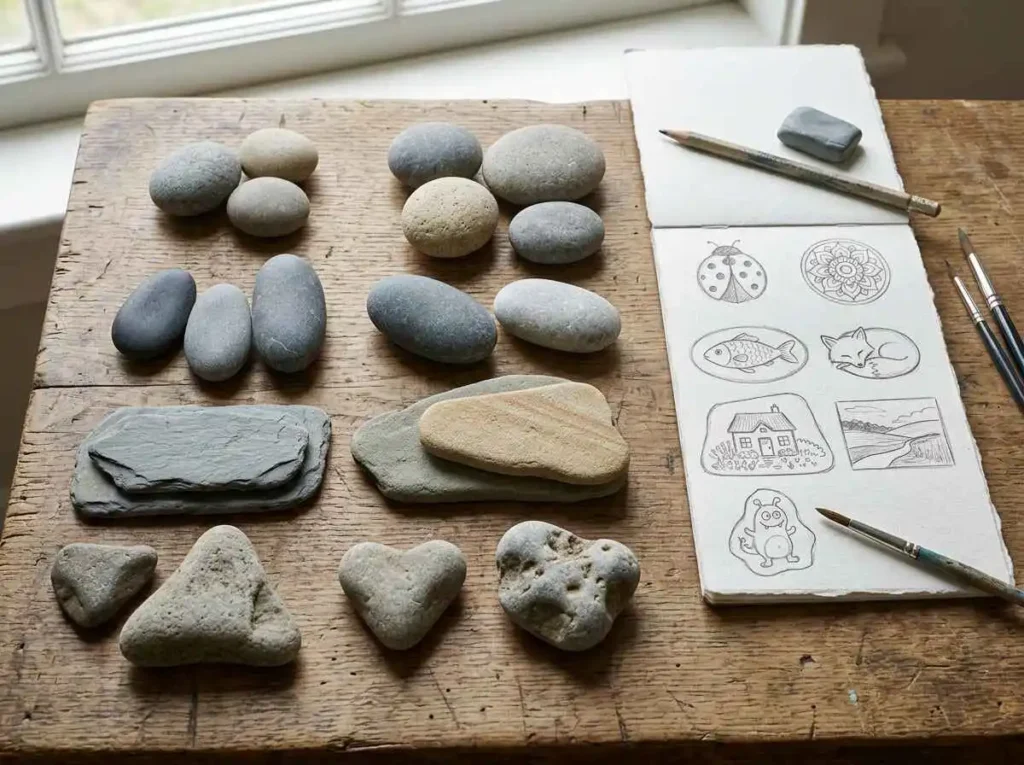
Choosing the right rocks is the first step toward creating beautiful painted artwork. Not every rock will provide the same painting experience, so selecting suitable stones can make the process much easier.
The best rocks for painting usually have smooth surfaces, simple shapes, and enough space for your chosen design.
When searching for rocks, think about what you want to paint. A small round stone may be perfect for a ladybug or smiley face, while a larger flat stone may work better for detailed artwork.
Look for Smooth Rocks
Smooth rocks are usually the best choice for painting because they provide a more even surface.
Rocks with smooth textures allow paint brushes to move easily and help colors appear cleaner.
Good painting rocks usually have:
- A smooth surface
- Few cracks
- No sharp edges
- A solid structure
River rocks and beach stones are often popular choices because natural water movement can create smooth surfaces over time.
However, you do not always need to buy special rocks. Many suitable stones can be found outdoors if they have the right shape and texture.
Choose the Right Size and Shape
The size and shape of a rock can influence the type of design you create.
Different shapes work well for different projects.
Round rocks are useful for:
- Faces
- Ladybugs
- Snowmen
- Christmas ornaments
Oval rocks are great for:
- Animals
- Characters
- Nature designs
Flat rocks work well for:
- Messages
- Mandala patterns
- Detailed scenes
Choosing a rock that matches your design idea can make painting easier and more enjoyable.
For example, a naturally oval rock may already look like the body shape of an animal, helping you create your design more easily.
Avoid Rocks With Too Many Cracks
Although some natural texture can add character, rocks with many cracks or uneven areas can make painting difficult.
Deep cracks can:
- Break up your design
- Make paint coverage uneven
- Make small details harder to create
Beginners should usually start with simple rocks that have a mostly even surface.
Once you become more comfortable with rock painting, you can experiment with different textures and unusual shapes.
How to Clean Rocks Before Painting
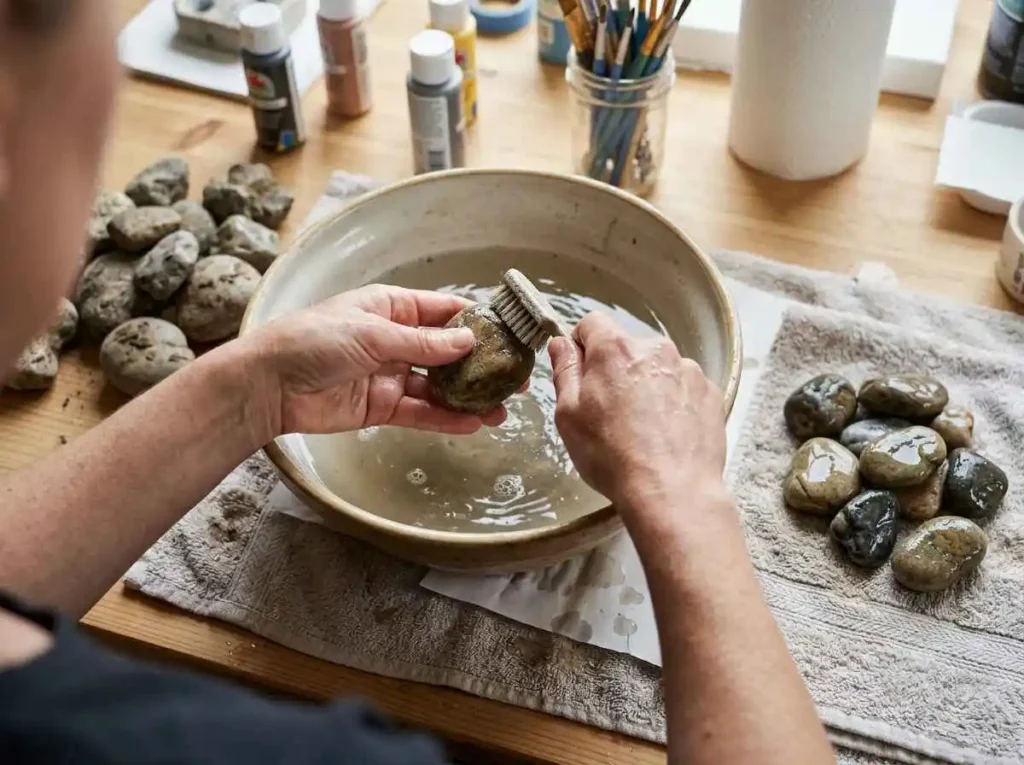
Cleaning rocks properly is one of the most important preparation steps. A clean surface allows paint to apply smoothly and helps your artwork look better.
Outdoor rocks often contain dirt, dust, sand, and natural materials that should be removed before painting.
Remove Dirt and Dust
Start by checking the rocks carefully and removing any loose dirt.
You can:
- Brush away dry dirt
- Remove small pieces of leaves or plants
- Wipe away dust
This first cleaning step helps make the washing process easier.
Wash Rocks With Water
After removing loose dirt, wash the rocks with water.
Place the rocks under running water or soak them for a short time. Use your hands or a small brush to remove remaining dirt from the surface.
For rocks with stubborn dirt, gentle scrubbing can help create a cleaner surface.
Avoid using harsh chemicals because simple water cleaning is usually enough for most rock painting projects.
How to Dry Rocks Before Painting
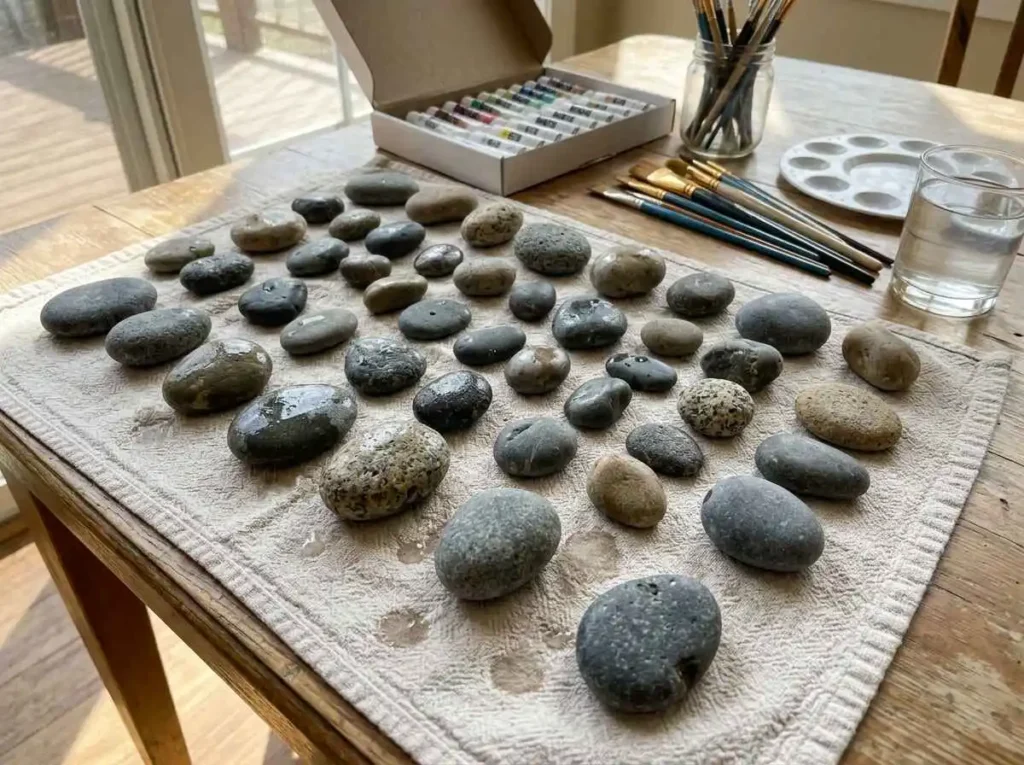
After cleaning your rocks, the next important step is allowing them to dry completely before applying any paint.
Many beginners skip this step because the outside of the rock may look dry, but small amounts of moisture can still remain inside tiny cracks or pores. Painting on a damp surface can affect how the paint spreads and may reduce how well it sticks.
Proper drying creates a better surface and helps your artwork look cleaner.
Allow Rocks to Air Dry Naturally
The easiest way to dry rocks is to place them on a clean towel or paper surface and let them air dry.
Spread the rocks apart so air can move around each stone. Depending on the size of the rocks and the amount of water absorbed, drying may take several hours.
Small rocks usually dry faster, while larger stones may need more time.
Avoid painting until the rocks feel completely dry when touched.
Check for Hidden Moisture
Some rocks can hold moisture inside small cracks or porous areas even after the outside feels dry.
Before painting, check:
- Deep cracks
- Uneven areas
- Rough surfaces
If you notice any cool or damp feeling, allow the rock to dry longer.
Taking extra time at this stage can prevent problems later when adding paint.
Why Drying Matters for Acrylic Paint
Acrylic paint works best when applied to a clean and dry surface.
A wet rock can cause:
- Uneven paint coverage
- Longer drying time
- Colors appearing lighter
- Paint adhesion problems
A properly dried rock gives you a smoother painting experience and helps your designs look better.
Should You Sand Rocks Before Painting?
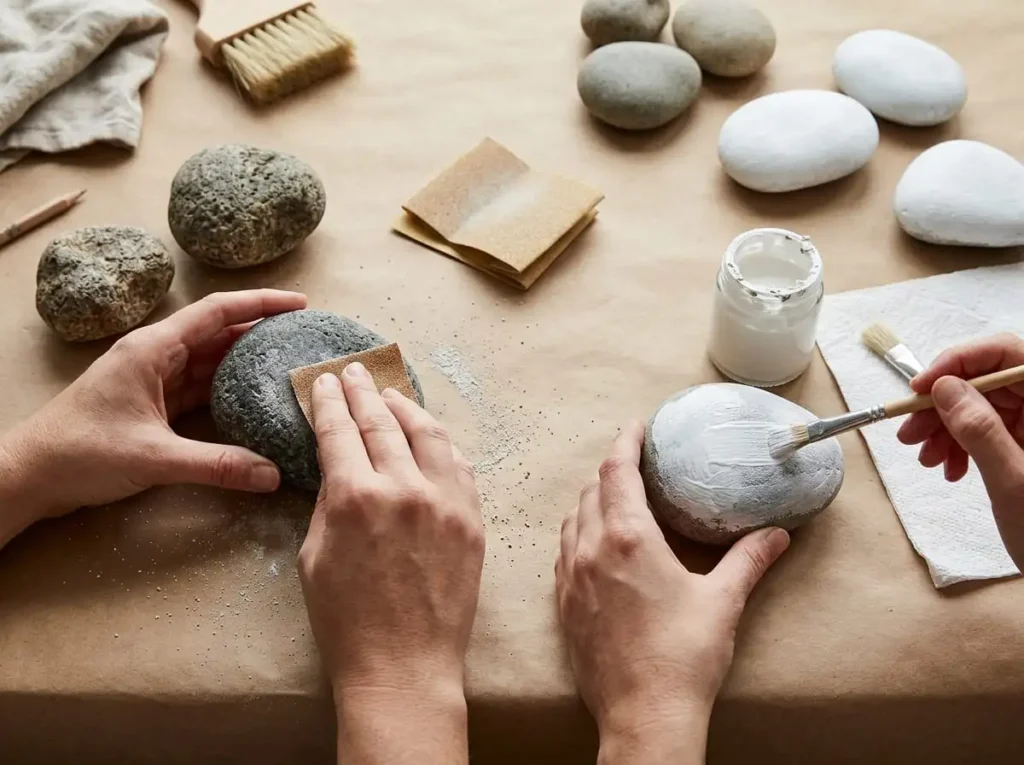
Sanding is not always necessary, but it can be helpful when working with rough rocks.
Many naturally found stones already have a good surface for painting. However, some rocks may have sharp edges, rough patches, or uneven areas that make painting difficult.
Sanding can help create a more comfortable surface, especially for detailed artwork.
When Sanding Is Useful
You may want to sand a rock if it has:
- Sharp edges
- Rough areas
- Uneven bumps
- Difficult painting surfaces
For example, if you are creating a detailed mandala design, a smoother surface can make it easier to create balanced patterns.
Sanding is also helpful when children are painting rocks because smoother edges make the stones easier and safer to handle.
How to Sand Rocks Properly
If a rock needs smoothing, use fine sandpaper and gently rub the rough areas.
You do not need to completely change the shape of the rock. The goal is simply to remove uncomfortable rough spots and create a better painting surface.
After sanding:
- Remove the dust
- Wash the rock again if needed
- Allow it to dry completely
This prevents small particles from mixing with your paint.
Do All Rocks Need Sanding?
No, not every rock needs to be sanded.
Many smooth river rocks and naturally polished stones are already suitable for painting. Sanding should only be used when the surface creates a problem.
For beginners, choosing naturally smooth rocks is often easier than spending extra time preparing rough ones.
Do You Need to Prime Rocks Before Painting?
Priming rocks before painting is optional, but it can improve the final appearance of some designs.
A primer creates a base layer between the rock surface and the paint. It can help colors appear brighter and provide better coverage.
However, many beginners can create beautiful painted rocks without primer by using good quality acrylic paint on clean rocks.
The choice depends on the type of project and the result you want.
Benefits of Using a White Primer
White primer is commonly used for rock painting because it creates a clean background for colors.
Using primer can help:
- Bright colors stand out more
- Paint cover darker rocks better
- Designs appear cleaner
- Small details become easier to see
For example, a white base coat can make bright colors look stronger when creating animal designs, holiday rocks, or colorful patterns.
When You Can Paint Without Primer
Primer is not always required.
You may not need primer when:
- The rock has a light color
- The surface is smooth
- You are creating a simple design
- The acrylic paint already provides good coverage
Many beginner projects, such as smiley faces, flowers, and simple animal designs, can be completed directly on clean rocks.
How to Apply Primer Correctly
If you decide to use primer, apply a thin and even layer across the rock surface.
Avoid adding a very thick layer because it can hide the natural texture of the stone.
Allow the primer to dry completely before starting your design.
A properly prepared base helps the paint layers look smoother and more professional.
Step By Step Rock Preparation Process
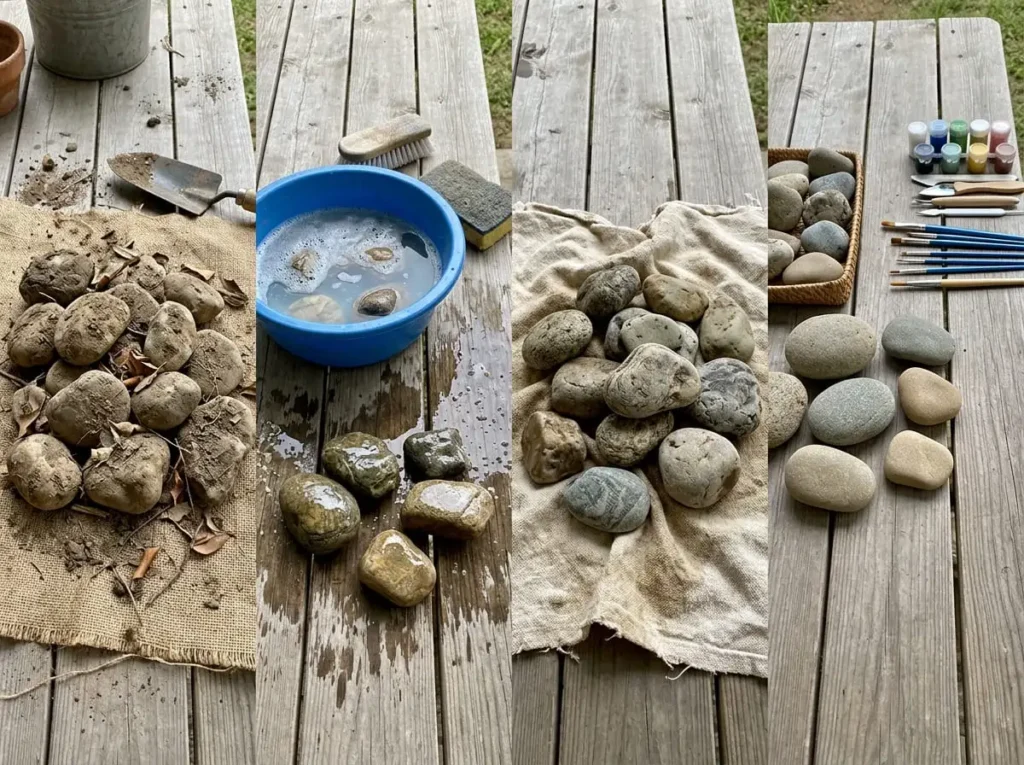
Following a simple preparation process can make rock painting easier, especially for beginners.
Before picking up your paint brush, complete these steps.
Step 1: Choose Suitable Rocks
Start by selecting rocks that match your project.
Look for:
- Smooth surfaces
- Useful shapes
- Comfortable sizes
- No major cracks
Think about your design before choosing the rock. A good rock shape can make your artwork much easier.
Step 2: Clean the Rocks
Remove dirt, dust, and natural debris from the rocks.
Wash them with water and gently scrub if needed.
A clean surface helps acrylic paint stick better and creates a smoother finish.
Step 3: Allow Rocks to Dry Completely
Place the cleaned rocks on a towel and wait until they are completely dry.
Do not rush this step. Moisture can affect the quality of your painting.
Dry rocks provide a better surface for creating detailed artwork.
Step 4: Smooth Rough Areas
Check the rocks after drying.
If you find sharp edges or rough areas, gently sand them to improve the surface.
Remember that sanding is optional and only needed when the rock surface creates difficulty.
Step 5: Apply Primer If Needed
Decide whether your project needs a primer.
A primer can be useful for detailed designs or darker rocks, but simple projects can often be painted directly.
Choose the method that works best for your design.
Step 6: Start Painting Your Design
Once your rock is clean, dry, and prepared, it is ready for painting.
Now you can begin creating:
- Animal designs
- Mandala patterns
- Holiday decorations
- Personalized messages
The preparation process creates the foundation, but creativity brings the rock to life.
Common Mistakes When Preparing Rocks for Painting
Preparing rocks may seem simple, but beginners often make small mistakes that can affect the final artwork. Understanding these common problems can help you create better painted rocks and enjoy the process more.
A little extra time spent during preparation can save you from problems later when applying paint.
Painting Dirty Rocks
One of the most common mistakes is painting directly on rocks without cleaning them first.
Outdoor rocks often contain:
- Dirt
- Dust
- Sand
- Small pieces of plants
- Natural oils
When paint is applied over these materials, it may not stick properly. The colors can look uneven, and the design may not last as long.
Always clean your rocks before painting to create a better surface.
Painting Wet Rocks
Another common mistake is starting the painting process before the rocks are completely dry.
Even a small amount of moisture can affect how acrylic paint behaves on the surface.
Painting wet rocks can cause:
- Uneven coverage
- Longer drying times
- Paint adhesion problems
Always allow enough time for your rocks to dry before adding any colors.
Choosing Rocks That Are Too Rough
While some natural textures can add character, very rough rocks can make painting difficult.
Rough surfaces can make it harder to create:
- Small details
- Clean lines
- Smooth patterns
Beginners should start with smooth rocks because they provide an easier painting experience.
Skipping the Preparation Process
Some people want to start painting immediately because the creative part feels more exciting. However, skipping preparation can affect the final result.
Cleaning, drying, and checking the surface only takes a little extra time, but it creates a much better foundation for your artwork.
Good preparation helps both beginners and experienced painters create better designs.
Rock Preparation Tips for Kids
Rock painting is a wonderful activity for children, but preparing rocks properly can make the experience easier and more enjoyable.
Since children may be working with smaller hands and simple designs, the preparation process should be safe and easy.
Let Children Help Choose Rocks
Allowing children to choose their own rocks can make the activity more exciting.
They can look for interesting shapes and imagine what each rock could become.
A child may see:
- A round rock becoming a face
- An oval rock becoming an animal
- A flat rock becoming a message board
This encourages creativity before painting even begins.
Help With Cleaning and Preparation
Younger children may need help with washing and preparing rocks.
Parents or teachers can assist with:
- Removing dirt
- Checking rock surfaces
- Drying the rocks
- Sanding rough edges if needed
This allows children to focus on the fun painting stage while staying safe.
You can also explore more child friendly projects in our guide about rock painting ideas for kids.
Choose Simple Rocks for Beginners
Children usually enjoy painting more when they have an easy surface to work on.
The best beginner rocks are:
- Smooth
- Medium sized
- Easy to hold
- Free from sharp edges
Simple preparation helps children feel confident and enjoy creating their designs.
Preparing Rocks for Outdoor Painting Projects
Many people use painted rocks as outdoor decorations in gardens, pathways, and outdoor spaces. If your rocks will be placed outside, preparation becomes even more important.
Outdoor conditions can affect painted surfaces, so starting with a properly prepared rock helps create longer lasting artwork.
Choose Strong and Durable Rocks
For outdoor projects, choose rocks that are:
- Solid
- Free from major cracks
- Able to handle weather changes
Very fragile rocks may break or deteriorate when exposed to outdoor conditions.
Prepare the Surface Carefully
Outdoor painted rocks should be cleaned thoroughly before painting.
A clean surface helps:
- Paint stick better
- Colors stay brighter
- Designs last longer
Taking time during preparation creates a stronger base for outdoor artwork.
Protect Finished Outdoor Rocks
After painting outdoor rocks, applying a suitable sealer can help protect the design.
A sealer can help reduce damage caused by:
- Rain
- Sun exposure
- Dirt
For more information about protecting finished rocks, read our guide on how to seal painted rocks outdoors.
Frequently Asked Questions
Do you need to wash rocks before painting?
Yes, washing rocks before painting is recommended. Cleaning removes dirt, dust, and other materials that can prevent paint from sticking properly.
What is the best way to clean rocks for painting?
The easiest method is washing rocks with water and gently scrubbing away dirt. A small brush can help remove stubborn debris from rough areas.
Do rocks need primer before acrylic paint?
No, primer is not always required. Clean and smooth rocks can often be painted directly with acrylic paint. However, primer can help create brighter colors and better coverage for some projects.
How long should rocks dry before painting?
Drying time depends on the size and type of rock. Small rocks may dry within a few hours, while larger stones may need longer. The important thing is making sure the rock is completely dry before painting.
What type of rocks are best for painting?
Smooth rocks with flat surfaces are usually the best choice. River rocks and naturally polished stones are popular because they provide an easier surface for painting.
Can I paint rocks collected outside?
Yes, rocks collected outdoors can be used for painting as long as they are properly cleaned, dried, and prepared before starting your design.
Conclusion
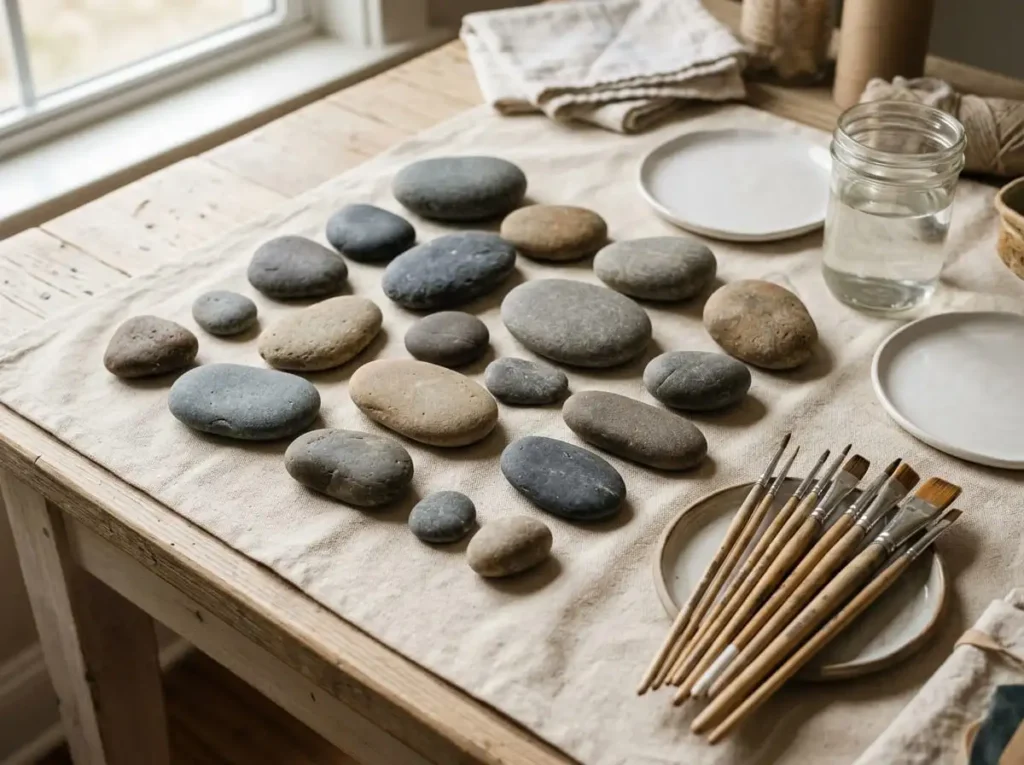
Preparing rocks before painting is a simple but important step that can improve your entire rock painting experience. A clean, dry, and suitable rock provides a better surface for acrylic paint and makes it easier to create beautiful designs.
By choosing the right rocks, washing them properly, allowing them to dry, and preparing the surface when needed, beginners can create artwork that looks better and lasts longer.
Whether you are painting animal designs, holiday decorations, mandala patterns, or simple messages, proper preparation creates the perfect starting point for your creativity.
Taking a little extra time before painting can help transform an ordinary stone into a piece of handmade art that you can proudly display or share with others.