
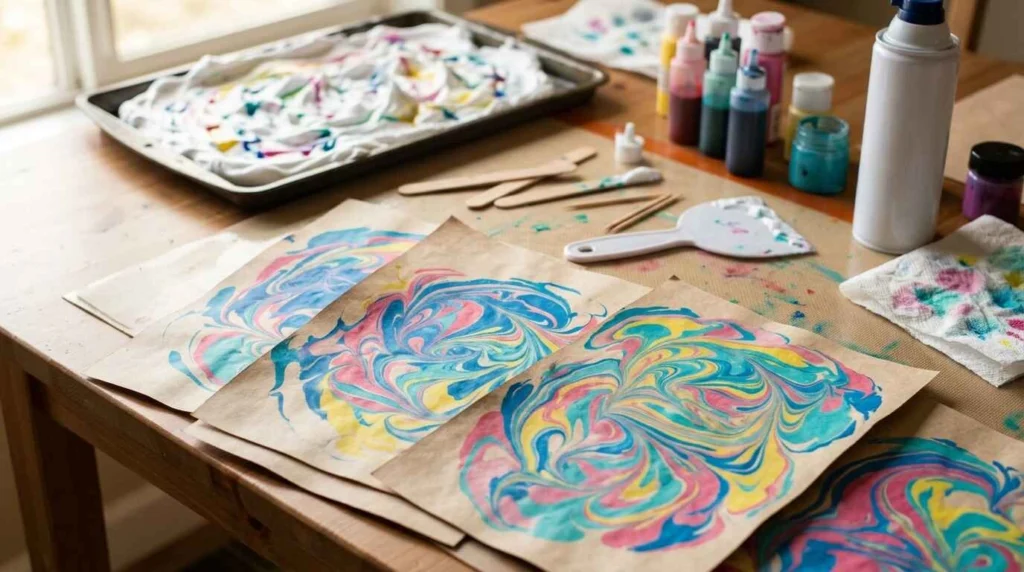
Creating beautiful artwork does not always require expensive supplies or complicated techniques. With simple materials like shaving cream, paint, and paper, you can create colorful designs that look unique every time.
Shaving cream marbling art is a fun and easy craft activity that allows children and beginners to explore colors, patterns, and creativity. The process involves creating a colorful design on a layer of shaving cream and transferring that pattern onto paper to create a marble effect.
One of the best things about this craft is that no two designs look exactly the same. Every swirl, color combination, and pattern creates a different piece of artwork.
This activity is perfect for:
• Kids craft projects
• Classroom activities
• Family craft time
• Beginner artists
• Creative home projects
Shaving cream marbling is also a great sensory activity because children can enjoy mixing colors and creating designs using their hands and simple tools.
In this shaving cream marbling art guide, you will learn what this technique is, why it is popular, what supplies you need, and how to prepare for creating your own colorful marble patterns.
What Is Shaving Cream Marbling Art?
Shaving cream marbling art is a creative painting technique that uses shaving cream as a base for creating colorful patterns on paper.
Instead of painting directly onto a surface, colors are placed on top of a layer of shaving cream and gently moved around to create swirls and designs. A piece of paper is then pressed onto the surface, allowing the pattern to transfer onto the paper.
The result is a beautiful marble effect with flowing lines, soft colors, and unique patterns.
This technique is similar to traditional paper marbling, but shaving cream makes it easier and more accessible for beginners and children.
The basic process includes:
• Spreading shaving cream on a tray
• Adding drops of paint or coloring
• Creating patterns with a tool
• Pressing paper onto the design
• Removing extra shaving cream
• Allowing the artwork to dry
The materials are simple and easy to find, which makes this craft popular among parents, teachers, and beginner artists.
Shaving cream marbling can be used to create different types of projects, including:
• Greeting cards
• Decorative paper
• Book covers
• Gift wrapping paper
• Wall art
• Scrapbook designs
One reason people enjoy this craft is that the process is just as exciting as the final result. Watching colors move through the shaving cream creates a fun and surprising experience.
Children can experiment with different colors and patterns without worrying about making mistakes. Since every print turns out differently, each artwork becomes a one of a kind creation.
Why Shaving Cream Marbling Is Popular
Shaving cream marbling has become a popular craft activity because it combines creativity, simplicity, and fun.
It allows people of different ages to create impressive looking artwork without needing advanced painting skills.
Easy for Beginners
One of the biggest advantages of shaving cream marbling is that it is easy to learn.
Beginners do not need experience with painting techniques or drawing skills.
The process is simple:
• Add colors
• Create patterns
• Press paper
• Reveal the design
Even first time crafters can create beautiful results by experimenting with different techniques.
Uses Affordable Materials
Another reason this craft is popular is because it does not require expensive supplies.
Most materials are easy to find and can often be purchased at low cost.
Basic supplies include:
• Shaving cream
• Paint
• Paper
• Simple craft tools
This makes it a budget friendly activity for families, schools, and craft groups.
Creates Unique Designs Every Time
Every shaving cream marbling project produces a different result.
The way colors mix and move creates patterns that cannot be perfectly repeated.
Even if you use the same colors and technique, each paper print will have its own design.
This makes the activity exciting because the final artwork always feels like a surprise.
Great Sensory Activity for Kids
Shaving cream marbling is not only an art project but also a sensory experience.
Children can enjoy:
• Feeling different textures
• Mixing colors
• Creating patterns
• Exploring creativity
Sensory activities like this can make crafting more engaging and enjoyable for children.
Suitable for Different Ages
This craft can be adapted for different skill levels.
Younger children can enjoy simple color mixing, while older kids and adults can create more detailed patterns.
It works well for:
• Preschool activities
• Elementary school projects
• Family craft sessions
• Beginner art practice
The activity can be as simple or creative as you want.
Supplies Needed for Shaving Cream Marbling
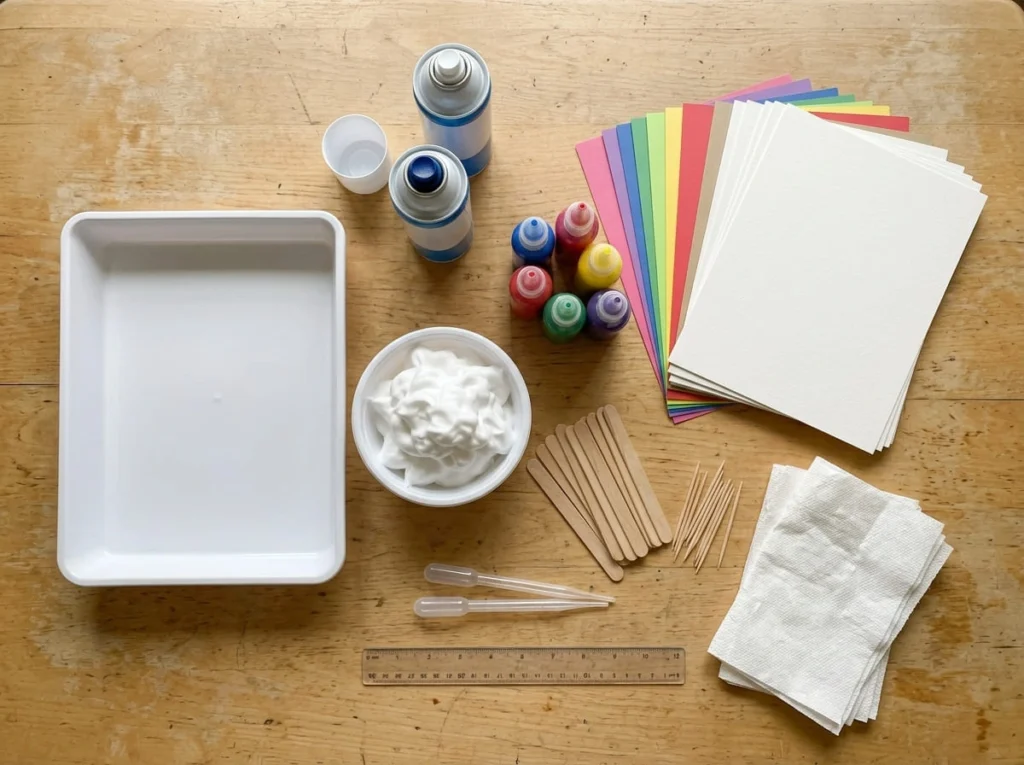
Before starting your shaving cream marbling project, it is important to prepare all the necessary materials.
The good thing about this craft is that most supplies are simple and affordable.
Having everything ready before beginning will make the process smoother and more enjoyable.
Shaving Cream
Shaving cream is the main material used to create the base for this technique.
The foam creates a soft surface where colors can spread and form beautiful patterns.
For best results, use:
• White foam shaving cream
• Fresh shaving cream with a light texture
• Enough shaving cream to create an even layer
Avoid using shaving gels because they do not create the same texture needed for marbling.
A smooth foam surface helps colors move easily and creates clearer patterns.
Paint or Food Coloring
Colors are what create the marble effect in this craft.
You can use different types of coloring depending on the look you want.
Common options include:
• Acrylic paint
• Liquid watercolor
• Food coloring
• Washable kids paint
For children, washable paints are often a good choice because they are easier to clean.
You can use:
• Two or three colors for a simple design
• Multiple colors for a bright pattern
• Similar shades for a soft marble effect
Experimenting with colors is part of the fun of this activity.
Paper
Choosing the right paper helps create better results.
Thin paper may tear easily, especially when placed on wet shaving cream.
Better options include:
• Cardstock
• Watercolor paper
• Thick craft paper
A stronger paper holds the design better and creates a cleaner finished artwork.
You can use different paper sizes depending on your project.
Tools Needed
A few simple tools can help you create patterns and complete the project.
Useful tools include:
• Tray or shallow container
• Toothpick
• Wooden stick
• Ruler
• Paint dropper
• Scraper
These tools help move colors around and remove extra shaving cream from the paper.
Protective Supplies
Because this activity can become messy, preparing your workspace is helpful.
Useful protective items include:
• Table cover
• Apron
• Paper towels
• Gloves if needed
Covering your workspace makes cleaning easier and allows children to enjoy the process without worrying about making a mess.
How to Make Shaving Cream Marbling Art Step by Step
Creating shaving cream marbling art is a simple process that allows you to experiment with colors and patterns.
The technique does not require perfect designs because the natural movement of the colors creates beautiful results. The most important thing is to enjoy the process and let your creativity guide you.
Before starting, prepare your workspace and place all materials nearby. Cover your table with a protective sheet because the process can become messy.
Follow these simple steps to create your own shaving cream marbling artwork.
Step 1: Prepare Your Workspace
The first step is preparing a clean and organized workspace.
Shaving cream marbling is a fun activity, but it can create some mess while working with foam and paint.
Before beginning:
• Cover your table with paper or plastic
• Prepare all supplies
• Keep paper towels nearby
• Arrange your paper and colors
If children are participating, make sure they have enough space to work comfortably.
A prepared workspace makes the activity easier and allows everyone to focus on creating artwork.
Step 2: Add Shaving Cream to the Tray
Once your workspace is ready, add a layer of shaving cream to a shallow tray or container.
Spread the shaving cream evenly across the surface.
The layer should be:
• Smooth
• Even
• Thick enough to hold colors
Avoid creating a very thin layer because it may not allow the colors to move properly.
Use a ruler, spatula, or flat tool to smooth the surface if needed.
A smooth shaving cream base helps create clearer marble patterns.
Step 3: Add Colors to the Shaving Cream
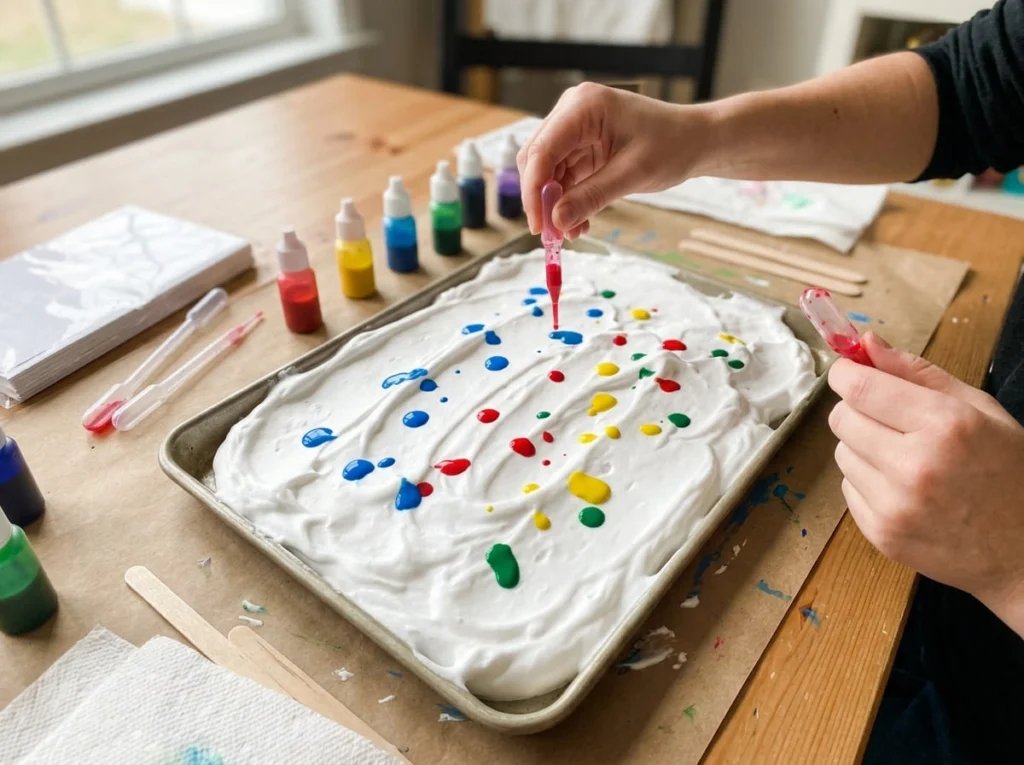
After preparing the shaving cream surface, it is time to add colors.
Place small drops of paint or coloring across the top of the shaving cream.
You can create different effects by changing how you add the colors.
For example:
• Place colors close together for blended patterns
• Spread colors apart for separate designs
• Use multiple colors for a bright effect
Popular color combinations include:
• Blue and green
• Pink and purple
• Yellow and orange
• Rainbow colors
Start with a small amount of color because too much paint can make the design less clear.
The goal is to add enough color to create patterns while still allowing the shaving cream texture to show.
Step 4: Create Marble Patterns
Creating patterns is the most creative part of shaving cream marbling.
Use a simple tool like a toothpick, wooden stick, or the end of a paintbrush to move the colors around.
You can create different designs by changing your movements.
Try:
• Swirling in circles
• Creating straight lines
• Making wave patterns
• Drawing simple shapes
Do not mix the colors too much because over mixing can make the colors blend together and lose the marble effect.
The best designs usually come from gentle movements that create visible color patterns.
Step 5: Press Paper Onto the Design
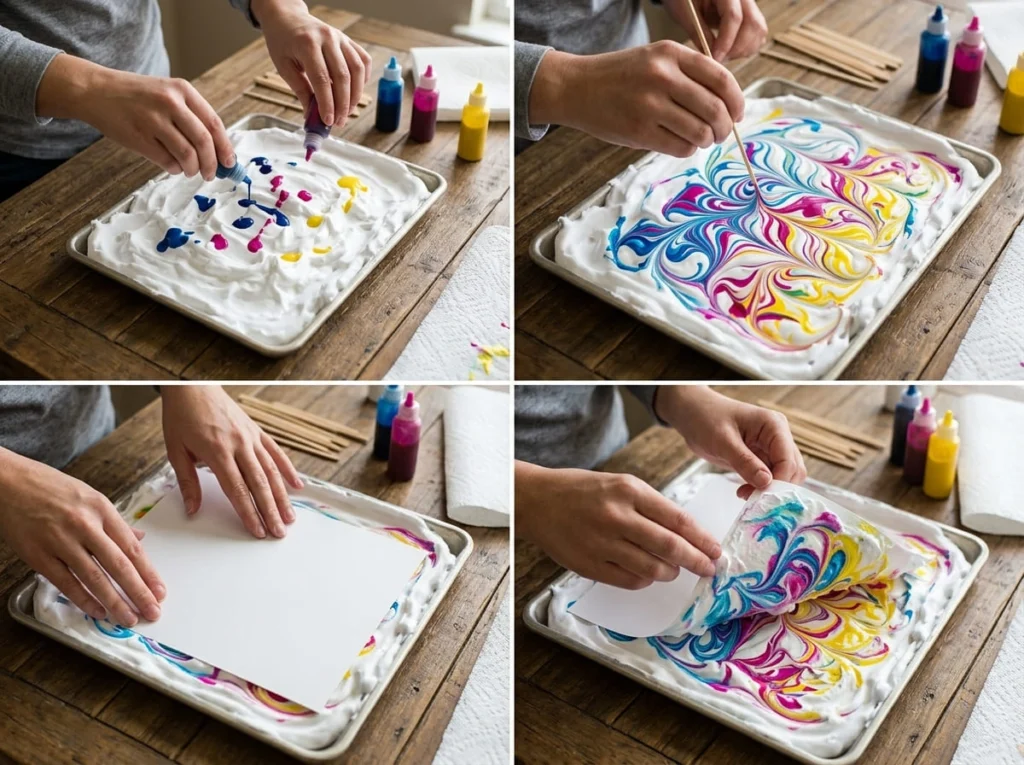
After creating your marble pattern, carefully place your paper on top of the shaving cream.
Press the paper gently so the colors transfer onto the surface.
Avoid pressing too hard because the paper may absorb too much shaving cream.
Make sure:
• The entire paper touches the design
• The paper stays flat
• The pattern has enough time to transfer
Leave the paper on the shaving cream for a few seconds before removing it.
This allows the colors to create a clearer print.
Step 6: Remove Excess Shaving Cream
After lifting the paper, you will notice shaving cream covering the surface.
This needs to be removed carefully to reveal the final marble design.
Use a scraper, ruler, or flat piece of cardboard to gently remove the extra shaving cream.
Move the tool across the paper in one smooth direction.
After removing the shaving cream, the colorful marble pattern will appear.
Avoid rubbing the paper because this can smudge the design.
Step 7: Let the Artwork Dry
The final step is allowing your artwork to dry completely.
Place the paper on a flat surface and leave it undisturbed.
Drying time depends on:
• Paper thickness
• Amount of paint used
• Humidity
Thicker paper usually creates better results because it handles moisture more easily.
Once dry, your marble paper can be used for different craft projects.
You can turn it into:
• Greeting cards
• Bookmarks
• Decorations
• Gift wrapping
Easy Shaving Cream Marbling Art Ideas
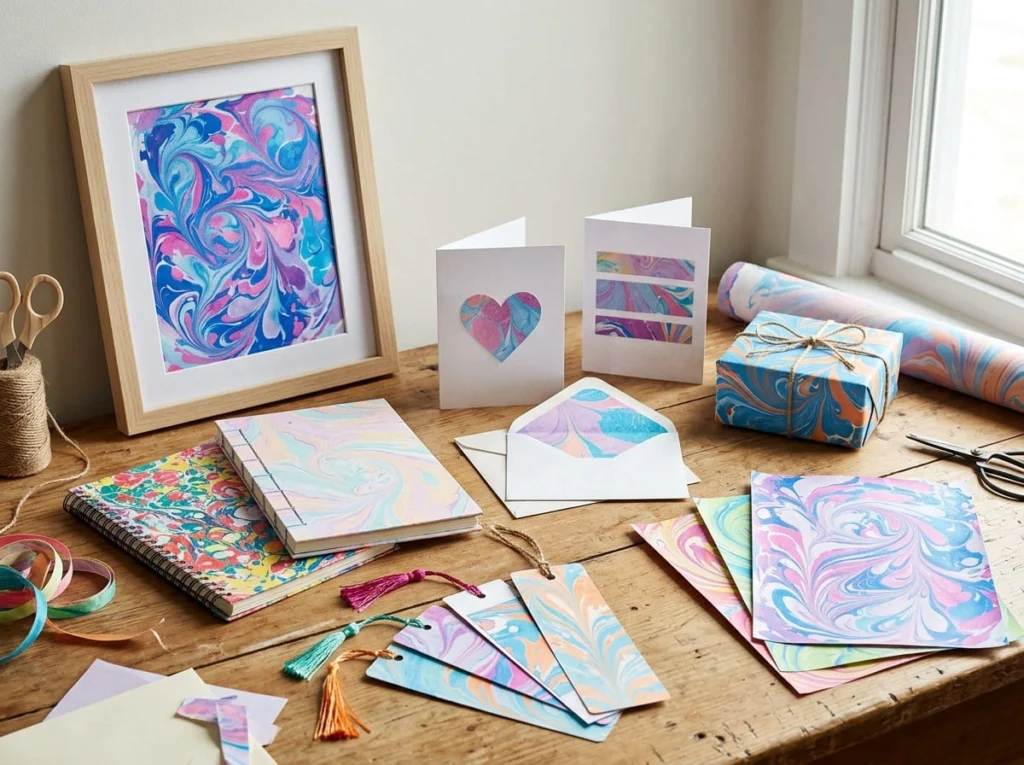
After learning the basic technique, you can use your marble paper to create many creative projects.
The patterns created through shaving cream marbling work well for decorations, gifts, and handmade crafts.
Here are some beginner friendly ideas.
Colorful Marble Paper
One of the easiest ways to enjoy shaving cream marbling is by creating decorative paper.
The finished marble paper can be used for many different projects.
You can create:
• Scrapbook backgrounds
• Craft paper designs
• Notebook covers
• Decorative displays
Experiment with different colors to create different moods.
Bright colors can create a fun and energetic look, while softer colors create a calm and elegant style.
Greeting Cards
Marbled paper is perfect for creating handmade greeting cards.
You can cut the finished artwork into smaller pieces and attach it to card paper.
Create cards for:
• Birthdays
• Holidays
• Thank you messages
• Special occasions
Adding handmade marble patterns gives cards a personal touch that makes them feel more special.
Book Covers
Shaving cream marbling can also be used to decorate notebooks and books.
You can cover plain notebooks with handmade marble paper to create unique designs.
This is a great project for:
• School supplies
• Journals
• Sketchbooks
Children can create their own personalized covers using their favorite colors.
Gift Wrapping Paper
Instead of using regular wrapping paper, you can create your own decorative paper.
Large sheets of marbled paper can be used for small gifts and handmade packages.
This creates a creative presentation and adds a personal handmade touch.
You can also use matching colors for different occasions.
Seasonal Marbling Crafts
Shaving cream marbling works well for seasonal decorations.
You can choose colors based on different celebrations.
Examples include:
Christmas:
- Red, green, and white patterns
Halloween:
- Orange, black, and purple designs
Spring:
- Soft pastel colors
Seasonal marble paper can be turned into ornaments, cards, and decorations.
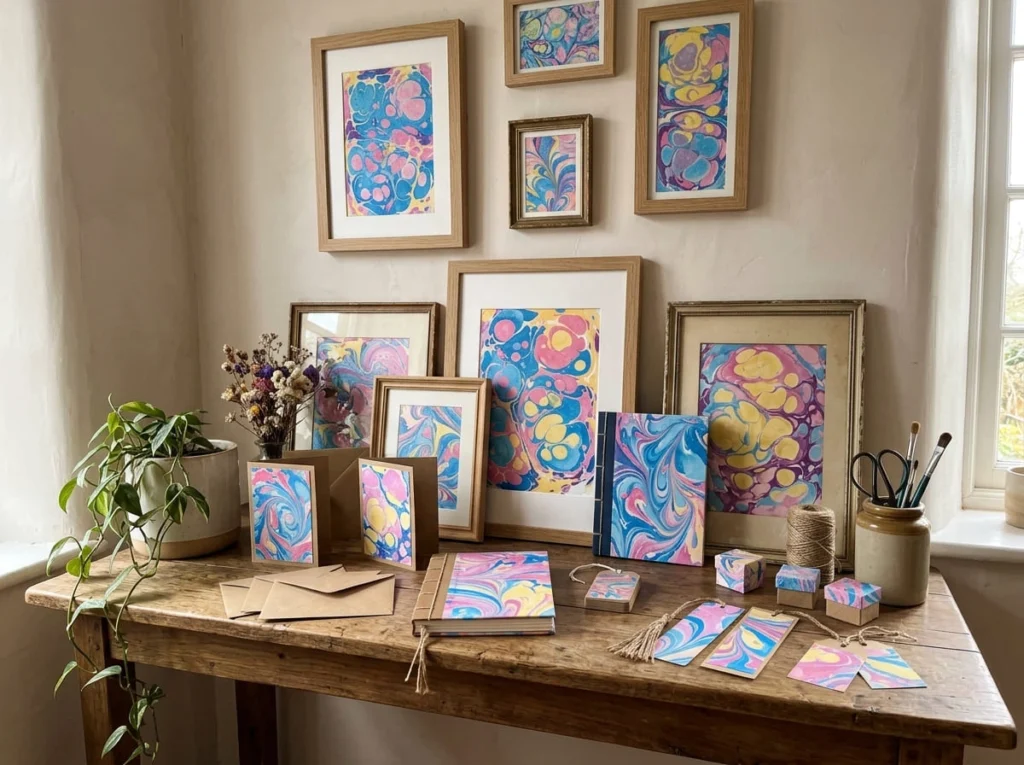
Abstract Wall Art
Marbled paper can also become simple wall artwork.
Choose your favorite color combinations and place the finished designs in frames.
You can create:
• Modern abstract art
• Colorful room decorations
• Handmade gallery displays
This is an easy way to turn a simple craft activity into home decoration.
Tips for Better Shaving Cream Marbling Results
Shaving cream marbling is a simple craft, but a few small techniques can help you create cleaner patterns and better looking designs.
Beginners may need some practice to understand how colors move and how much pressure to use. The more you experiment, the easier it becomes to create unique marble effects.
Here are some helpful tips to improve your results.
Use Good Quality Paper
The type of paper you use can affect the final appearance of your artwork.
Thin paper may become damaged because it absorbs moisture quickly from the shaving cream.
For better results, choose:
• Cardstock
• Watercolor paper
• Thick craft paper
Stronger paper is easier to handle and usually creates a cleaner marble print.
It also works better for projects like greeting cards, bookmarks, and decorations.
Avoid Mixing Colors Too Much
One common mistake beginners make is mixing the colors too much.
The beauty of shaving cream marbling comes from the separate colors creating flowing patterns.
If you stir too much, the colors may blend together and create a muddy appearance.
For better designs:
• Use gentle movements
• Create simple swirls
• Stop before colors completely mix
Leaving some separation between colors creates a stronger marble effect.
Create Patterns Quickly
Once you add colors to the shaving cream, start creating your design before the paint spreads too much.
Working quickly helps maintain clear patterns.
Plan your design movement before starting and use smooth motions.
Simple movements often create the most attractive results.
You do not need complicated patterns to make beautiful marble artwork.
Use Fresh Shaving Cream
Fresh shaving cream creates a better surface for marbling.
Old or flat shaving cream may not hold colors properly and can make the process more difficult.
A fluffy foam texture helps:
• Hold paint drops
• Create smoother patterns
• Transfer designs better
Using fresh materials improves the overall crafting experience.
Experiment With Color Combinations
Color choices can completely change the appearance of your marble designs.
Try different combinations to discover your favorite styles.
Some ideas include:
• Bright rainbow colors for children’s crafts
• Pastel shades for soft designs
• Blue and green for ocean inspired artwork
• Black and gold for a modern look
Experimenting with colors is part of the creative process.
Keep the Process Fun
The most important tip is to enjoy the activity.
Shaving cream marbling is about creativity and exploration, not creating perfect artwork.
Allow children and beginners to experiment with:
• Different colors
• New patterns
• Different tools
Every design will look different, and that is what makes this craft special.
Common Mistakes When Making Shaving Cream Marbling Art
Although shaving cream marbling is easy, beginners may face some common challenges.
Understanding these mistakes can help you create better results.
Using Too Much Paint
Adding too much paint can make the colors heavy and difficult to control.
Too much color may cause the marble effect to disappear.
Use small drops of paint and add more only if needed.
Starting with less color gives you better control over the final design.
Over Mixing Colors
Over mixing is another common problem.
When colors are mixed too much, they can lose their individual patterns and create a dull appearance.
Use gentle movements and avoid stirring the shaving cream like regular paint.
The goal is to create swirls, not completely blend the colors.
Choosing Thin Paper
Thin paper may tear or become difficult to handle after touching the shaving cream.
It can also absorb too much moisture.
Using thicker paper helps maintain the design and makes the finished artwork easier to use for crafts.
Pressing Paper Too Hard
When transferring the design, pressing the paper too firmly can create messy results.
Gentle pressure is enough to pick up the colors.
Place the paper carefully, allow the pattern to transfer, and remove it slowly.
Removing Paper Incorrectly
Removing the paper too quickly or roughly can affect the final print.
Lift the paper carefully and remove the extra shaving cream gently.
A smooth removal process helps keep the marble pattern clear.
Frequently Asked Questions
What is shaving cream marbling?
Shaving cream marbling is a craft technique where colors are placed on shaving cream to create marble patterns that are transferred onto paper.
It is a simple art activity suitable for beginners and children.
Is shaving cream marbling safe for kids?
Yes, shaving cream marbling is commonly used as a children’s craft activity.
Children should be supervised during the activity, especially younger kids who may touch materials or need help with cleanup.
Always use craft materials according to their intended purpose.
What type of shaving cream works best?
Foam based shaving cream usually works best for marbling because it creates a smooth surface for colors.
Avoid shaving gels because they do not provide the same texture needed for creating patterns.
Can you use food coloring for shaving cream art?
Yes, food coloring can be used to create colorful shaving cream marbling designs.
It creates bright colors and works well for simple craft projects.
You can also use washable paint or liquid colors depending on your project.
What paper is best for marbling art?
Thicker paper usually works best because it handles moisture better.
Good options include:
• Cardstock
• Watercolor paper
• Thick craft paper
These papers help create cleaner prints and are easier to use for decorations.
How long does shaving cream marbling take to dry?
Drying time depends on the type of paper, amount of paint used, and environment.
Thin designs may dry quickly, while thicker paper may need more time.
Allow the artwork to dry completely before using it for other crafts.
Can shaving cream marbling be used for decorations?
Yes, marbled paper can be used for many decorative projects.
You can create:
• Wall art
• Cards
• Gift wrapping
• Book covers
• Scrapbook designs
The unique patterns make each project different.
Can adults make shaving cream marbling art?
Yes, adults can enjoy this craft as well.
While it is popular with children, adults can create more detailed designs for home decoration, journaling, and creative projects.
Final Thoughts
Shaving cream marbling art is a simple and enjoyable way to explore creativity using basic materials.
With shaving cream, colors, and paper, anyone can create beautiful marble patterns without needing advanced artistic skills.
This craft is perfect for children, families, classrooms, and beginners because the process is easy to follow and every design becomes unique.
The best part is that there are no strict rules. You can experiment with different colors, patterns, and project ideas to create artwork that reflects your own style.
Whether you make handmade cards, decorations, or colorful paper designs, shaving cream marbling is a fun activity that turns simple supplies into creative artwork.
Gather your materials, try different patterns, and enjoy the process of making your own handmade marble designs.