
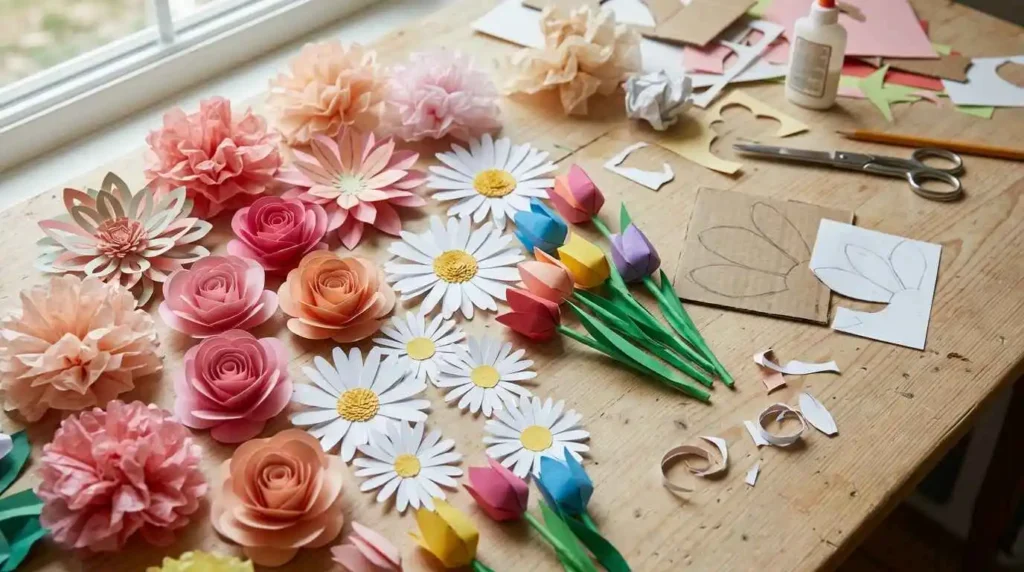
Many people think they need a Cricut machine or other cutting equipment to create beautiful paper flowers. However, you can make stunning handmade flowers using simple tools that you may already have at home.
With just paper, scissors, glue, and a little creativity, you can create different types of paper flowers without any expensive machines. Hand cutting each piece also gives you more freedom to change the shape, size, and style of your flowers.
Making paper flowers without Cricut is a great option for beginners, children, and anyone who enjoys simple craft projects. You can create decorations for your home, handmade gifts, party decorations, or beautiful flower arrangements using only basic supplies.
In this guide, you will learn how to make DIY paper flowers without Cricut step by step. You will discover what materials you need, how to create flower templates, how to cut and shape petals by hand, and how to build flowers that look creative and beautiful.
Can You Make Paper Flowers Without Cricut?
Yes, you can make paper flowers without Cricut. A cutting machine can make the process faster, especially for large projects, but it is not necessary for creating beautiful handmade flowers.
Many paper flowers are made using simple techniques that have been used for years. Instead of a machine cutting the shapes, you can create your own templates, trace them onto paper, and cut each piece using scissors.
Handmade paper flowers can look just as beautiful as machine cut flowers because the final result depends more on the design, layering, colors, and shaping techniques.
When making flowers by hand, you have more control over small details. You can make petals slightly different, adjust the size, and create a more natural handmade appearance.
Some benefits of making paper flowers without Cricut include:
• Lower cost because you do not need to buy a cutting machine
• Easy to start with basic craft supplies
• More creative freedom when designing flowers
• A relaxing activity that you can do anywhere
• Suitable for beginners and children
You can create many different flower styles without Cricut, including roses, daisies, tulips, large wall flowers, and delicate tissue paper flowers.
The process may take a little more time compared to using a machine, but many people enjoy the handmade feeling that comes with cutting and creating each piece themselves.
Benefits of Making Paper Flowers Without Cricut
Creating paper flowers without a Cricut machine has many advantages, especially for beginners who want to enjoy crafting without complicated equipment.
Lower Cost Craft Project
One of the biggest benefits is that you can start with simple and affordable materials.
A Cricut machine can be useful, but it is an extra expense that not everyone wants to make. With handmade paper flowers, you only need basic supplies like paper, scissors, and glue.
This makes paper flower crafting accessible for more people.
More Creative Freedom
When you cut flowers by hand, you are not limited to a specific design file or machine pattern.
You can create:
• Different petal shapes
• Unique flower sizes
• Custom color combinations
• Your own handmade designs
Small changes can make every flower look different and special.
Easy for Beginners
Handmade paper flowers are beginner friendly because the process uses simple steps.
You can start with basic shapes and improve your skills over time.
The main techniques include:
• Drawing
• Cutting
• Folding
• Shaping
• Gluing
Once you understand these steps, you can create many different types of flowers.
No Machine Setup Required
Using a Cricut machine requires learning how the machine works, preparing designs, and setting up materials.
Making flowers by hand removes those extra steps.
You can start your project whenever you want without preparing any special equipment.
This makes it a convenient craft activity for quick projects.
Great Portable Craft Activity
Hand cutting paper flowers is easy to do in different places.
You can work on your project at home, in a classroom, or during a creative activity with friends and family.
All you need is a small workspace and your basic supplies.
Supplies Needed for Making Paper Flowers Without Cricut
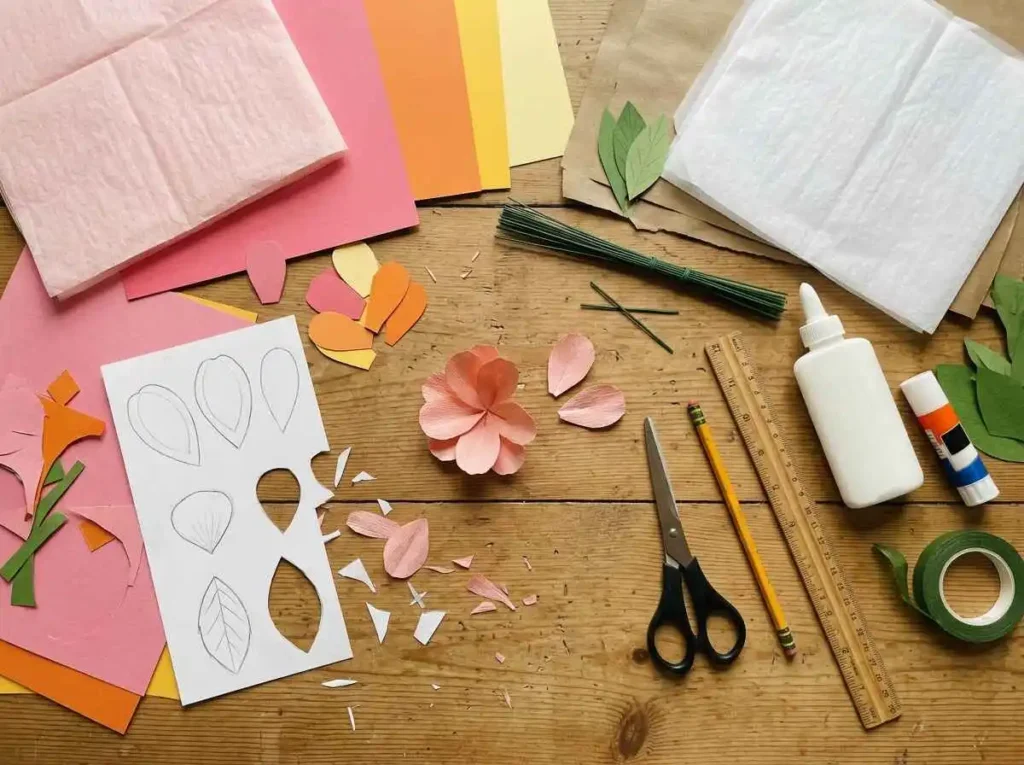
You do not need complicated tools to create handmade paper flowers. Most beginner projects can be completed with simple craft supplies.
Choosing good materials will make the cutting process easier and help your flowers look better.
Paper
Paper is the main material for creating flowers.
Different types of paper create different results, so choose based on the style of flower you want to make.
Cardstock Paper
Cardstock is a popular choice for handmade paper flowers because it is thicker and holds its shape well.
It works especially well for:
• Large flowers
• Wall decorations
• Structured petals
• Long lasting crafts
Cardstock creates stronger flowers that can maintain their shape after being assembled.
Colored Craft Paper
Colored craft paper is a good option for beginners.
It is easy to cut and available in many colors.
You can use different shades to create realistic flowers or colorful decorative designs.
Tissue Paper
Tissue paper is useful when you want soft and lightweight flowers.
It creates a delicate appearance and works well for:
• Party decorations
• Large flower arrangements
• Soft looking petals
Because tissue paper is thin, cut and handle it carefully to avoid tearing.
Scissors
Scissors are the main tool when making paper flowers without Cricut.
Choose scissors that are comfortable to use and sharp enough to create clean cuts.
Good cutting helps your petals look smoother and makes the assembly process easier.
For children, use age appropriate craft scissors and provide help when needed.
Paper Flower Templates
Templates help you create similar petal shapes each time.
You can:
• Draw your own templates
• Create reusable patterns
• Use simple flower shapes as guides
Templates are especially helpful when making multiple flowers because they save time and help keep the designs consistent.
You do not need complicated patterns. Simple petal shapes can create beautiful flowers.
Glue and Adhesives
Glue is needed to attach petals, flower centers, leaves, and other parts.
A basic craft glue works well for many paper flower projects.
For larger flowers, stronger adhesive options may help keep the layers secure.
Use glue carefully because too much can make the paper soft or messy.
Extra Craft Supplies
A few additional tools can make your project easier.
Useful supplies include:
• Pencil for drawing templates
• Ruler for measuring
• Floral wire for stems
• Green paper for leaves
• Markers for adding details
• Small tools for shaping petals
These supplies are optional, but they can help you create more detailed and realistic paper flowers.
How to Make Paper Flowers Without Cricut Step by Step
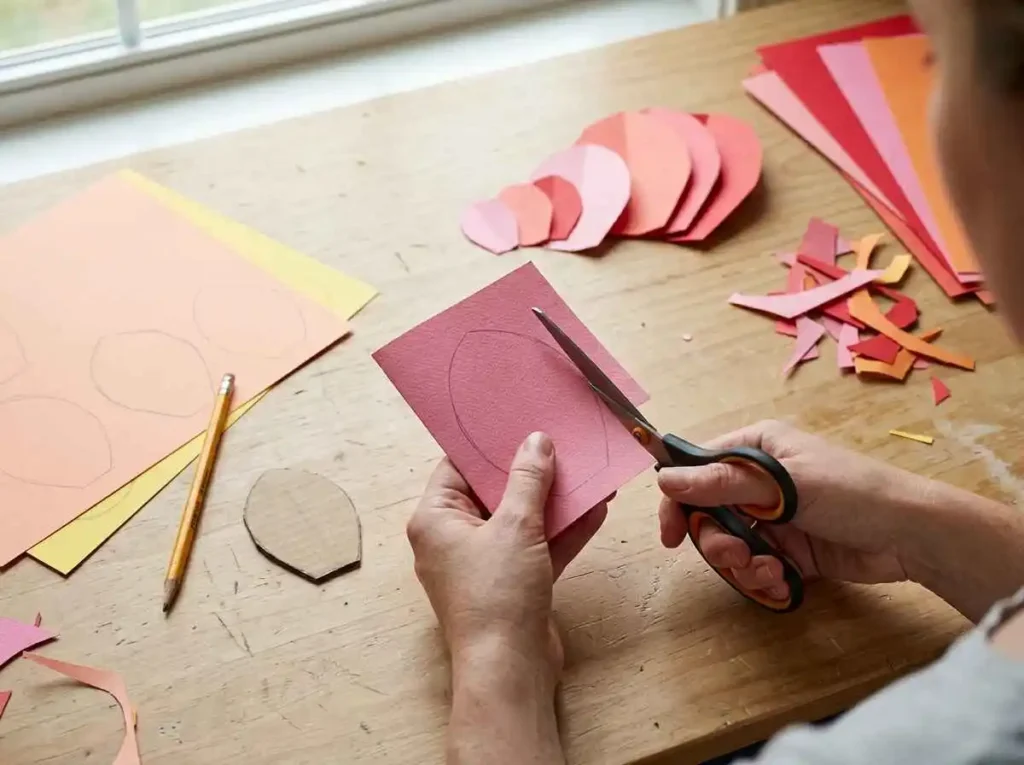
Making paper flowers by hand is a simple process when you follow each step carefully. You do not need a cutting machine to create beautiful designs. With a template, some patience, and basic craft tools, you can create flowers that look detailed and creative.
The main idea is to build your flower layer by layer. Each petal, fold, and small detail helps create the final shape.
Follow these steps to make your own DIY paper flowers without Cricut.
Step 1: Choose Your Flower Design
Before cutting any paper, decide what type of flower you want to create.
Choosing a simple design first can make the process easier, especially if you are a beginner.
Some easy flower styles include:
• Paper roses
• Daisies
• Tulips
• Simple wildflowers
• Large decorative wall flowers
Think about where you want to use your flower before choosing the design.
Small flowers are useful for:
• Greeting cards
• Gift decorations
• Small arrangements
Large flowers are better for:
• Wall decorations
• Party backgrounds
• Home displays
Also choose your colors before starting. You can create realistic flowers by using natural shades, or you can use bright colors for a fun handmade look.
Do not worry about making your first flower perfect. The purpose is to learn the basic techniques and enjoy the creative process.
Step 2: Create or Print a Paper Flower Template
Since you are not using Cricut, templates can help you create consistent shapes by hand.
A template is simply a guide that shows the shape and size of each flower piece.
You can create your own template by drawing simple shapes on paper.
For example, you can draw:
• Round petals
• Pointed petals
• Heart shaped petals
• Leaf shapes
• Flower centers
You can also create one template and reuse it for multiple flowers.
When making your template, consider creating different sizes of the same petal shape.
Small petals work well near the center, while larger petals create the outside layers.
Having different sizes helps your flower look fuller and more realistic.
Step 3: Trace the Template on Paper
After creating your template, place it on the paper you want to use.
Use a pencil to lightly trace around the shape.
Try to place your template carefully so you can save as much paper as possible.
When tracing multiple petals:
• Keep the shapes organized
• Leave enough space between pieces
• Mark different sizes if needed
Light pencil lines are better because they are easier to hide after cutting.
If you plan to make many flowers, you can keep your templates and use them again for future projects.
Step 4: Cut the Petals by Hand
Cutting the petals is one of the most important steps when making paper flowers without Cricut.
Use sharp scissors and take your time.
Try to follow the pencil lines carefully and avoid rushing.
Clean cuts will make your flower pieces easier to arrange.
When cutting:
• Hold the scissors comfortably
• Turn the paper instead of forcing the scissors
• Cut slowly around curves
• Keep similar petals close together
Remember that handmade flowers do not need every petal to be exactly the same.
Small differences can actually make the final flower look more natural.
If you are making a large flower, cut all your petals first before starting the assembly process.
This helps you see how many pieces you need and keeps the project organized.
Step 5: Shape and Curl the Petals
Flat paper petals can look simple, but shaping them can make a big difference.
Adding curves and folds gives the flower more depth and makes it look closer to a real flower.
You can shape petals by:
• Curling edges with a pencil
• Folding the center slightly
• Bending the paper gently
• Rolling small sections
For example, rose petals often look better when the edges are curled outward.
Tulip petals can look more natural when they are slightly curved upward.
Do not press too hard when shaping the paper. Gentle curves usually create a softer and more realistic appearance.
Step 6: Layer the Petals Together
Now it is time to build the flower shape.
Start by arranging the smallest petals near the center.
Add glue to the bottom part of each petal and attach them around the middle.
Continue adding larger petals around the outside.
Layering creates:
• A fuller flower shape
• More realistic depth
• Better structure
Try to place each new petal between the previous petals instead of directly on top of them.
This creates a natural pattern similar to real flowers.
You can keep adding layers until you are happy with the size and shape.
Some flowers may need only two or three layers, while larger flowers may need many more.
Step 7: Add the Flower Center
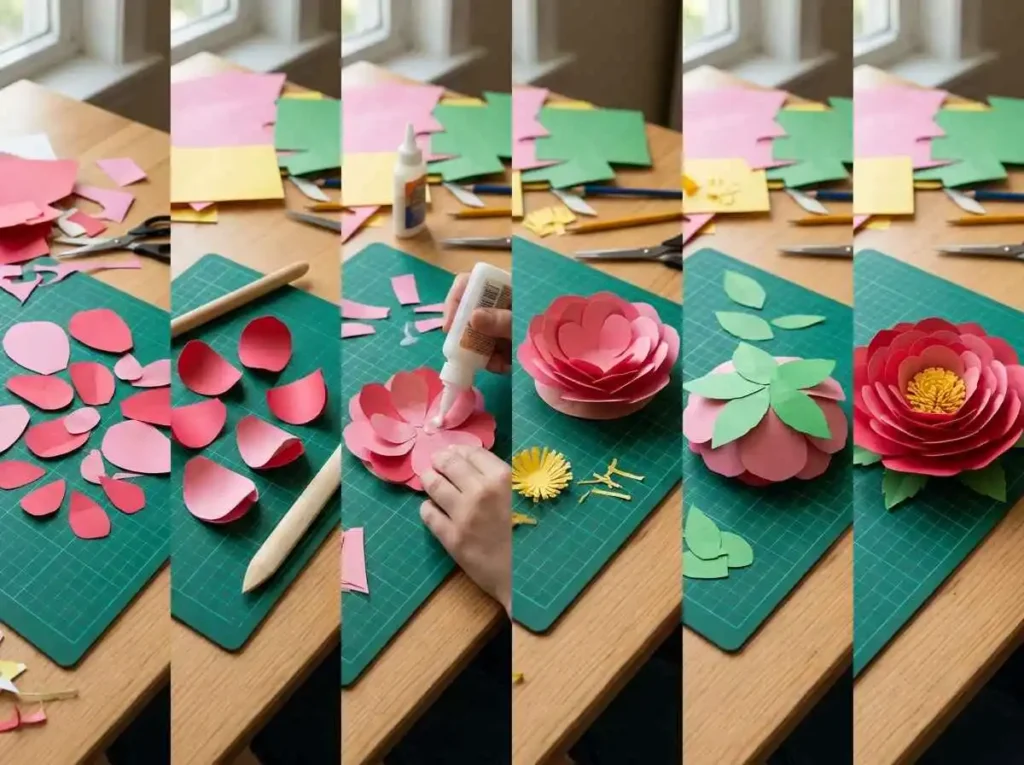
The flower center adds the finishing touch and connects the petals together.
There are many simple ways to create a center.
You can use:
• Small paper circles
• Rolled paper strips
• Folded paper pieces
• Small decorative shapes
For example, a yellow center works well for daisies, while a darker center can make colorful petals stand out.
For a more detailed look, create several small pieces and arrange them together in the middle.
The center does not need to be complicated. Even a simple design can make your flower look complete.
Step 8: Add Leaves and Stem
Adding leaves and a stem can turn a paper flower into a complete decoration.
To make leaves:
- Draw simple leaf shapes on green paper.
- Cut them carefully.
- Fold them slightly to create texture.
- Attach them near the flower or along the stem.
For the stem, you can use:
• Floral wire covered with green paper
• Rolled green paper
• A wooden stick wrapped with paper
The type of stem depends on how you want to use your flower.
For a bouquet, stronger stems work better. For wall decorations, you may not need stems at all.
Step 9: Finish Your Handmade Flower
The final step is checking your flower and making small improvements.
Look at the overall shape and adjust anything that feels uneven.
You can:
• Add extra petals
• Adjust the center
• Curl more edges
• Add small color details
• Change the position of leaves
Small finishing touches can make a simple paper flower look much more detailed.
Once your flower is complete, you can make more flowers in different colors and sizes to create a beautiful handmade arrangement.
Easy Paper Flower Designs You Can Make Without Cricut
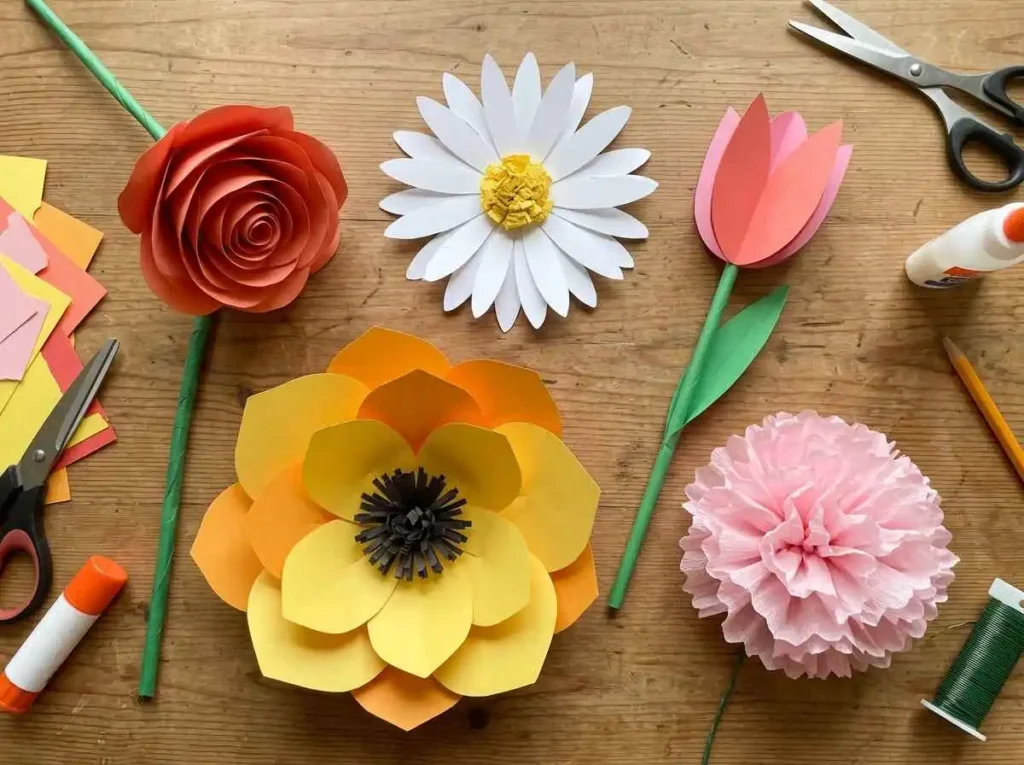
After learning the basic process, you can try different flower styles using the same hand cutting method.
Each design uses simple shapes and does not require a cutting machine.
Simple Paper Rose
Paper roses are one of the most popular handmade flower designs.
They use layered petals that gradually become smaller toward the center.
To create a rose, cut several rounded petals, shape the edges, and layer them carefully.
Using different shades of the same color can make the rose look more realistic.
Pink, red, white, and cream are popular choices for paper roses.
Daisy Paper Flower
Daisies are perfect for beginners because they use a simple petal shape.
Cut several similar white petals and arrange them around a yellow center.
You can create small daisies for cards or larger daisies for decorations.
Because the design is simple, it is a good project for children and first time crafters.
Tulip Paper Flower
Paper tulips have a clean and simple shape.
They usually need fewer petals compared to roses, making them quicker to create.
Use curved petals and shape them into a cup like flower.
Bright colors such as pink, yellow, purple, and red work well for tulips.
Add green leaves and stems to complete the design.
Large Paper Wall Flower
Large paper flowers are popular for home decorations and events.
They use bigger petals and multiple layers to create a bold look.
You can make different sizes and arrange them together to create a beautiful wall display.
Large flowers work well for:
• Party backgrounds
• Bedroom decorations
• Photo areas
Tissue Paper Flower
Tissue paper flowers are soft, lightweight, and easy to make.
They are created by layering thin paper and shaping the edges.
These flowers are commonly used for:
• Party decorations
• Classroom crafts
• Large colorful displays
Handle tissue paper carefully because it can tear more easily than thicker paper.
Tips for Making Paper Flowers Without a Cutting Machine
Making paper flowers without Cricut becomes easier as you practice. The right techniques can help you create cleaner cuts, better shapes, and more realistic looking flowers.
You do not need advanced tools to improve your results. Small changes in your process can make a big difference.
Use Good Quality Templates
Templates help you create flower pieces with better shapes and sizes.
A good template makes it easier to repeat the same design when creating multiple flowers.
You can create your own templates by drawing simple petal shapes on paper. Keep your favorite designs so you can use them again for future projects.
When making templates, consider creating different sizes of the same petal.
Small petals can be used near the center, while larger petals can create the outside layers.
This simple technique helps your flowers look fuller and more natural.
Keep Extra Flower Patterns
Saving your flower patterns can save time when starting new projects.
Instead of drawing new petals every time, you can reuse your favorite templates.
Keep different patterns for:
• Roses
• Daisies
• Tulips
• Large wall flowers
• Leaves
Having a collection of templates allows you to create different flowers quickly whenever you want.
Cut Slowly and Carefully
Since you are making flowers without a cutting machine, hand cutting is an important skill.
Take your time when cutting petals.
Avoid rushing because uneven cuts can affect how your flower looks after assembly.
Some helpful cutting tips include:
• Use sharp scissors
• Follow the shape lines carefully
• Cut around curves slowly
• Keep your hand relaxed
Remember that handmade flowers do not need to look exactly like machine cut designs. Small differences can make them look more natural.
Use Different Paper Thicknesses
Different flowers may need different types of paper.
Thicker paper works well for flowers that need strong shapes, such as large wall flowers or structured roses.
Lighter paper works better for soft and delicate flowers.
Experimenting with different paper types helps you understand which materials work best for each design.
Add Layers for Realistic Results
Layers are one of the easiest ways to make paper flowers look more realistic.
A flower with only one layer of petals may look flat.
Adding multiple layers creates:
• More depth
• A fuller appearance
• Better shape
Try using different petal sizes and arranging them from small to large.
This creates a natural flower shape without needing complicated techniques.
Practice Simple Flowers First
If you are new to paper flower making, start with simple designs.
Easy flowers help you learn the basic skills:
• Cutting petals
• Shaping paper
• Attaching pieces
• Creating layers
Once you feel comfortable, you can move to more detailed flowers.
Practicing simple designs will help you create better results with more advanced projects.
Common Mistakes When Making Paper Flowers by Hand
Making paper flowers without Cricut is simple, but beginners may make a few common mistakes.
Understanding these problems can help you avoid frustration and improve your crafting skills.
Cutting Petals Too Quickly
Rushing through the cutting process can create uneven petals.
Uneven shapes may make it harder to arrange the flower properly.
Take your time and focus on creating clean cuts.
Careful cutting will make the final flower look more polished.
Using Weak Paper
Very thin paper may not hold its shape well, especially for larger flowers.
If the petals bend too easily, try using cardstock or stronger craft paper.
Choosing the right paper helps your flower maintain its shape for longer.
Making All Petals the Same Size
Real flowers usually have different layers and shapes.
Using petals that are all the same size can make your paper flower look flat.
Try creating smaller petals for the center and larger petals around the outside.
This simple change can make your flower look much more realistic.
Using Too Much Glue
Too much glue can make paper soft and messy.
It can also make it harder to adjust petals after they are attached.
Use a small amount of glue and add more only when needed.
Allow each part to dry before making adjustments.
Skipping Petal Shaping
Flat petals can make your flower look simple.
Shaping the petals by curling, folding, or bending them adds depth and makes the design more attractive.
Even a small curve can improve the final result.
Frequently Asked Questions
Can you make paper flowers without Cricut?
Yes, you can make beautiful paper flowers without Cricut.
A cutting machine can make the process faster, but basic tools like scissors, paper, templates, and glue are enough to create many different flower designs.
What can I use instead of Cricut for paper flowers?
You can use simple craft tools instead of Cricut.
Some useful alternatives include:
• Scissors
• Paper templates
• Pencil
• Ruler
• Craft knife with adult supervision
• Cutting mat
These tools allow you to create handmade flowers without using a machine.
Do I need templates to make paper flowers?
Templates are helpful, but they are not required.
Beginners often find templates useful because they make it easier to create similar petal shapes.
However, you can also create flowers by drawing your own designs.
What paper is best for hand cut paper flowers?
Cardstock and craft paper are popular choices because they hold their shape well.
Tissue paper is useful for soft and delicate flowers.
The best paper depends on the type of flower you want to create.
Are paper flowers without Cricut difficult?
No, paper flowers without Cricut are beginner friendly.
The process involves simple steps like cutting, shaping, and attaching paper pieces.
Starting with easy designs can help you learn quickly.
How long does it take to make a paper flower by hand?
The time depends on the flower design and size.
A simple flower may take a short time, while larger flowers with many layers can take longer.
As you practice, you will become faster and more comfortable with the process.
Can kids make paper flowers without Cricut?
Yes, children can make simple paper flowers with age appropriate supplies.
Easy designs can help children practice creativity and basic craft skills.
Adults should provide help when using scissors or tools that require extra care.
Can handmade paper flowers look professional?
Yes, handmade paper flowers can look very detailed and beautiful.
Using good quality paper, careful cutting, layered petals, and proper shaping can create flowers that look impressive.
The handmade details often make each flower unique.
Final Thoughts
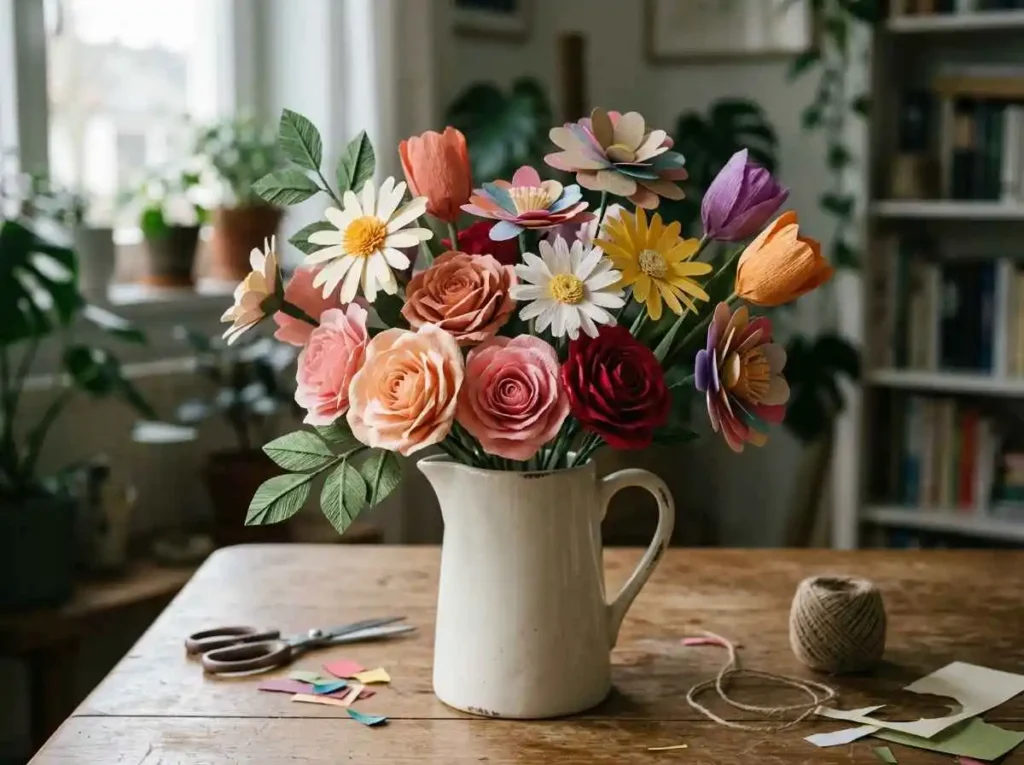
Making DIY paper flowers without Cricut proves that you do not need expensive machines to create beautiful crafts.
With simple supplies like paper, scissors, glue, and templates, you can create handmade flowers that look creative and decorative.
The best part about making flowers by hand is the freedom to design everything yourself. You can choose your own colors, create different shapes, and adjust every detail according to your style.
If you are a beginner, start with simple flowers and focus on learning the basic techniques. With practice, you can create more detailed designs and larger decorations.
Whether you want to decorate your home, make handmade gifts, or enjoy a relaxing craft activity, paper flowers without Cricut are an easy and enjoyable project for everyone.