
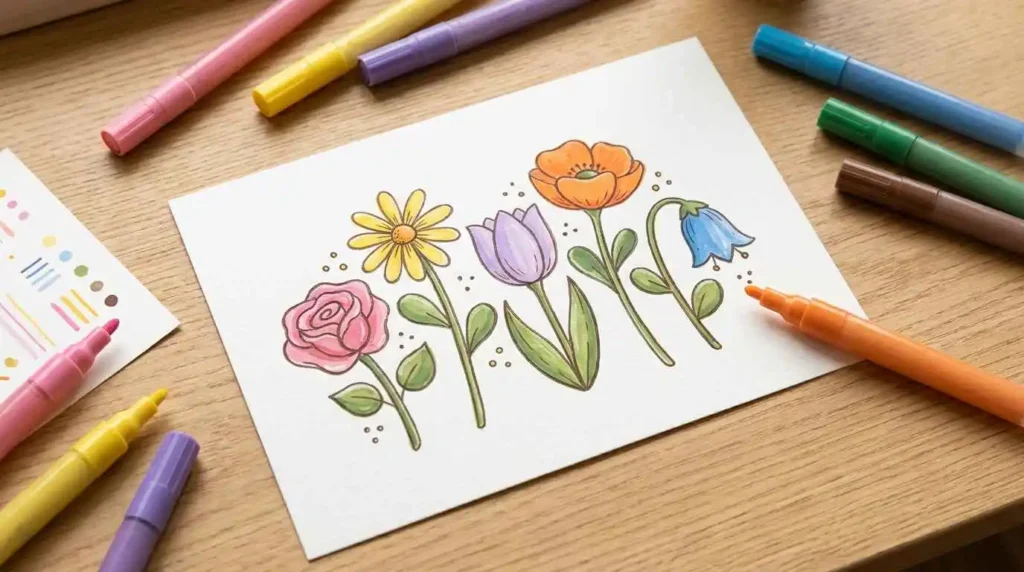
Acrylic paint pens make it easy to create colorful artwork without using brushes or mixing paint. You can use them to draw simple pictures, decorate handmade crafts, add small details, and turn everyday objects into something special. But if you have never used them before, you might wonder how to get the paint flowing or how much pressure to apply.
Learning how to use acrylic paint pens is simple once you understand a few basic steps. You need to prepare your painting surface, activate the pen correctly, test the paint flow, and let each layer dry before adding more details.
In this beginner’s guide, you will learn how to start using acrylic paint pens, create smooth lines, apply colors, and avoid common mistakes. You do not need any previous painting experience to get started.
What Are Acrylic Paint Pens?
Acrylic paint pens are markers filled with acrylic paint instead of ordinary marker ink. They allow you to paint directly onto different surfaces without using a separate paintbrush.
Most acrylic paint pens contain water-based paint that becomes dry to the touch after application. Depending on the product, the dried paint can provide an opaque finish that covers the surface underneath.
You can use acrylic paint pens for drawing, lettering, decorating crafts, and adding details to larger paintings. They are especially helpful when you want better control over small shapes and lines.
How Acrylic Paint Pens Work
Acrylic paint pens have a container that holds liquid paint and a tip, also called a nib, that transfers the paint onto your project.
Many acrylic paint pens contain a small mixing ball. When you shake the pen, the ball helps mix the paint inside so that the color has a more even consistency.
Some paint pens also have a valve system that controls how paint reaches the nib. You press the tip gently against a suitable testing surface to allow paint to flow through it.
Once the nib contains enough paint, you can begin drawing or coloring. The paint moves from the tip onto your surface as you use the pen.
Not every acrylic paint pen works the same way. Some are ready to use immediately, while others require shaking or priming. Always check the instructions for your particular markers before using them.
Why Acrylic Paint Pens Are Good for Beginners
Acrylic paint pens are a useful choice for beginners because they make painting easier to control.
You can hold them like regular writing pens, making it simple to create lines, dots, letters, and small designs. Unlike traditional acrylic painting, you do not need to keep dipping a brush into paint.
They are also convenient for small craft projects because you can change colors simply by picking up another pen.
Some reasons beginners enjoy using acrylic paint pens include:
- They are easy to hold and control.
- They work well for simple shapes and small details.
- They reduce the need for separate brushes and paint palettes.
- Many colors offer good coverage once applied properly.
- They are useful for decorating rocks, paper, wood, and other compatible craft surfaces.
However, acrylic paint pens still require a little practice. Learning how to control paint flow and pressure will help you achieve cleaner results.
Supplies You Need Before Using Acrylic Paint Pens
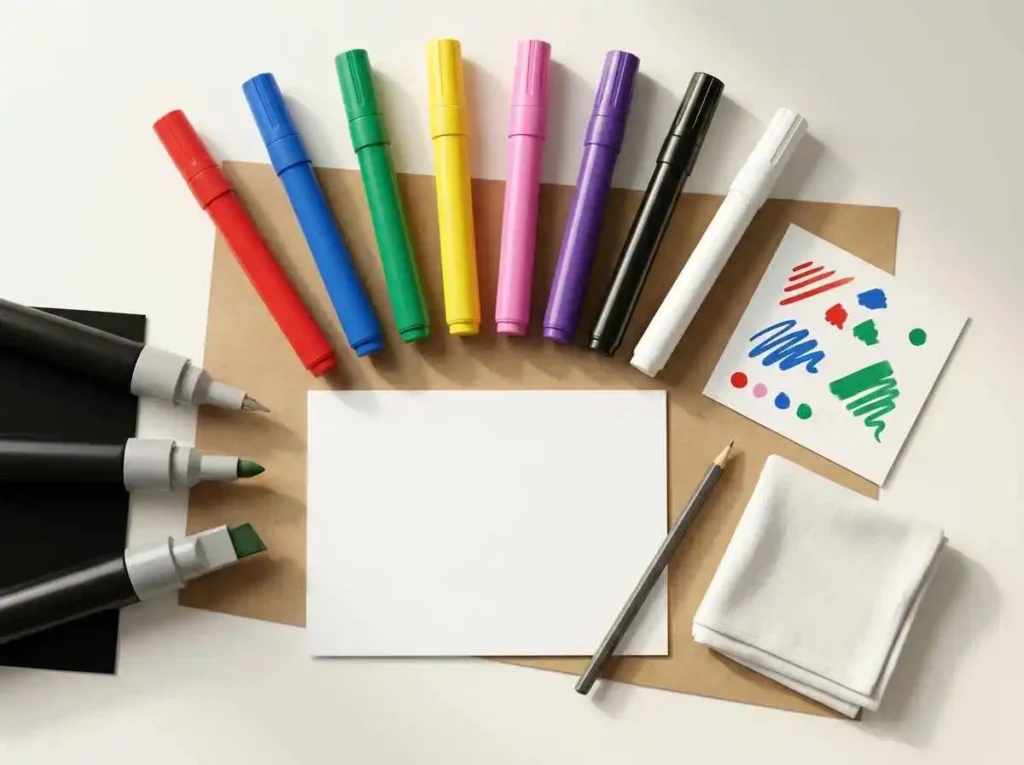
You do not need many supplies to start painting with acrylic paint pens. A few basic materials are enough to practice simple designs and complete your first project.
Preparing everything before you begin also helps you avoid interruptions while painting.
Acrylic Paint Pens
Start with a small selection of acrylic paint pens in colors you enjoy using.
Different pens have different tip sizes, and each tip works best for certain types of artwork.
Fine-tip pens are useful for writing, drawing thin lines, and adding small details. Medium-tip pens are suitable for general drawing and coloring. Broad-tip pens help cover larger areas more quickly.
If you are a beginner, medium-tip pens are a practical starting point because they can handle many simple painting activities.
You can also explore our guide to Best Paint Pens for Rock Painting if you are choosing markers for stone decorating projects.
A Surface to Paint On
Choose a surface that is suitable for the acrylic paint pens you have.
Paper or cardstock is a good place to begin because it allows you to practice strokes and patterns without worrying about damaging a craft project.
Once you feel comfortable, you can try other surfaces such as:
- Smooth rocks
- Wooden craft pieces
- Prepared canvas
- Thick paper or cardstock
- Other materials approved by the pen manufacturer
Keep in mind that acrylic paint pens may behave differently on each surface. Rough materials can make drawing more difficult, while smooth or nonporous surfaces may require extra preparation.
For your first practice session, choose a clean, flat surface that is easy to work on.
Other Helpful Supplies
A few additional materials can make painting easier.
Keep these items nearby:
- Scrap paper for testing paint flow
- A clean cloth or paper towel
- Protective paper for your table
- A pencil for sketching simple designs
- A suitable sealer if your finished project requires protection
You do not need to buy every possible painting accessory before getting started.
A few paint pens, some scrap paper, and a suitable painting surface are enough to learn the basic techniques.
How to Use Acrylic Paint Pens Step by Step
Using acrylic paint pens becomes much easier when you follow the correct process.
The most important things to remember are to prepare your surface, follow the pen’s activation instructions, test the paint before drawing, and avoid applying too much pressure.
These simple steps will help you create smoother lines, more even colors, and cleaner designs.
Step 1: Prepare Your Work Surface
Before using acrylic paint pens, make sure the surface you want to decorate is clean and dry.
Dust, dirt, grease, and moisture can prevent paint from sticking properly. They may also make your lines look uneven.
For paper or cardstock, simply place the sheet on a flat, protected table.
If you are painting a rock, gently wash away dirt and allow it to dry completely. For wooden crafts, remove dust and check whether the surface needs sanding or priming.
You can learn more about preparing stones in our guide to How to Prepare Rocks Before Painting.
Place protective paper underneath your project to keep unwanted paint off your furniture.
Starting with a clean surface helps the paint spread more evenly and reduces the chance of unwanted marks.
Step 2: Shake the Acrylic Paint Pen
Many acrylic paint pens need to be shaken before use because the paint pigments can settle inside the barrel.
First, check that the cap is securely attached.
If the manufacturer recommends shaking, hold the pen firmly and shake it for the amount of time given in the instructions.
You may hear a small mixing ball moving inside the pen. This ball helps mix the paint and produce a more consistent color.
Avoid shaking an uncapped pen because paint could splash onto your clothing or work area.
Remember that not all acrylic paint pens require the same preparation. Some products have different designs or activation methods, so always follow the instructions provided with your markers.
Step 3: Prime the Pen Tip
After preparing the pen, you may need to activate the nib before painting.
Priming allows paint to move from the pen’s container into the tip.
For a typical pump-action acrylic paint pen, place a piece of scrap paper on your table and hold the pen with the nib facing downward.
Gently press the tip against the paper, then release it. Repeat slowly until you notice paint reaching the nib.
You may need to wait briefly for the paint to flow.
Do not press too hard or pump continuously. Excessive pressure can release too much paint and create a puddle on your paper.
Stop once the nib contains enough paint to draw a smooth line.
Some pens are already primed or use a different activation system. If your marker does not have a pump-action nib, do not force it. Follow its specific instructions instead.
Step 4: Test the Paint Flow
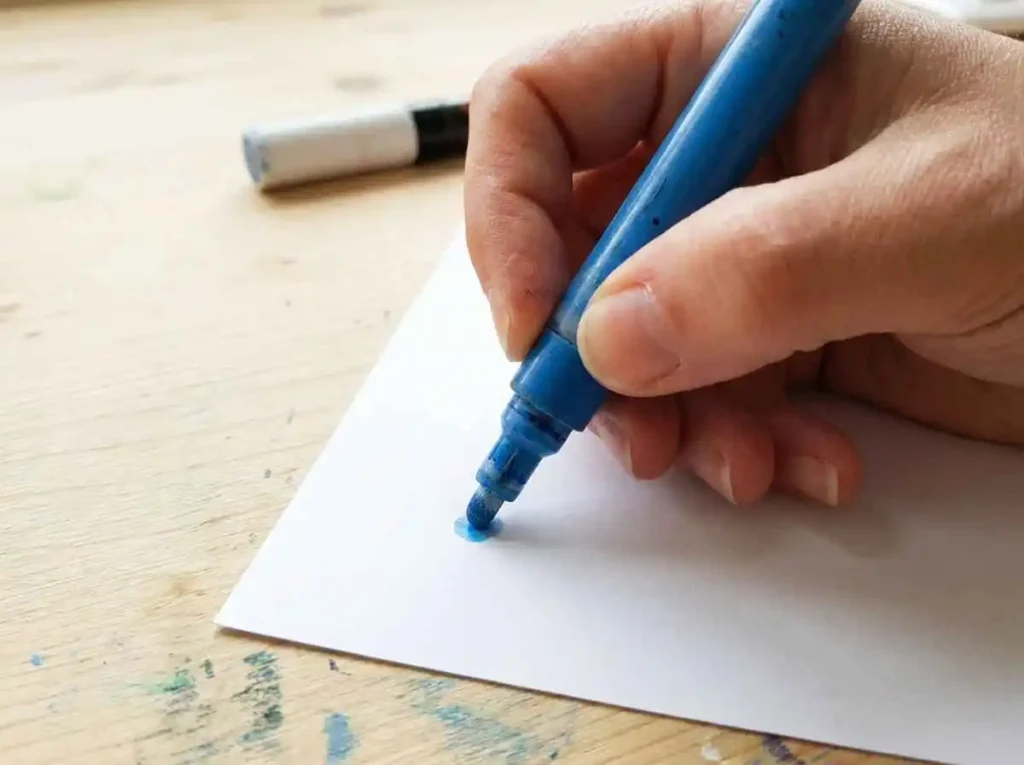
Before drawing on your actual project, test the acrylic paint pen on scrap paper.
Draw a few short lines, circles, or simple shapes.
Check whether the paint comes out evenly and whether the color looks consistent.
A properly prepared pen should produce reasonably smooth marks without releasing large drops of paint.
If the line looks faint or broken, your pen may need additional preparation according to the manufacturer’s directions.
If too much paint comes out, stop pumping the tip and gently remove excess paint using an appropriate method for your marker.
Testing the pen first is especially important when working on materials that are difficult to clean.
A short practice test can help you avoid unwanted paint blobs on your finished craft.
Step 5: Start Drawing with Light Pressure
Once the paint flows properly, you can begin drawing on your chosen surface.
Hold the acrylic paint pen the same way you would hold a normal writing pen.
Keep your hand relaxed and apply light, steady pressure as you move the tip across the surface.
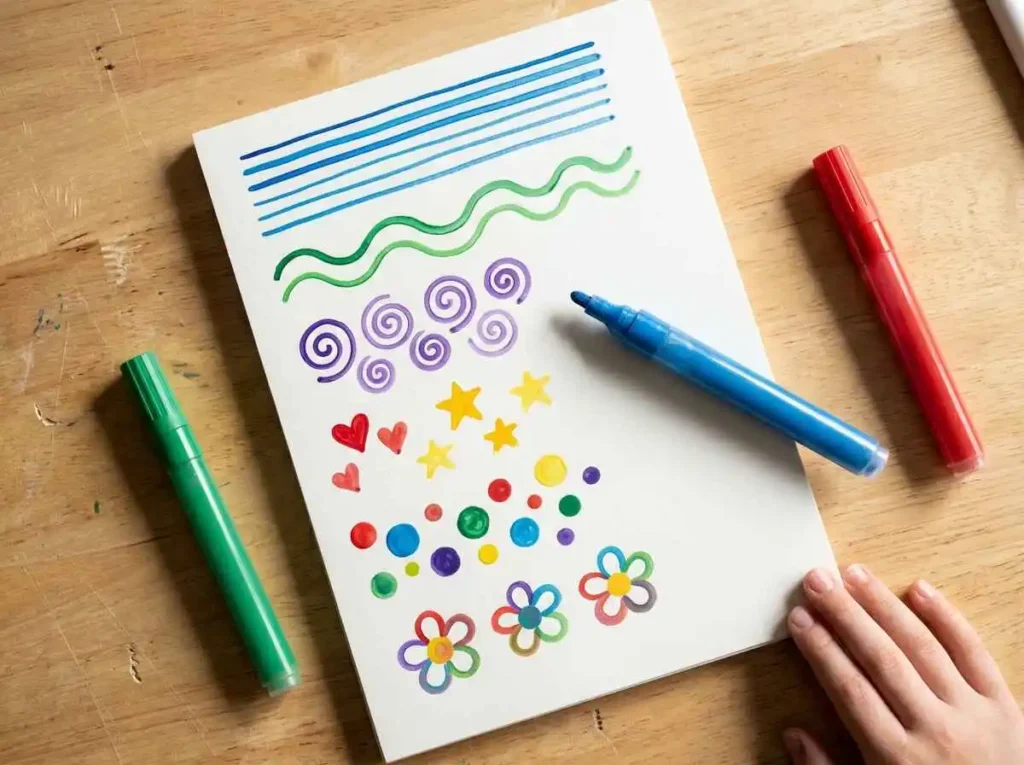
Start with simple shapes such as:
- Straight lines
- Curved lines
- Small circles
- Dots
- Hearts
- Stars
- Simple flowers
Try drawing slowly enough to control your movements without keeping the tip pressed against one spot for too long.
Pressing too hard can damage certain nibs or cause excess paint to collect on the surface.
If you want to create a detailed design, lightly sketch the main shapes with a pencil first, provided the surface allows it.
You can then follow the sketch with your paint pen.
As you practice, you will become more comfortable controlling the direction, thickness, and shape of your lines.
Step 6: Fill Larger Areas with Color
After drawing your basic outline, you can start filling the design with color.
Begin at one side of the shape and work slowly toward the other side.
Use short, controlled strokes to spread the paint across the area.
Try to keep your strokes moving in the same general direction for a more even appearance.
Avoid pressing repeatedly over wet paint because this can create uneven patches or disturb the layer underneath.
For large shapes, a medium or broad-tip acrylic paint pen may be easier to use than a fine-tip marker.
If you notice small gaps after the paint dries, you can add another suitable layer to improve coverage.
Some colors provide strong coverage in one application, while others need more than one coat. The result depends on the marker, the paint color, and the surface.
Work patiently rather than trying to cover everything with a thick layer of wet paint.
Step 7: Let the Paint Dry Before Adding Details
Once you finish applying the first color, allow it to dry before adding another layer or drawing over it.
If you work over wet paint too soon, the colors may mix, smear, or lift from the surface.
Drying time depends on several factors, including:
- The paint pen formulation
- The thickness of the paint
- The type of surface
- Room temperature
- Humidity
Thin paint marks on paper may dry relatively quickly, while thicker paint on certain craft surfaces may need longer.
Follow the manufacturer’s drying recommendations instead of assuming that every acrylic paint pen dries at the same speed.
When the previous layer is dry enough to paint over, you can add outlines, highlights, dots, or other small details.
For example, you might paint a red flower first, allow it to dry, and then use a black pen to outline the petals.
Working in layers helps you create clearer shapes and more detailed artwork.
Step 8: Finish and Protect Your Artwork
After completing your design, place the project somewhere safe and allow the paint to dry properly.
Avoid touching the painted areas until they are ready to handle.
Some projects may benefit from an additional protective coating, especially if they will be handled frequently or displayed outdoors.
However, sealing is not necessary or suitable for every project.
The correct finishing method depends on the paint pens you used, the surface material, and how you plan to use the finished item.
For example, a decorative rock kept outdoors may need a compatible protective sealer to help reduce weather damage.
You can find more information in our guide to How to Seal Painted Rocks Outdoors.
Always check whether your chosen sealer is compatible with the paint and surface. Test it on a small sample before applying it to your completed artwork.
Also, remember that dry acrylic paint is not automatically waterproof, dishwasher-safe, or suitable for direct food contact.
Following the correct finishing instructions will help protect your artwork without damaging the painted design.
Easy Acrylic Paint Pen Techniques for Beginners
Once you know how to activate your acrylic paint pens and get the paint flowing, you can start exploring different painting techniques. You do not need advanced drawing skills to create colorful designs. A few simple methods can help you make smoother lines, interesting patterns, and more detailed artwork.
The best way to improve is to practice each technique on scrap paper before trying it on your main project. This helps you understand how your pens behave and how much pressure you need.
Drawing Smooth Lines and Outlines
Smooth lines are useful for drawing shapes, writing letters, and adding details to your artwork.
Start by holding your acrylic paint pen comfortably and keeping your hand relaxed. Move the pen steadily across the surface without pressing too hard.
For straight lines, try moving your hand in one continuous motion. If you are drawing a curved line, slow down slightly to maintain control.
You can practice by drawing rows of straight lines, circles, waves, and spirals.
When outlining a painted design, wait until the base color has dried. This helps prevent the outline from mixing with the paint underneath.
If your lines appear broken, test the pen on scrap paper before continuing.
Making Dots and Simple Patterns
Dots are one of the easiest designs you can create with acrylic paint pens. You can use them to decorate rocks, greeting cards, wooden ornaments, and other craft projects.
Hold the pen gently against the surface to create a small dot. Lift it without dragging the tip.
Try placing dots in straight rows, circles, or simple flower shapes.
You can also combine dots with lines to create different patterns.
For example, draw a small circle in the center of your design and arrange several dots around it to make a simple flower.
The size of each dot depends on the pen tip, the amount of paint flowing, and how you touch the surface.
Practice applying consistent pressure so your dots look more even.
Layering Different Colors
Layering allows you to place one paint color over another to create more detailed artwork.
Start by applying your first color and allowing it to dry.
Once the paint is ready for another coat, gently draw over it with a different color.
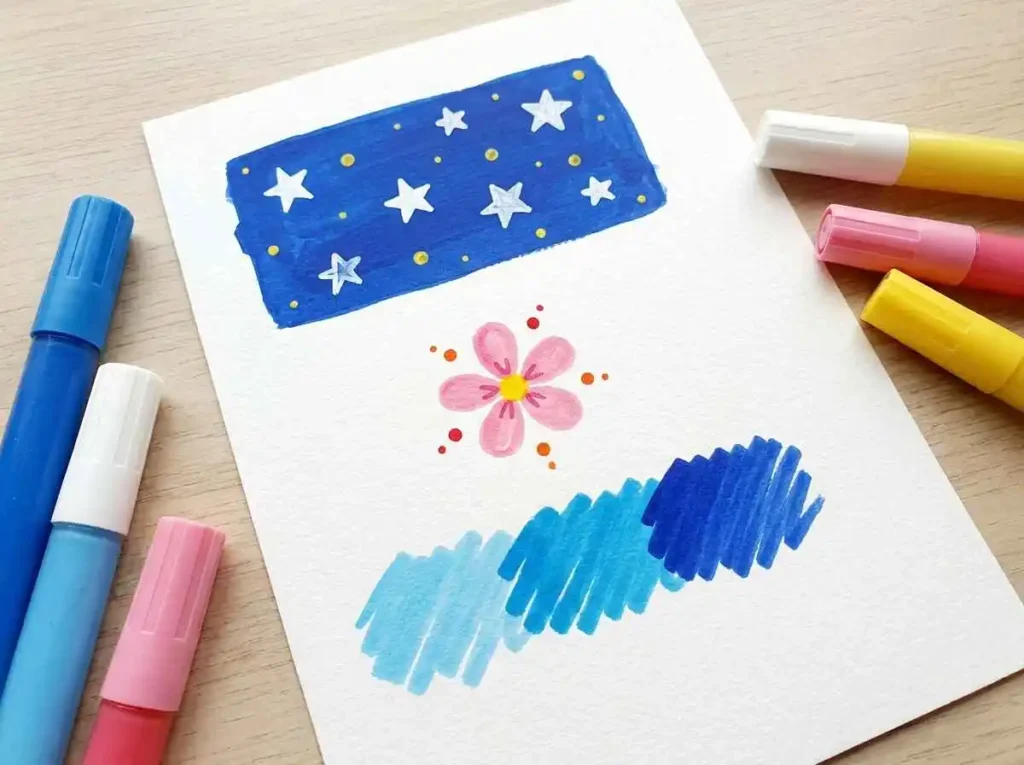
For example, you could paint a blue background, let it dry, and then add white stars or yellow dots.
Acrylic paint pens with good opacity can cover darker colors, although the results depend on the particular paint and surface.
Avoid repeatedly rubbing the nib over the same area. Too much pressure can disturb the paint underneath.
Thin, carefully applied layers often produce cleaner results than one heavy application.
Blending Colors with Acrylic Paint Pens
Blending means creating a gradual change between two or more colors.
Some acrylic paint pens allow limited blending while the paint is still wet. However, not every pen works well with this technique.
If your markers support wet blending, place two compatible colors close together and gently soften the area where they meet using the method recommended by the manufacturer.
You can also create a simple blended appearance by placing similar colors next to each other.
For example, use light blue and dark blue in neighboring sections of a sky design.
Another beginner-friendly option is layering small marks or dots of different colors to create a softer visual effect.
Always test a blending technique on scrap paper first. Avoid pressing pen tips directly against each other because this may transfer unwanted paint or damage the nibs.
Correcting Small Painting Mistakes
Small mistakes are a normal part of learning to use acrylic paint pens.
If you draw a line in the wrong place, avoid immediately rubbing it with your fingers. This can spread wet paint and make the mistake larger.
The best correction depends on the surface and paint.
On some smooth, nonporous materials, fresh paint may be removable using a manufacturer-approved cleaning method. However, paint can absorb quickly into paper, untreated wood, and other porous surfaces.
If the paint is already dry, you may be able to cover a small mistake with another opaque color.
For example, a small unwanted mark inside a white design might be covered with a suitable white acrylic paint pen.
Test the correction method first because additional paint can sometimes make the area look uneven.
Remember that handmade artwork does not need to look perfectly printed. Small differences in lines and shapes often give craft projects their own character.
What Surfaces Can You Use Acrylic Paint Pens On?
One of the useful features of acrylic paint pens is that many products can work on different materials.
You can use compatible pens on paper, rocks, wood, canvas, and certain nonporous surfaces. However, the results depend on the paint formulation and how well you prepare the material.
A pen that works beautifully on paper may behave differently on glass or untreated wood.
Before starting a new project, check the manufacturer’s surface recommendations and test your paint on a small area.
Using Acrylic Paint Pens on Paper and Cardstock
Paper and cardstock are excellent surfaces for beginners because they are easy to find and convenient for practicing.
You can create greeting cards, simple illustrations, lettering, and colorful patterns without needing special equipment.
Choose paper that is thick enough to handle the paint. Very thin paper may wrinkle, absorb too much moisture, or allow color to show through.
Place the paper on a flat surface and practice your design using light pressure.
If you want to apply several layers of paint, allow the first layer to dry before continuing.
Cardstock is especially useful for handmade cards and decorative paper projects because it generally provides a firmer surface than ordinary printer paper.
Using Acrylic Paint Pens on Rocks
Smooth rocks are popular for acrylic paint pen projects because they provide a small surface for creating colorful designs.
You can paint flowers, animals, patterns, simple messages, or seasonal decorations.
Start by choosing a relatively smooth stone. Wash away dirt and allow the rock to dry completely.
Some stones benefit from a suitable base coat, particularly when you want bright colors on a dark surface.
Use your acrylic paint pens to draw the main shapes before adding small details.
If you are new to rock painting, our guide on how to paint rocks with acrylic paint can help you understand the basic painting process.
For outdoor decorations, check whether your paint and protective coating are suitable for exposure to moisture and changing weather conditions.
Using Acrylic Paint Pens on Wood
Acrylic paint pens can be useful for decorating wooden signs, ornaments, picture frames, and small craft pieces.
However, wood preparation is important because unfinished wood may absorb paint unevenly.
If the surface feels rough, gently sand it when appropriate and remove the dust before painting.
A suitable primer or base coat may help create a smoother painting surface, especially when working with porous wood.
Once the surface is ready, you can draw letters, flowers, borders, or small decorative designs.
Allow the paint to dry before adding extra details.
Some wooden crafts may also benefit from a compatible protective finish.
We will cover surface preparation, paint application, and finishing methods in greater detail in our upcoming article, Acrylic Paint Pens on Wood.
Using Acrylic Paint Pens on Glass
Glass is another surface that certain acrylic paint pens can decorate, but it requires more care than paper or rocks.
Because glass is smooth and nonporous, paint may have difficulty sticking unless the product is designed for that surface.
Before painting, clean the glass using a method recommended for your paint and project. Remove dust, fingerprints, and greasy marks.
Allow the surface to dry completely before adding your design.
Apply the paint gently and avoid touching wet areas.
Some paint markers require special curing or finishing instructions when used on glass. Others are intended only for temporary or decorative applications.
Do not assume that painted glass is dishwasher-safe, waterproof, microwave-safe, or suitable for direct food contact.
For example, if you decorate a drinking glass, keep artwork away from areas that touch food, drinks, or the mouth unless the product is specifically certified for that use.
Our upcoming guide, Acrylic Paint Pens on Glass, will explain this process in greater detail.
Using Acrylic Paint Pens on Canvas
Canvas can be a good surface for creating simple artwork with compatible acrylic paint pens.
You can use the pens to draw outlines, add patterns, create lettering, or decorate an existing acrylic painting.
Prepared canvas generally provides a more suitable surface for acrylic painting than untreated fabric.
However, canvas has a woven texture that can make thin lines appear less smooth than they would on paper.
For detailed artwork, use a pen with a suitable tip and apply light, steady pressure.
You can begin with a simple pencil sketch, add your main colors, and finish with smaller details once the paint dries.
If the texture makes it difficult to draw clean lines, practice on a small area before working on the full canvas.
Easy First Project Using Acrylic Paint Pens
Now that you understand the basic techniques and suitable surfaces, you can try a simple craft project.
Painting a small flower on a smooth rock is an easy way to practice outlines, filling shapes, layering colors, and adding details.
You only need a few supplies, and the design does not require advanced drawing skills.
Make a Simple Painted Rock with Acrylic Paint Pens
For this project, gather a smooth rock, acrylic paint pens, scrap paper, and a clean cloth.
Choose three or four colors. For example, you could use yellow for the flower center, pink for the petals, green for the leaves, and black for the outlines.
Start by cleaning the rock and allowing it to dry completely.
If necessary, prepare your acrylic paint pens according to their instructions and test each color on scrap paper.
Follow these simple steps:
- Place the clean rock on a protected table.
- Draw a small yellow circle near the center of the rock.
- Add five or six pink petals around the circle.
- Draw a green stem and two small leaves.
- Allow the painted areas to dry.
- Use a fine-tip pen to add outlines or small details.
- Let the finished artwork dry according to the paint manufacturer’s instructions.
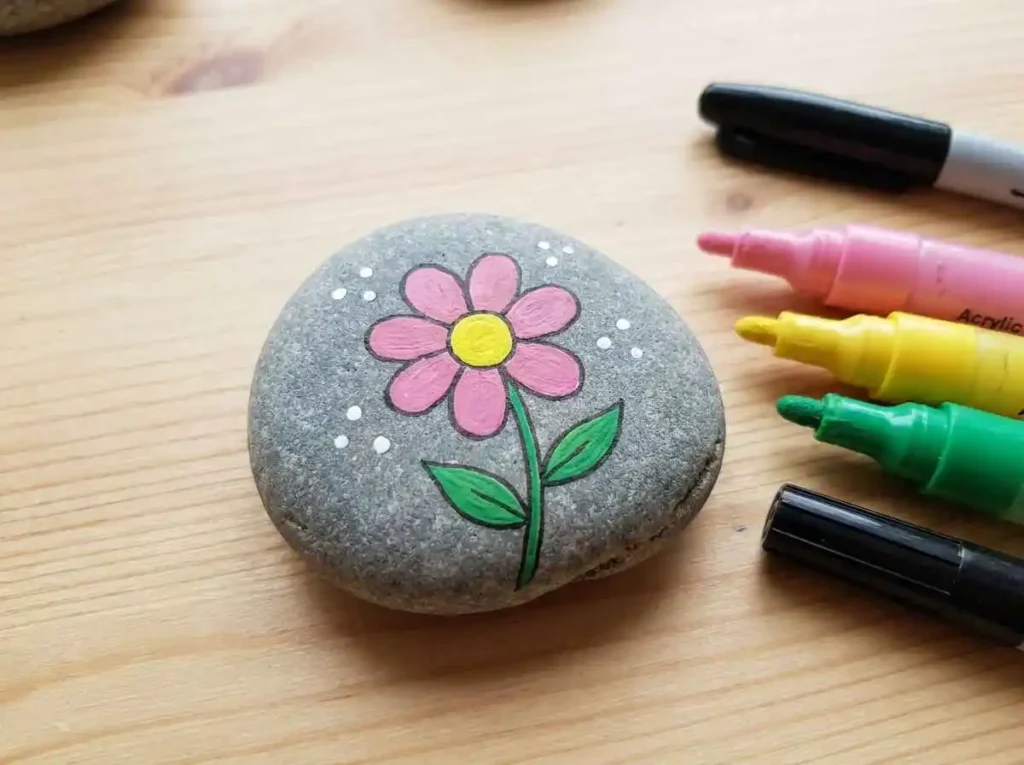
If you want more colorful decoration, add small dots or patterns around the flower.
Keep your first design simple so you can focus on controlling the pen.
Once you become comfortable, try decorating rocks with hearts, stars, animals, or geometric patterns.
For more beginner-friendly inspiration, explore our article on 50 Easy Rock Painting Ideas for Beginners.
Common Acrylic Paint Pen Problems and How to Fix Them
Acrylic paint pens are generally easy to use, but you may experience problems with paint flow, uneven coverage, or smudging.
These issues do not always mean that your markers are damaged.
Sometimes, the problem comes from incomplete activation, the type of surface, excess pressure, or paint that has not dried properly.
Understanding a few simple solutions can help you avoid frustration.
Acrylic Paint Pen Is Not Working
If your acrylic paint pen does not produce any paint, start by checking the manufacturer’s activation instructions.
Some new markers require shaking and priming before their first use.
For a pump-action pen, gently activate the nib on scrap paper as directed by the manufacturer.
If the pen has been used before, inspect the tip for dried paint.
A clogged nib may prevent paint from flowing even when paint remains inside the marker.
Clean or replace the nib only if the product instructions allow it.
Avoid forcing the tip or opening the pen barrel without guidance, as this could damage the marker or cause paint to spill.
Paint Is Not Flowing Smoothly
Sometimes, acrylic paint pens produce broken or uneven lines.
This may happen when paint has not fully reached the tip, the pigments need mixing, or the nib contains dried paint.
If your pen requires shaking, close the cap and shake it according to the instructions.
Then test the paint on scrap paper.
Check the nib for visible buildup and clean it using the manufacturer’s recommended method if necessary.
You should also consider the painting surface. Rough wood, textured canvas, and uneven rocks can interrupt the line even when the pen works correctly.
Try drawing on smooth paper to determine whether the problem comes from the pen or the surface.
Too Much Paint Comes Out
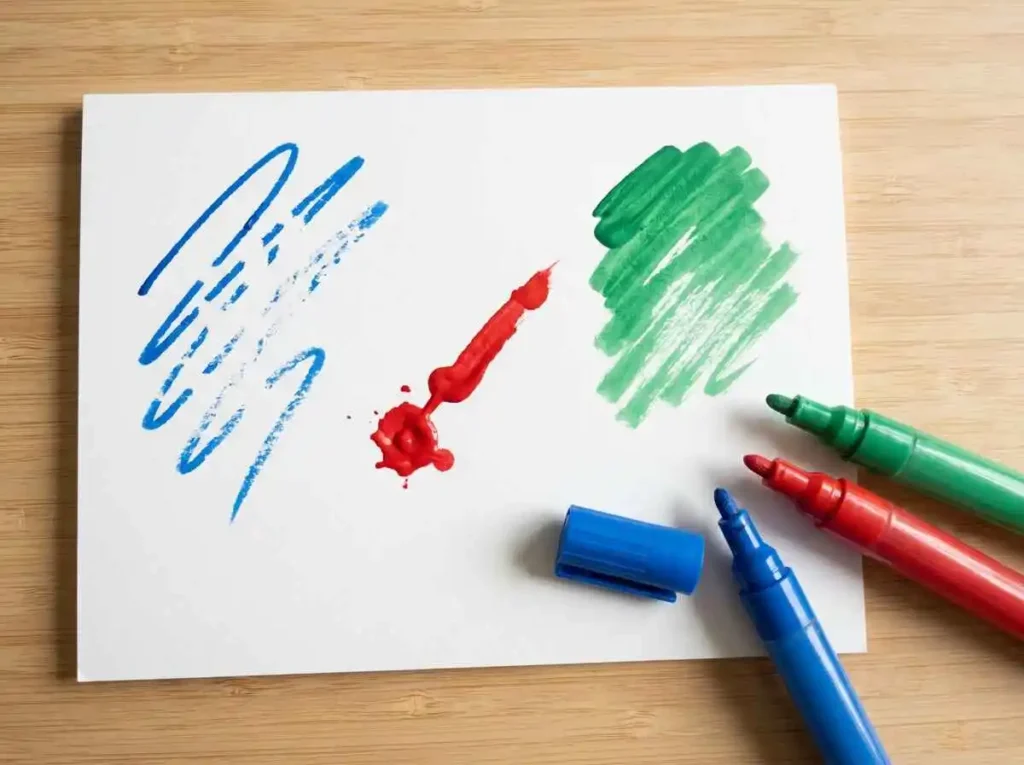
Excess paint can create puddles, thick lines, and unwanted blobs.
This often happens when a pump-action nib is pressed too many times or too firmly.
If you notice too much paint flowing, stop pumping the pen.
Carefully remove excess paint from the nib using a suitable cloth or test surface, following the manufacturer’s instructions.
Test the pen on scrap paper until the paint flow becomes manageable.
When you return to your project, use gentle pressure and avoid pressing the nib repeatedly in one spot.
If too much paint has already collected on the artwork, allow it to settle or remove it using a method appropriate for that surface.
Paint Looks Streaky or Uneven
Streaky paint can make a design appear patchy, especially when filling larger areas.
The result may depend on the surface texture, paint opacity, or how quickly you move the pen.
Start by making sure the marker is properly prepared.
Apply paint using controlled strokes without repeatedly dragging the nib through wet areas.
If the first layer does not provide enough coverage, let it dry before adding another suitable coat.
On porous surfaces such as untreated wood, a compatible primer may improve coverage.
Different acrylic paint pens have different opacity levels, so some colors may naturally require more layers than others.
Colors Smudge or Mix Unexpectedly
Smudging often happens when you touch wet paint or apply a new color before the previous layer has dried.
For example, drawing a black outline over a wet yellow flower may cause the colors to mix.
To avoid this problem, allow each painted section to dry before adding new details.
Use light pressure when drawing over an existing layer.
If you accidentally smear wet paint, avoid rubbing the area repeatedly.
On absorbent surfaces, wiping can spread the paint and make the mistake more noticeable.
Allow the paint to dry when appropriate, then decide whether a small correction or another layer can improve the result.
With practice, you will become more familiar with how quickly your markers dry and how different colors behave.
Tips for Getting Better Results with Acrylic Paint Pens
Getting clean and colorful results with acrylic paint pens takes a little practice. Even small changes in how you hold the pen or prepare your surface can make a difference.
These simple tips can help you feel more confident and avoid common problems while painting.
Practice on Scrap Paper First
Before starting a new design, spend a few minutes practicing on scrap paper.
Draw straight lines, circles, dots, and simple patterns to understand how the paint flows.
If you are using a new color or a different pen tip, test it before applying paint to your actual project. This helps you avoid unexpected blobs or uneven lines.
Choose the Right Tip for Your Design
Different pen tips are useful for different painting tasks.
Fine tips work well for small details, lettering, and delicate outlines. Medium tips are suitable for everyday drawing, while broader tips help fill larger shapes.
Using the right tip makes painting easier and reduces the need to go over the same area repeatedly.
Work with Light and Steady Pressure
You do not need to press hard to create colorful marks with a properly prepared acrylic paint pen.
Hold the marker comfortably and move your hand at a steady pace.
Excessive pressure can damage certain nibs or cause unwanted paint buildup. If the paint stops flowing, check the pen instead of forcing the tip against your artwork.
Keep Your Painting Surface Clean
A clean surface helps acrylic paint stick more evenly.
Before starting, remove dust, dirt, and grease using a cleaning method suitable for the material.
Make sure the surface is completely dry before painting.
This is especially important when decorating rocks, wood, glass, or other materials that may collect dirt or moisture.
Allow Enough Drying Time
Be patient when applying several colors or adding small details.
Allow each layer to dry before painting over it unless you are intentionally using a wet blending technique supported by your markers.
Trying to finish too quickly can cause smudges, uneven coverage, or unwanted color mixing.
Test Sealers Before Using Them on Finished Artwork
If your project needs a protective coating, choose a sealer that is compatible with the paint and surface.
Always test the sealer on a separate sample before using it on your finished design.
Some coatings can affect the appearance of certain paints, so following the product instructions helps prevent unwanted changes.
How to Clean and Store Acrylic Paint Pens
Taking care of your acrylic paint pens helps keep them ready for future projects.
Paint can dry around the nib or inside an improperly stored marker, making it difficult to create smooth lines.
A few simple habits can help maintain your pens and reduce unnecessary waste.
Cleaning the Pen Tip
After finishing your artwork, check the pen tip for excess paint.
If you notice paint collecting around the nib, gently clean it using the method recommended by the manufacturer.
For some water-based acrylic paint markers, carefully wiping the tip with an appropriate cloth may be enough to remove fresh paint.
Other products may have removable or washable nibs, but you should only remove or wash them if the manufacturer specifically allows it.
Avoid pulling the nib out with force or soaking the entire marker in water.
If the tip becomes clogged, follow the cleaning instructions for your particular product rather than using sharp objects to clear it.
Keeping the tip clean can help prevent dried paint from interfering with future projects.
Storing Acrylic Paint Pens Properly
Always replace the cap securely after using an acrylic paint pen.
An improperly closed cap can allow paint to dry around the tip.
Keep your markers in a cool, dry place away from excessive heat and direct sunlight.
The correct storage position depends on the marker design. Some manufacturers recommend storing certain pens horizontally, while others provide different instructions.
Follow the recommendations printed on the packaging or provided by the manufacturer.
It is also helpful to keep your pens together in a storage case or container so you can find the colors you need.
Before using a stored pen again, check whether it requires shaking or testing.
Good storage habits can help your acrylic paint pens remain useful for more projects.
Common Mistakes to Avoid When Using Acrylic Paint Pens
Learning how to use acrylic paint pens becomes easier when you understand which mistakes can affect your results.
Many beginners experience problems because they rush through preparation or use more pressure than necessary.
Avoiding these simple mistakes can help you create cleaner artwork.
Skipping the Priming Process
Some acrylic paint pens need to be primed before their first use.
If you skip this step, the nib may remain dry even though the pen contains paint.
Check the manufacturer’s instructions and activate the tip correctly when required.
Always test the paint flow before drawing on your main project.
Pressing the Tip Too Hard
Pressing too hard does not necessarily make acrylic paint flow better.
With certain pens, excessive pressure can damage the nib or release too much paint.
Use gentle, steady movements while drawing.
If the pen stops working properly, check its condition and activation instructions instead of applying more force.
Painting on a Dirty Surface
Dust, grease, and moisture can interfere with paint adhesion.
This is especially noticeable on materials such as glass, rocks, and wood.
Clean the surface using an appropriate method and allow it to dry completely before decorating it.
Adding New Colors Before Previous Layers Dry
Applying another color too soon can cause smudging or unwanted mixing.
For cleaner outlines and layered designs, wait until the first coat is dry enough to paint over.
Use a light touch when adding details on top of an existing color.
Using the Wrong Marker for the Surface
Not every acrylic paint pen is designed for every material.
Some markers work well on paper and wood but may not provide durable results on smooth glass or other nonporous surfaces.
Check the manufacturer’s recommendations before beginning your project.
Testing the paint on a small area can help you understand how well it works.
Assuming Every Finished Project Is Waterproof
Acrylic paint may resist moisture after drying, but that does not mean every painted object is completely waterproof.
Durability depends on the paint formulation, surface preparation, curing instructions, and intended use.
If your project will be displayed outdoors or exposed to moisture, choose suitable materials and follow the manufacturer’s protection recommendations.
Frequently Asked Questions
Do You Need to Shake Acrylic Paint Pens Before Using Them?
Many acrylic paint pens need to be shaken before use to mix the paint pigments inside the marker. Keep the cap securely attached and follow the manufacturer’s instructions. Some pens use different designs and may not require shaking.
Why Is My New Acrylic Paint Pen Not Working?
A new acrylic paint pen may need to be activated before paint reaches the nib. Check whether your marker requires shaking or gentle priming. If it still does not work, inspect the tip and follow the manufacturer’s troubleshooting instructions rather than forcing it.
Do Acrylic Paint Pens Need Water?
Most ready-to-use acrylic paint pens do not need additional water because the paint is already prepared inside the marker. Avoid adding water directly to the pen unless the manufacturer specifically recommends it. Extra water can change the paint consistency or damage the marker.
Can Beginners Use Acrylic Paint Pens?
Yes, acrylic paint pens are suitable for many beginners because they are easy to hold and allow controlled drawing. You can start by practicing lines, dots, and simple shapes on paper. Once you feel comfortable, try decorating small craft projects.
Can You Paint Over Acrylic Paint Pens?
You can often apply another compatible paint layer over dried acrylic paint pen artwork. Allow the first layer to dry properly before adding more color. The results depend on the paint formulation and surface, so testing a small area is helpful.
How Long Do Acrylic Paint Pens Take to Dry?
Acrylic paint pen drying times vary depending on the product, paint thickness, surface, temperature, and humidity. Thin marks may become touch-dry relatively quickly, while thicker layers can take longer. Follow the manufacturer’s drying and curing recommendations before handling or sealing your artwork.
Are Acrylic Paint Pens Waterproof When Dry?
Some acrylic paint pens offer water-resistant or waterproof results after the paint has fully cured, but not all products perform the same way. Water resistance also depends on the surface and how the painted object is used. Check the product information before exposing your artwork to water.
Do You Need to Seal Acrylic Paint Pen Artwork?
Not every acrylic paint pen project needs sealing. Decorative artwork kept indoors may not require additional protection, while frequently handled or outdoor projects may benefit from a compatible sealer. Always check the paint and surface requirements before applying a protective coating.
Can Acrylic Paint Pens Be Used on Fabric?
Some acrylic paint pens can be used on fabric, but ordinary acrylic markers are not always designed for flexible or washable textiles. Paint may become stiff, crack, or wash away if the product is unsuitable. For clothing and other washable items, choose markers specifically approved for fabric and follow their setting and washing instructions.
Final Thoughts
Learning how to use acrylic paint pens is a fun way to begin exploring painting and handmade crafts. You do not need expensive tools or advanced artistic skills to create colorful designs.
Start with a clean surface, prepare your markers according to their instructions, and practice a few simple strokes before beginning your project. Use gentle pressure, allow paint layers to dry, and take care of your pens after each session.
As you become more comfortable, try adding patterns, combining colors, and decorating different craft surfaces.
Whether you enjoy drawing on paper, decorating wooden pieces, or creating painted rocks, acrylic paint pens offer plenty of opportunities to experiment and create something personal.
The more you practice, the easier it becomes to turn simple ideas into finished artwork.