
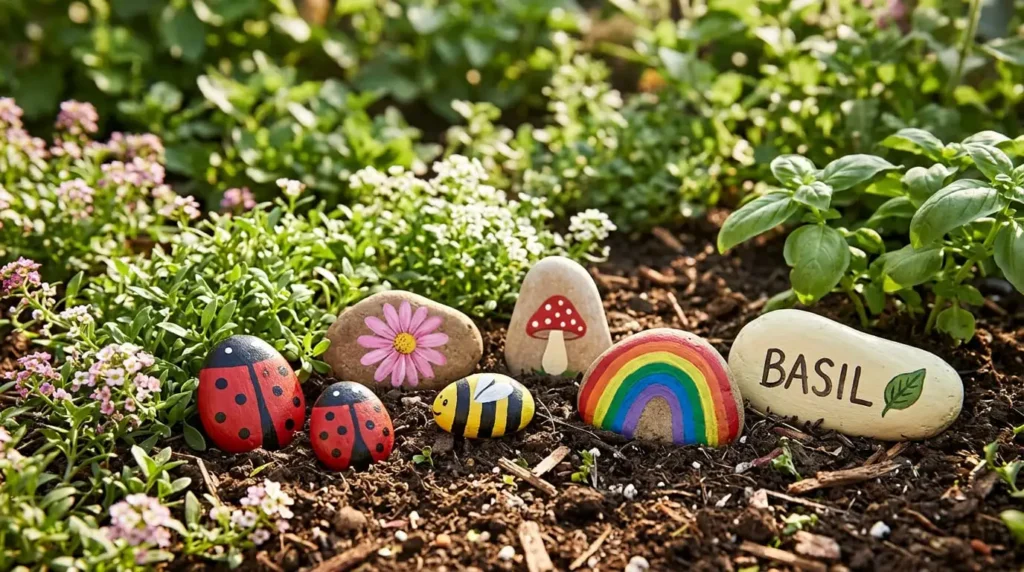
DIY painted rocks for garden decoration are a fun and affordable way to add color and personality to your outdoor spaces. With a few ordinary stones, some paint, and simple craft supplies, you can create handmade decorations for flower beds, garden planters, and decorative borders.
You do not need professional painting skills to get started. Easy designs such as ladybugs, bees, flowers, and colorful patterns can turn plain rocks into attractive garden accents.
The important thing is to choose suitable stones, prepare their surfaces properly, and use painting materials that can handle the conditions where your decorations will be displayed.
In this guide, you will learn how to select and prepare rocks, paint a simple ladybug garden stone step by step, and protect your finished artwork for outdoor use. You will also discover creative garden rock painting ideas and practical ways to display them.
Why Use Painted Rocks for Garden Decoration?
Painted rocks are an easy way to personalize a garden without making permanent changes to the landscape.
You can place small painted stones around flower beds, use larger rocks as decorative accents, or create colorful plant markers for an herb garden.
They are also a practical craft project for beginners because many designs use simple shapes and a few colors.
Painted Rocks Add Color to Garden Spaces
A few colorful stones can brighten an ordinary garden corner.
For example, red ladybug rocks can look cheerful among green plants, while painted flowers can add decorative color to a plain planter.
You can also choose colors that match existing flowers or outdoor decorations.
Painted rocks work particularly well as small accents because you can move them when you want to change your garden arrangement.
You do not need to decorate every corner. A few carefully placed stones can create an attractive display without making the garden look crowded.
Garden Rock Painting Is Beginner-Friendly
Many garden rock designs are based on simple shapes.
A ladybug needs a rounded body, a few dots, and a dark head. A painted bee can be created using yellow and black stripes, while a flower design may only need a circular center and rounded petals.
These patterns are suitable for beginners who want to practice brush control and painting small details.
You can start with one or two stones before creating a larger collection.
Working on simple designs also gives you an opportunity to test how your chosen paint behaves on natural stone.
You Can Personalize Your Garden Decorations
One of the best things about painting garden rocks is that you can choose colors and designs that suit your outdoor space.
You might create matching flower rocks for a planter or decorate several stones with your favorite garden colors.
Painted plant markers are another useful option.
For example, you can write “BASIL,” “MINT,” or “THYME” on separate stones and place them beside the corresponding herbs.
You can also paint short words such as “GROW” or “BLOOM” on larger flat rocks.
These small details can make your garden feel more personal and welcoming.
Supplies Needed for DIY Painted Garden Rocks
You do not need a large collection of professional art supplies to paint decorative garden stones.
A few suitable rocks, paint, brushes, and basic preparation materials are enough for many beginner projects.
However, garden rocks need slightly different consideration from indoor painted stones because they may be exposed to sunlight, rain, and changing temperatures.
Choosing appropriate materials from the beginning can help your decorations last longer.
Choosing Smooth Rocks for Painting
Smooth rocks are generally easier to paint than rough or heavily textured stones.
Look for clean, solid stones with surfaces that allow a brush to move comfortably.
Flat rocks are useful for flowers, garden messages, and plant labels.
Rounded or oval stones work well for ladybugs, bees, strawberries, and other decorative shapes.
Choose rocks that can rest securely in your intended display location.
Avoid stones with loose, crumbling surfaces or sharp edges.
You can purchase suitable craft stones or collect rocks only from places where collection is permitted. Avoid taking stones from protected areas or disturbing natural habitats.
Best Paint for Outdoor Garden Rocks
The best paint for garden rocks depends on how much outdoor exposure the decorations will receive.
For stones that will be displayed outside, choose a paint specifically recommended by its manufacturer for the stone surface and intended outdoor conditions.
Certain exterior-rated acrylic paints and suitable multi-surface paints may be appropriate.
Ordinary acrylic craft paint can be useful for practicing and indoor decorations, but it is not automatically weather-resistant.
A paint labeled permanent does not necessarily mean it can withstand repeated rain, strong sunlight, or freezing temperatures.
Check the product instructions for surface preparation, drying, curing, and outdoor suitability.
For this beginner ladybug project, choose compatible red and black paints intended for the conditions in which the rock will be displayed.
Paintbrushes and Acrylic Paint Pens
You can create most garden rock designs using only two or three brushes.
A small flat brush is useful for applying base colors to larger stone surfaces.
A medium round brush works well for curved shapes, flower petals, and rounded patterns.
A fine detail brush helps you paint thin lines, small dots, and decorative outlines.
Acrylic paint pens can also be useful for lettering and small details when the specific markers are suitable for stone and the intended outdoor finishing system.
Before using a paint pen, follow its preparation instructions and test it on a separate rock.
Avoid assuming that every marker is weatherproof simply because it contains acrylic paint.
Optional Primer and Protective Sealer
Some rocks may benefit from a compatible primer or base coat before painting.
A suitable preparation layer can help create more even coverage on certain porous or uneven surfaces.
However, primer is not required for every stone and paint combination.
Check the manufacturer’s instructions before adding one.
A compatible outdoor protective finish may also help reduce wear from moisture, handling, and sunlight.
The protective product must be suitable for the paint underneath and the conditions where the stone will be displayed.
Do not assume that one coat of an ordinary indoor craft sealer will make a painted rock permanently waterproof.
Additional Rock Painting Supplies
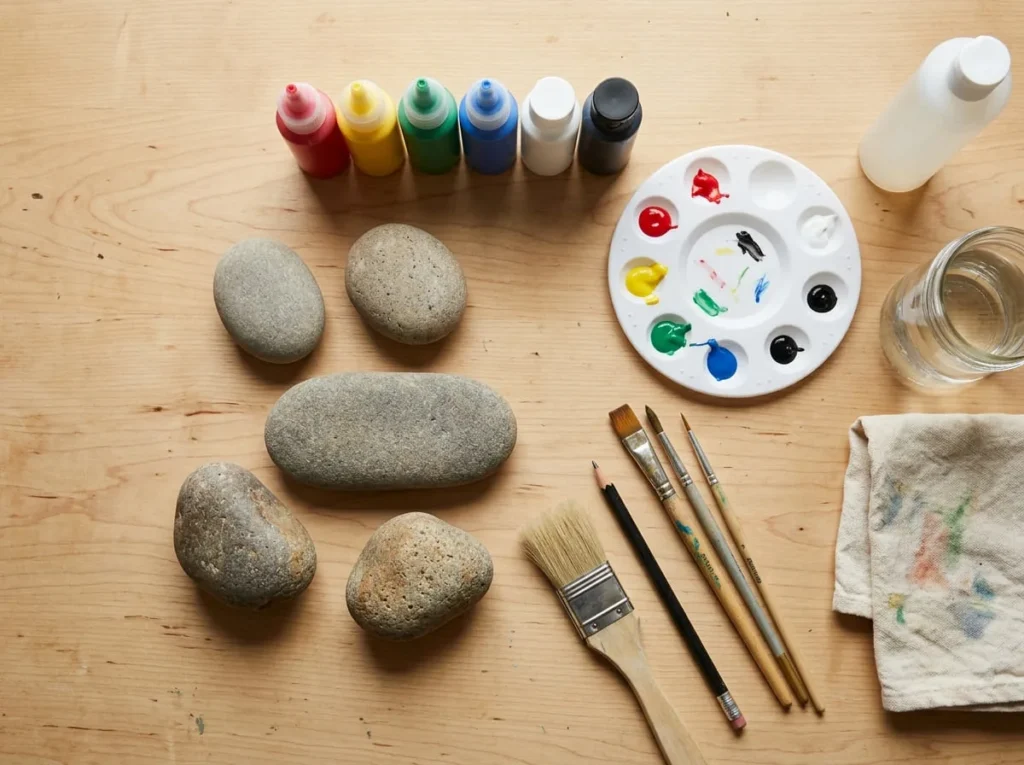
Along with your rocks, paint, and brushes, gather a few simple accessories:
- A container of clean water
- A soft cleaning brush
- A clean cloth or paper towels
- A pencil for planning designs
- A small palette for mixing colors
- Protective paper or a reusable craft mat
- Suitable primer or protective coating, if required
Keep your supplies organized before beginning.
If you plan to use a spray coating, follow the manufacturer’s ventilation, protective equipment, and application instructions. These products should be handled separately from the ordinary painting activity.
How to Choose and Prepare Rocks for Garden Painting
Preparing your rocks before painting is an important part of creating outdoor decorations.
Natural stones may contain dust, soil, moisture, and small particles that interfere with paint application.
Even when a rock looks clean, its surface may need attention before you begin.
A little preparation can help you achieve neater painted designs.
Look for Rocks with a Suitable Painting Surface
Start by examining the shape and texture of your rocks.
For a ladybug, choose a smooth oval stone with a rounded upper surface.
For plant markers, flatter stones usually provide more room for readable lettering.
Avoid rocks with large cracks, loose material, or surfaces that crumble when handled.
Check whether the stone can rest securely without rolling.
The shape should support the design you want to create.
For example, an oval rock naturally suits a ladybug body, while a long, narrow stone may work better for a decorative plant label.
Wash Away Dirt and Loose Particles
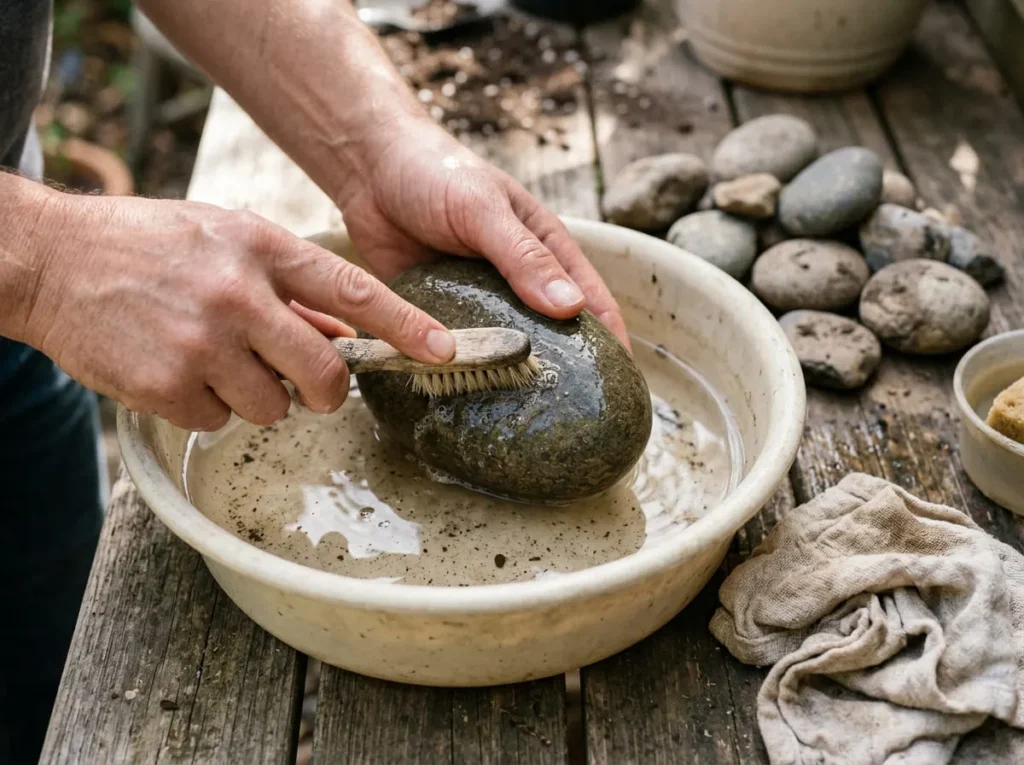
Before painting, clean your selected rocks.
Use water and a soft brush to remove soil, dust, and loose particles from the surface.
Gently scrub areas where dirt has collected in small grooves.
You do not need to use harsh cleaning chemicals for ordinary garden stones.
Rinse the rocks to remove remaining dirt and cleaning residue.
Check the surface again after washing.
If any loose particles remain, remove them carefully before proceeding.
A clean surface gives the paint a better opportunity to adhere to the stone.
Let the Rocks Dry Completely
After washing, place the rocks somewhere clean and allow them to dry thoroughly.
Do not paint them immediately while they are still wet.
Some stones contain small pores or cracks that can retain moisture even after the surface appears dry.
Trapped moisture may interfere with paint adhesion or affect later coatings.
Drying time depends on the type and size of the stone and the surrounding conditions.
Avoid using one fixed waiting time for every rock.
Check that the stone is thoroughly dry and follow any additional preparation instructions provided by your paint manufacturer.
Decide Whether Your Rock Needs a Base Coat
Some painted rock designs look attractive with natural stone visible around the artwork.
Others benefit from a solid background color.
For example, a flat gray stone with a simple painted flower may not need a complete base coat.
However, a bright red ladybug usually looks clearer when most of the visible upper surface is painted.
You can also use a compatible primer when the paint system requires it.
If you are unsure how your colors will appear, test them on a small area or a spare stone.
For our ladybug project, we will create a red background for the body and then add black details.
How to Make DIY Painted Rocks for Garden Decoration Step by Step
Now that your materials are ready, you can begin creating your first painted garden rock.
For this tutorial, we will make a simple red ladybug with a black head, a dividing line between its wings, and several black spots.
This design works well on a smooth oval stone and requires only a few colors.
We will also cover how to prepare the finished decoration for outdoor display.
Follow each step carefully, especially the drying and protective finishing stages.
Step 1: Select a Smooth, Rounded Rock
Choose a clean oval stone with a gently rounded upper surface.
The shape should resemble the body of a ladybug when viewed from above.
Place the stone on your worktable and check which side sits most securely.
Use the more suitable upper surface for painting.
Make sure the stone does not wobble excessively while you work.
If the rock has a few natural marks, you can usually leave them as long as the surface is stable and suitable for painting.
The goal is to choose a stone that makes the ladybug design easy to recognize.
Step 2: Clean and Dry the Rock
Even if your stone looks clean, inspect it for remaining dirt or dust.
Wash it with water and a soft brush if necessary.
Rinse away loose material and place it somewhere clean to dry completely.
Pay particular attention to small grooves where moisture may remain.
Do not begin painting until the stone is ready for the coating system you selected.
Place the dry rock on protective paper or a craft mat.
Keep your red and black paint, brushes, and water container nearby.
Step 3: Apply a Suitable Base Coat
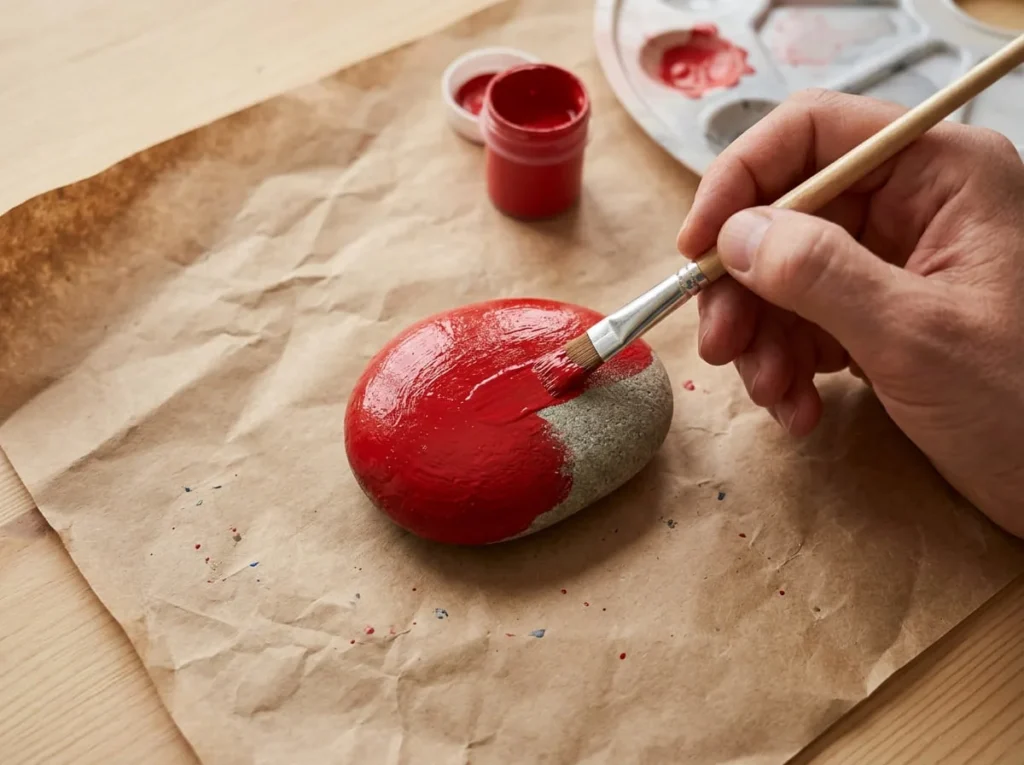
For our ladybug rock, the main body will be red.
If your chosen paint system requires a primer, prepare the stone according to those instructions and allow the primer to dry or cure as directed.
Next, use a small flat or medium round brush to apply red paint across the visible upper surface of the rock.
Work carefully around the curved edges.
Avoid loading the brush with too much paint because excess paint may collect in small grooves or run down the sides.
Allow the first coat to dry according to the manufacturer’s instructions.
If the stone still shows through more than you want, apply another thin coat.
You can paint the underside if your coating system requires it, but make sure each surface is ready to handle before turning the stone.
Should You Prime Rocks Before Painting?
Not every rock needs a separate primer.
Some paints are designed to be applied directly to properly prepared stone, while other products require a specific primer.
Porous stones may also absorb paint differently from smoother surfaces.
Before choosing a primer, check the paint manufacturer’s recommendations for stone or masonry surfaces.
Use compatible products rather than combining random primers, paints, and sealers.
For a simple decorative rock, the most important thing is to follow a suitable preparation and coating process.
Step 4: Sketch the Ladybug Design
Once the red background is dry enough for additional painting, plan your ladybug details.
Imagine the oval stone as the ladybug’s rounded body.
Near one end, lightly mark a curved section for the black head.
Next, draw a thin line along the center of the red body to divide the two wings.
Keep the line simple and follow the natural shape of the stone.
Lightly mark where you want to place the black spots.
You can use three or four spots on each side, depending on the size of your rock.
Try to leave enough space between them so they remain clearly visible.
You do not need perfect symmetry.
Slight variations can give your ladybug a natural handmade appearance.
Step 5: Paint the Head and Wing Details
Use a small round brush and black paint to fill the ladybug’s head.
Follow the curved guideline you created near one end of the rock.
Apply the paint carefully and avoid covering too much of the red body.
Next, use a fine detail brush to paint the central wing division.
Draw a dark line along the middle of the red surface, beginning near the black head and extending toward the opposite end.
Keep your brush movements controlled.
If the first line looks too light, allow it to dry before carefully adding more paint.
Do not repeatedly brush over partially dried paint because this may create uneven edges.
Step 6: Add the Ladybug Spots
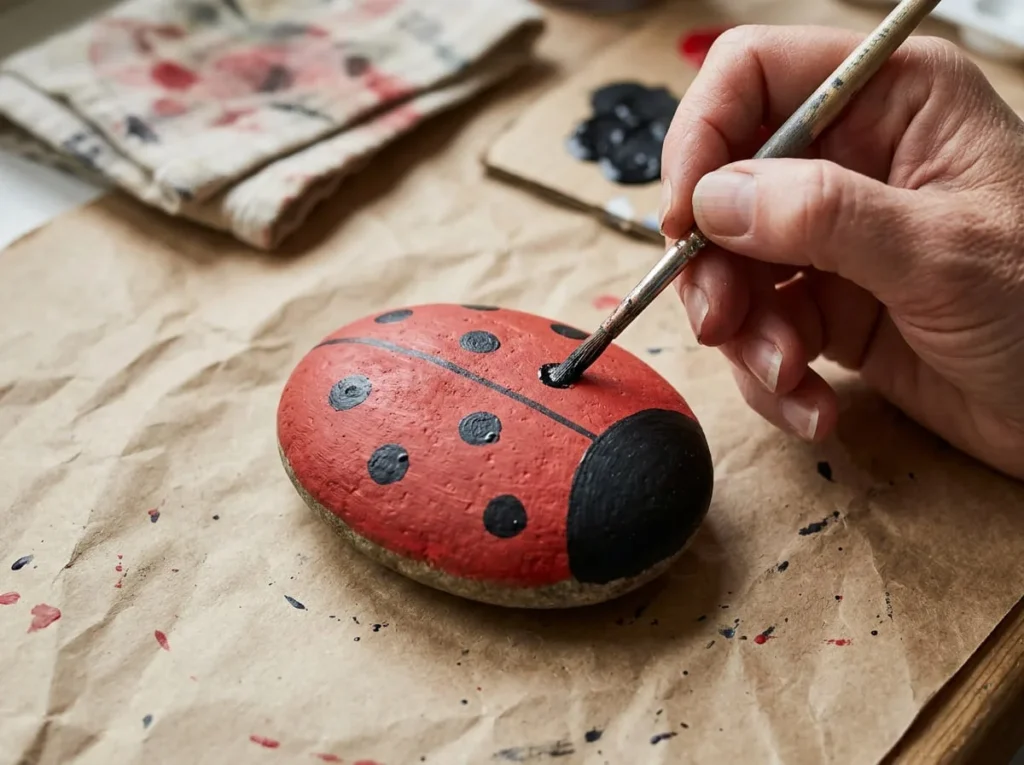
Now you can add the black spots that make your rock look like a ladybug.
Use a small round brush or a suitable dotting tool with black paint.
Place a few round spots on each side of the central wing line.
Make the spots large enough to be visible from a short distance.
Avoid placing them too close together.
If your stone is small, four or five spots across the whole body may be enough.
For a larger rock, you can add a few more.
Allow the black paint to dry before deciding whether any spots need correction.
You may also add two small white dots to the black head for a decorative appearance, but this is optional.
Step 7: Allow the Paint to Dry Properly
Once the ladybug design is complete, place the rock somewhere clean and protected.
Allow all painted areas to dry according to the instructions for your chosen product.
Do not touch the black spots or painted details while they are wet.
Remember that paint can feel dry before it has fully cured.
Some coatings need additional time before a protective finish can be applied.
Avoid rushing this stage because applying another product too early may affect the appearance or adhesion of the painted design.
Inspect the rock after the paint has dried sufficiently.
Check whether the spots, wing line, and red background look complete.
Step 8: Protect the Rock for Outdoor Display
If your ladybug rock will be displayed outdoors, consider the protective finishing requirements of your paint system.
Some exterior paints may be suitable for their intended exposure without a separate clear coat, while others may benefit from a compatible outdoor protective finish.
Choose a product specifically recommended for the painted surface and expected conditions.
Before applying it to the completed rock, test the coating on a separate painted sample when possible.
Follow the manufacturer’s instructions for application method, coat thickness, drying time, and curing.
If the finish is applied with a spray, work only in a suitable location and follow all ventilation and safety precautions.
Do not assume that applying more sealer will automatically provide better protection.
A compatible finishing system and correct application are more important than excessive coating thickness.
Step 9: Place Your Painted Ladybug in the Garden
After your painted ladybug rock has dried and any required protective finish has cured, choose a suitable garden location.
A decorative flower bed or planter can provide an attractive setting.
Place the stone on a stable surface where it will not roll or damage nearby plants.
Keep it away from walking surfaces where someone might trip over it.
Avoid placing freshly coated or deteriorating painted rocks where loose coating fragments could contaminate soil or water.
For edible gardens, use extra care with product suitability and placement.
If possible, choose a sheltered decorative location that reduces unnecessary exposure to heavy rain and strong sunlight.
Your painted ladybug can now add a cheerful handmade touch to your garden while serving as a starting point for more colorful garden rock designs.
12 Easy Painted Rock Ideas for Garden Decoration
Once you have painted your first ladybug rock, you can try other simple designs to decorate different areas of your garden.
Painted garden stones can feature colorful insects, flowers, fruits, plants, and decorative patterns. You can also use them as practical labels to identify herbs and vegetables.
The best designs are easy to recognize, suit the natural shape of the stone, and remain visible when placed among plants.
Here are 12 beginner-friendly garden rock painting ideas, along with suggested colors, simple instructions, and suitable outdoor display locations.
1. Painted Ladybug Rocks for Flower Beds
Suggested colors: Red, black, and optional white
Ladybug rocks are one of the easiest ways to add cheerful colors to a flower garden.
Their bright red bodies and black spots stand out beautifully against green leaves and natural soil.
You can paint several ladybugs using different rounded stones to create a small decorative collection.
How to Paint a Ladybug Garden Rock
1. Choose a smooth oval stone and clean it thoroughly.
2. Apply a suitable red base coat and allow it to dry.
3. Paint a black curved section near one end to create the head.
4. Use a detail brush to draw a thin black line dividing the wings.
5. Add several black spots on both sides of the line.
6. Allow the paint to dry and apply a compatible protective finish if required for outdoor use.
You can create variations by using slightly different red shades or changing the number and arrangement of spots.
Keep the pattern simple so each ladybug remains recognizable.
Garden placement: Arrange a few finished ladybug rocks along a flower bed border or inside a decorative planter, making sure they rest securely without pressing against plant stems.
2. Cute Painted Bee Rocks
Suggested colors: Yellow, black, white, and pale blue
Painted bee rocks are a fun addition to a garden filled with flowers.
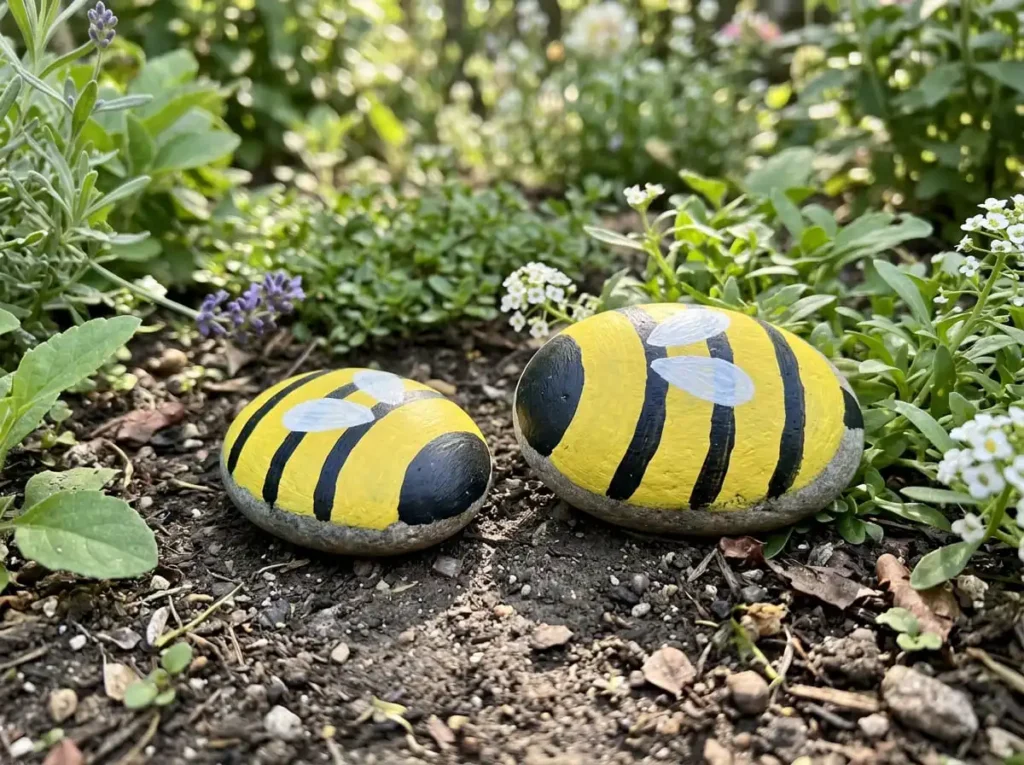
The design uses a bright yellow body, black stripes, and two small wings.
An oval stone works particularly well because its natural shape resembles a bee’s rounded body.
You can make the bee look cheerful without adding complicated facial details.
How to Paint a Bee on a Rock
1. Select a smooth oval stone and prepare its surface for painting.
2. Paint the visible upper surface yellow using a compatible paint.
3. Allow the yellow layer to dry before adding black details.
4. Use a small brush to paint two or three curved black stripes across the body.
5. Add a simple black head near one end of the stone.
6. Paint two small white or pale blue wings near the upper sides of the body.
7. If desired, add two tiny white eye dots after the darker paint has dried.
8. Finish the decoration according to your outdoor coating system’s instructions.
Avoid adding too many narrow stripes because they may become difficult to paint on a small stone.
Garden placement: Place a painted bee rock near decorative flowering plants, without disturbing real bees or other pollinators visiting the flowers.
3. Simple Flower Painted Rocks
Suggested colors: Pink, yellow, white, and green
Flower-painted rocks can brighten garden planters even when nearby plants are not blooming.
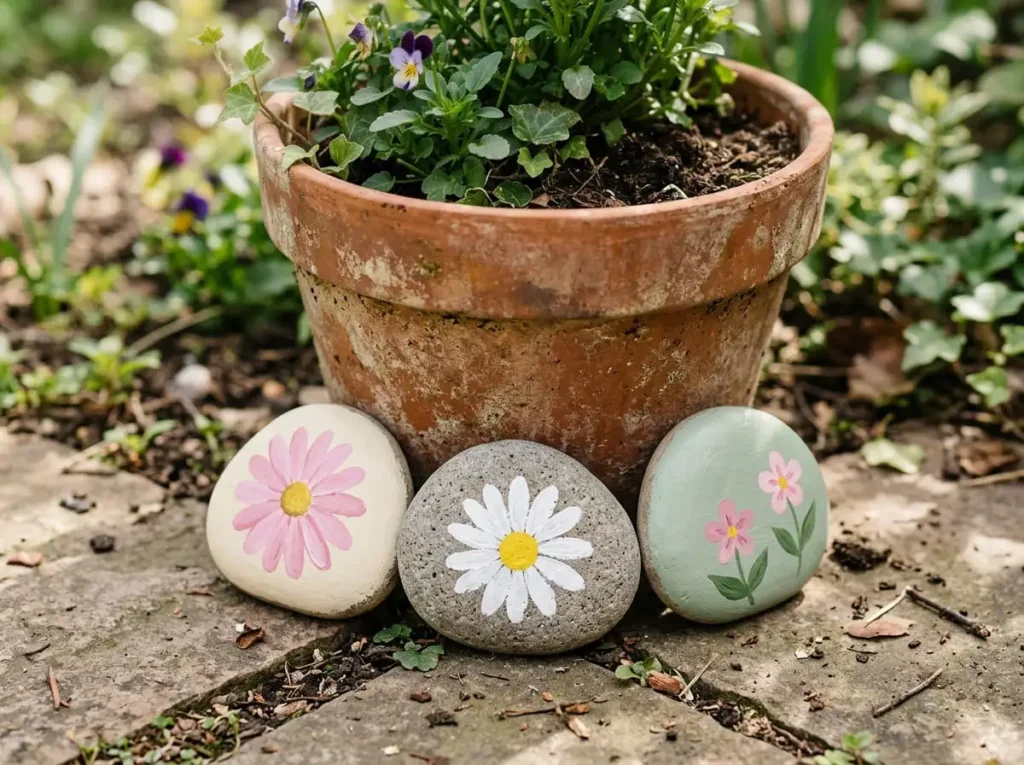
You can create daisies, simple pink flowers, or colorful floral patterns using basic brush strokes.
Flat stones are especially useful because they provide enough room for rounded petals and small decorative details.
How to Paint Easy Flowers on Garden Stones
1. Choose a smooth, fairly flat rock and clean it.
2. Decide whether to leave the natural stone visible or apply a suitable background color.
3. Lightly mark a small circle near the center of the rock.
4. Paint the circle yellow to create the flower center.
5. Add five or six rounded petals around the circle using pink or white paint.
6. Use green acrylic paint to add one or two small leaves if there is enough space.
7. Allow the design to dry before applying any required compatible outdoor finish.
You can create several flower rocks using different petal colors while keeping the same basic pattern.
Garden placement: Arrange painted flower stones around the outer edge of an ornamental planter or create a small decorative group near a flower bed.
4. Strawberry Painted Garden Rocks
Suggested colors: Red, green, yellow, and optional black
Strawberry-painted rocks are a cute idea for garden decorations, particularly if you enjoy growing fruit.
Rounded stones with a slightly pointed end can resemble strawberries naturally.
The design is easy to create using a red background, green leaves, and tiny yellow seed marks.
How to Paint Strawberry Rocks
1. Choose a smooth stone with a shape similar to a strawberry.
2. Clean and dry the stone thoroughly.
3. Paint the visible surface red and allow the base coat to dry.
4. Use green paint to create several small pointed leaves near the wider end.
5. Add a short green stem if the shape allows enough space.
6. Use a fine detail brush to paint small yellow seed marks across the red body.
7. Add a second layer of color where needed after the previous paint has dried.
8. Protect the finished stone using a suitable outdoor finishing method.
Keep the seed marks spaced apart rather than covering the entire rock with tiny dots.
Garden placement: Display strawberry rocks in a decorative container beside your strawberry plants or near a garden bed. Avoid placing painted stones where children or animals might mistake them for food.
5. Painted Rock Herb Garden Markers
Suggested colors: Cream, dark green, white, and optional accent colors
Painted rock herb markers combine garden decoration with a practical purpose.
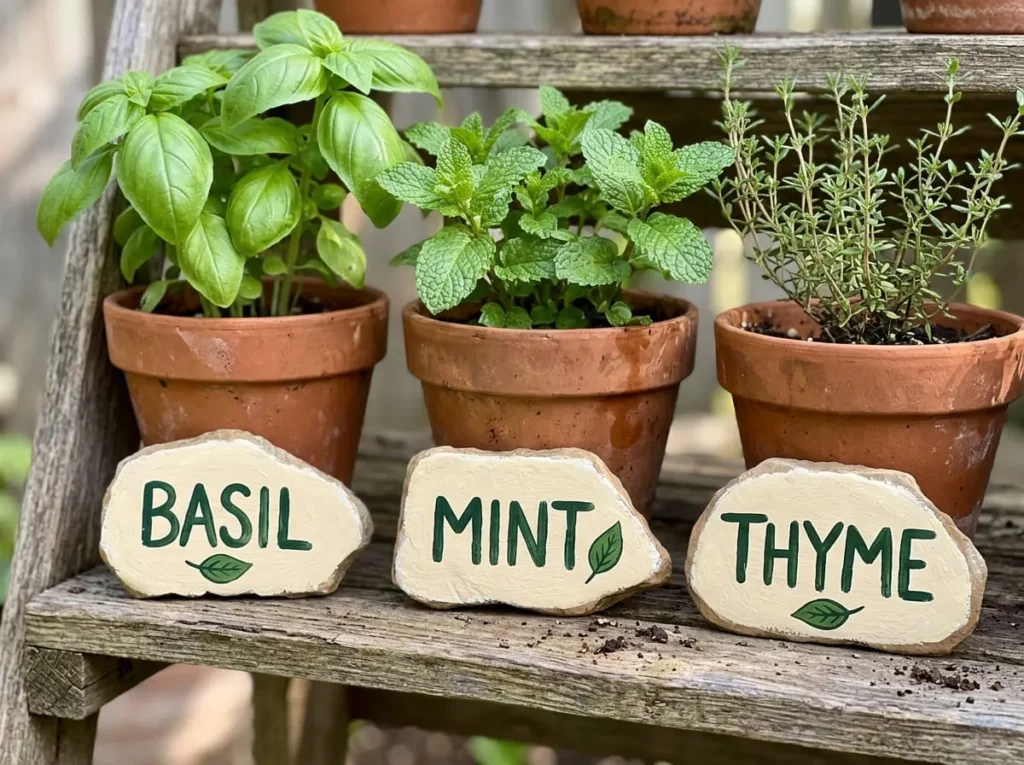
Instead of using ordinary plastic labels, you can paint short herb names on smooth flat stones.
These markers are useful for identifying different plants while adding a handmade appearance to an herb garden.
How to Make Painted Herb Name Rocks
1. Choose flat stones with enough room for readable lettering.
2. Clean the stones and allow them to dry completely.
3. Apply a cream or other light-colored background using suitable paint.
4. Lightly sketch a short herb name such as “BASIL,” “MINT,” or “THYME.”
5. Use a small brush or compatible paint pen to paint the letters in dark green.
6. Add a simple leaf near the lettering if desired.
7. Allow the paint to dry or cure as directed before finishing the stone.
8. Apply a suitable protective coating if needed for your outdoor display conditions.
Choose large, simple letters rather than thin decorative handwriting.
Garden placement: Position each herb marker beside the correct plant, keeping it clear of the plant’s crown and avoiding areas where the stone could interfere with watering or drainage.
6. Vegetable Garden Marker Rocks
Suggested colors: Green, orange, red, and white
Vegetable garden marker rocks can help you identify crops while making your planting area look more organized.
You can paint simple pictures of vegetables alongside their names.
For example, a carrot marker might feature a small orange carrot and the word “CARROT,” while a tomato marker could have a red tomato illustration.
How to Paint Vegetable Labels on Stones
1. Select a smooth flat rock with enough surface area for a small picture and short word.
2. Clean and dry the rock before painting.
3. Apply a light background color if needed for better contrast.
4. Lightly sketch a simple vegetable shape near one side of the stone.
5. Paint the vegetable using basic colors, such as orange for carrots or red for tomatoes.
6. Add small green leaves or stems.
7. Write the vegetable name using clear, readable letters.
8. Allow the paint to dry properly and finish it with a compatible protective system if required.
Avoid detailed illustrations that make the labels difficult to read.
Garden placement: Place the markers at the edges of raised vegetable beds or in a separate decorative holder rather than burying painted surfaces in food-growing soil. Choose coating products and locations that minimize the risk of paint or finish fragments entering the soil.
7. Painted Mushroom Garden Rocks
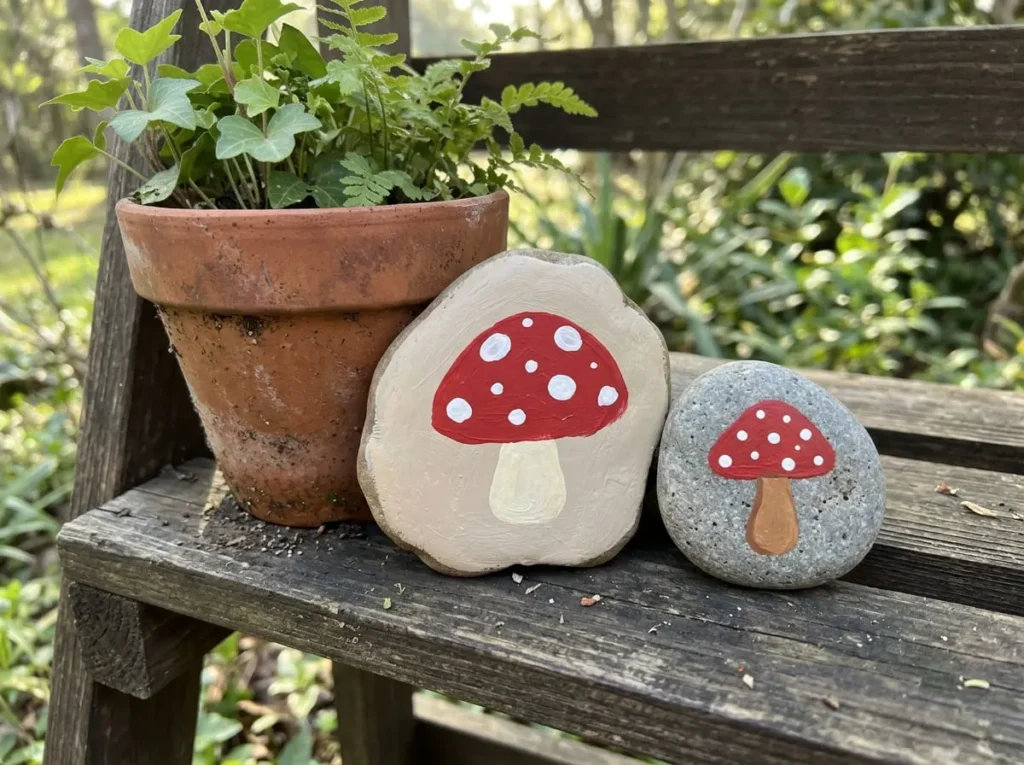
Suggested colors: Red, white, beige, and brown
Mushroom-painted rocks can create a charming decoration for garden corners and flower beds.
You can paint a simple mushroom illustration on a flat stone without changing the rock’s shape.
The classic red mushroom with white spots is especially easy for beginners to recognize and recreate.
How to Paint a Cute Mushroom Rock
1. Choose a smooth, flat rock and prepare its surface.
2. Apply a light beige background or leave the natural stone visible if suitable.
3. Sketch a short mushroom stem near the lower center.
4. Draw a large rounded mushroom cap above the stem.
5. Paint the stem cream or light brown.
6. Fill the mushroom cap with red paint.
7. After the red paint dries, add several small white spots.
8. Use a small amount of brown paint to add a simple shadow beneath the mushroom cap if desired.
9. Allow the painted details to dry and apply the appropriate protective finish when needed.
Keep the mushroom large enough to remain visible from a short distance.
Garden placement: Place mushroom-painted rocks near decorative plants, beside a garden shelf, or in a sheltered corner of an ornamental flower bed.
8. Colorful Butterfly Painted Stones
Suggested colors: Purple, blue, pink, and black
Butterfly designs can make painted garden stones look colorful and delicate.
A smooth, fairly flat stone provides enough space for two pairs of wings and a small central body.
You do not need to paint a realistic butterfly. Simple wing shapes and a few colored sections are enough.
How to Paint Butterfly Designs on Rocks
1. Choose a flat stone and clean the surface thoroughly.
2. Apply a light background color if you want the butterfly to stand out.
3. Sketch a short vertical line near the center for the butterfly’s body.
4. Draw two larger upper wings and two smaller lower wings.
5. Paint the wings using purple, blue, and pink acrylic colors.
6. Allow the main colors to dry before adding outlines.
7. Use black paint and a detail brush to create the central body and simple wing borders.
8. Add a few small decorative dots if desired.
9. Finish the rock according to the paint and protective coating instructions.
Try to keep the wings reasonably balanced without worrying about perfect symmetry.
Garden placement: Arrange butterfly stones near flower planters or in a decorative garden display where their colorful designs remain visible.
9. Mini Cactus Painted Rocks
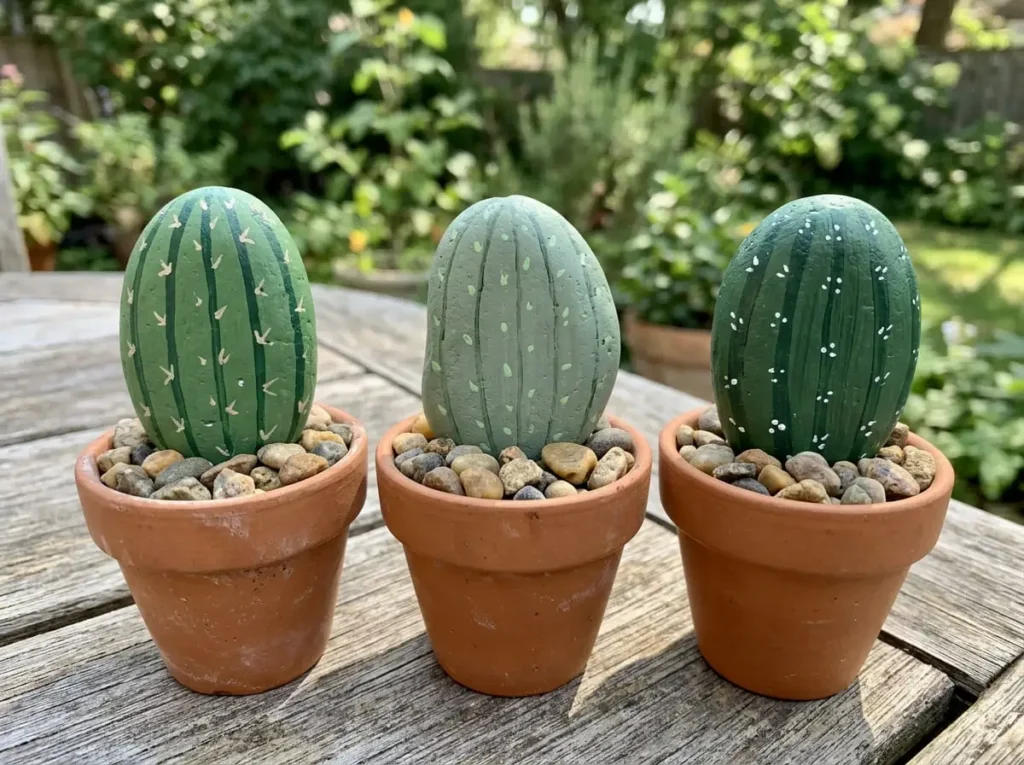
Suggested colors: Green, dark green, white, and terracotta
Painted cactus rocks are an interesting garden decoration because they resemble tiny potted plants.
Instead of painting a cactus picture on a flat stone, you can transform an upright oval rock into the cactus itself.
This makes the project a little different from ordinary painted rock designs.
How to Turn Rocks into Painted Cacti
1. Select a smooth oval stone that can sit securely in a decorative pot.
2. Clean the rock and allow it to dry completely.
3. Apply a compatible green paint across the visible surface.
4. Let the paint dry before adding details.
5. Use a fine brush and dark green paint to create a few subtle vertical lines.
6. Add short white or pale green marks to represent cactus spines.
7. Allow the painted design to dry properly.
8. Apply an appropriate outdoor protective finish if required.
9. Place the finished cactus stone upright in a stable decorative pot filled with suitable supporting pebbles.
You can make several cactus rocks using different green shades.
Garden placement: Display painted cactus stones inside a decorative outdoor pot or on a sheltered patio table. Make sure the rocks cannot tip over or roll.
10. Rainbow Painted Garden Stones
Suggested colors: Red, orange, yellow, green, blue, and purple
Rainbow-painted stones are a cheerful way to add several colors to a garden.
You can create a simple rainbow on one flat rock or paint different stones in coordinated colors.
For beginners, a rainbow with a few broad bands is easier to paint than one containing many narrow lines.
How to Paint a Rainbow on a Rock
1. Choose a flat, smooth stone with enough room for a curved design.
2. Clean and dry the stone thoroughly.
3. Apply a suitable light background if desired.
4. Sketch a broad rainbow arch using a pencil.
5. Paint the outer curved band red.
6. Add orange, yellow, green, blue, and purple bands toward the center, adjusting the number of colors to the space available.
7. Allow neighboring bands to dry when necessary to prevent unwanted mixing.
8. Use a small brush to correct uneven edges after the paint dries.
9. Apply a compatible outdoor protective finish if needed.
Leave some background visible around the rainbow so the design does not feel crowded.
Garden placement: Arrange rainbow rocks along decorative flower borders or in a sheltered garden display where their colors can be seen easily.
11. Simple Mandala Garden Rocks
Suggested colors: Dark blue, white, yellow, and teal
Mandala-painted stones can create attractive decorative accents in a garden.
Although detailed mandalas may look complicated, beginners can create simple designs using a central dot and a few surrounding circles.
You do not need to cover the entire stone with intricate patterns.
How to Paint a Basic Dot Mandala
1. Choose a smooth, flat or rounded stone.
2. Clean and dry the surface thoroughly.
3. Apply a dark blue background if desired and allow it to dry.
4. Use a small detail brush or suitable dotting tool to place one yellow dot near the center.
5. Add a ring of small white dots around the central dot.
6. Create another ring using teal dots, leaving enough space between the marks.
7. Add a few smaller dots between the larger ones if the stone has enough room.
8. Allow the design to dry and protect it appropriately for outdoor display.
Start with only two surrounding rings instead of a complicated pattern.
Garden placement: Use a larger mandala-painted stone as a decorative focal point in a sheltered planter or along a garden border.
12. Painted Garden Message Rocks
Suggested colors: Cream, dark green, white, and muted pink
Painted message rocks are a simple way to add short, cheerful words to your garden.
You can use words such as “GROW,” “BLOOM,” or “JOY” to create a welcoming handmade decoration.
Flat stones are useful for this project because they provide enough space for lettering.
How to Paint Short Words on Garden Rocks
1. Choose a smooth, flat stone with a broad painting surface.
2. Clean and dry it thoroughly.
3. Apply a cream or light-colored background if needed.
4. Lightly sketch your chosen word in large, simple letters.
5. Use dark green acrylic paint and a small detail brush to follow the lettering outlines.
6. Fill the letters carefully using controlled brush strokes.
7. Add a few small pink flowers or green leaves near the edges.
8. Allow the lettering and decorations to dry completely.
9. Apply a compatible finishing product if required for outdoor use.
Avoid long phrases or complicated lettering styles.
Short words are easier to read when the stones are displayed among plants.
Garden placement: Position message rocks on a stable garden shelf, in a sheltered decorative planter, or beside ornamental flowers.
How to Arrange Painted Rocks in Your Garden
Once your painted rocks are ready for outdoor display, you can arrange them in different ways to complement your plants and garden layout.
The best placement depends on the size of your rocks, the designs you have painted, and the space available.
Keep safety and plant care in mind when creating decorative arrangements.
Decorate Flower Bed Borders
Painted rocks can add colorful accents along the edges of flower beds.
You might place a few ladybug stones between ornamental plants or arrange flower-painted rocks along part of a border.
Choose stable positions where the stones will not roll into walking areas.
Avoid placing heavy rocks directly against delicate stems or shallow-rooted plants.
A few grouped decorations can look more balanced than a long line of closely packed painted stones.
Add Painted Rocks to Garden Planters
Decorative planters are another suitable place for painted rocks.
Small flower, bee, or butterfly stones can complement the colors of the plants.
Choose stones that fit comfortably without covering large areas of the potting surface.
Avoid blocking drainage holes or placing heavy stones where they could compress delicate plants.
For edible planters, be especially careful about coating suitability and the risk of chipped paint entering the soil.
Create a Small Painted Rock Garden Display
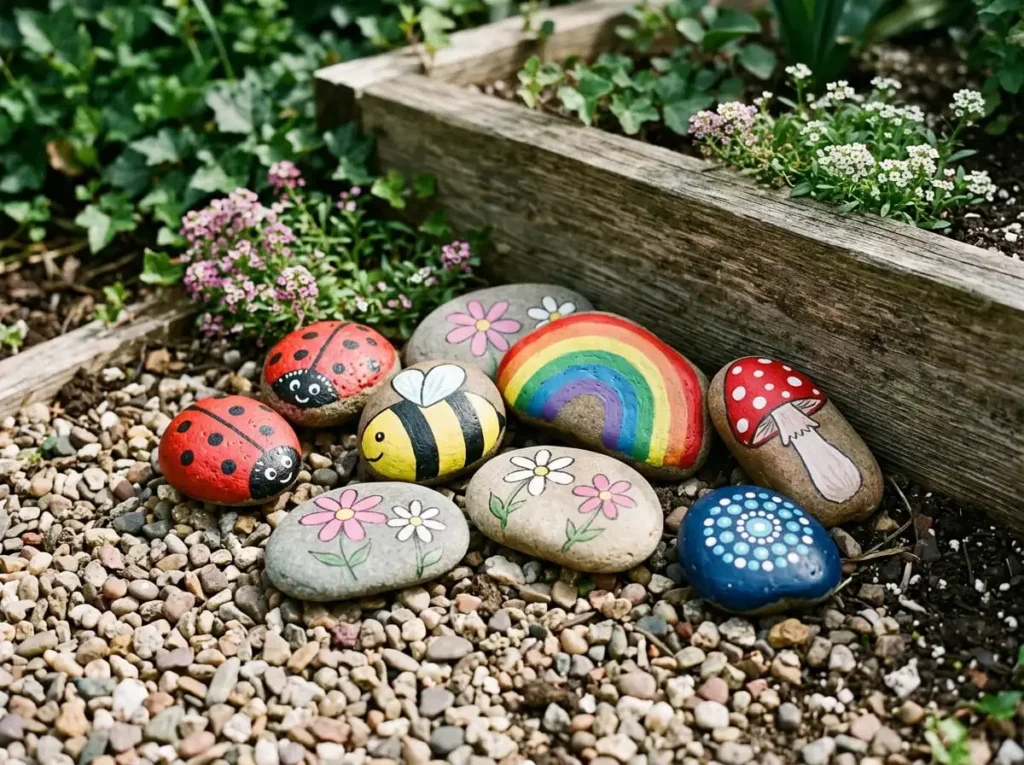
You can make a dedicated decorative area using several painted stones.
For example, combine two ladybugs, one mushroom, and a few simple flower rocks on a stable display surface.
You can also arrange matching colors together to create a coordinated appearance.
Leave enough space between the decorations so each design remains visible.
Choose a location that does not interfere with plant growth, maintenance, or drainage.
Use Painted Rocks as Plant Labels
Painted rock markers are useful for identifying herbs, vegetables, and ornamental plants.
Choose stones with enough room for clear lettering.
Keep the words short and use colors that are easy to read.
Position each marker near the correct plant without burying painted surfaces unnecessarily.
Check the labels occasionally because outdoor weathering may make the lettering less visible over time.
Display Painted Rocks Along Garden Paths
Painted stones can decorate the sides of garden paths when positioned carefully.
Place them beside the walking surface rather than directly in areas where people step.
Choose stable locations where stones cannot easily roll, shift, or create tripping hazards.
You can arrange several flower or rainbow rocks near a path border to add color.
Avoid placing loose decorative stones where they may obstruct drainage, lawn maintenance, or normal movement through the garden.
How to Protect Painted Rocks for Outdoor Use
Protecting painted rocks is especially important when you plan to display them in a garden.
Unlike indoor decorations, garden rocks may be exposed to rain, direct sunlight, moisture, and changing temperatures. These conditions can gradually affect the paint and the stone underneath.
Choosing suitable materials and following the correct finishing process can help your decorations remain attractive for longer.
However, no ordinary protective finish can guarantee that painted rocks will remain unchanged outdoors forever.
Choose Paint Suitable for Outdoor Conditions
Before painting garden rocks, check whether your chosen paint is recommended for outdoor use on stone.
Certain exterior-rated acrylic paints and suitable multi-surface paints are designed to withstand specific outdoor conditions.
However, not every acrylic craft paint provides the same level of protection.
Some paints work well for indoor decorations but may fade, peel, or deteriorate when repeatedly exposed to rain and sunlight.
Choose products according to the stone surface and intended display location.
If you plan to apply a protective finish, make sure it is compatible with the paint underneath.
Allow Paint to Dry and Cure Before Sealing
One common mistake is applying a protective coating before the painted design is ready.
Acrylic paint may feel dry to the touch while still requiring additional time before another coating can be applied.
Applying a sealer too early may affect the paint surface, cause smearing, or interfere with the finishing process.
Allow the base color, decorative details, and lettering to dry according to the manufacturer’s instructions.
Check the recommended waiting time before applying another product.
Do not assume that every paint requires the same drying or curing period.
Select a Compatible Outdoor Protective Finish
If your paint system requires additional protection, choose a clear coating suitable for the painted stone and the expected outdoor conditions.
Some protective finishes are designed to resist moisture and sunlight, but their performance depends on the product and application method.
A coating labeled water-resistant is not necessarily waterproof.
Similarly, a finish intended for outdoor use does not guarantee complete protection against prolonged rain, strong sunlight, or freezing temperatures.
Check the manufacturer’s instructions to confirm that the finish can be used over your chosen paint.
For a more detailed explanation of protective products and finishing techniques, our article How to Seal Painted Rocks Outdoors covers the process step by step.
Apply the Protective Finish Correctly

The way you apply a protective coating can affect the finished appearance of your painted garden rocks.
Follow the instructions provided with the specific product rather than using the same method for every sealer.
Test the Sealer on a Painted Sample
Before applying a protective finish to your completed decoration, test it on a separate painted stone.
Use the same paint and surface preparation as your main project.
Apply the sealer according to its instructions and check whether it changes the colors, appearance, or texture.
Allow the sample to dry or cure before evaluating the result.
Follow the Recommended Application Method
Different protective coatings may require brushing, spraying, or another application method.
Use the method recommended by the manufacturer.
Avoid applying excessively thick layers because they may cause drips, pooling, or an uneven finish.
If additional coats are required, follow the recommended waiting time between applications.
When using spray products, work in an appropriate location and follow all ventilation and protective equipment instructions.
Allow the Coating to Cure Before Display
After applying the protective finish, place the rock somewhere clean and protected.
Allow the coating to dry and cure according to the manufacturer’s directions.
Avoid placing the rock outside immediately if the finish is not ready for exposure.
Handling or moving the stone too early may damage the coating.
Once the finish has cured, check that the painted surface looks complete before displaying it.
Understand the Limits of Weather Protection
Even properly painted and protected garden rocks may change in appearance over time.
Sunlight can cause certain colors to fade, while moisture and temperature changes can affect the coating.
Repeated freezing and thawing may also damage some stones or finishes.
A protective sealer can improve resistance to certain conditions, but it cannot prevent every type of outdoor damage.
Choose a suitable display location and inspect your decorations occasionally.
If a rock begins peeling or developing cracks, consider removing it from the garden until it can be repaired safely.
How to Keep Painted Garden Rocks Looking Good
A little regular care can help painted garden rocks maintain their appearance.
Outdoor decorations collect dust, soil, and moisture, so it is useful to check them occasionally.
You do not need an elaborate maintenance routine, but careful cleaning and suitable placement can make a difference.
Choose a Suitable Outdoor Location
Try to display painted rocks where they will not experience unnecessary exposure to harsh conditions.
A sheltered garden shelf, covered patio, or protected flower bed may reduce direct rain and sunlight.
However, a sheltered location does not eliminate all moisture or weather exposure.
Choose a position that suits the materials used and allows the rock to remain stable.
Remove Loose Dirt Gently
Painted garden rocks may collect soil, dust, and fallen leaves.
Remove loose dirt using a soft, dry brush or another cleaning method recommended for the protective finish.
Avoid scrubbing aggressively because this may scratch or damage the painted surface.
Do not use harsh cleaning chemicals unless the coating manufacturer specifically recommends them.
Check for Fading, Peeling, or Cracks
Inspect your painted garden stones occasionally.
Look for fading colors, peeling paint, cracks, or areas where the protective finish has worn away.
These problems can indicate that the decoration needs attention.
If a painted layer begins flaking, remove the rock from areas where loose coating could enter garden soil or water.
Repair Small Damaged Areas When Appropriate
Small scratches or faded details may sometimes be repaired.
Before repainting, make sure the damaged surface is clean, dry, and stable.
Remove loose coating using a method suitable for the materials.
Apply compatible paint to the affected area and allow it to dry or cure properly.
Restore the protective finish when required by the coating system.
If the damage is extensive, replacing the decoration may be easier than repairing it.
Store Delicate Painted Rocks During Harsh Weather
Some decorative stones may benefit from temporary indoor storage.
For example, a small painted rock made with materials intended for sheltered display may not tolerate prolonged freezing weather or heavy rain.
If severe weather is expected, consider moving delicate decorations to a dry, protected location.
Store them carefully so their painted surfaces do not rub against each other.
Common Mistakes When Painting Rocks for the Garden
Painting rocks for outdoor decoration is a simple craft, but certain mistakes can affect the results.
Many problems happen because the stone was not prepared properly, unsuitable paint was used, or the protective coating was applied incorrectly.
Understanding these issues can help you create more reliable garden decorations.
Painting Dirty or Damp Rocks
Paint may not adhere properly when the stone contains dust, soil, grease, or moisture.
Even if a rock looks clean, small particles can remain in its surface grooves.
Wash your stones before painting and allow them to dry thoroughly.
Follow any additional preparation requirements provided by the paint manufacturer.
Using Paint Not Suitable for Outdoor Exposure
Ordinary acrylic craft paints are not automatically designed for repeated outdoor exposure.
Some may fade or deteriorate when exposed to moisture and sunlight.
Before starting a garden project, check whether the paint is recommended for the intended surface and conditions.
Do not rely on a protective sealer to make unsuitable paint weatherproof.
Applying Too Much Paint at Once
Thick paint layers can create drips, uneven coverage, and unwanted buildup around curved stone surfaces.
Apply controlled amounts of paint using a suitable brush.
Allow each coat to dry according to the product instructions before adding another layer.
Several carefully applied coats may provide a neater result than one excessively thick coat.
Adding Small Details to Rough Stones
Highly textured rocks can make thin lines, tiny dots, and detailed lettering difficult to paint.
Paint may collect inside grooves or spread unevenly across the surface.
For detailed designs, choose smoother stones.
If you want to use a naturally rough rock, select a simpler pattern with larger shapes.
Sealing Before the Paint Is Ready
Applying a clear finish before the paint is sufficiently dry or cured can cause problems.
The coating may disturb the painted design or fail to perform as expected.
Always follow the manufacturer’s recommended waiting times.
Test the finishing process on a separate painted stone when possible.
Assuming Sealed Rocks Are Permanently Waterproof
A protective coating does not automatically make a painted rock permanently waterproof.
Outdoor conditions can gradually wear down paint and finishes.
Rain, sunlight, temperature changes, and physical contact may affect the decoration over time.
Choose suitable products, follow their instructions, and inspect painted rocks occasionally.
Placing Painted Rocks in Unsafe Locations
Garden decorations should not create hazards for people, animals, or plants.
Avoid placing loose painted stones in walking areas where someone might trip.
Do not block drainage openings or press heavy rocks against delicate plant stems.
Keep small painted stones away from children who may put objects in their mouths.
Avoid placing deteriorating painted rocks near ponds, streams, or other areas where coating fragments could enter the water.
In vegetable gardens, use extra care to prevent paint or finish fragments from entering food-growing soil.
Can Kids Help Make Painted Garden Rocks?
Yes, children can enjoy painting simple garden rocks when the activity uses suitable materials and adult supervision.
Garden rock painting can be a creative way to explore colors, shapes, and decorative patterns.
However, the project should be adapted to the child’s age and abilities.
Choose Simple Age-Appropriate Designs
For younger children, choose easy designs such as flowers, colorful dots, or simple shapes.
Older children may enjoy creating ladybugs, bees, or plant markers.
Avoid requiring very detailed patterns that may be frustrating to complete.
Let children experiment with colors while keeping the project manageable.
Use Suitable Child-Friendly Materials
Choose paints and craft supplies that are appropriate for the child’s age and follow the manufacturer’s safety instructions.
Avoid products containing ingredients unsuitable for children’s use.
Provide a protected workspace and supervise the painting activity.
Make sure children wash their hands after handling paint and craft materials.
Let Adults Handle Certain Finishing Products
Some protective coatings, particularly aerosol sealers and solvent-based finishes, are not suitable for children to apply.
Adults should handle these products according to the manufacturer’s safety directions.
Keep children away from the application area and allow the coating to cure properly before handling the finished decorations.
Do not assume that a finishing product is safe for children simply because it is sold in a craft store.
Choose Safe Places to Display the Finished Rocks
After the painted rocks are ready for outdoor use, choose stable display locations.
Avoid areas where someone could trip over the stones.
Keep small rocks away from young children who may put them in their mouths.
Make sure the decorations do not interfere with plants, pets, or normal garden activities.
Frequently Asked Questions
What Kind of Paint Should You Use on Garden Rocks?
Choose paint that the manufacturer recommends for stone surfaces and the outdoor conditions where the rock will be displayed. Certain exterior-rated acrylic paints and suitable multi-surface paints may work well. Check product compatibility, surface preparation requirements, and drying instructions before starting.
Can You Use Regular Acrylic Paint on Outdoor Rocks?
Regular acrylic craft paint can be used for practicing rock painting and making indoor decorations, but it may not withstand long-term outdoor exposure. Some acrylic products are formulated specifically for exterior use. For garden rocks, choose suitable outdoor-rated materials rather than assuming all acrylic paints have the same durability.
How Do You Prepare Rocks for Outdoor Painting?
Start by selecting a solid stone with a suitable surface. Wash away dirt and loose particles using water and a soft brush. Rinse the rock and allow it to dry thoroughly. If your paint system requires a primer, apply a compatible product according to its instructions before painting.
Do You Need to Prime Rocks Before Painting?
Not every rock needs primer. Some paints are suitable for direct application to properly prepared stone, while others require a specific primer. Stone porosity and surface texture can also affect coverage. Follow the paint manufacturer’s preparation instructions and test the materials on a spare rock when possible.
What Are the Easiest Garden Rock Painting Ideas?
Ladybugs, flowers, bees, strawberries, rainbows, and simple plant labels are good beginner projects. These designs use basic shapes and a limited number of colors. Smooth rocks make painting easier, especially when you want to add small details or lettering.
How Do You Make Painted Rock Plant Markers?
Choose smooth, flat stones with enough space for short plant names. Clean and dry the rocks, then paint a suitable background if needed. Add readable lettering using a small brush or compatible paint pen. Allow the design to dry and protect it according to the outdoor finishing system before placing the marker near the appropriate plant.
Do Painted Garden Rocks Need Sealing?
Not every painted garden rock requires a separate sealer. Some exterior paint systems may provide suitable protection without an additional clear coat. Other products may benefit from a compatible outdoor protective finish. Check the paint and coating manufacturers’ instructions before deciding whether sealing is necessary.
Can Painted Rocks Stay Outside in the Rain?
Painted rocks may be suitable for rainy outdoor conditions when the stone, paint, and protective finishing system are designed for that exposure. However, repeated moisture can gradually affect some coatings. Ordinary indoor craft paint and sealer should not be assumed to provide reliable rain resistance.
How Do You Keep Painted Garden Rocks from Fading?
Choose paint and finishing products rated for the expected outdoor exposure, including sunlight where relevant. Follow the manufacturer’s application instructions and allow coatings to cure properly. Displaying rocks in partially sheltered locations may help reduce exposure. Inspect the decorations occasionally for fading or damage.
Are Painted Rocks Safe to Put in Flower Beds?
Painted rocks can be used as decorative accents in flower beds when their materials are suitable for the intended environment and they are placed carefully. Avoid blocking drainage, damaging plant stems, or creating tripping hazards. Remove stones if their coatings begin peeling or flaking.
Can You Put Painted Rocks in Vegetable Gardens?
It is best to use extra caution when displaying painted rocks in vegetable gardens. Not all paints and protective coatings are intended for contact with food-growing soil. Unless the manufacturer confirms suitability for that use, keep decorated stones in separate holders or on stable displays outside the growing soil. Avoid direct contact with edible plant parts and remove any rocks with damaged coatings.
How Long Do Painted Rocks Last Outdoors?
There is no universal lifespan for outdoor painted rocks. Durability depends on the stone, paint formulation, protective finish, weather exposure, and maintenance. Some decorations may need touch-ups sooner than others. Using compatible outdoor materials and choosing a suitable display location can help improve longevity.
Final Thoughts
DIY painted rocks for garden decoration are a creative way to add handmade color and personality to flower beds, planters, and outdoor displays.
You can start with simple designs such as ladybugs, flowers, bees, or colorful plant markers using only a few basic supplies.
Choose suitable stones, clean and dry them carefully, and use paints and finishes appropriate for the intended outdoor conditions.
Remember to display your decorations securely without damaging plants or creating hazards.
With a little creativity and proper care, painted garden rocks can become cheerful decorative accents that make your outdoor space feel more personal and welcoming.