
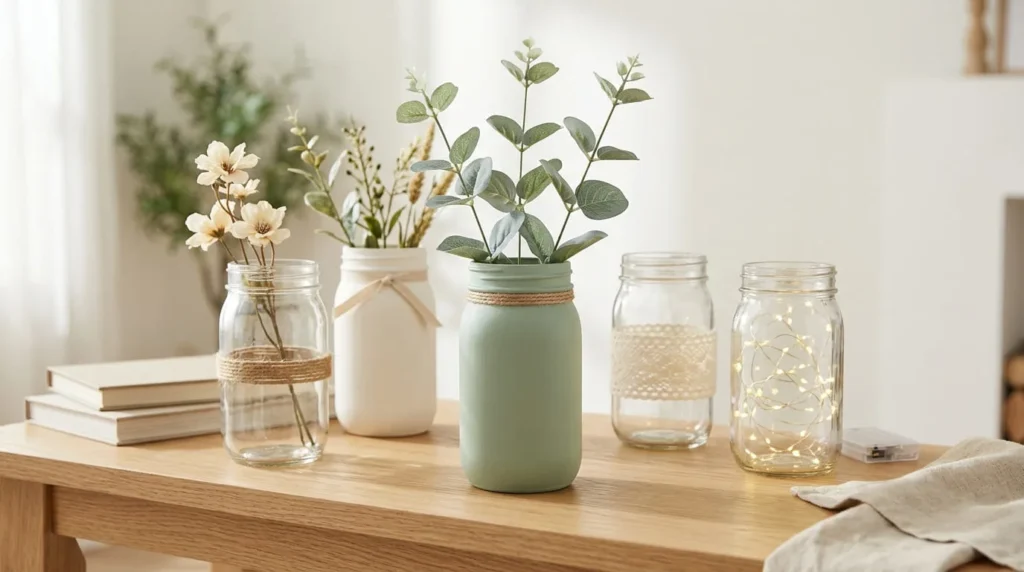
DIY mason jar crafts for home decoration are a creative and affordable way to turn ordinary glass jars into beautiful handmade accessories. With simple materials such as acrylic paint, twine, ribbon, lace, and faux flowers, you can create decorations that add charm and personality to different areas of your home.
You do not need advanced crafting skills or expensive equipment to get started. Many mason jar projects involve basic painting, wrapping, gluing, and arranging techniques that beginners can learn easily.
You can make a rustic flower vase for your living room, a decorative organizer for your bedroom, or a simple centerpiece for an entryway table.
The best part is that you can reuse suitable empty glass jars instead of purchasing new decorative containers.
In this guide, you will discover 15 easy mason jar craft ideas, learn how to make a painted mason jar vase step by step, and find practical tips for preparing, decorating, and displaying your finished projects.
Why Use Mason Jars for DIY Home Decoration?
Mason jars are useful craft materials because they are versatile, widely available, and easy to personalize.
Their simple glass shape provides a suitable surface for many decorative techniques, including painting, wrapping, stenciling, and adding small embellishments.
You can create different designs depending on your decorating style and the supplies you already have.
Mason Jars Are Affordable and Easy to Find
One of the main advantages of mason jar crafts is that you do not need expensive materials.
You may already have clean, reusable glass jars at home.
If you do not have any suitable jars, simple glass craft jars are often available at home stores or craft shops.
You can decorate them using leftover ribbon, small pieces of fabric, twine, or paint from other craft projects.
For example, a plain glass jar can become a decorative flower vase with a simple twine band and a few faux stems.
Choose jars that are clean, stable, and free from cracks or chipped edges.
You Can Decorate Mason Jars in Different Styles
Mason jars can be adapted to many decorating styles.
For farmhouse décor, try a matte white painted jar with a simple neutral ribbon.
If you prefer rustic decorations, leave the glass clear and wrap part of the jar with natural jute twine.
A modern home may suit a simple color-blocked jar in cream and sage green.
You can also create vintage-inspired designs using lace, soft floral patterns, and muted colors.
The key is choosing a few coordinated materials rather than adding too many unrelated decorations.
Mason Jars Work in Different Rooms
Decorative mason jars can be displayed in several areas of the home.
A painted jar with faux greenery can look attractive on a living room console.
In a bedroom, a simple jar can hold makeup brushes or serve as a decorative accessory.
A group of three jars may create an attractive centerpiece for an entryway table.
You can also use jars on kitchen shelves for dry decorative displays.
Choose a stable location and keep glass jars away from edges where they could fall.
Consider the room’s humidity, available space, and nearby heat sources before deciding where to place a decorated jar.
What Materials Do You Need for Mason Jar Crafts?
Most beginner mason jar projects require only a few basic supplies.
The materials you choose will depend on whether you want to paint the glass, wrap it with fabric, add paper decorations, or create a simple display.
You do not need to purchase every possible craft material at once.
Start with one project and collect only the supplies necessary to complete it.
Clean Mason Jars and Reused Glass Containers
The most important material is a suitable glass jar.
You can use a clean mason jar or another reusable glass container with a similar shape.
Choose jars with a flat, stable base and no visible damage.
Inspect the rim, sides, and bottom for cracks, chips, or sharp edges.
Do not use damaged jars for craft projects because broken glass can cause injuries.
A simple jar with a wide opening works well for faux flower arrangements or lightweight decorative accessories.
For your first project, choose a jar that is comfortable to hold and easy to decorate.
Glass-Compatible Acrylic Paint and Primer
Paint can transform a plain glass jar into a colorful home decoration.
However, not every acrylic paint is designed to adhere properly to smooth glass.
Choose a glass-compatible acrylic paint or a paint system specifically recommended for glass surfaces.
Some products may require a suitable primer, while others can be applied directly after cleaning.
Read the product instructions before starting.
Soft colors such as sage green, cream, dusty pink, and muted blue work well for many home decorating styles.
For a matte decorative appearance, choose a product that provides the desired finish and is suitable for your project.
Remember that painted glass decorations are not automatically waterproof, dishwasher-safe, or food-safe.
Paintbrushes, Sponges, and Basic Craft Tools
A few basic tools can make decorating easier.
A small flat brush may be suitable for covering larger sections of a jar, depending on the paint.
A soft sponge applicator can help some glass-compatible paints produce a more even appearance.
Fine detail brushes are useful for adding flowers, leaves, dots, and simple patterns.
You may also need scissors, a ruler, a pencil, and a protective craft mat.
Choose tools recommended for the paint or adhesive you are using.
Avoid using sharp tools directly against the glass unless the technique and tool are specifically intended for that purpose.
Twine, Ribbon, Lace, and Fabric Scraps
Natural twine, cotton ribbon, lace, and fabric scraps are useful for adding texture to mason jar decorations.
You can wrap a small section of a jar with jute twine for a rustic appearance.
A simple cotton ribbon around the upper body can create a farmhouse-style decoration.
Lace can add a softer vintage-inspired look.
Choose materials that are easy to attach and do not make the jar unstable.
Keep decorations away from the jar opening when they might interfere with the intended display.
For beginners, one neat decorative band is usually enough.
Decorative Paper, Adhesives, and Stencils
Decorative paper can be attached to suitable glass jars using a compatible decoupage medium.
You can use simple botanical cutouts, geometric patterns, or small floral designs.
Stencils are another useful option for creating repeated patterns.
Choose adhesives that are recommended for glass and the material you want to attach.
For example, an adhesive suitable for paper may not be the best choice for thick twine.
Avoid applying excessive glue because it may create visible lumps or leave messy marks on the glass.
Follow the manufacturer’s instructions for application and curing.
Optional Protective Finishes and Decorations
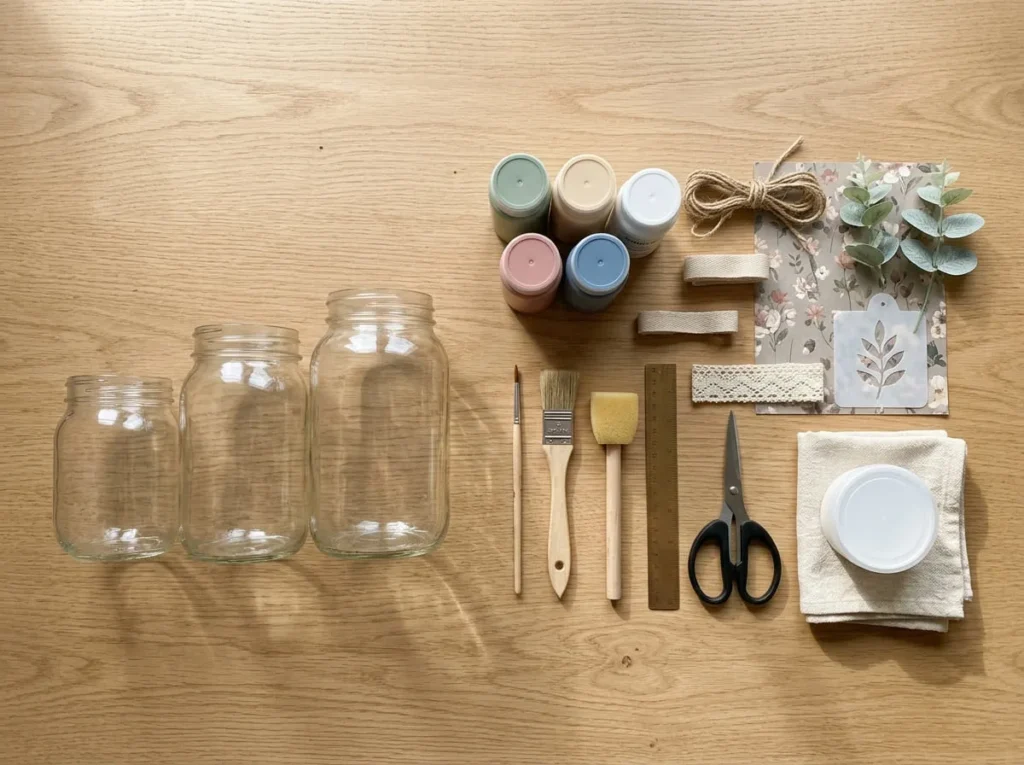
Some painted mason jar crafts may benefit from a compatible protective finish.
The need for a coating depends on the paint, intended use, and manufacturer instructions.
Do not assume that ordinary craft sealers make glass decorations waterproof or safe for food contact.
For displaying finished jars, you can use faux flowers, lightweight decorative stems, or suitable battery-operated LED lights.
Choose decorations that fit comfortably inside the jar without making it top-heavy.
Avoid open flames, high heat, and electrical products that are not designed for use inside enclosed containers.
How to Prepare Mason Jars Before Decorating
Preparing the glass properly can help paint and adhesive attach more evenly.
Glass surfaces often look clean even when they contain fingerprints, grease, or leftover adhesive.
Taking a little time to prepare the jar can improve the finished appearance and make the decorating process easier.
Remove Labels and Adhesive Residue
If you are reusing a glass jar, begin by removing any paper labels.
Follow a suitable label-removal method that will not damage the glass.
You can often loosen ordinary paper labels with warm water, but check the jar and its condition before washing.
Remove any remaining adhesive using an appropriate cleaning product or gentle method.
Avoid aggressive scraping with sharp tools.
Once the labels are removed, check that the glass feels smooth and clean.
Any remaining sticky patches may interfere with painting or attaching decorations.
Wash and Dry the Jars Thoroughly
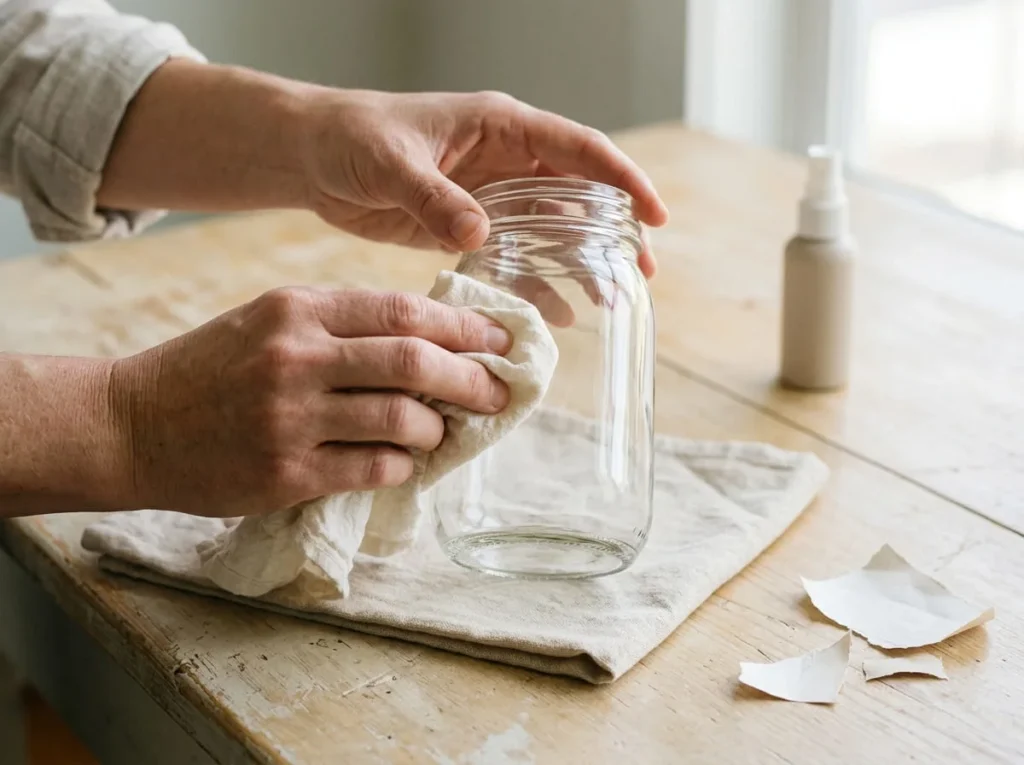
Wash the jar using an appropriate glass-cleaning method to remove dust, grease, and fingerprints.
Pay attention to the outside surface where you plan to apply paint.
Rinse away any cleaning residue if required.
Dry the jar thoroughly using a clean cloth.
Allow any remaining moisture to evaporate before decorating.
Paint or adhesive may not attach properly to damp glass.
Handle the clean jar by areas that will not be decorated whenever possible to reduce fingerprints on the prepared surface.
Check for Cracks, Chips, and Sharp Edges
Before decorating, examine the entire jar carefully.
Look at the rim, sides, base, and any threaded sections near the opening.
Do not use a jar with visible cracks or chipped glass.
Damaged glass can break unexpectedly or cause cuts during handling.
Also check that the jar stands securely on a flat surface.
If the base is uneven or the jar wobbles, choose another container.
A stable, undamaged jar is a better choice for a decorative project.
Choose the Right Paint or Adhesive for Glass
Smooth glass does not behave like wood, paper, or cardboard.
Some ordinary craft paints and glues may peel or separate from glass surfaces.
Choose products specifically suitable for glass and the intended decorative use.
Check whether the surface needs primer or another preparation step.
Follow the manufacturer’s instructions for application, drying, and curing.
Avoid combining products unless their compatibility is supported.
If you are unsure about the final appearance, test the paint or adhesive on a separate suitable glass sample before decorating your main jar.
Decide How the Finished Jar Will Be Used
Before beginning your project, decide where the jar will be displayed and what it will hold.
A painted jar with faux flowers has different requirements from a container intended for water or food.
For this guide, most projects are designed for dry indoor decoration.
Decorated glass jars should not automatically be treated as suitable for food storage or direct food contact.
Similarly, paint, twine, lace, and craft adhesives may not be appropriate for candle holders or high-temperature applications.
Choose a decorative use that matches the materials and construction of your finished project.
How to Make a Painted Mason Jar Vase Step by Step
A painted mason jar vase is one of the easiest ways to turn an ordinary glass container into an attractive handmade decoration.
For this project, you will create a matte sage green mason jar with a simple natural jute twine band around the upper body.
The finished vase will hold a few lightweight faux eucalyptus stems.
This combination works well with farmhouse, rustic, and modern home décor.
The project does not require complicated painting techniques or advanced craft tools.
However, using paint suitable for glass and allowing it to cure properly are important for a successful result.
Step 1: Gather Your Materials
Choose one clean mason jar without cracks, chips, or sharp edges.
Gather a glass-compatible acrylic paint in sage green, a suitable primer if required, and a brush or sponge recommended for the paint.
You will also need natural jute twine, scissors, and an adhesive suitable for attaching twine to the decorated surface.
Choose two or three lightweight faux eucalyptus stems for the finished arrangement.
Keep a protective craft mat and a clean cloth nearby.
If the paint manufacturer recommends additional preparation materials or a compatible finish, gather those as well.
Arrange everything on a clean worktable before starting.
Step 2: Clean and Dry the Glass Jar
Make sure the jar is free from labels, adhesive residue, dust, and fingerprints.
Wash or clean the outside surface using a method recommended for the glass and paint system.
Dry the jar completely.
Check the glass again for moisture or greasy patches.
Place the jar upright on your protected work surface.
Avoid touching the areas you plan to paint unnecessarily.
Starting with clean, dry glass can help the coating adhere more evenly.
Step 3: Apply Glass Primer if Needed
Check the instructions for your chosen glass-compatible paint.
Some products recommend using a primer, while others do not require one.
If primer is needed, choose a compatible product designed for the surface.
Apply it according to the manufacturer’s directions.
Work carefully around the curved glass body and avoid leaving thick buildup near the base.
Keep the rim, opening, and inner surface free from decorative coatings.
Allow the primer to dry or cure as required before applying the main color.
Do not skip recommended preparation steps because they may affect paint adhesion.
Step 4: Paint the Jar Sage Green
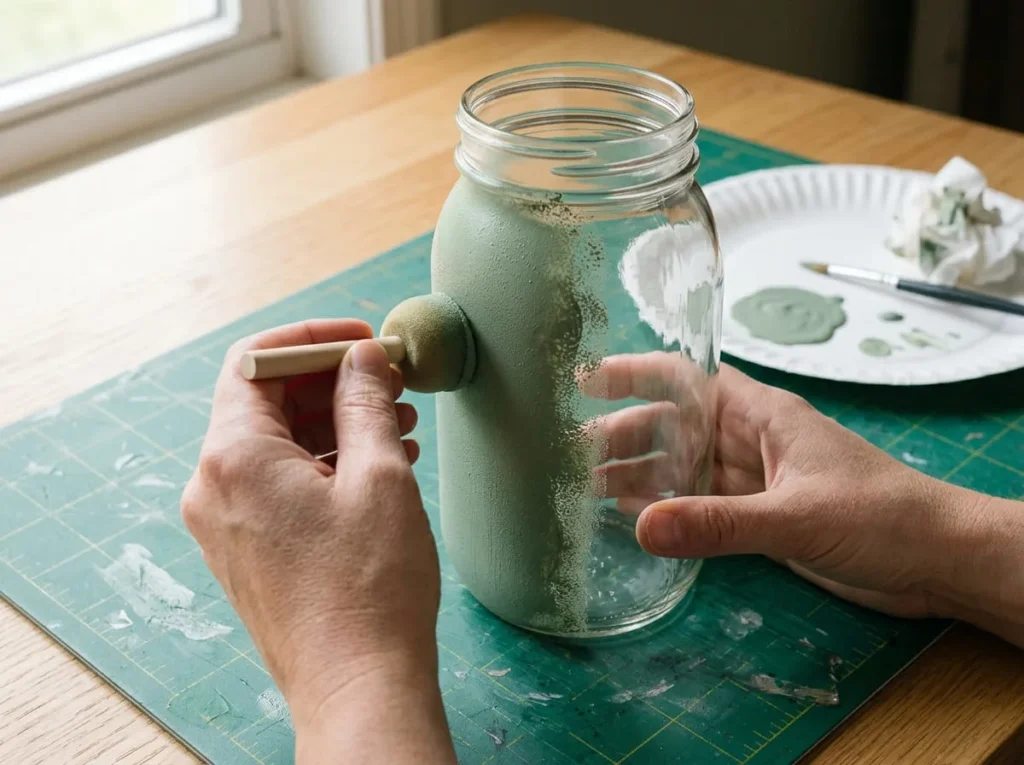
Pour a small amount of sage green glass-compatible paint onto a suitable palette.
Use a brush or sponge applicator recommended for the paint.
Begin applying the color to the outside of the jar.
Work around the curved glass surface using controlled movements.
Apply a thin, even coat rather than trying to cover the entire jar with one thick layer.
Keep the jar upright and avoid touching freshly painted areas.
Leave the opening and interior unpainted.
If the glass remains slightly visible through the first coat, do not worry.
Some paints require multiple thin coats to achieve even coverage.
Step 5: Let the Paint Dry Between Coats
Once the first coat is complete, place the jar in a clean, protected area.
Allow the paint to dry according to the manufacturer’s instructions.
Avoid handling the painted surface while it is wet.
Do not use direct heat to speed up the process unless the paint system specifically requires and permits that method.
Drying times vary depending on the product and surrounding conditions.
Some glass paints also require additional curing steps before reaching their intended durability.
Follow the instructions carefully before adding another coat.
Step 6: Add a Second Coat if Needed
Inspect the jar after the first coat has dried sufficiently.
Look for thin patches, uneven coverage, or areas where the glass is still visible.
If the manufacturer recommends another coat, apply it using the same controlled technique.
Work carefully around the entire body of the jar.
Avoid applying excessive paint near the raised glass lettering or textured sections, if present.
A second thin coat can help create a more consistent sage green appearance.
Allow the paint to dry as directed before continuing.
How to Avoid Brush Marks and Uneven Paint
Using too much paint can create visible ridges or uneven patches.
Start with a small amount of paint on your brush or sponge.
Work in controlled sections and avoid repeatedly brushing over paint that has started to set.
Choose an applicator recommended for the product.
For some glass paints, gentle sponge application may help create a more even finish.
Do not force the paint to become perfectly smooth if the product is designed to leave a particular texture.
A few subtle handmade variations are normal.
The goal is an attractive, consistent decorative finish.
Step 7: Wrap Jute Twine Around the Jar
Once the paint has reached the stage recommended for adding decorations, you can begin the twine accent.
Choose a section around the upper body of the jar, below the opening and threaded rim.
Measure enough jute twine to create a simple decorative band.
Place the first section of twine against the jar to check its position.
Wrap the twine carefully around the glass body.
Keep the strands close together without pulling excessively tight.
Continue until the band looks balanced.
A narrow band is usually enough to add rustic texture without covering too much of the sage green paint.
Step 8: Secure the Twine Neatly
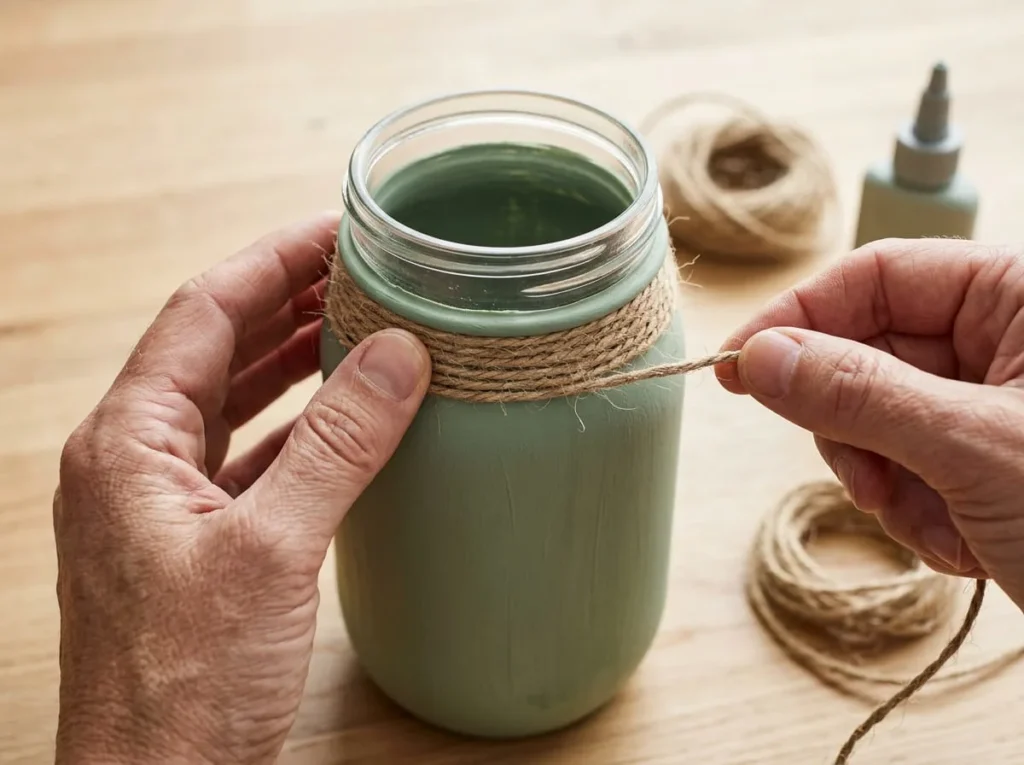
Use an adhesive suitable for the twine and the finished painted surface.
Check that the paint is sufficiently cured for the adhesive method you are using.
Apply the adhesive carefully according to its instructions.
Secure the starting end of the twine and continue attaching the band in small sections.
Keep the wraps reasonably even.
When the band is complete, trim the excess twine and secure the final end neatly.
Avoid leaving loose strands or large visible adhesive lumps.
Do not apply adhesive inside the jar or around the opening.
Allow the adhesive to dry or cure before handling the decoration further.
Step 9: Allow the Jar to Cure Properly
After painting and attaching the twine, leave the jar in a clean, protected location.
Follow the paint and adhesive manufacturers’ instructions for full curing.
Remember that a surface may feel dry before it has reached its intended durability.
Avoid placing objects inside the jar if doing so could damage the finish or disturb the decorative band.
Do not wash or soak the finished decoration unless the products specifically permit it.
Once everything has cured properly, inspect the twine and paint for loose sections.
Your jar should now have a matte sage green body with a neat natural twine accent.
Step 10: Add Faux Greenery and Display the Jar
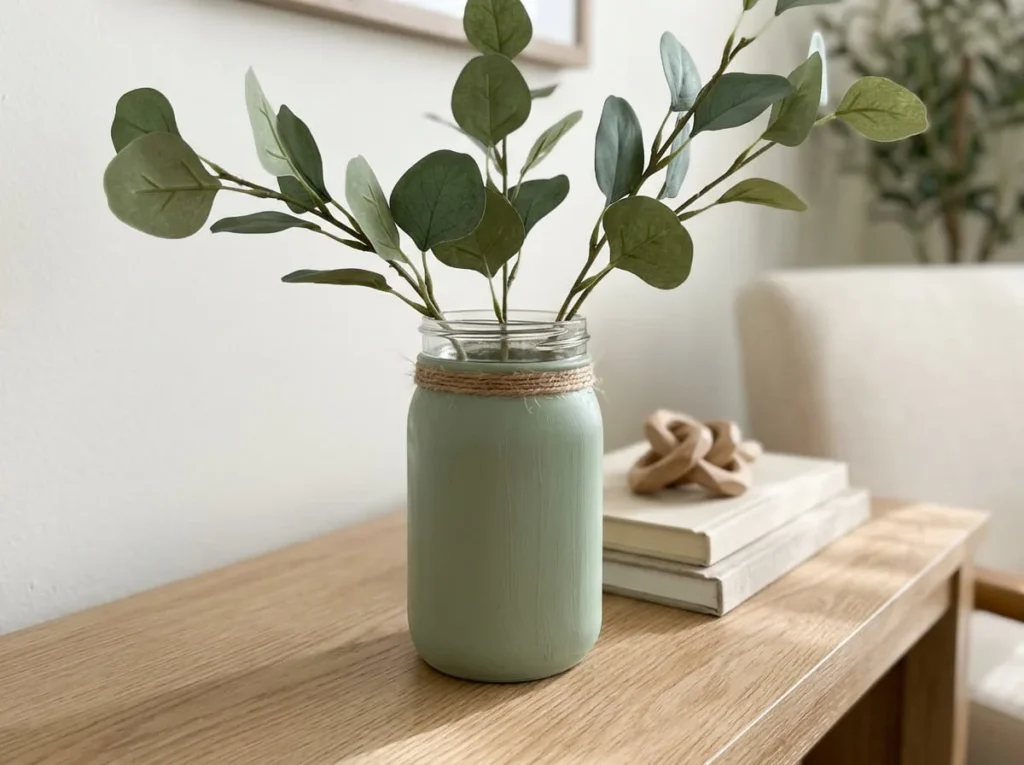
Choose two or three lightweight faux eucalyptus stems that fit comfortably inside the jar.
Arrange the stems so they spread naturally above the opening.
You can gently adjust the flexible stems to create a balanced shape.
Avoid adding too many stems because a crowded arrangement may make the jar appear top-heavy.
Place the finished mason jar vase on a stable shelf, dresser, coffee table, or entryway console.
A light wooden surface and neutral background can complement the sage green paint and natural twine.
Keep the decoration away from edges where it could fall, as well as from open flames, excessive heat, and frequent moisture.
Your painted mason jar vase is now complete, with a soft sage green finish, rustic twine detail, and simple faux greenery that adds a handmade touch to your home.
15 Easy DIY Mason Jar Crafts for Home Decoration
Mason jars are one of the most versatile materials for creating affordable handmade home decorations. With simple supplies such as twine, paint, ribbon, lace, and battery-operated lights, you can transform ordinary glass containers into attractive accessories for different rooms.
These DIY mason jar crafts for home decoration include rustic flower vases, farmhouse-style jars, decorative organizers, botanical designs, and creative light displays.
Most projects use clean, reusable glass jars and beginner-friendly decorating techniques. You do not need advanced painting skills or expensive crafting equipment to achieve beautiful results.
Before starting any project, inspect the jar for cracks, chips, or sharp edges. Choose paints and adhesives suitable for glass, and keep decorative jars away from excessive heat and open flames.
The following eight ideas offer different ways to decorate mason jars while keeping the projects practical, affordable, and easy to recreate.
1. Rustic Twine-Wrapped Mason Jar Vase
Materials: Clean glass mason jar, natural jute twine, glass-compatible craft adhesive, scissors, and lightweight faux flowers.
Best location: Living room or entryway.
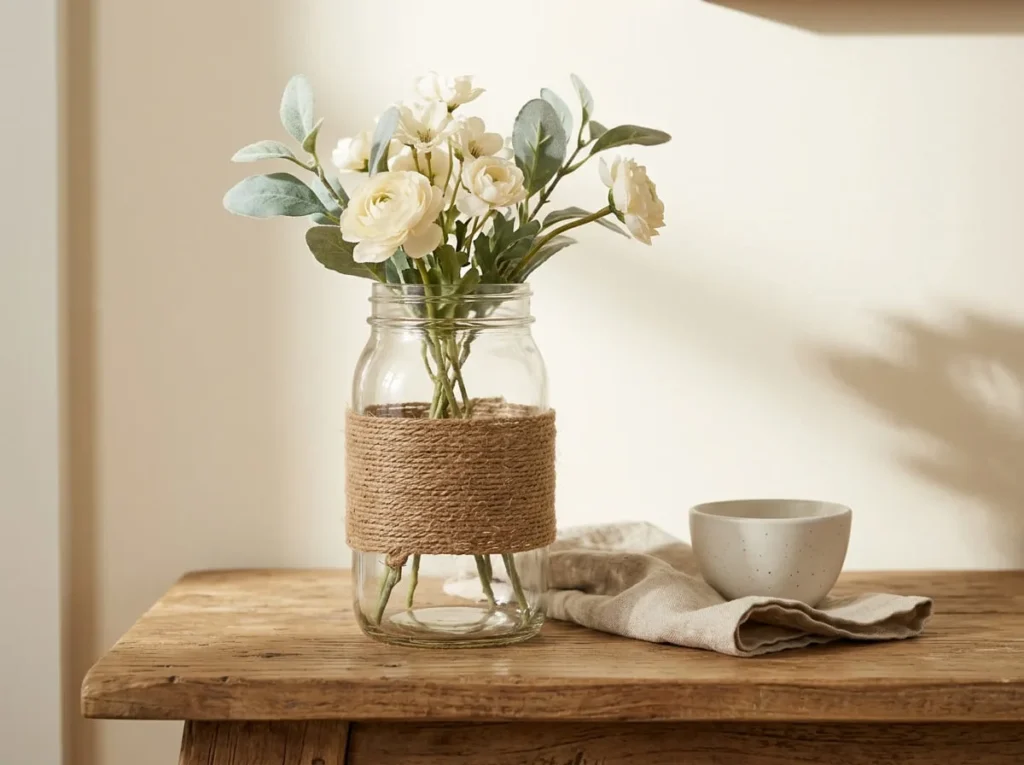
A rustic twine-wrapped mason jar is a simple way to add natural texture to your home.
Unlike a fully painted jar, this design leaves most of the clear glass visible. A band of natural jute twine around the lower or middle section creates a warm farmhouse-inspired appearance.
You can display the finished jar with cream-colored faux flowers, eucalyptus stems, or other lightweight decorative greenery.
This project works particularly well with natural wood furniture, woven baskets, and neutral home accessories.
How to Make a Rustic Twine Mason Jar
- Choose a clean, undamaged glass mason jar with a stable base.
- Remove any labels and adhesive residue from the outside.
- Wash and dry the jar thoroughly before decorating.
- Decide where you want the twine band to appear.
- Measure a suitable length of natural jute twine.
- Apply a small amount of compatible adhesive to the starting point.
- Begin wrapping the twine around the jar, keeping the strands close together.
- Continue wrapping until the decorative band reaches your desired width.
- Secure the final end neatly and allow the adhesive to cure according to its instructions.
- Add two or three lightweight faux flower stems and display the jar securely.
You can tie a small twine bow around the finished band if you want an additional decorative detail.
Avoid covering the entire jar with bulky layers of twine. Leaving part of the clear glass visible creates a lighter appearance.
Beginner tip: Keep the wraps close together and use only enough adhesive to secure them. Excess glue can become visible through the clear glass.
2. Farmhouse White Painted Mason Jar

Materials: Clean mason jar, glass-compatible white acrylic paint, suitable primer if needed, paintbrush or sponge, and optional cotton ribbon.
Best location: Farmhouse-style living room or bedroom.
A farmhouse white mason jar is an attractive choice for homes decorated with cream textiles, light wooden furniture, and natural accessories.
The soft white finish gives an ordinary glass jar a simple handmade appearance.
You can leave the jar completely white or add one narrow beige ribbon around the upper body.
This design works well for displaying lightweight faux greenery or decorative stems.
How to Paint a Farmhouse Mason Jar
- Choose a clean glass mason jar without cracks or chipped edges.
- Remove labels, adhesive residue, and fingerprints.
- Dry the glass thoroughly.
- Check whether your glass-compatible paint requires primer.
- Apply primer if recommended and allow it to dry as directed.
- Use a suitable brush or sponge to apply a thin coat of matte white paint to the exterior.
- Allow the first coat to dry according to the product instructions.
- Apply another thin coat if needed for more even coverage.
- Once the coating is sufficiently cured, attach a simple cotton ribbon if desired.
- Allow all materials to finish curing before arranging lightweight faux stems inside the jar.
You can create a coordinated display using two white jars with different heights.
Place them on a stable console table beside a small wooden ornament.
Beginner tip: Use thin paint layers instead of one heavy coat. Thick paint can create visible drips and uneven patches on smooth glass.
3. Mason Jar Fairy Light Decoration
Materials: Clear mason jar, battery-operated LED fairy lights suitable for the intended container use, and optional ribbon.
Best location: Bedroom shelf or living room console.
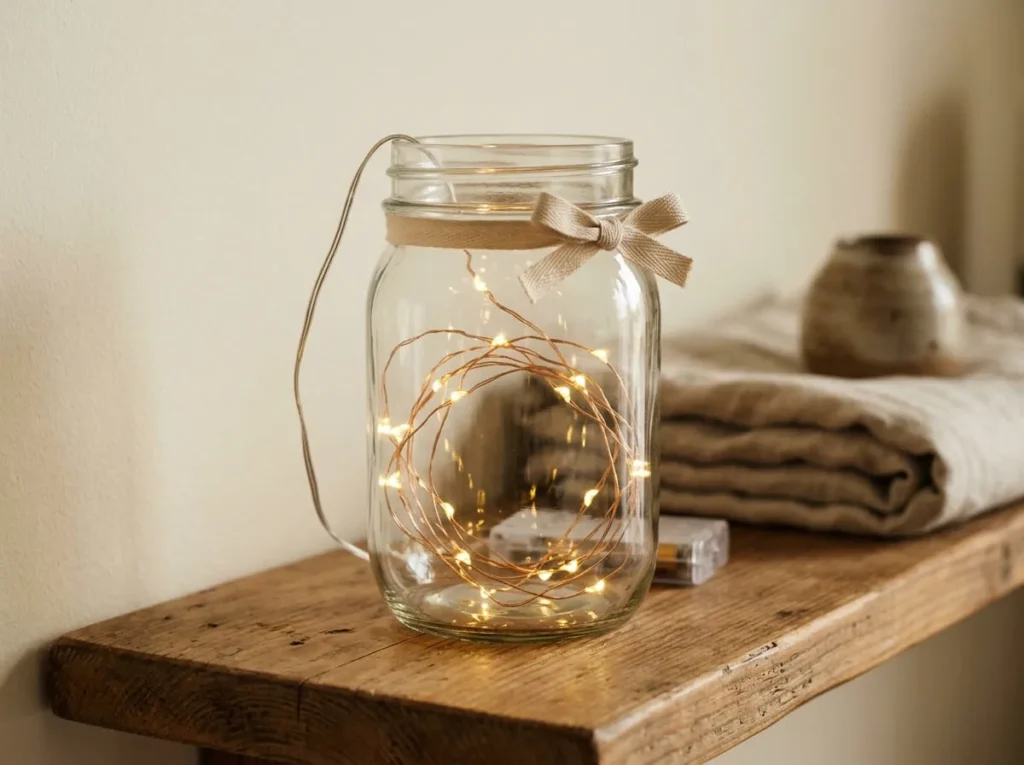
A mason jar fairy light decoration can add a soft decorative glow to a bedroom or living room.
The idea is to place a suitable battery-operated LED light strand inside a clear glass jar.
Because the glass remains transparent, the lights become the main decorative feature.
You can add a simple ribbon around the jar’s upper body without covering the glass.
This project is especially attractive when displayed on a stable shelf among neutral accessories.
How to Make a Mason Jar Fairy Light Display
- Choose a clean, undamaged glass mason jar with a wide opening.
- Make sure the inside of the jar is completely dry.
- Select a battery-operated LED fairy light product whose manufacturer permits use inside a glass container.
- Check the light strand and battery compartment for damage before use.
- Arrange the LED strand loosely inside the jar without forcing or tightly compressing it.
- Keep the battery compartment accessible and positioned according to the manufacturer’s instructions.
- Avoid sealing the jar or blocking ventilation if the light product requires airflow.
- Add a small ribbon around the exterior if desired.
- Place the jar on a stable shelf away from fabrics, moisture, and heat sources.
- Turn on the lights and check their operation, following the product’s operating and supervision instructions.
Warm white LEDs can create a gentle appearance, while a simple clear jar keeps the decoration uncluttered.
Avoid using a real candle, mains-powered light strand, or an unsuitable electrical product inside the jar.
Beginner tip: Do not overfill the jar with lights. A loosely arranged strand can create an attractive glow while keeping the installation simpler.
4. DIY Mason Jar Makeup Brush Holder
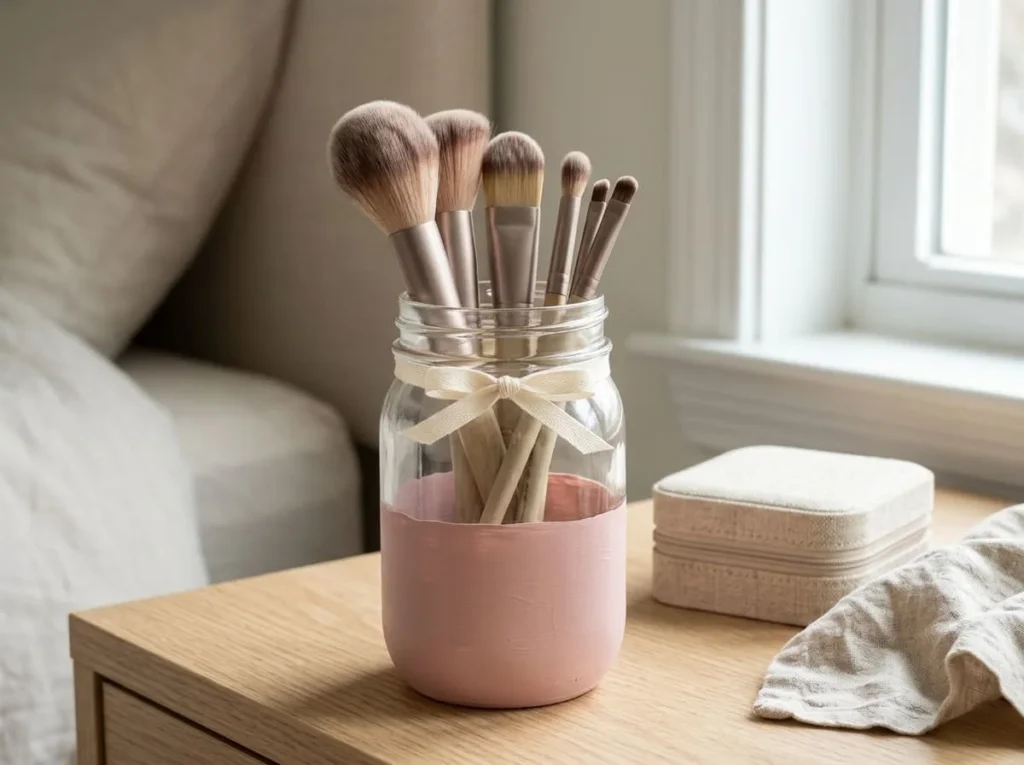
Materials: Clean wide-mouth mason jar, compatible glass paint or ribbon, optional dry decorative filler, and suitable craft adhesive.
Best location: Bedroom vanity or dressing table.
A mason jar makeup brush holder is a practical way to organize brushes while adding a handmade accessory to your vanity.
A wide-mouth glass jar provides space for several brushes and makes them easy to reach.
You can decorate the outside with a soft pastel color or a simple ribbon.
For a modern appearance, try a muted dusty pink or cream finish.
Keep the inside of the jar clean and free from paint, glue, and loose decorative materials.
How to Make a Decorative Makeup Brush Holder
- Select a stable, wide-mouth glass mason jar.
- Inspect the rim carefully to make sure it has no sharp or chipped sections.
- Clean and dry the jar thoroughly.
- Choose a simple exterior decoration, such as a narrow ribbon or suitable glass paint.
- If painting, prepare the surface according to the paint manufacturer’s instructions.
- Apply thin coats to the exterior and allow them to dry as directed.
- If using a ribbon, attach it around the upper exterior body without covering the opening.
- Allow the paint or adhesive to cure fully.
- Place clean, dry makeup brushes inside the jar with their handles downward.
- Display the holder on a stable vanity or dresser away from the edge.
You can make a matching set using one jar for face brushes and another for smaller eye brushes.
If you prefer a decorative filler, choose one that does not shed or create dust around the brush handles.
Beginner tip: Keep the opening smooth and the interior clean. Avoid thick decorations near the rim where they could interfere with removing or replacing brushes.
5. Lace-Wrapped Mason Jar Decoration
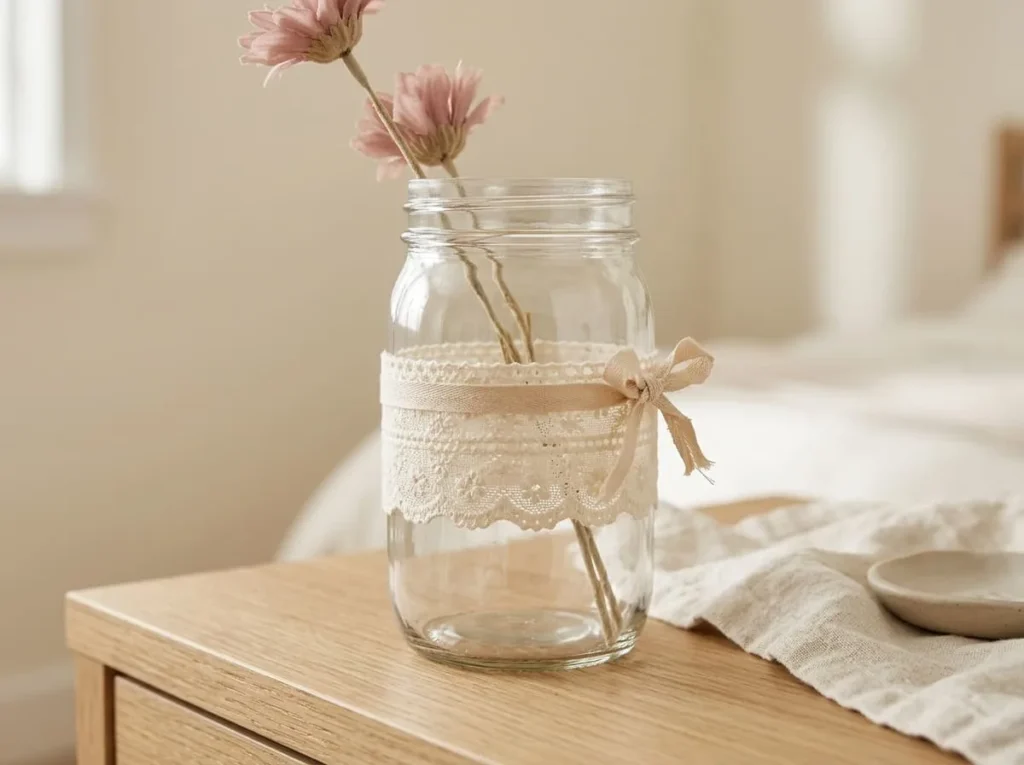
Materials: Clear mason jar, cotton lace, suitable glass-compatible craft adhesive, scissors, and optional satin or cotton ribbon.
Best location: Bedroom dresser or decorative shelf.
A lace-wrapped mason jar creates a soft vintage-inspired decoration without requiring painting skills.
The delicate texture of lace adds interest while allowing some of the clear glass to remain visible.
This project works especially well with cream, ivory, or dusty pink home accessories.
You can display the finished jar with lightweight faux flowers or leave it empty as a decorative accent.
Choose lace with a simple pattern that can wrap comfortably around the curved glass.
How to Decorate a Mason Jar with Lace
- Choose a clean mason jar with a stable base.
- Remove any labels and adhesive residue.
- Dry the glass completely.
- Select a strip of cotton lace wide enough to create a visible decorative band.
- Wrap the lace loosely around the jar to measure the required length.
- Cut the lace neatly using suitable craft scissors.
- Position the lace around the middle or lower section of the glass.
- Attach it using an adhesive recommended for both glass and fabric.
- Secure the ends neatly and allow the adhesive to cure.
- Add a simple ribbon or a few faux stems if desired.
You can leave most of the jar transparent so the lace remains the main feature.
For a coordinated display, create two jars using the same lace pattern but different jar shapes.
Beginner tip: Choose lace with a relatively simple pattern. Very delicate lace may be harder to attach without stretching or leaving visible glue marks.
6. Botanical Leaf Stencil Mason Jar
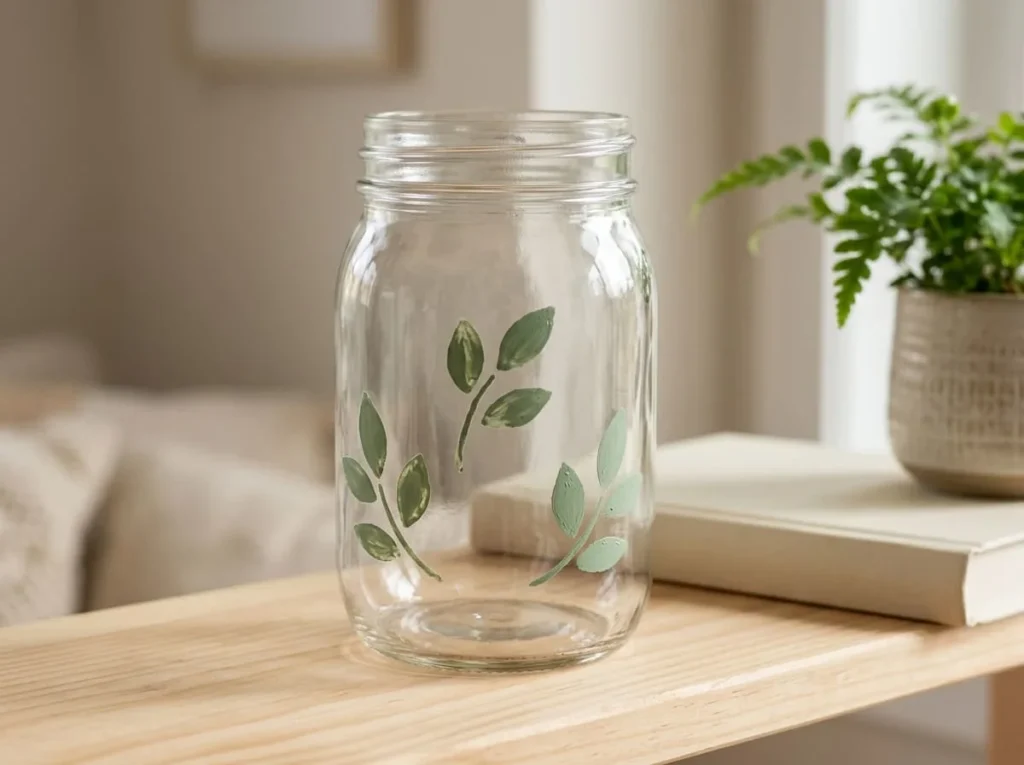
Materials: Clear mason jar, suitable glass paint, small leaf stencil, stencil brush or sponge, and appropriate temporary fixing material.
Best location: Living room or reading corner.
A botanical leaf stencil mason jar is a beautiful option for nature-inspired home décor.
Instead of painting an entire jar, you can add a few simple leaf shapes to the clear glass.
The transparent background allows light to pass through the jar while the green painted leaves create a decorative pattern.
This project works well with faux eucalyptus stems and natural wooden furniture.
A small reusable stencil can help beginners create consistent leaf shapes.
How to Stencil Leaves on a Glass Jar
- Choose a clean, undamaged glass mason jar.
- Remove all labels, grease, and fingerprints.
- Dry the outside surface thoroughly.
- Select a small leaf stencil that can sit reasonably flat against the jar’s curved surface.
- Position the stencil on one side of the jar.
- Secure it using a temporary method suitable for glass and the stencil.
- Apply a small amount of compatible green glass paint using a stencil brush or sponge.
- Lift the stencil carefully according to the product instructions.
- Repeat the design in two or three locations if desired.
- Allow the painted decoration to dry and cure fully before displaying the jar.
Keep the leaf pattern concentrated on one side if you want a minimalist appearance.
You can also use two slightly different green shades if the paint system supports layering.
Beginner tip: Use a small amount of paint and avoid pressing too hard. Excess paint may spread beneath the stencil and blur the leaf shapes.
7. Mason Jar Faux Flower Centerpiece

Materials: Three clean mason jars, lightweight faux flowers, greenery stems, cotton ribbon or natural twine, and suitable adhesive if needed.
Best location: Dining table or entryway console.
A group of mason jar flower vases can create an attractive handmade centerpiece without expensive floral arrangements.
Using three jars allows you to combine different heights and shapes.
You can leave the glass clear or decorate each jar with a matching ribbon.
Soft white flowers, dusty pink blossoms, and sage green faux leaves work well with neutral home décor.
This design is especially useful when you want a simple decoration that can be rearranged for different occasions.
How to Arrange a Mason Jar Flower Centerpiece
- Choose three clean, stable mason jars in complementary shapes.
- Inspect every jar for cracks, chips, or sharp edges.
- Remove labels and dry the jars thoroughly.
- Select one ribbon or twine color for all three jars.
- Tie or attach a narrow decorative band around each jar.
- Choose lightweight faux flowers in two coordinating colors.
- Place taller stems in the central jar.
- Arrange shorter flowers or greenery in the outer jars.
- Adjust the stems so the arrangement looks balanced from different angles.
- Group the jars securely on a stable table or console, leaving enough space around them.
You can create a soft farmhouse centerpiece using cream flowers and natural twine.
For a more colorful arrangement, try dusty pink blossoms with muted green leaves.
If displaying the jars on a dining table, keep them clear of hot serving dishes, open flames, and areas where they may be knocked over.
Beginner tip: Repeat the same ribbon or twine color across all three jars. This helps the different glass containers look like one coordinated decoration.
8. Simple Mason Jar Bathroom Organizer
Materials: Clean wide-mouth glass mason jar, moisture-appropriate exterior decoration, and clean dry bathroom accessories.
Best location: Stable, dry bathroom shelf away from the sink edge.
A mason jar bathroom organizer can help keep small bathroom accessories tidy while adding a simple decorative touch.
You can use a clean jar to hold dry cotton swabs, cotton rounds, or other suitable lightweight items.
A clear jar is particularly useful because you can see the contents easily.
For a minimalist appearance, keep the glass transparent and add one narrow ribbon or a subtle decorative detail.
Bathroom humidity can affect certain paints, paper decorations, and adhesives, so choose materials suitable for the environment.
How to Make a Decorative Bathroom Jar Organizer
- Select a clean, stable glass jar with a wide opening.
- Check that the rim is smooth and free from chips.
- Remove labels and adhesive residue.
- Wash and dry the jar thoroughly.
- Decide whether to leave the glass clear or add a simple moisture-appropriate exterior decoration.
- If using a ribbon or adhesive, check whether the material is suitable for the bathroom’s humidity.
- Keep the interior free from paint, glue, and loose decorative materials.
- Allow any exterior decoration to dry or cure fully.
- Place clean, dry cotton swabs or other suitable accessories inside.
- Display the jar on a stable, dry shelf away from the edge and direct water splashes.
A pair of matching clear jars can look attractive on a bathroom shelf.
You might use one for cotton rounds and another for cotton swabs, depending on the jar openings and your storage needs.
Avoid placing ordinary decorated glass jars where they can easily fall onto hard bathroom surfaces.
Beginner tip: Choose a simple exterior design that is easy to clean. Clear glass with one small decorative accent is often more practical in humid areas than thick paint, paper, or fabric coverings.
9. DIY Decoupage Mason Jar Decoration
Materials: Clean glass mason jar, decorative paper, glass-compatible decoupage medium, soft brush, and scissors.
Best location: Bedroom or craft room.
Decoupage is a creative way to decorate mason jars using paper designs instead of painting detailed patterns.
You can attach simple botanical shapes, floral paper cutouts, or geometric patterns to the outside of a glass jar.
This project works especially well if you enjoy paper crafts and want to reuse leftover decorative paper from other projects.
For a soft vintage-inspired appearance, choose cream paper with small dusty pink flowers or muted green leaves.
The key is using a compatible adhesive and keeping the paper arrangement simple.
How to Decorate a Mason Jar with Paper
- Choose a clean, undamaged glass mason jar with a stable base.
- Remove labels, adhesive residue, and fingerprints from the exterior.
- Dry the glass completely before decorating.
- Select decorative paper with a simple floral or botanical pattern.
- Cut two or three large shapes from the paper using suitable craft scissors.
- Arrange the cutouts against the jar to decide where they should appear.
- Apply a glass-compatible decoupage medium according to the manufacturer’s instructions.
- Position the paper pieces carefully and smooth them gently to reduce wrinkles.
- Allow the adhesive to dry before applying any compatible protective coating recommended for the project.
- Let the finished decoration cure fully before displaying the jar with lightweight dry accessories.
You can create a matching pair using the same paper colors on two different jars.
Avoid covering the entire jar with numerous small paper pieces because the curved glass surface can make them difficult to attach neatly.
Beginner tip: Start with a few larger paper cutouts. Simple shapes are easier to position and usually create a cleaner finished appearance.
10. Modern Minimalist Mason Jar Vase
Materials: Clear mason jar, neutral cotton ribbon, lightweight faux greenery, and optional suitable adhesive.
Best location: Modern living room or entryway.
A minimalist mason jar vase is an attractive option if you prefer simple home decorations.
Instead of painting the glass or adding many decorative materials, this project keeps the jar mostly transparent.
One narrow cotton ribbon around the upper body provides a subtle handmade detail.
The clear glass looks beautiful beside natural wooden furniture, cream textiles, and neutral accessories.
This design is especially suitable for beginners because it requires very little preparation.
How to Create a Minimalist Mason Jar Display
- Choose a clean glass mason jar with a simple shape.
- Inspect the glass for cracks, chips, and sharp edges.
- Remove any paper labels and adhesive residue.
- Wash and dry the jar thoroughly.
- Select a narrow cotton ribbon in cream, beige, or another neutral color.
- Wrap the ribbon around the upper exterior body of the jar.
- Tie a small, neat knot or secure the ribbon using a suitable method.
- Choose two or three lightweight faux eucalyptus or botanical stems.
- Arrange the stems naturally inside the empty jar.
- Place the finished decoration on a stable shelf, coffee table, or console.
You can leave the ribbon ends short for a clean appearance.
If you want a slightly warmer design, choose natural beige cotton ribbon instead of bright white.
Avoid adding extra charms, labels, or bulky ornaments.
Beginner tip: Keep the glass mostly clear and use one neutral ribbon. The beauty of this design comes from its simplicity.
11. Decorative Mason Jar Pencil Holder
Materials: Wide-mouth glass mason jar, glass-compatible acrylic paint or decorative paper, suitable adhesive, and dry stationery.
Best location: Home office or study desk.
A mason jar pencil holder is a practical way to organize everyday stationery while adding a handmade decoration to your workspace.
You can use it to hold pencils, pens, markers, or other lightweight writing tools.
A clear jar with a simple painted accent can look attractive without making your desk feel crowded.
For a modern home office, try a cream and sage green color combination.
Choose a jar with a stable base and an opening wide enough for the stationery you want to store.
How to Make a Mason Jar Desk Organizer
- Select a clean, stable wide-mouth glass mason jar.
- Check the rim for chips or sharp edges.
- Remove labels and clean the exterior thoroughly.
- Decide whether to paint part of the jar or add a decorative paper design.
- If painting, choose a compatible glass paint and follow the preparation instructions.
- Apply a simple color block around the lower exterior section of the jar.
- Allow the paint to dry between coats as recommended.
- Let the finished coating cure fully before using the jar.
- Place lightweight dry pencils, pens, or markers inside.
- Display the jar toward the back of your desk where it is less likely to be knocked over.
You can create matching desk organizers using two jars with different accent colors.
For example, one jar might have a sage green lower section while another features muted blue.
Beginner tip: Avoid placing heavy scissors, metal rulers, or other bulky tools inside a lightweight glass jar. Excess weight can make the holder unstable.
12. Vintage-Inspired Floral Mason Jar
Materials: Glass mason jar, glass-compatible acrylic paints, fine detail brush, and optional neutral ribbon.
Best location: Bedroom dresser or decorative shelf.
A vintage-inspired floral mason jar adds a soft handmade touch to bedrooms and cozy living spaces.
This design features a few simple dusty pink flowers with sage green leaves painted directly onto the exterior glass.
You do not need advanced painting skills because the flowers can be created with basic rounded brush strokes.
Leaving part of the glass visible helps the decoration feel light and balanced.
The finished jar can hold a small arrangement of faux flowers or remain empty as a decorative accessory.
How to Paint Simple Flowers on a Mason Jar
- Choose a clean glass mason jar without cracks or chips.
- Remove labels, grease, and fingerprints.
- Dry the exterior thoroughly.
- Select glass-compatible paints in dusty pink, sage green, and a soft contrasting color for the flower centers.
- Apply primer if required by the paint instructions.
- Lightly plan where three small flowers will appear on one side of the jar.
- Use a fine detail brush to paint five rounded pink petals for each flower.
- Add small flower centers and a few sage green leaves.
- Allow the painted design to dry and cure according to the manufacturer’s instructions.
- Display the finished jar with lightweight faux stems or beside other neutral decorations.
You can add a small cotton ribbon around the upper body if you want an additional vintage detail.
Avoid painting too many flowers because the curved glass can make the design look crowded.
Beginner tip: Practice making simple five-petal flowers on scrap paper before painting the jar. Leave enough space between the flowers so each one remains visible.
13. Mason Jar Pebble and Faux Plant Display
Materials: Clear glass mason jar, clean dry decorative pebbles, small faux succulent, and optional neutral ribbon.
Best location: Living room shelf or home office desk.
A mason jar faux plant display is a simple way to add greenery to your home without maintaining a living plant.
You can place a small faux succulent inside a clear jar and surround its base with a few decorative pebbles.
The arrangement creates a natural appearance using materials that require very little maintenance.
This project works well on shelves, desks, and entryway consoles.
Choose a faux plant that fits comfortably inside the jar without making it top-heavy.
How to Make a Decorative Faux Plant Jar
- Choose a clear glass jar with a wide opening and stable base.
- Inspect the jar for cracks, chips, or sharp edges.
- Wash and dry the glass thoroughly.
- Select a small lightweight faux succulent.
- Gather a small amount of clean, dry decorative pebbles.
- Place a shallow layer of pebbles at the bottom of the jar.
- Position the faux succulent in the center.
- Add a few more pebbles around its base to hold it in place.
- Adjust the leaves so the plant looks balanced.
- Display the finished jar on a stable shelf or desk.
Choose muted green faux leaves and natural-colored pebbles for a simple modern appearance.
You can add a narrow cotton ribbon around the exterior if desired.
Avoid overfilling the jar with heavy stones because unnecessary weight can make it more difficult to move safely.
Beginner tip: Use only enough pebbles to support the faux plant. A simple arrangement with visible clear glass often looks more attractive than a tightly packed container.
14. Color-Blocked Painted Mason Jar
Materials: Clean mason jar, compatible glass paints, suitable painter’s tape, brush or sponge, and optional primer.
Best location: Modern shelf or home office.
Color-blocked mason jars are a creative choice for modern home decoration.
Instead of detailed flowers or stencils, this design uses two large sections of color.
For example, you can paint the lower section terracotta and the upper section warm cream.
You can also leave part of the glass transparent for a lighter appearance.
This project works especially well when you want several jars to match your existing room colors.
How to Paint Color Blocks on a Mason Jar
- Choose a clean, undamaged glass mason jar.
- Remove all labels and clean the exterior thoroughly.
- Dry the glass completely.
- Select two compatible glass paint colors that complement each other.
- Mark the boundary between the two color sections using painter’s tape suitable for the glass and paint system.
- Apply the first color in thin, even layers.
- Allow the paint to dry as directed before adding additional coats if needed.
- Paint the second section using the same careful method.
- Remove the painter’s tape according to the product instructions.
- Allow the painted jar to cure fully before displaying it with lightweight dry accessories.
A cream and terracotta jar can look attractive in a warm modern living room.
For a softer bedroom design, try dusty pink and muted beige.
Avoid adding too many narrow stripes because they can be difficult to paint neatly around curved glass.
Beginner tip: Use two large color sections instead of several small bands. A simple color-blocked design is easier to create and often looks more balanced.
15. Seasonal Mason Jar Decoration Set
Materials: Three clean mason jars, removable ribbons, lightweight seasonal faux stems, and small decorative accessories.
Best location: Entryway or living room.
A seasonal mason jar decoration set allows you to update your home décor throughout the year without making new projects every season.
The idea is to keep the jars simple and change the decorative accessories.
You can use faux flowers for spring, fresh-looking artificial greenery for summer, warm-colored leaves for autumn, and neutral ornaments for winter.
Choosing a coordinated set of jars helps the arrangement remain attractive throughout the year.
How to Decorate Mason Jars for Different Seasons
- Choose three clean, stable glass mason jars.
- Inspect them for cracks, chips, or sharp edges.
- Remove labels and dry the jars thoroughly.
- Keep the glass clear or add a simple neutral decoration.
- Choose matching removable cotton ribbons for the upper sections.
- For spring, arrange lightweight pastel faux flowers inside the jars.
- For summer, replace the flowers with simple faux greenery.
- For autumn, use decorative artificial leaves in warm orange and brown shades.
- For winter, add suitable lightweight ornaments or faux evergreen stems.
- Display the jars together on a stable console or table, leaving enough space between them.
You can change the ribbons to coordinate with each season.
For example, cream ribbon works well throughout the year, while muted orange can complement autumn arrangements.
Avoid adding heavy decorations that could cause the jars to tip.
Beginner tip: Keep the permanent jar decorations neutral and update only the removable accessories. This makes seasonal decorating easier and more affordable.
How to Style Decorative Mason Jars in Different Rooms
Handmade mason jars can become attractive home accessories when they are displayed thoughtfully.
The best arrangement depends on the room, available space, and decorating style.
You do not need a large collection to create a beautiful display.
One carefully decorated jar or a small coordinated group is often enough.
Living Room Mason Jar Decor Ideas
A decorated mason jar can look beautiful on a coffee table, bookshelf, or console.
For a modern living room, choose a painted jar in cream, sage green, or another soft neutral color.
Add lightweight faux greenery to create a simple botanical arrangement.
You can also display a clear jar with a natural twine band beside a small wooden ornament.
Keep the display balanced and avoid overcrowding the surrounding surface.
Bedroom and Vanity Mason Jar Decorations
Mason jars can add soft colors and useful organization to bedrooms.
A small floral jar can decorate a dresser, while a wide-mouth jar may be used as a makeup brush holder.
For a cozy atmosphere, consider a clear jar with suitable battery-operated LED fairy lights.
Choose colors that complement your bedding and furniture.
Keep glass decorations away from bed edges and places where they could be knocked over.
Entryway Mason Jar Centerpieces
An entryway console is a useful location for handmade mason jar decorations.
You can display one larger painted jar with faux flowers or arrange three smaller jars together.
Choose decorations that match the surrounding furniture.
Natural wood, cream paint, and jute twine can create a warm farmhouse-inspired appearance.
Make sure each jar sits securely on the console.
Leave enough space for everyday items such as keys and bags.
Kitchen Shelf Mason Jar Decorations
Decorative mason jars can add handmade character to kitchen shelves.
You might display a clear jar with faux greenery or a painted jar with a simple botanical pattern.
Choose stable shelves away from the edges.
Keep ordinary craft-decorated jars away from cooking heat, grease, and frequent moisture.
Do not assume that painted, glued, or decoupaged jars are suitable for direct food contact or food storage.
Use the projects in this article primarily for dry decorative displays.
How to Group Mason Jars Without Cluttering a Space
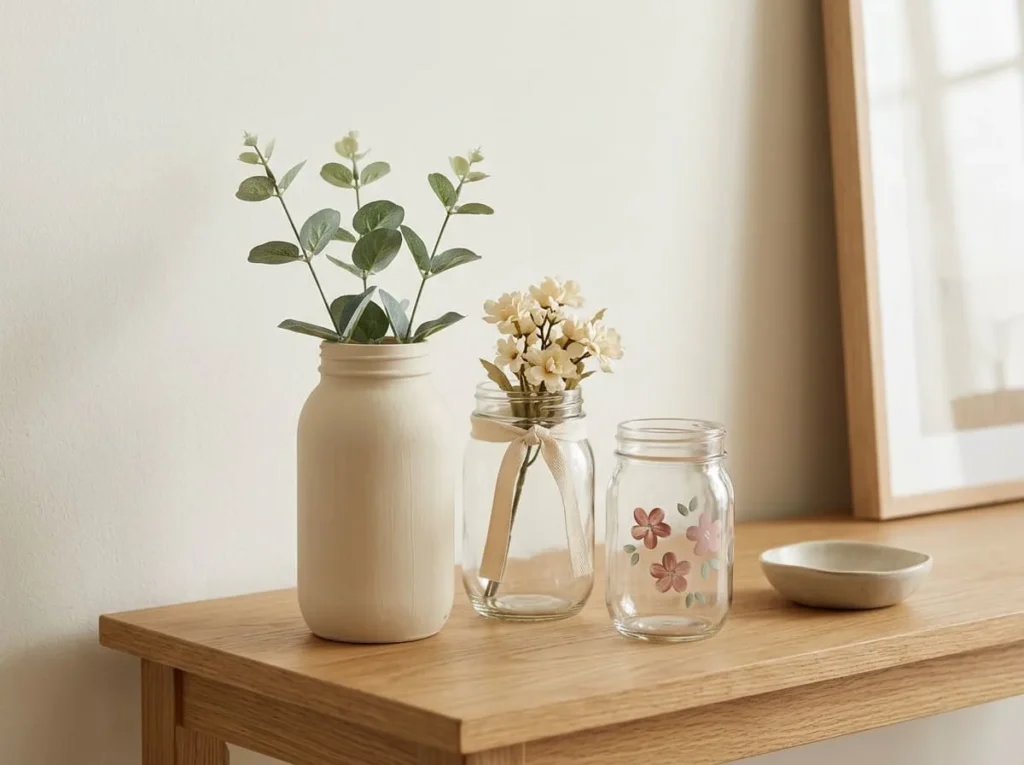
Grouping jars can create a coordinated arrangement.
Choose two or three jars with similar colors or decorative materials.
You can vary their heights slightly to make the display more interesting.
For example, place a taller faux flower vase beside two shorter clear jars.
Leave some space between them so each decoration remains visible.
If the arrangement feels crowded, remove one jar or reduce the number of accessories.
How to Protect and Maintain DIY Mason Jar Crafts
Decorated mason jars can remain attractive when they are handled carefully and displayed in suitable conditions.
Different paints, adhesives, and decorative materials require different maintenance methods.
Always follow the manufacturer’s care instructions for the products used.
Allow Paint and Adhesive to Cure Fully
Paint and glue may feel dry before they have fully cured.
Avoid handling the decorated surface too frequently while the materials are curing.
Follow the instructions for the paint, primer, adhesive, and protective finish.
Some products may require longer curing periods or specific conditions.
Do not rush the process because it may affect adhesion or durability.
Use Protective Finishes Suitable for Glass
Some glass craft paints may be used with compatible protective coatings.
Other products may not require additional sealing.
Check the manufacturer’s recommendations before applying a finish.
A protective coating may improve durability for certain projects, but ordinary craft sealers do not automatically make jars waterproof, dishwasher-safe, heatproof, or food-safe.
Choose products based on the intended decorative use.
Clean Decorated Jars Gently
Dust can collect on painted glass, twine, lace, and decorative paper.
Use a soft, dry cloth to remove light dust when suitable for the materials.
Avoid soaking decorated jars in water unless every material used is specifically suitable for that cleaning method.
Do not use abrasive sponges that could scratch painted surfaces.
For fabric or twine decorations, clean according to the material and adhesive instructions.
Keep Glass Jars Away from Heat and Open Flames
Decorative paints, ribbons, lace, twine, and adhesives may be damaged by heat.
Some materials can also be flammable.
Do not place burning candles inside ordinary painted or embellished mason jars.
Choose suitable battery-operated LED lights when you want a glowing decorative effect, following the product instructions.
Keep glass decorations away from heaters, stovetops, and open flames.
Check for Chipped Glass and Loose Decorations
Inspect your mason jar crafts occasionally.
Look for cracks, chips, loose twine, lifting paper, or separating fabric.
If the glass becomes cracked or chipped, discontinue using the jar.
Do not attempt to hide damaged glass beneath decorations.
Loose decorative materials may be repaired using a suitable adhesive when appropriate.
Make sure repaired decorations are fully cured before displaying the jar again.
Common Mistakes When Making Mason Jar Decorations
Mason jar crafts are generally beginner-friendly, but a few mistakes can affect the appearance and durability of the finished project.
Understanding these problems can help you create better handmade decorations.
Painting Dirty or Greasy Glass
Dust, grease, and fingerprints can interfere with paint adhesion.
Clean the glass thoroughly before decorating.
Remove old labels and sticky residue.
Allow the jar to dry completely before applying primer, paint, or adhesive.
Using Paint That Is Not Suitable for Glass
Not every acrylic paint is designed to adhere to smooth glass.
Some products may peel or scratch easily if used on an unsuitable surface.
Choose paint specifically recommended for glass and your intended project.
Follow the manufacturer’s preparation and curing instructions.
Applying Thick, Uneven Paint Coats
Thick paint can create drips, ridges, and uneven coverage.
Apply thin coats using an appropriate brush or sponge.
Allow each coat to dry according to the paint instructions.
If additional coverage is needed, apply another thin coat rather than adding excessive paint at once.
Adding Decorations Before Paint Has Cured
Attaching twine, ribbon, or paper too early may damage the painted surface.
Check the curing instructions before adding embellishments.
Avoid pulling decorations tightly against paint that has not reached the required durability.
Use adhesives compatible with the decorated surface.
Using Too Much Glue for Twine or Paper
Excess adhesive can leave visible lumps or messy marks.
This is especially noticeable on clear glass.
Apply only the amount recommended for the materials.
Work in small sections when attaching twine or decorative paper.
Allow the adhesive to cure before handling the finished project.
Choosing Heavy Decorations That Make Jars Unstable
Tall faux flowers, heavy stones, or bulky accessories can make a jar unstable.
Choose lightweight decorations that fit the jar comfortably.
Place finished jars on flat, stable surfaces.
Avoid positioning them near shelf edges.
If the jar feels top-heavy, remove or rearrange some decorations.
Assuming Decorative Jars Are Heatproof or Food-Safe
Painted and embellished mason jars should not automatically be used for food storage, direct food contact, or burning candles.
Ordinary craft paints, adhesives, and sealers may not be suitable for these purposes.
Use decorative jars according to the limitations of their materials.
Keep painted and fabric-wrapped jars away from open flames and strong heat.
Frequently Asked Questions
What Are the Easiest Mason Jar Crafts for Beginners?
Some of the easiest mason jar crafts include twine-wrapped vases, ribbon-decorated jars, faux flower displays, and simple makeup brush holders. These projects require basic decorating techniques and do not involve complicated painting or glassworking.
What Can You Make with Empty Mason Jars for Home Decor?
You can turn empty mason jars into decorative flower vases, desk organizers, makeup brush holders, farmhouse decorations, botanical displays, and seasonal centerpieces. Choose projects that match the jar’s size, stability, and intended use.
Can You Paint Mason Jars with Acrylic Paint?
Yes, you can use acrylic paint that is specifically suitable for glass. Some products require primer or additional surface preparation. Follow the manufacturer’s application and curing instructions for the chosen paint system.
Do You Need Primer Before Painting Mason Jars?
Not every glass paint requires primer. Some products are formulated for direct application to clean glass, while others recommend a compatible primer. Check the paint manufacturer’s instructions before decorating your jar.
How Do You Make Paint Stick to Glass Jars?
Start by cleaning the glass thoroughly and removing grease, labels, and adhesive residue. Choose paint designed for glass, use primer if recommended, and follow the product’s drying and curing requirements. Avoid handling the painted surface before it is ready.
How Do You Decorate Mason Jars Without Paint?
You can decorate mason jars using natural twine, cotton ribbon, lace, fabric accents, or suitable decorative paper. Clear jars can also be styled with lightweight faux greenery or compatible battery-operated LED lights.
Can You Decorate Mason Jars with Twine?
Yes, natural jute twine can add a rustic appearance to glass jars. Wrap a neat band around the exterior and secure it using an adhesive suitable for glass and twine. Avoid excessive glue and keep the decoration away from the jar opening.
Can You Put Fairy Lights Inside Mason Jars?
You can use battery-operated LED fairy lights if the manufacturer permits their use inside a glass container. Keep the battery compartment accessible, follow ventilation and operating instructions, and avoid tightly compressing the lights. Do not use burning candles as a substitute.
How Do You Make Mason Jar Decorations Look Expensive?
Choose a coordinated color palette, use simple decorative details, and apply materials neatly. Matte glass-compatible paint, natural twine, neutral ribbon, and carefully arranged faux flowers can create an elegant appearance without expensive supplies.
Can You Use Painted Mason Jars as Flower Vases?
Painted mason jars can be used as decorative vases for lightweight faux flowers. If you want to add water and fresh flowers, make sure the jar, paint, and other materials are suitable for that use. Exterior craft decorations may be damaged by moisture.
Do Painted Mason Jars Need Sealing?
Some glass paint systems recommend a compatible protective finish, while others do not require one. Follow the paint manufacturer’s instructions. Ordinary craft sealers do not automatically make a painted jar waterproof, dishwasher-safe, or food-safe.
Can You Wash Decorated Mason Jars?
Cleaning depends on the paint, adhesive, and decorative materials used. Some products permit specific washing methods after curing, while others are intended only for gentle cleaning. Avoid soaking, scrubbing, or dishwashing decorated jars unless the materials specifically allow it.
Can Mason Jar Crafts Be Used for Food Storage?
Do not assume that painted or embellished mason jars are suitable for food storage. Craft paints, adhesives, ribbons, and sealers may not be food-contact safe. Use ordinary craft-decorated jars for dry decorative purposes unless the complete materials and intended use are specifically approved.
Can You Put Burning Candles Inside Decorated Mason Jars?
Burning candles should not be placed inside ordinary painted, glued, ribbon-wrapped, or fabric-decorated mason jars. Decorative materials may be flammable or damaged by heat, and the glass may not be suitable for candle use. Choose compatible battery-operated LED lights instead.
Final Thoughts
DIY mason jar crafts for home decoration are an affordable way to turn simple glass containers into beautiful handmade accessories.
You can start with a rustic twine-wrapped vase, a painted farmhouse jar, or a clear container filled with lightweight faux greenery.
Choose colors and materials that complement your home, and keep your first projects simple.
Always use undamaged glass, select compatible paints and adhesives, and follow the manufacturer’s curing instructions.
Keep ordinary craft-decorated jars away from open flames, excessive heat, and unsuitable food-contact uses.
With a little creativity and patience, everyday mason jars can become attractive decorations for your living room, bedroom, entryway, or home office.